| Scratchbuilding airport equipment: Passenger stairs in 1/72 scale |
During a recent
project of a civil airliner, I anticipated that the display base would
need a couple of accessories: passenger stairs and an accumulator
trolley. The aircraft in question was the DH Dove, and I happened to
find a photo of the real thing with the stairs in use. That was the
starting point I needed to scratchbuild one in 1/72 scale.
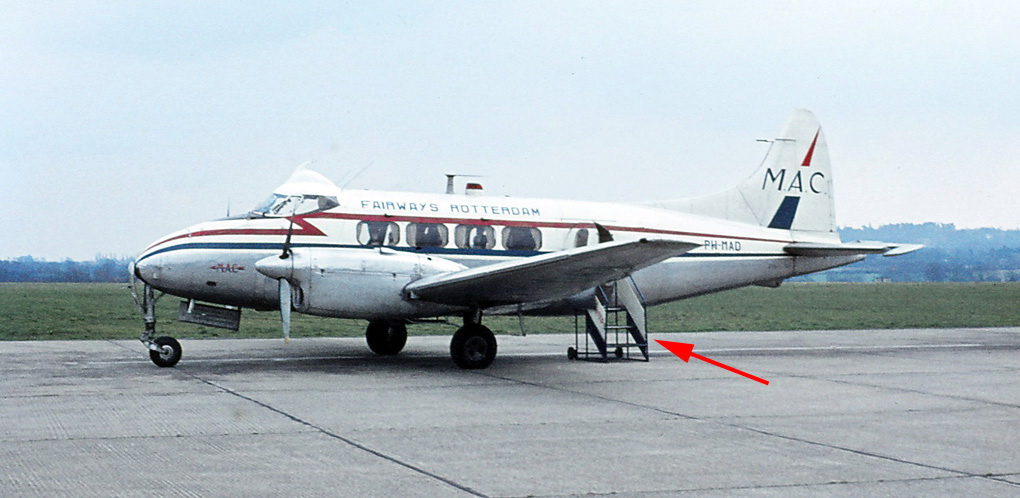
De Havilland DH.104 Dove 1 PH-MAD, cn 04030 (fair use of image from Berry Friend collection)
This is the type of thing that would be much easier if I had a 3D printer. But I don't, and this is a one-of-a-kind project. I wondered that I could do one in the span of a couple of nights. All I needed was bits of plastic card and rods. Oh, and a drawing, of course. I did not bother with the exact dimensions of these things. They were probably welded in the workshops of the airports, so I decided to practice some reverse Engineering using that photo and the dimensions of the airplane. Some dimensions were eyeballed, .as the important here is to look in scale and fit well to the airplane height.
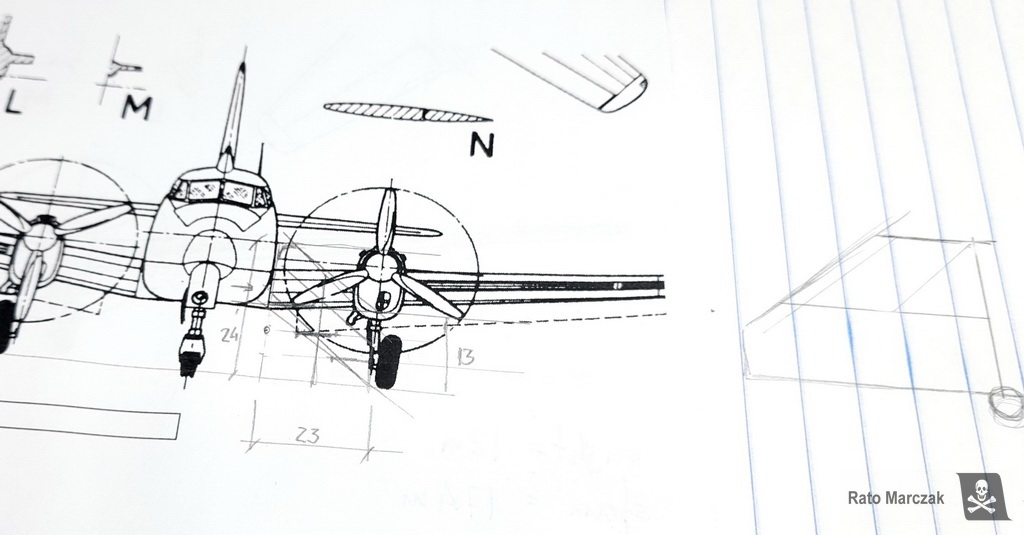
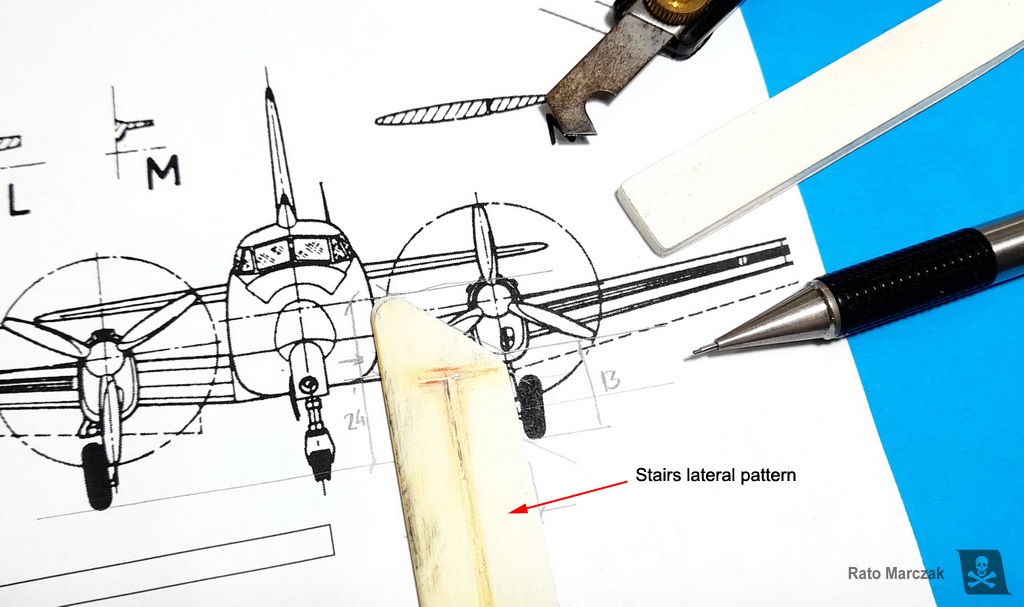
You can note that I printed the drawings of the Dove in scale and drew directly over the print, assuring that the correct height was held. Moreover, once satisfied with the shape, I could use the drawing as a guide to carve a pattern for the lateral structure of the stairs. I used a 2 mm thick plastic sheet, cut to shape, and sanded the corners rounded:
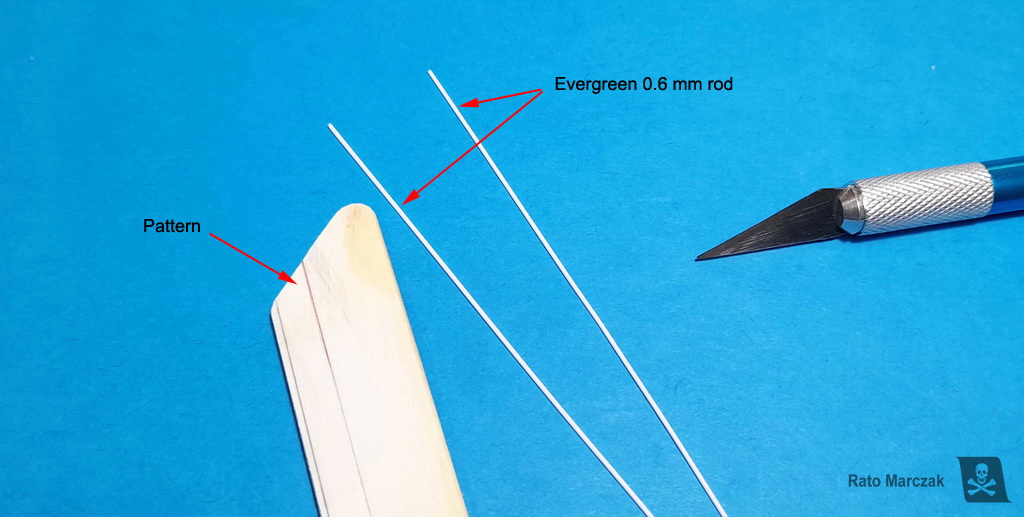
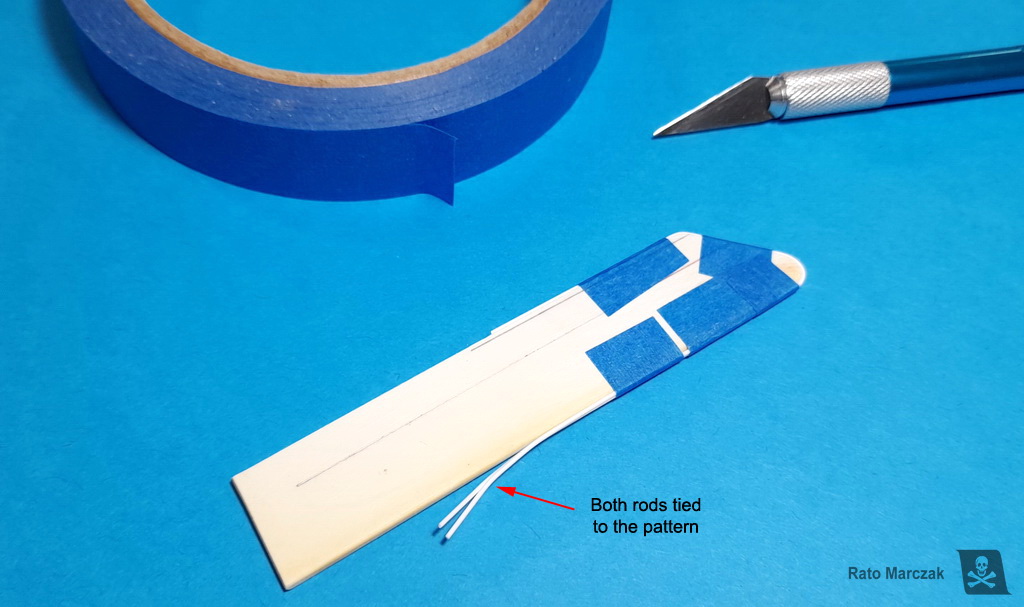
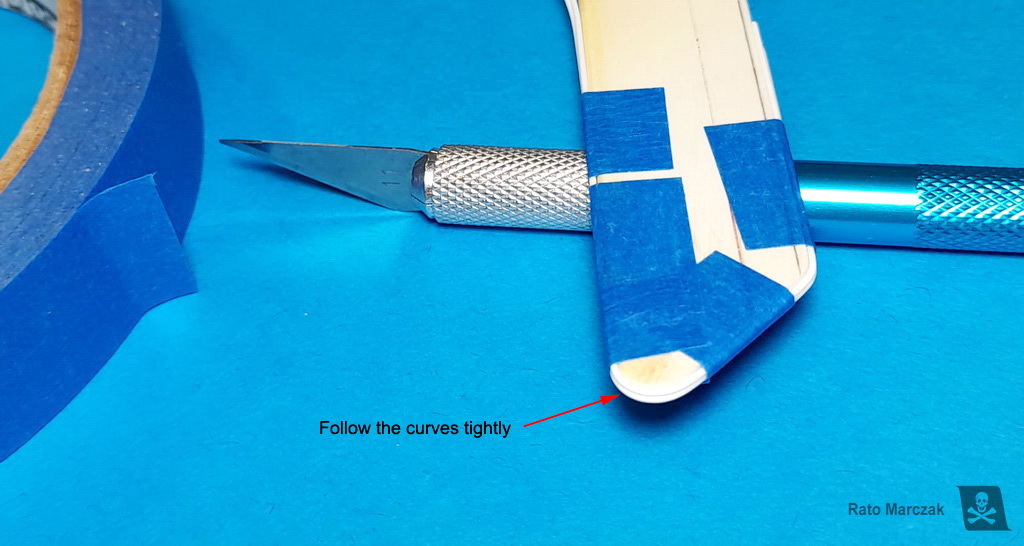
Next, I took 0,64 mm rods from Evergreen and tied them around the pattern using painter's tape. Since the pattern was thick enough, I could fix two rods to make both lateral sides of the stairs at the same time. Make sure that the tape is holding the rods well against the pattern, particularly around the corners:
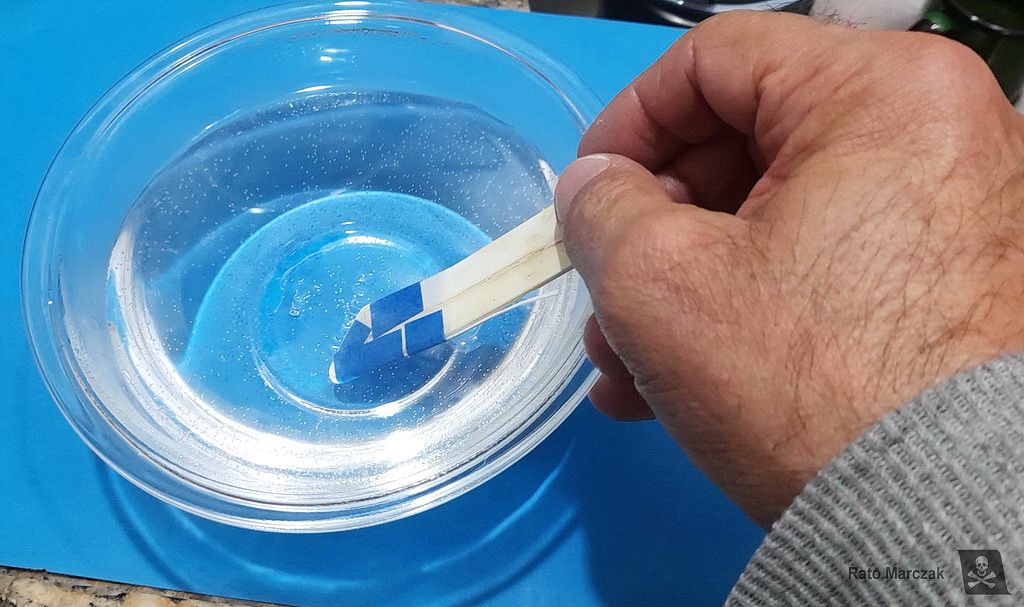
What now? Cook it! Seriously.
Heat a cup of water, large enough so to sink the whole structure. The water must be sufficiently hot but not boiling. Let the jig in the water for about a minute, remove it, and dip it in cold water. Because the pattern was thick, it can hold the temperature for a while without deforming. That is why I do not recommend making your jig from plastic sheets thinner than 2 mm.
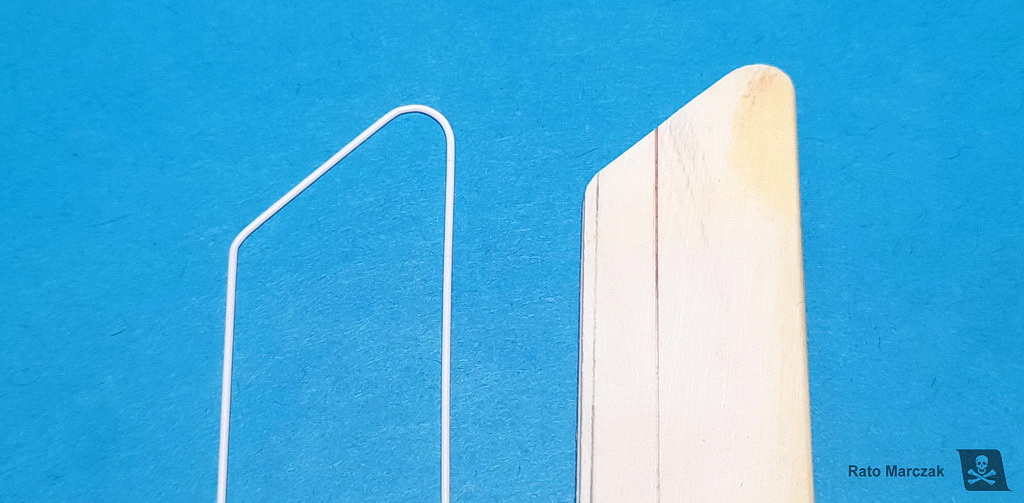
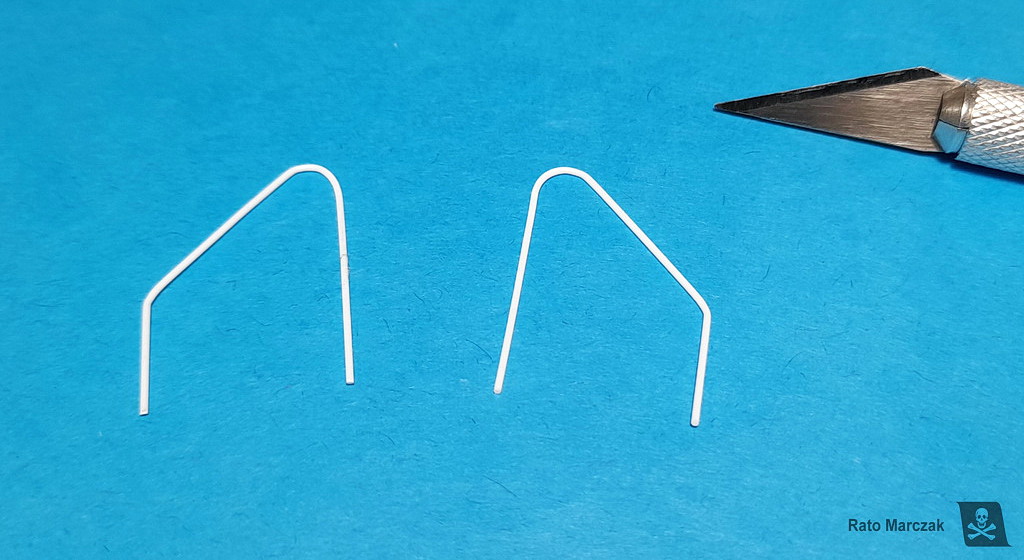
Ok, now the fun part: unboxing, or unwrapping, in this case. Remove the tapes, and you should have a plastic rim following the contour of the pattern. Even better, you have two of them! Now carefully trim them to the correct size using the measurements from the drawing. These are the sides of our stairs:
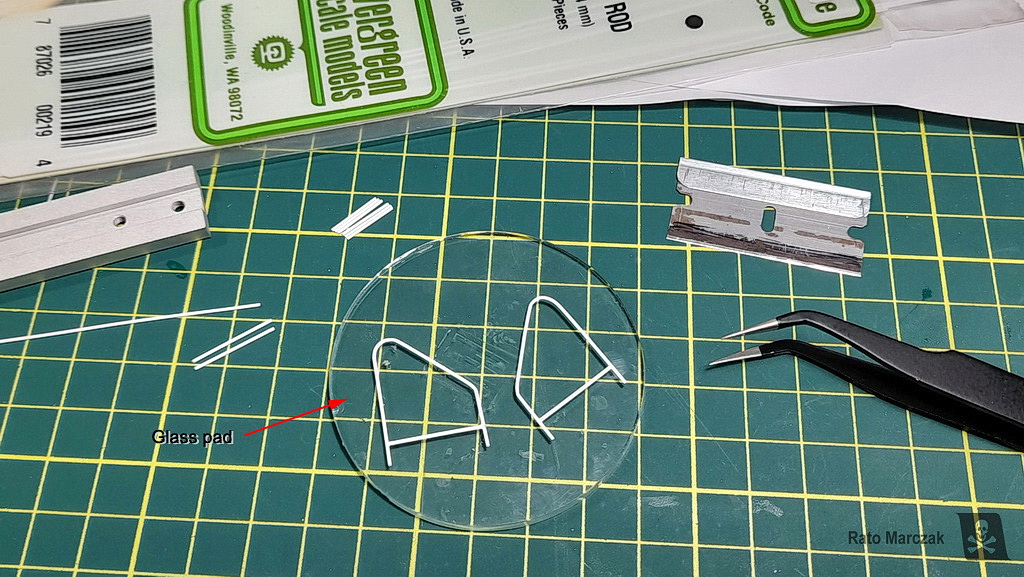
Next, chop a half dozen straight rods with the same length as the width of the stairs. They will be our transverse bars, connecting both rims. You also will need rods of different lengths to make the bracings. Always refer to the stairs you are building. In my case, I first braced each side, and then connected them with the transverse bars. And a tip: while gluing bracings, try to work on a glass pad. In this way, you can pop the assembly out when dry and brush a bead of liquid glue over the joints to smooth everything - no sanding necessary.
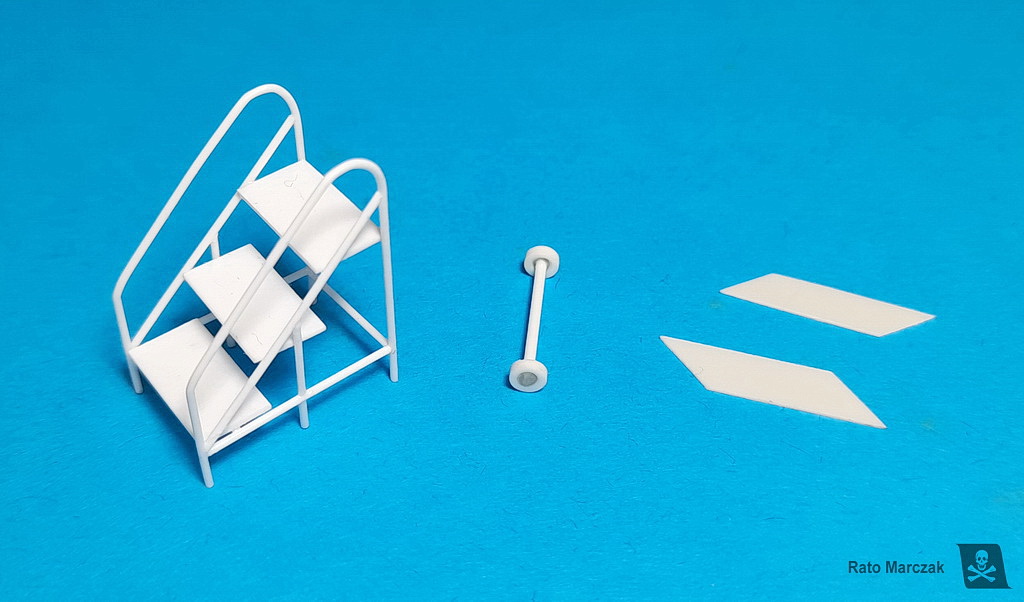
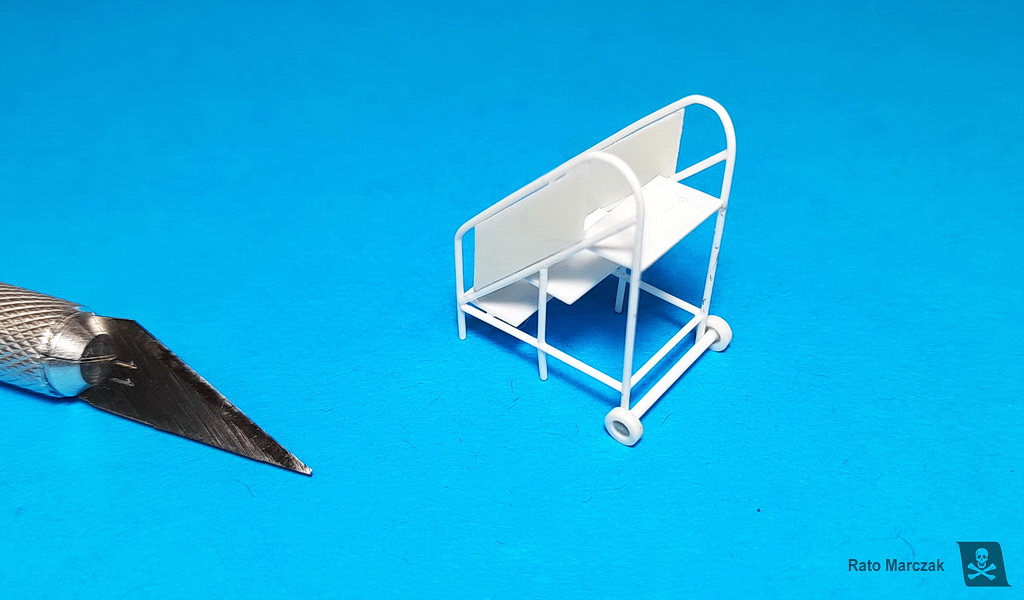
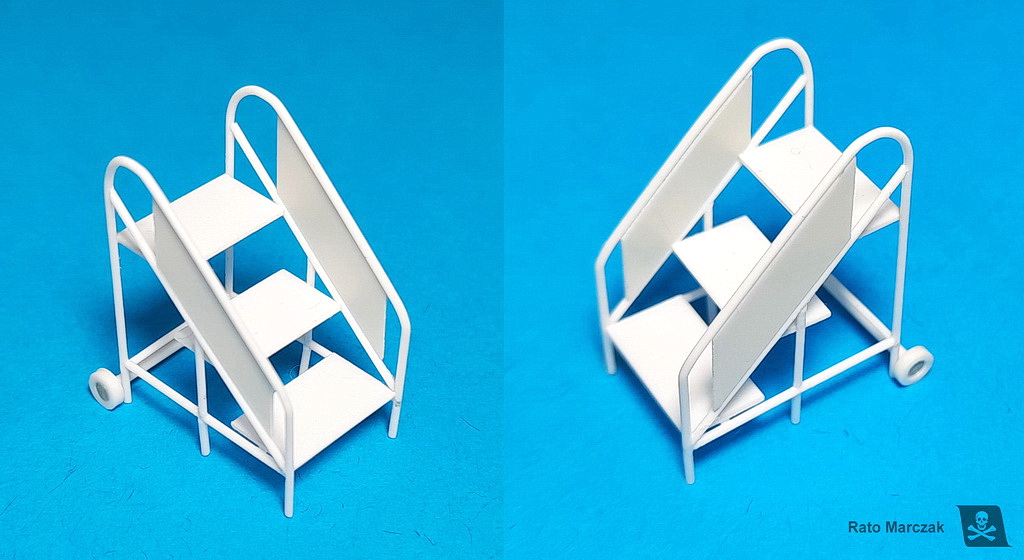
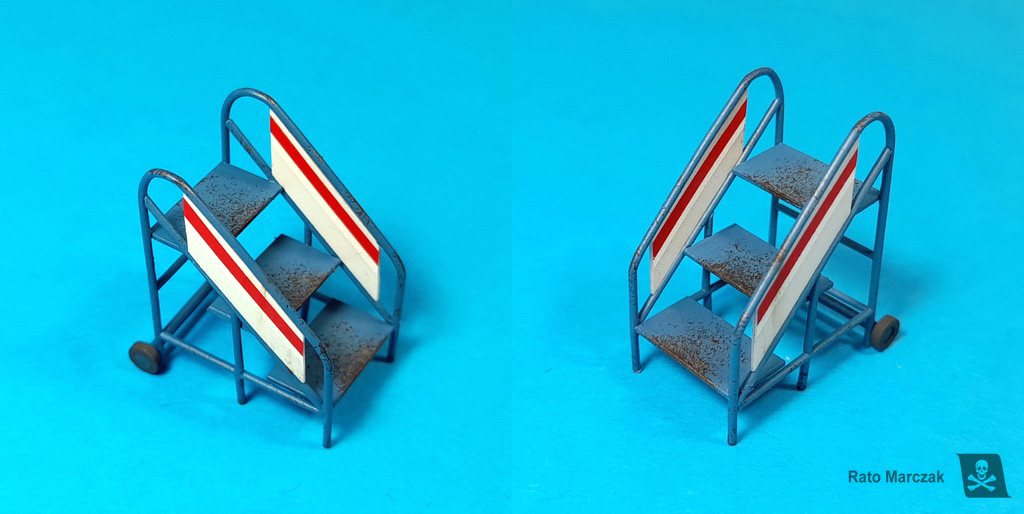
The steps are simple rectangles of plastic card trimmed to fit inside the 'cage' and cemented with liquid glue. The particular stairs I was depicting had cart wheels mounted on an axle to move the stairs around. I made it using rods and tubes. Also, there were panels bolted to the sides, which I made using 0.3 mm plastic card cut to shape.
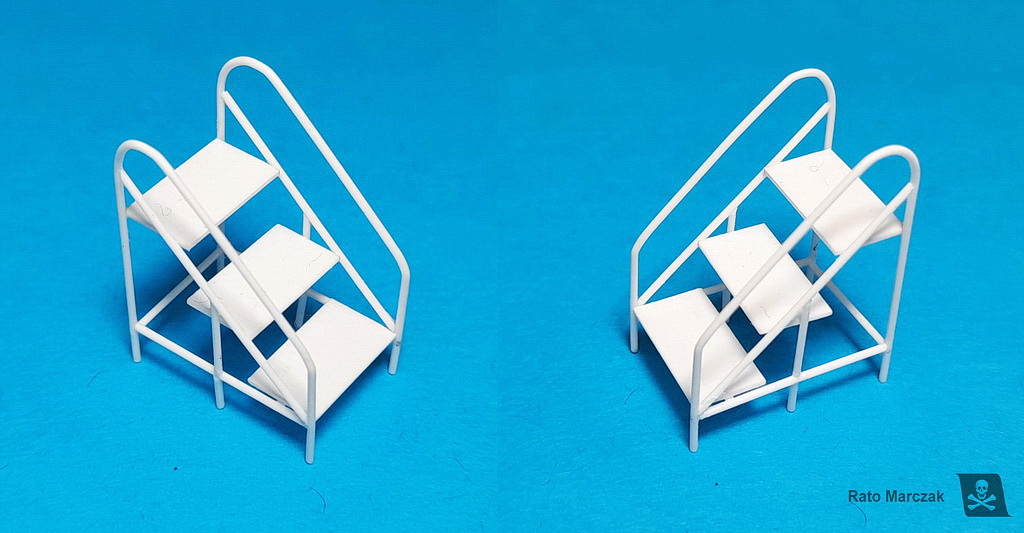
And after a couple of very pleasing evenings, this is was what I got:
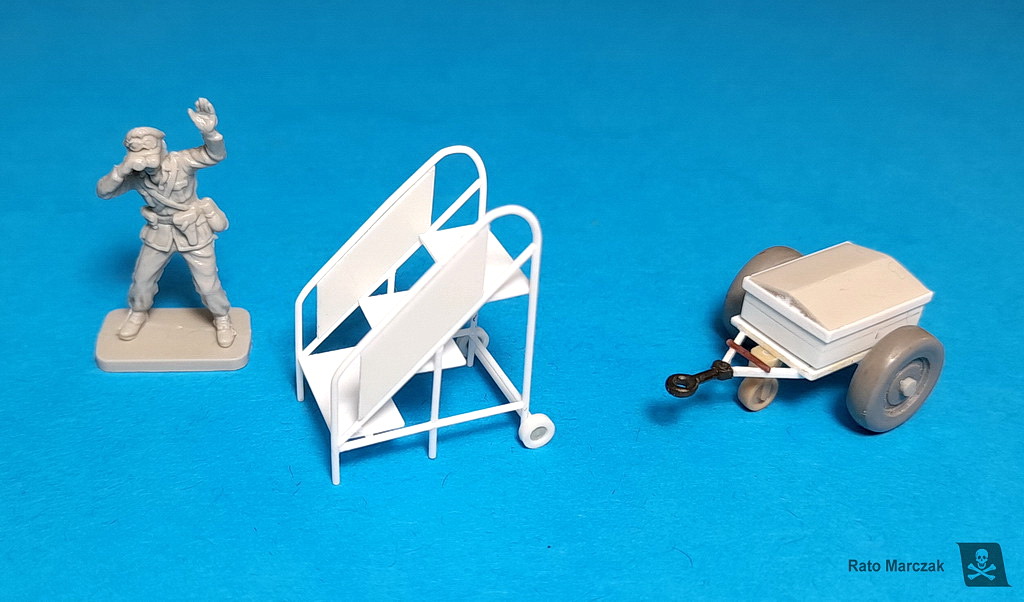
Here is the final assembly besides an accumulator trolley (subject of another report), being inspected by Rommel himself. Kidding aside, the soldier is 1/76 scale from an old Airfix set to give a sense of size.
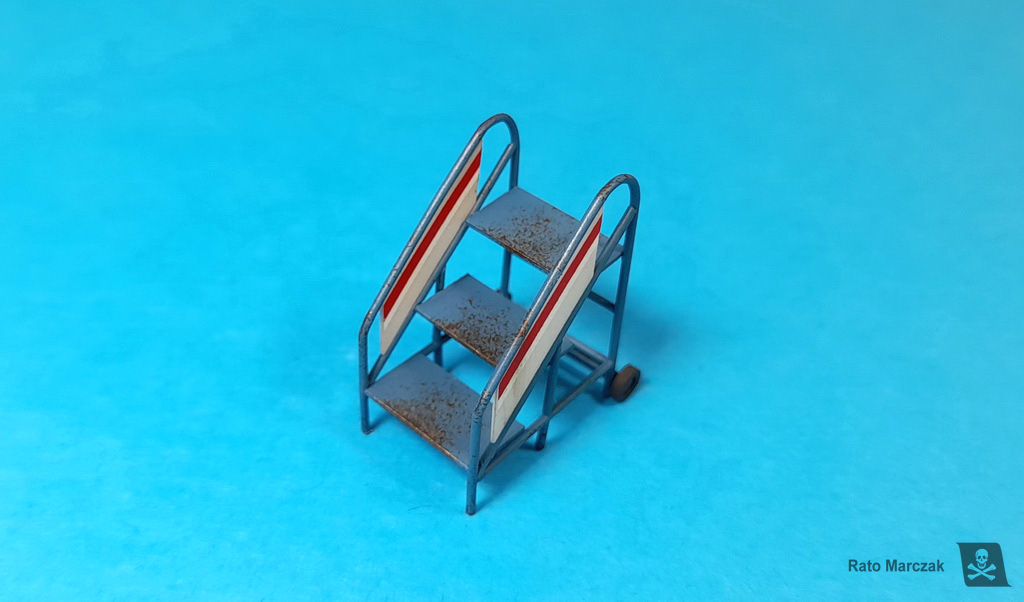
One more night to let everything fully dry and I then painted it roughly resembling the colors of the Martins Air Charter. My display will show the Dove pushed to the end of a runaway in the late 60's when the golden years of propeller air travel were over. So I reasoned that the ground equipment was not in its best shape and went heavy on the weathering.
This 'old school' way of doing things is becoming more and more scarce. It says my age...
Like I said in the beginning 3D printing would make this much easier, but I doubt it would be this fun. Furthermore, it certainly lacks that craftsmanship thing.
I hope you find this tip useful. Let me know what you think.
Rato
Marczak
© 2021De Havilland DH.104 Dove 1 PH-MAD, cn 04030 (fair use of image from Berry Friend collection)
This is the type of thing that would be much easier if I had a 3D printer. But I don't, and this is a one-of-a-kind project. I wondered that I could do one in the span of a couple of nights. All I needed was bits of plastic card and rods. Oh, and a drawing, of course. I did not bother with the exact dimensions of these things. They were probably welded in the workshops of the airports, so I decided to practice some reverse Engineering using that photo and the dimensions of the airplane. Some dimensions were eyeballed, .as the important here is to look in scale and fit well to the airplane height.
You can note that I printed the drawings of the Dove in scale and drew directly over the print, assuring that the correct height was held. Moreover, once satisfied with the shape, I could use the drawing as a guide to carve a pattern for the lateral structure of the stairs. I used a 2 mm thick plastic sheet, cut to shape, and sanded the corners rounded:
Next, I took 0,64 mm rods from Evergreen and tied them around the pattern using painter's tape. Since the pattern was thick enough, I could fix two rods to make both lateral sides of the stairs at the same time. Make sure that the tape is holding the rods well against the pattern, particularly around the corners:
What now? Cook it! Seriously.
Heat a cup of water, large enough so to sink the whole structure. The water must be sufficiently hot but not boiling. Let the jig in the water for about a minute, remove it, and dip it in cold water. Because the pattern was thick, it can hold the temperature for a while without deforming. That is why I do not recommend making your jig from plastic sheets thinner than 2 mm.
Ok, now the fun part: unboxing, or unwrapping, in this case. Remove the tapes, and you should have a plastic rim following the contour of the pattern. Even better, you have two of them! Now carefully trim them to the correct size using the measurements from the drawing. These are the sides of our stairs:
Next, chop a half dozen straight rods with the same length as the width of the stairs. They will be our transverse bars, connecting both rims. You also will need rods of different lengths to make the bracings. Always refer to the stairs you are building. In my case, I first braced each side, and then connected them with the transverse bars. And a tip: while gluing bracings, try to work on a glass pad. In this way, you can pop the assembly out when dry and brush a bead of liquid glue over the joints to smooth everything - no sanding necessary.
The steps are simple rectangles of plastic card trimmed to fit inside the 'cage' and cemented with liquid glue. The particular stairs I was depicting had cart wheels mounted on an axle to move the stairs around. I made it using rods and tubes. Also, there were panels bolted to the sides, which I made using 0.3 mm plastic card cut to shape.
And after a couple of very pleasing evenings, this is was what I got:
Here is the final assembly besides an accumulator trolley (subject of another report), being inspected by Rommel himself. Kidding aside, the soldier is 1/76 scale from an old Airfix set to give a sense of size.
One more night to let everything fully dry and I then painted it roughly resembling the colors of the Martins Air Charter. My display will show the Dove pushed to the end of a runaway in the late 60's when the golden years of propeller air travel were over. So I reasoned that the ground equipment was not in its best shape and went heavy on the weathering.
This 'old school' way of doing things is becoming more and more scarce. It says my age...
Like I said in the beginning 3D printing would make this much easier, but I doubt it would be this fun. Furthermore, it certainly lacks that craftsmanship thing.
I hope you find this tip useful. Let me know what you think.
