| K.I.S.S. display
bases |
Before you ask, the answer is: no, the acronym above has nothing to do with the famous rock band. KISS stands for keep it simple, stupid, and I'm not the author of the principle. Now back to modeling, this is an article about making a base to display your model. A quick one. All my models are on display bases. I like to think of bases as part of the model, almost a vignete but, mind you, I'm not talking about elaborated things like dioramas. I believe that even a small piece of wood under any model adds to it , let alone a small scene. Notion of size, the attitude of the subject in the air, sea, or on the ground, a glimpse of the environment where the object is embedded, you name it... Whatever is your reason, a nice base really blends in everything to the point of, occasionally, impart a better aspect to a model not so well finished.
On the other hand, I'm among the ones sometimes being criticized by friends under the claim that I could build another model with the time spent on a display base. Whoa! Hold your horses there. This article will prove they are wrong. Again, we are not talking about dioramas. Just a honest, well done simplistic base.
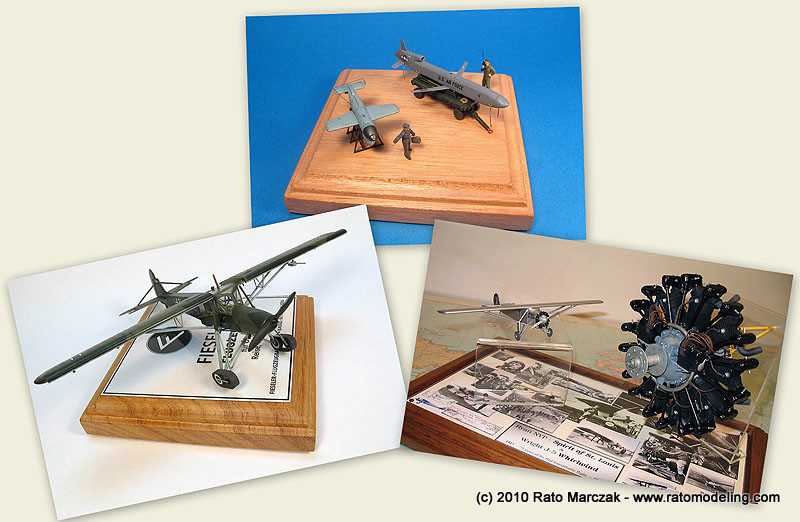
The examples below show that a bare wood base, maybe with the manufacturer logo or unit badge printed on top of it can be enough in many cases. Other times the base itself may be simple, but multiple models on acrylic stands can be used for good effect:
Style is matter of taste, but sometimes historical accuracy calls for a grass or coral field, and one or two figures will help to give a sense of relative size:
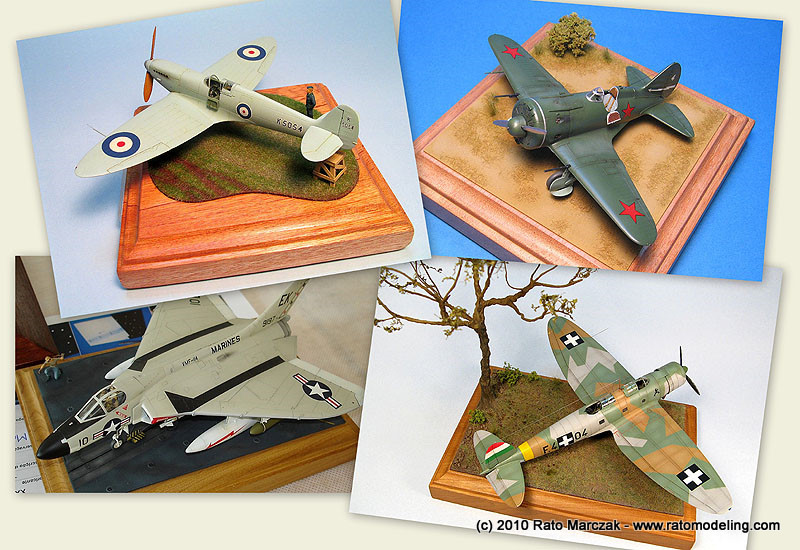
Ok, even a "simple" base can become pretty elaborated, such as a carrier deck or an area of a WWII airfield. We are not going that far. Just a quick base that you can do in one or two nights.
Motivation
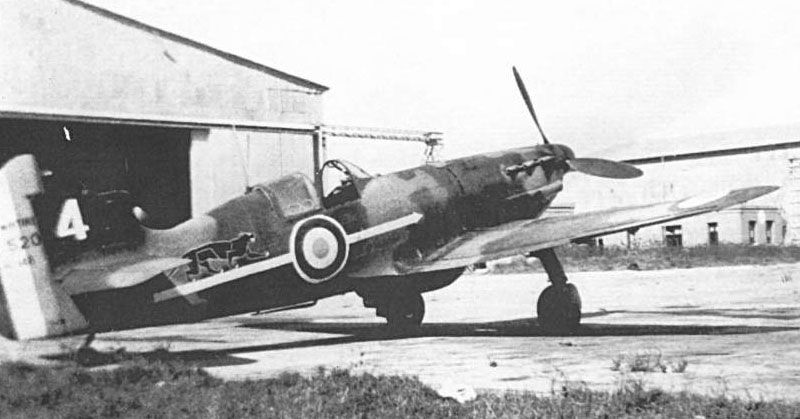
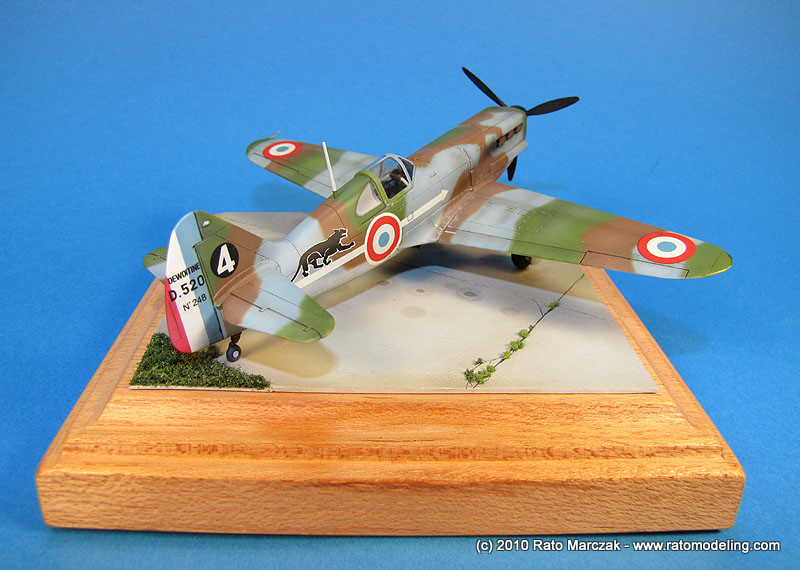
When in doubt about what to choose as a base, check out some pictures of the subject in action. Even if you don't want to reproduce a particular scene, a period photo will indicate basic features that could be present in the scene, such as type of ground and vegetation (if any), the environment, or simply inspire you. This was my case a while ago, when I had to decide which kind of base to put my 1/72 Hasegawa D.520 on. I thought that my best shot was to look as photos of the war. To my surprise, I found a picture of the same aircraft I did parked on a airfield tarmac with some ground vegetation growing along the perimeter of the tarmac.
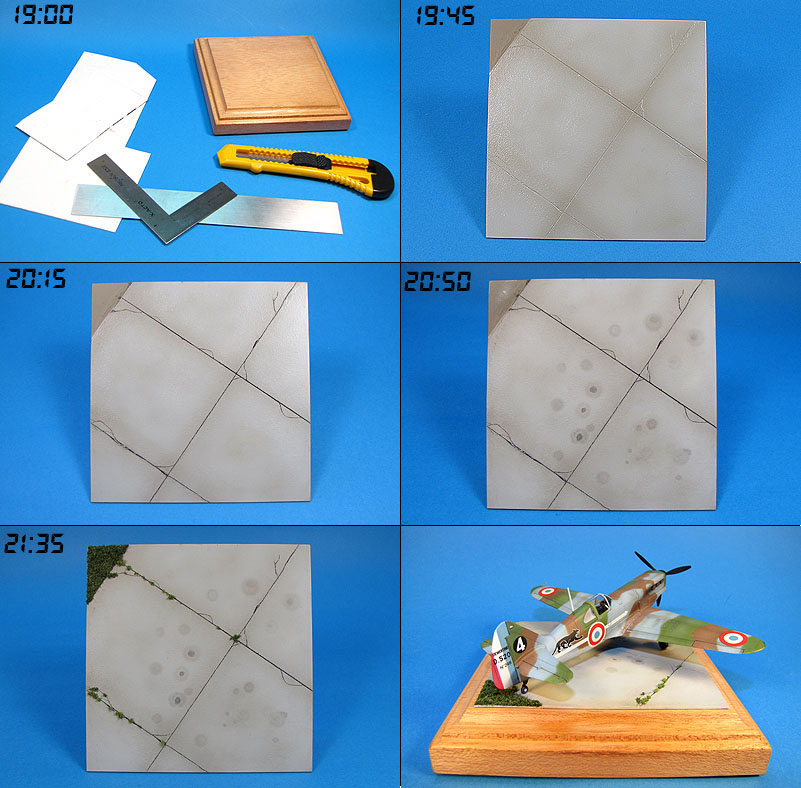
Seemed simple enough to be acomplished in a single modeling night. Hands on... This one particular time, however, I clocked everything.
7:00 PM - A bit of fracture mechanics
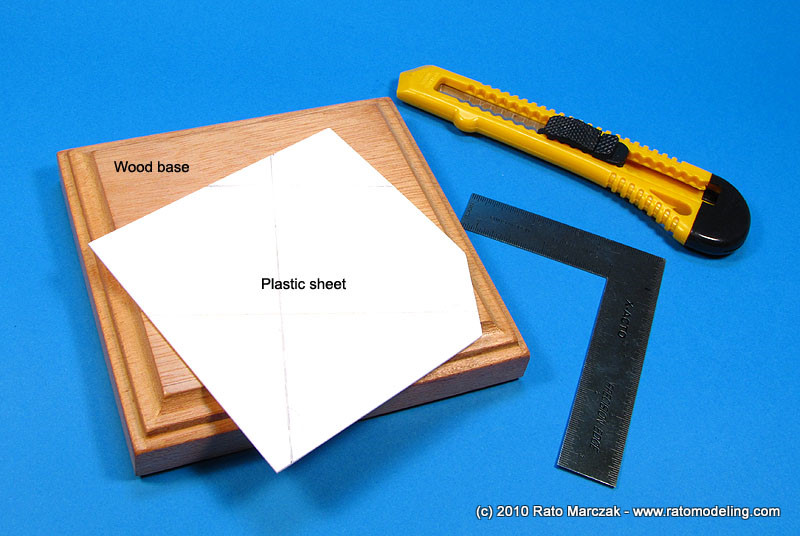
I have a stock of pre-cut wood bases that I standardized for modeling use years ago, in three sizes. The smallest is great for small propeler aircraft, and I like to display them diagonally in the base, with wingtips protuding out the base limits. I don't like to used bases large enough to enclose completely the aircraft. Contrary to tanks and vehicles, cruciform objects like aircraft take a lot of space in these cases, and such bases will need many diorama-like additions to fill the scene.
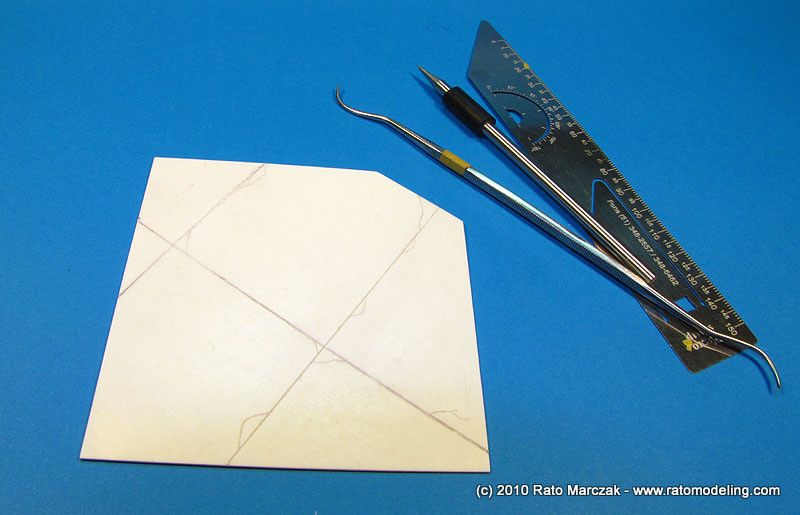
I started by cutting a square of 0.75 mm thick plastic sheet and pencilling the tarmac seam lines. One of the corners was cut off to be replaced later by a thinner piece. That would be the grass area of the base.
Next, a rough scribing job was in order. I really mean rough, because the objective is to simulate the tarmac joints, which are quite irregular, in general. A smart way to do so is to scrap the edge of an old plastic ruler with your hobby knife. This will produce a rough edge that you can use to "guide" your scriber in a not so straight line. Make the joints thick with multiple passes of the scriber. Once finished with them, put your creativity to work by adding those typical cracks that inevitably happen in concrete runways, using lighter passes to produce thinner lines.
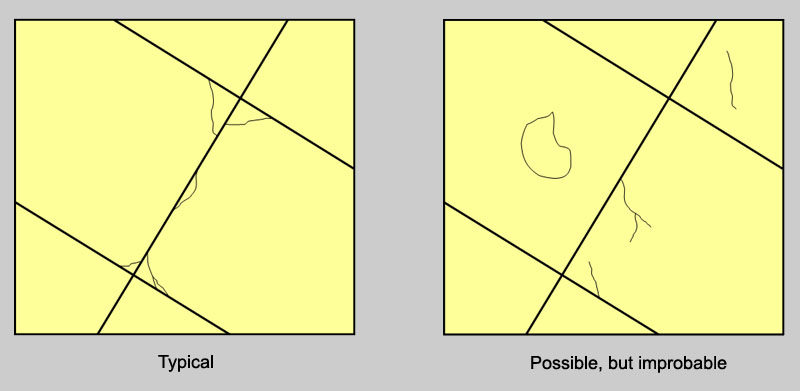
A word of advice here: try to be random, and concentrate the cracks on weak spots of the concrete block perimeter. Take a look on your city airport or a public basketball court to see what I mean. The figure below gives some suggestions, as well as some wrong things I found in display bases over the years:
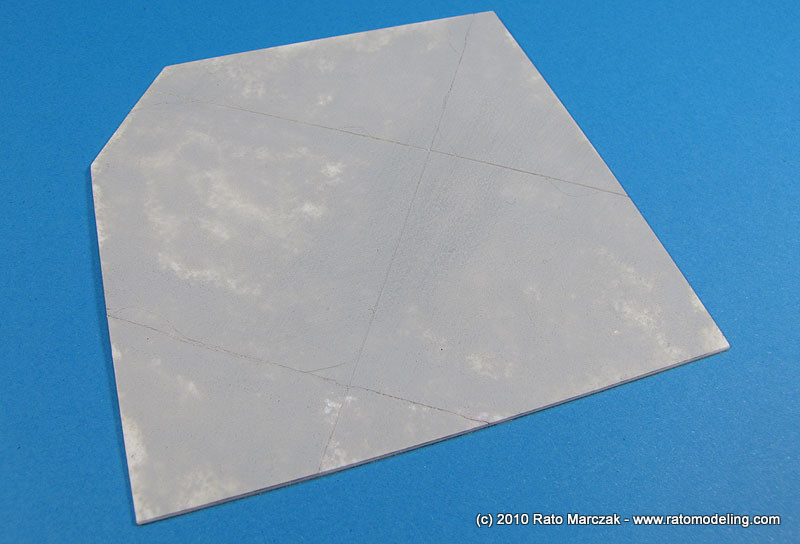
Next, we have to add some texture to make the ground look like tarmac or concrete. I scrubbed the plastic heavily using a metal brush and then sanded it to remove the residue. Then, liquid cement was generously applied to smooth the surface. Use a hair drier to reduce the glue drying time. Then take a hard bristle brush and stipple the base with Mr.Surfacer 500. Keep stippling even after the Mr.Surfacer started to dry.

This simple recipe will add a nice texture to the base which, together with the metal brush effect, will reproduce nicely the appearance of tarmac:
7:45 PM - Painting time
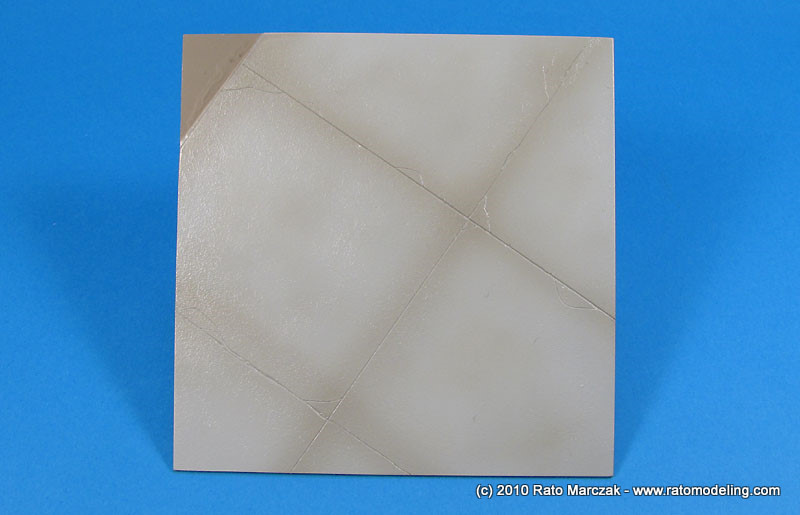
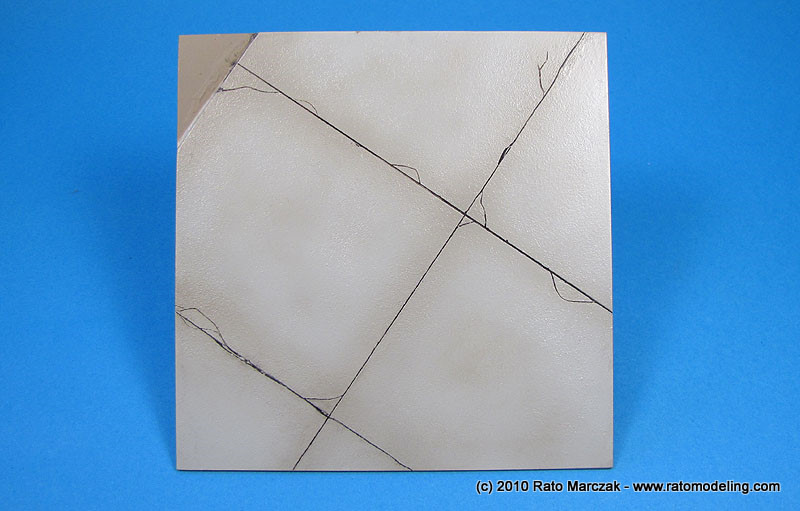
A small triangle was made of a thinner plastic card and super glued in the missing corner. Now we finally have a square shaped plate. Knowing that this should be a quick project, I kept myself away from enamels. To paint the tarmac, I mixed a concrete color using acrylic paints and airbrushed over the plate. A darker, brownish shade was then loosely airbrushed over the slabs' joints to simulate the characteristic shade along the joints. Hair drier sped up everything. Minutes later I was airbrushing a good coat of Tamiya Gloss Clear (X-22) to prepare the paint job to receive the washes. Again, the hair drier saved a lot of time. This is where I was 45 minutes after starting to work:
20:15 PM - Washes to make it dirtier
At this point the scribed joints were barelly visible. In order to make them look like filled with tar, I applied a black/brown wash with artists oil. In larger scales, there are alternative techniques like applying oil paint with a syringe along the joints. But in 1/72 it would not make much difference, I think.
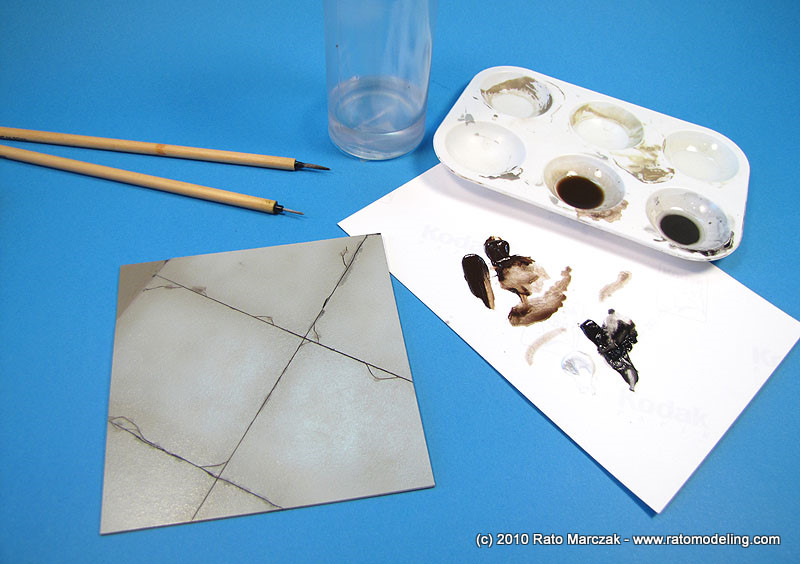
My only advice here is to use lighter fluid instead of white spirits to thin the oils in order to make the wash dry as fast as possible. An old rag was used to clean up the excess. It worked like a charm, as far as you have an acrylic gloss finish to work on:
20:50 PM - Making it operational
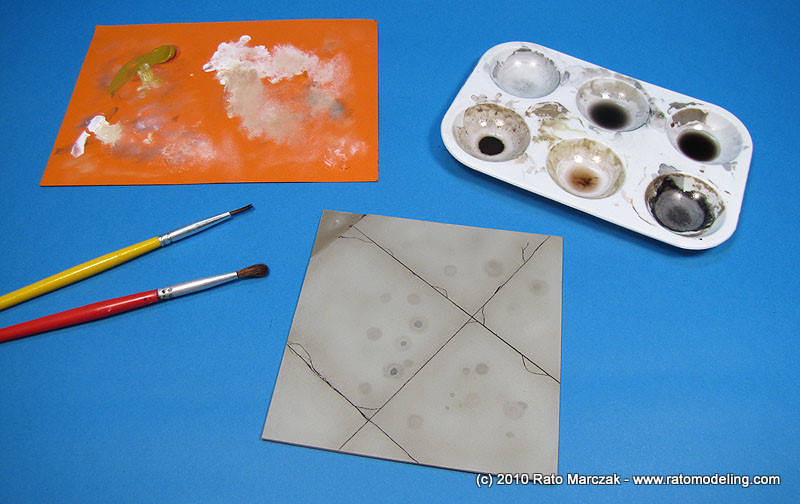
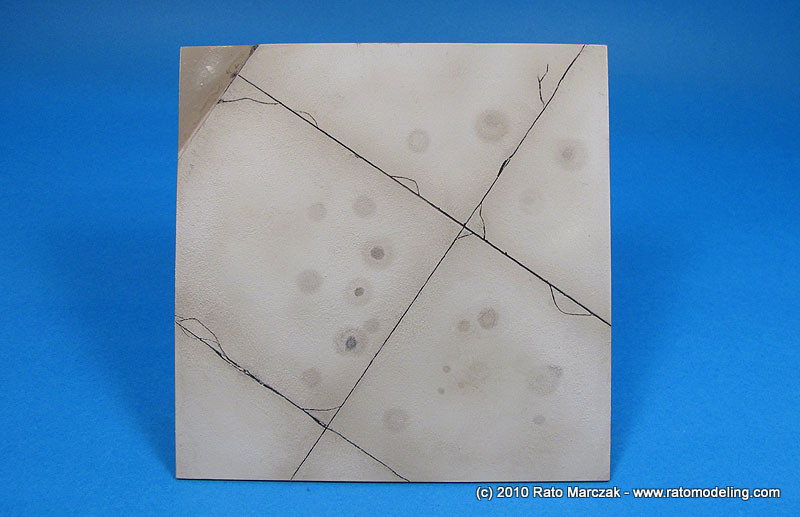
Now I have a nice base plate, although glossy and still too clean. I then airbrushed Testors Dullcote to cut the shine. In order to give it that used look, the whole tarmac surface was drybrushed with a light khaki color, making all the work with Mr.Surfacer worth - the texture really stands out. Just don't forget that drybrushing works much better over a flat base. I also simulated oil and fluid pools: using a medium round brush soaked in highly thinned oil paint, touch the surface gently and lay some of the paint. Repeat the application if you want, and try to use at least a couple of colors, like black and brown to look like different fluids.
This is where I was less than 2 hours after the start:
21:35 PM - Nature shows up
Looking back to my reference photos, like the one at the beginning of the article, I was sure that some ground vegetation would bring the little base to life - no pun intended. And it is really easy. I prepared a small amount of Woodland Scenincs light green coarse turf and Noch olive fine flocking mixed together to get some color variation. I applied a first layer using scenic glue over the small triangle reserved for that. After waiting some minutes, I applied another layer to add some volume to the vegetation.
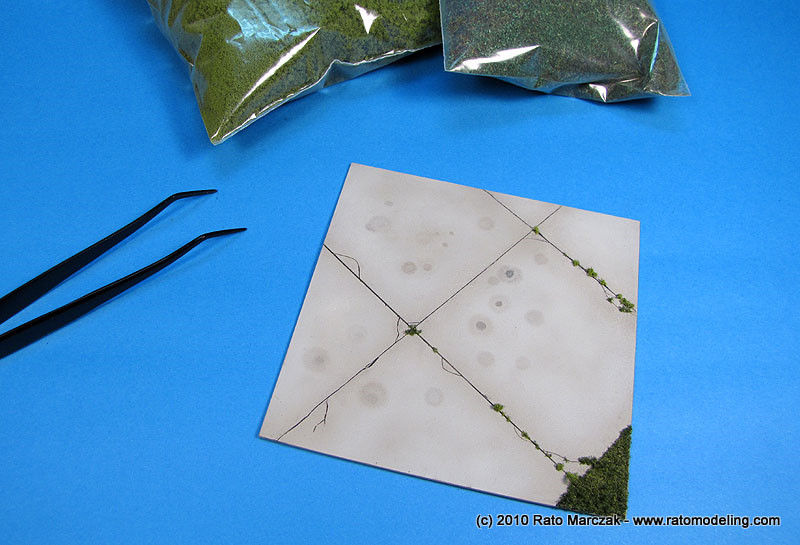
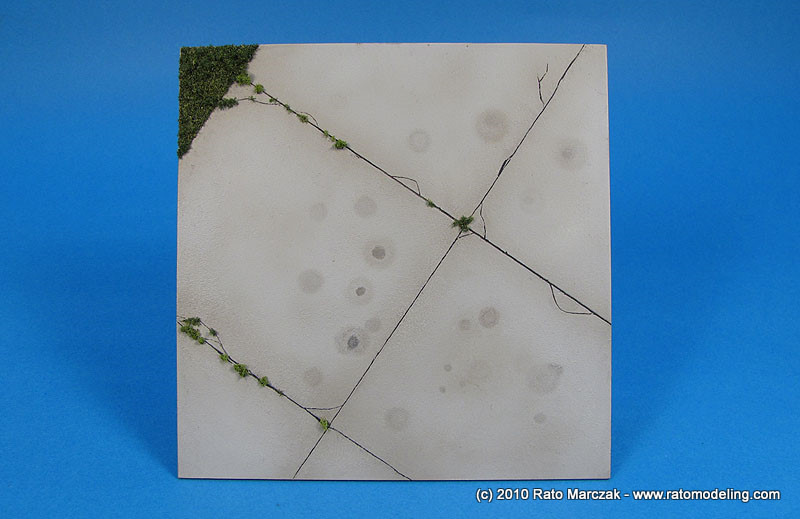
While I was at it, I also applied tiny dots of glue with a toothpick along the slab joints and sprinkled some extra vegetation - those typically found in low traffic areas. Blow off the excess that this is what we get:
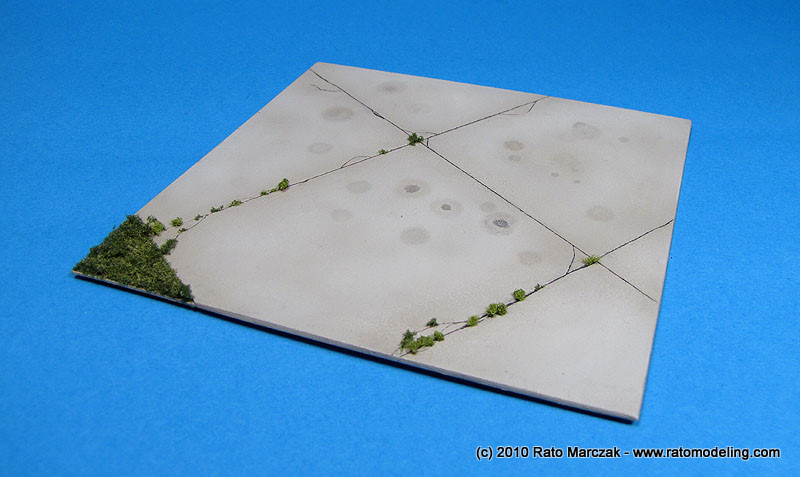
Two and a half hours after starting, the plate is ready to be glued to the wood base:
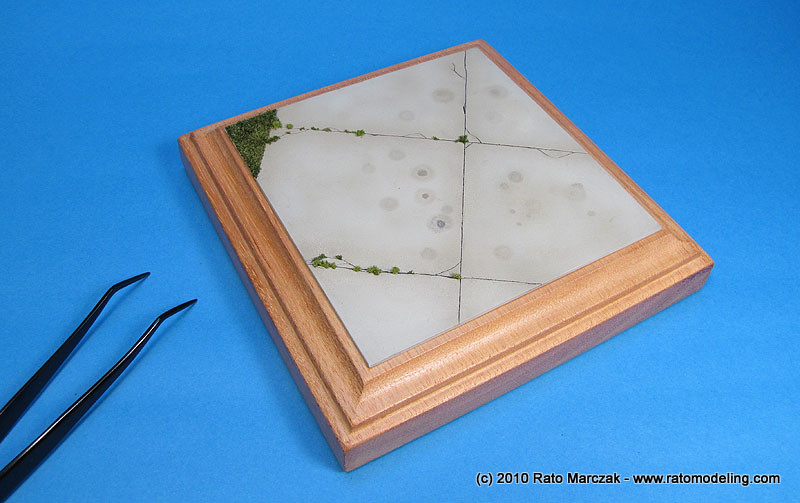
Finishing
And so I glued the plate to its base. Beautiful, isn't it?
In summary, all you need is to use fast drying products and a hair dryer. I couldn't finish any model in a less than three hours long modeling section.
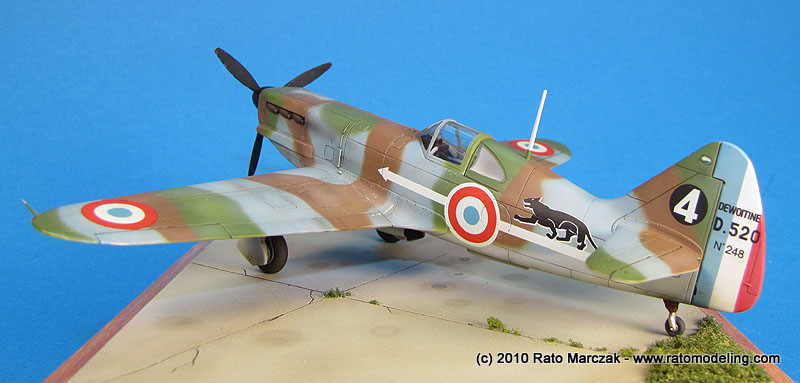
I liked the final result, and my little Dewoitine finally could rest in its place:

Recapping all steps:
I hope this proves that you can add some life to your models by simply using those workbench times when you are not really wanting to work on any model. Make a display base, instead:
I hope you find this tip useful.
