| Building a Korean war US carrier deck with JBD (jet blast deflector) in 1/72 |
While working on a F9F Panther diorama inspired by the Bridges at Toko-Ri movie, I faced the task of building a suitable US carried deck base. By studying photos and movies, it was clear that the American carriers deployed to Korean War were pretty much the same used in WWII - with straight (non-angled), wood planked decks. However, they had something different: retractable jet blast deflectors (JBD), afterall jet aircraft were debuting in combat, and jet blast of engines in full power were a constant hazard for crew and equipment.
During those early experiments with JBD, the types installed on the carriers were essentially three: square grill (small type), rectangular grill (large type) and the swivelling grill type (not used until the modern, angled decks appeared).
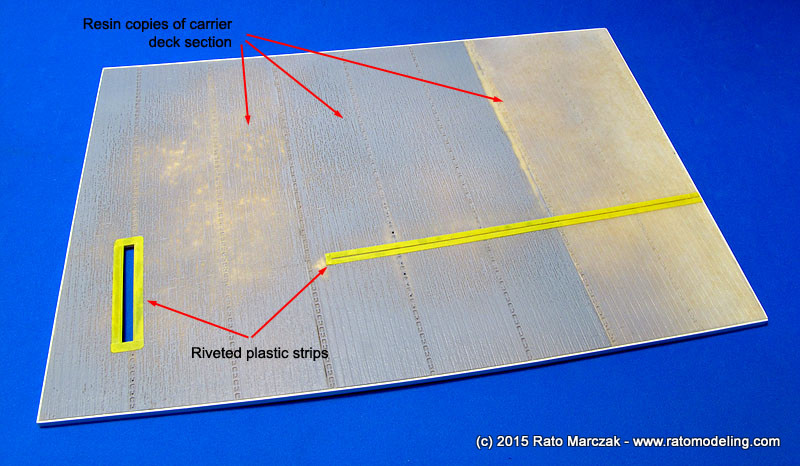
I would use resin copies of the deck sections that comes with the Hasegawa F2A Buffalo in 1/72 scale, but I had to modify it to include the JBD...
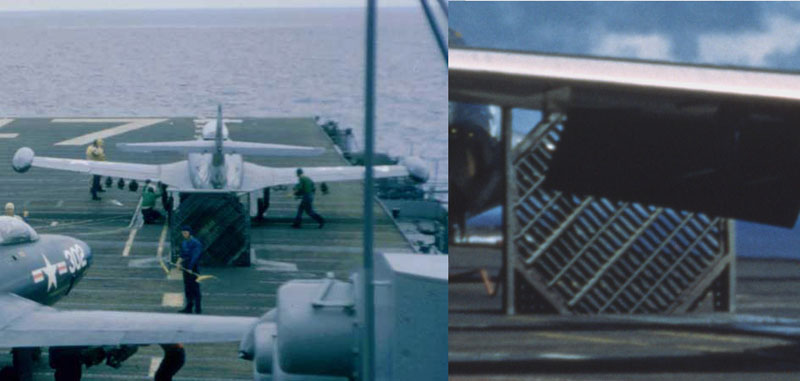
Images for reference purpose, only.
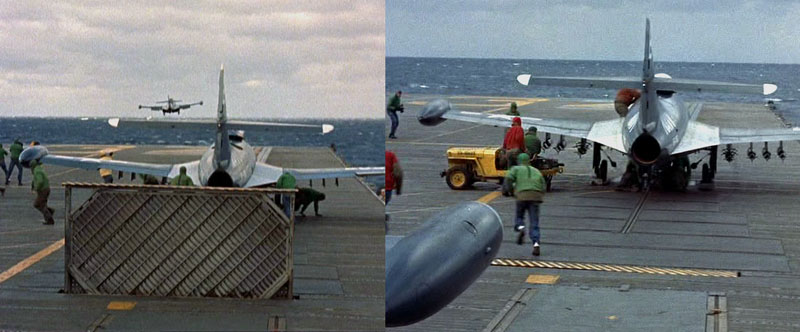
Images for reference purpose, only.
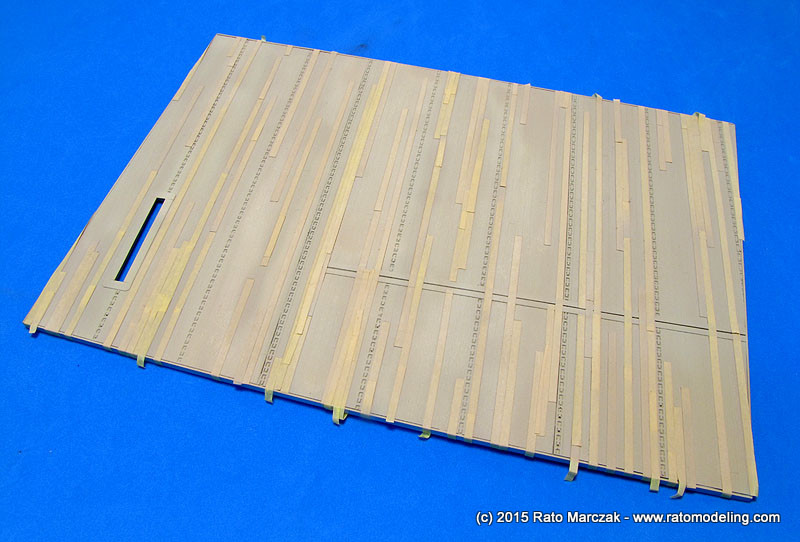
The aircraft carrier depicted in my diorama would be the USS Philippine Sea (CV-47). Observing the photos of the period, it was clear that CV-47 was equipped with the small squared JBD. I started by gluing three resin copies of the Hasegawa deck sections spanwise and trimming the assembly to size. The catapult track was made by scribing a deep line on the deck and cementing 0,2 mm styrene strips to simulate the steel reinforcements. The position of the JBD was eyeballed and a rectangular opening was made around it, again using plastic strips with embossed bolts to depict the steel borders:
The
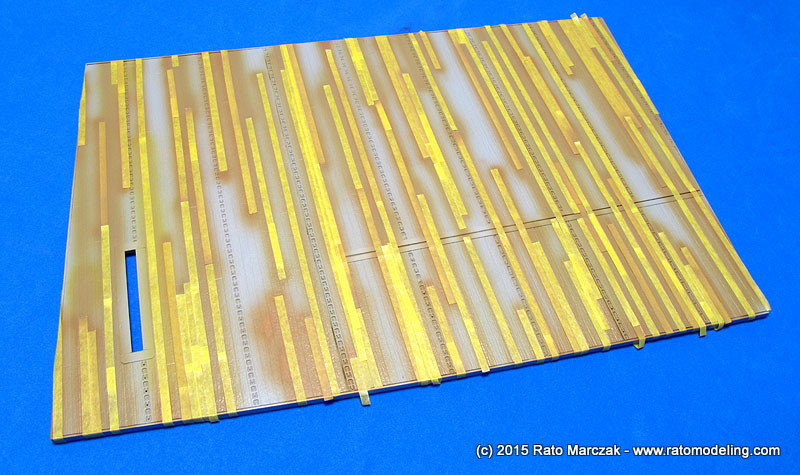
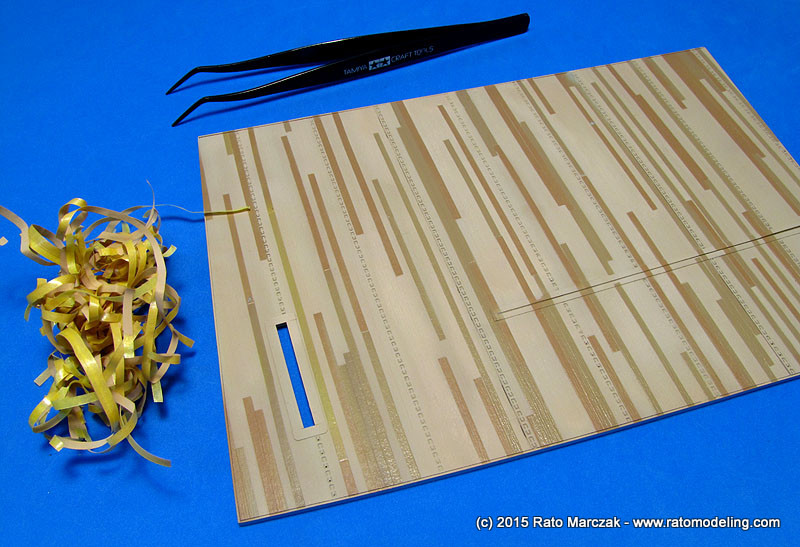
next step was to paint the deck wood planking. I used the
same recipe of my previous efforts: to paint individual planks
with two darker wood tones and complete the painting job with deck tan.
A fine tipped airbrush was used to apply the first wood color. These
were masked and I shot the second wood color, which were also
individually masked:
The final deck tan color was then applied over the remaining planking. I used Tamiya acrylics to make the process faster:
The
masking was removed, revealing the three colors used. It may look a bit
harsh in the photo below, but remember that not much of it will be
directly visible after the deck is stained and weathered. Before
proceeding, the whole deck received a coat of automotive clear gloss
lacquer to protect the paint job from the heavy weathering process
ahead:
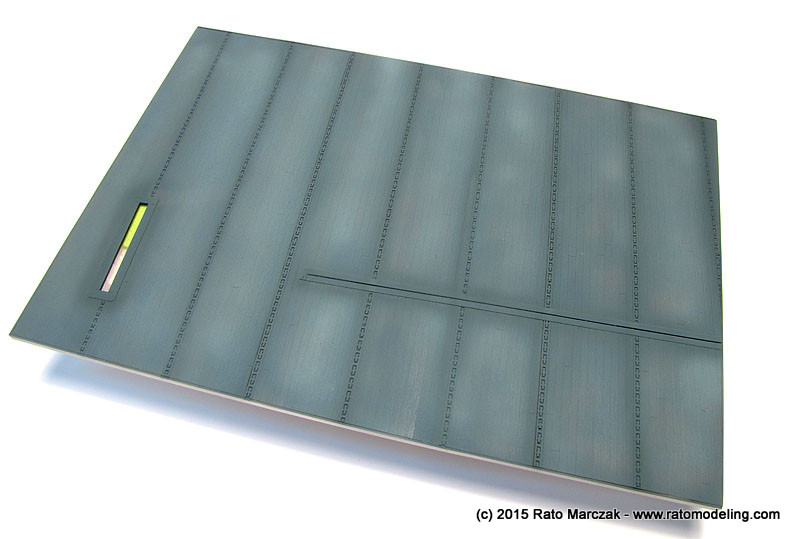
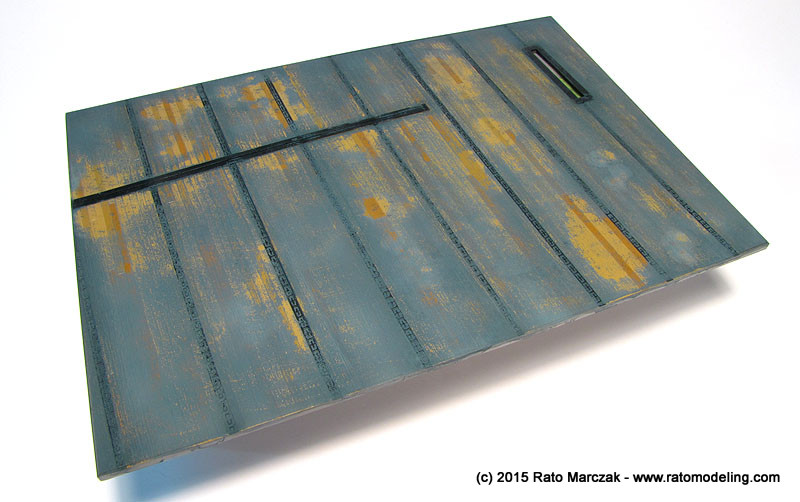
At this point I put the hairspray method to work. I used a cheap hairspray brand sprayed straight from the can. After waiting a few minutes the hairspray fluid was dry and I airbrushed my interpretation of the Deck Blue. I don't know whether by early 50's the USS Philippine Sea was still sporting its Measure 21 camouflage or not. Apparently, somewhere between the end of WWII and the beginning of Korea War the BuShips revised their camouflage system and adopted Deck Gray in lieu of the Deck Blue, but the color photos I researched didn't show that, so I stuck with the Navy Blue system. An interesting fact is that with Measure 21 Deck Blue paint replaced stain on wood surfaces. This means that the carrier deck camouflages actually chipped or flaked under use, instead of simply rubbing by abrasion. Those are technicalities which are not that important in building the base, but helped me to dicide between using the hairspray method or simply sanding down the deck blue to show the wood planking underneath.
Back to the hairspary, again I used exclusively Tamiya acrylics to paint the deck blue, mixed by eye, and a faded tone of the base color was airbrushed on the areas between the tie-down channels for a more interesting aspect.
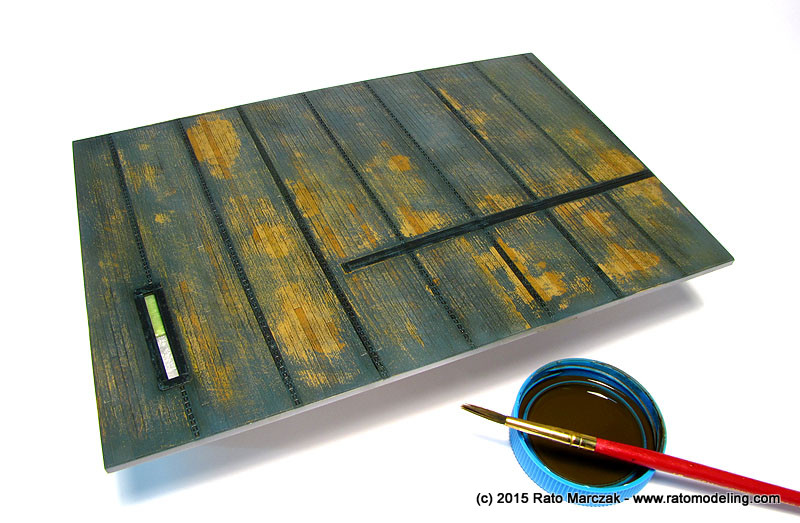
I misted the whole base with tap water and started removing the top color using a stiff flat brush. The areas corresponding to metal parts were masked and painted with a darker shade of Deck Blue. Everything was going alright, but at the end it was clear that I exaggerated on the paint removal. Maybe it was the new hairspray brand that I used, maybe I just went overboard. Anyyway, there was a solution in sight...
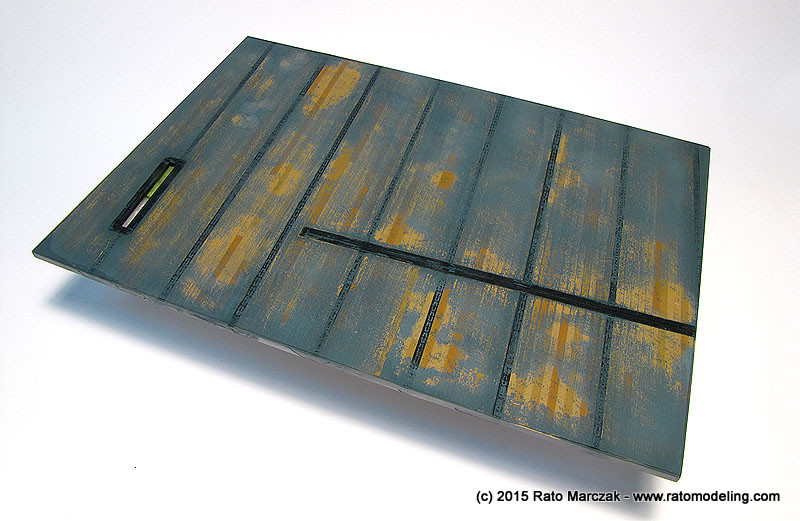
I decided to move on with a dark brown wash of artist oils. That improved the look a bit, but I was still not satisfied:
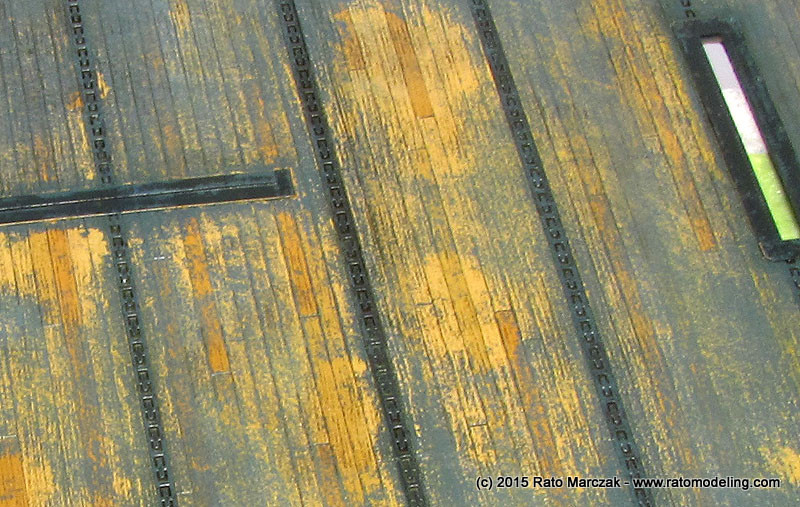
The overall effect was not that bad, mind you, and I was particularly happy with the realistic aspect of the wood planking showing through in different shades:
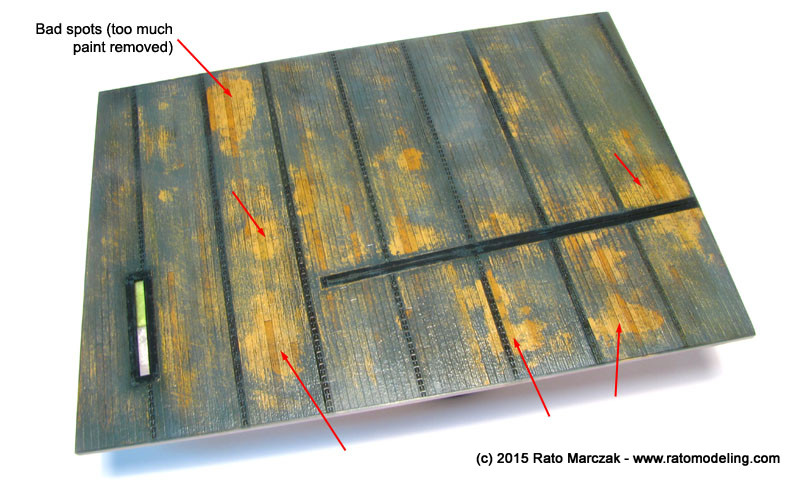
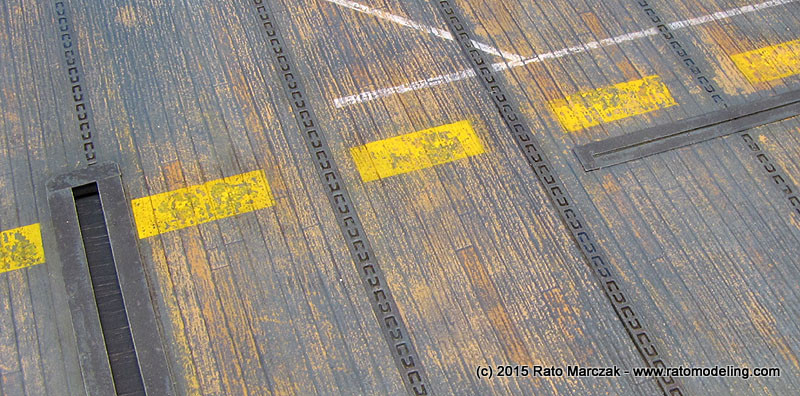
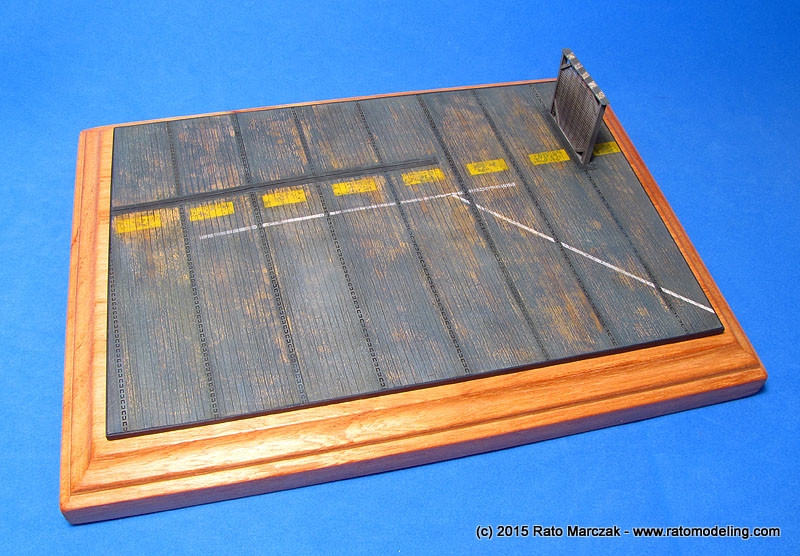
I don't mind to say that I had removed too much paint from several spots and had to correct it somehow. The episode was a nice opportunity to test a remedial method, and it came in the form of the well known sponge method. I simply used a piece of sponge dampened with the Deck Blue color and dabbed it over the areas where I removed too much paint. Airbrushing or hand brushing would not work, but the sponge alleviated the problem so well that if I don't tell, you wouldn't know. Happy again, I masked the apron lines and orientation lines and painted them alternating the airbrush and the sponge method. Another oils wash brought the deck to the aspect I was looking for. A coat of flat clear followed and a gentle drybrushing with gray oils ended the job on the deck. It was then glued to one of my standard wood bases.
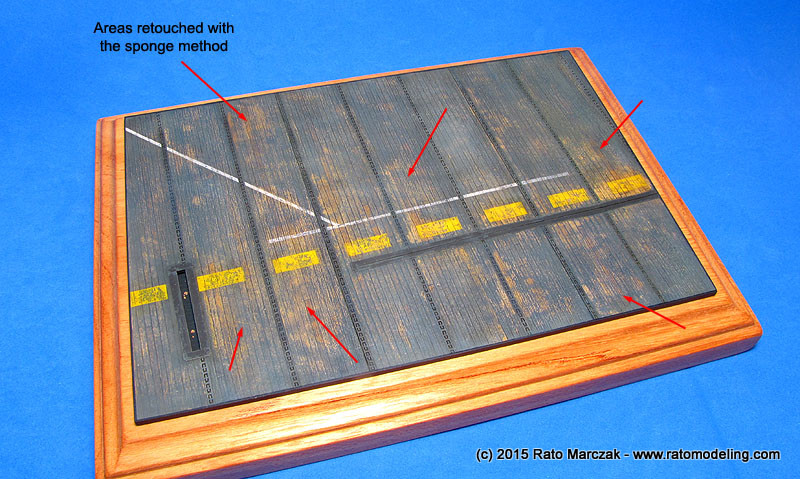
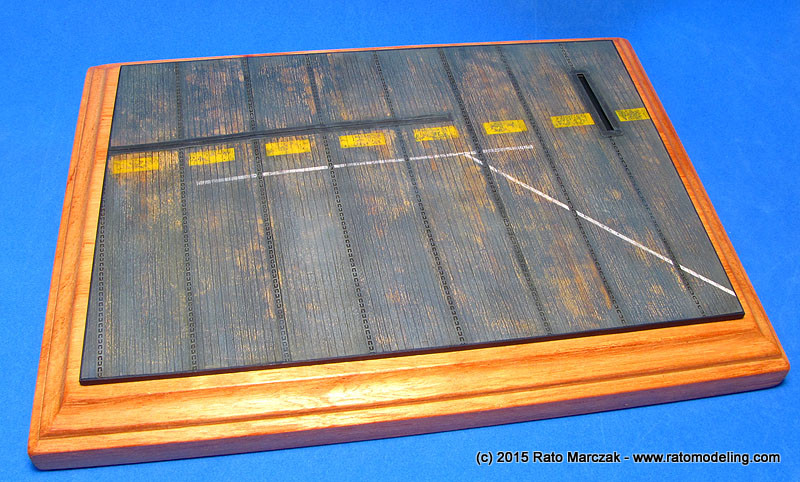
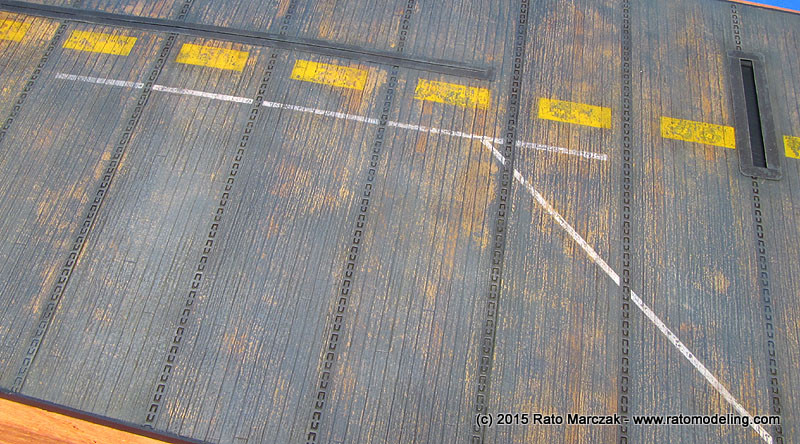
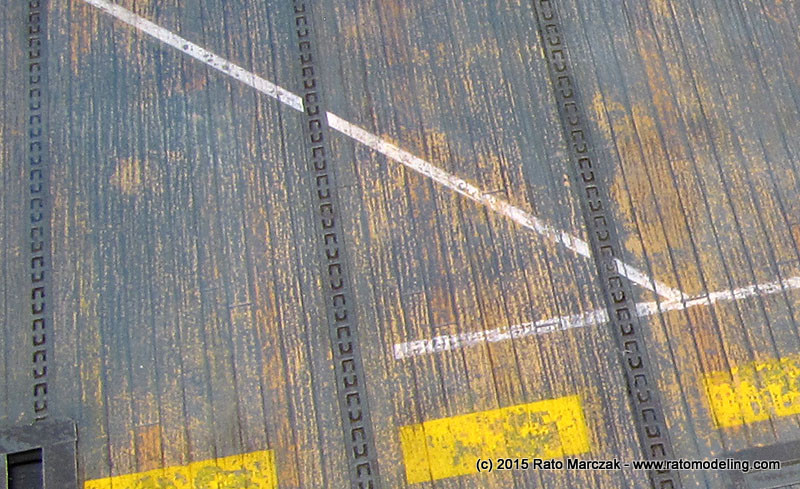
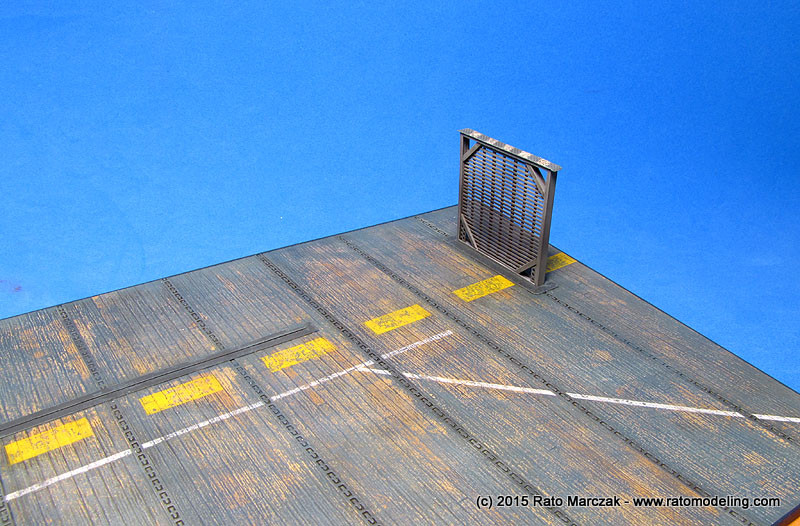
In the end, I think I got a very convincing finish, with the wood planking showing through randomly, and the other painted areas flaked and chipped like if under heavy use. In several places the painted areas looked like they had been retouched or painted over by the deck crew:
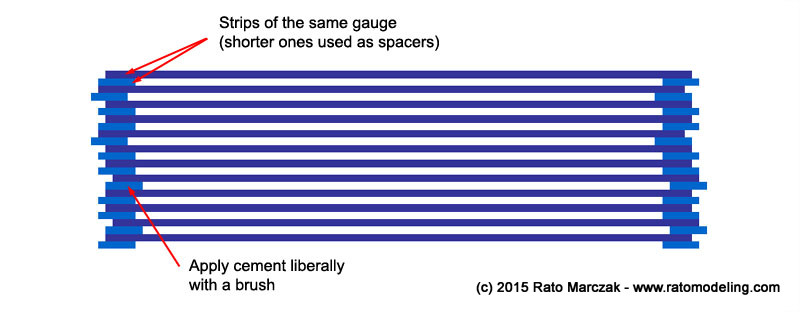
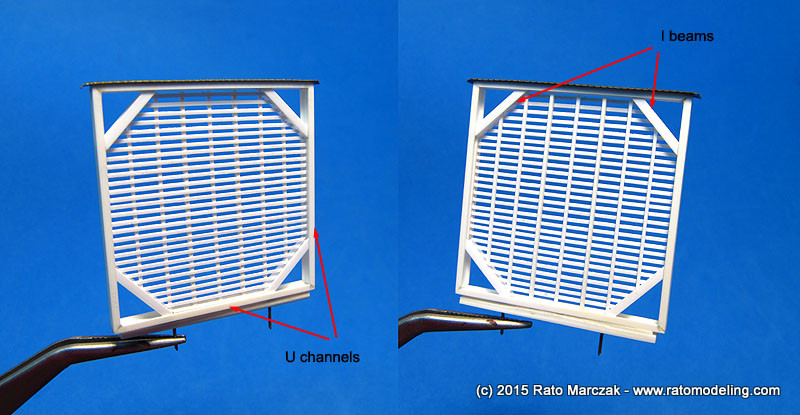
Next, I had to scratchbuilt the JBD itself. It is essentially a grille, but I failed to find a suitable ready made part or photo-etched fret. That left me with the ungrateful task of building one from plastic strips and beams. After eyeballing the dimensions using photos as reference, I built the surrounding structure using I-beams and U-channels from Plastruct, but left one side open to insert the grille later. In order to make a regularly spaced grille, an old trick was used: the same gauge used for the grille rods was used as spacers, keeping the spacing constant and making the gluing easier:
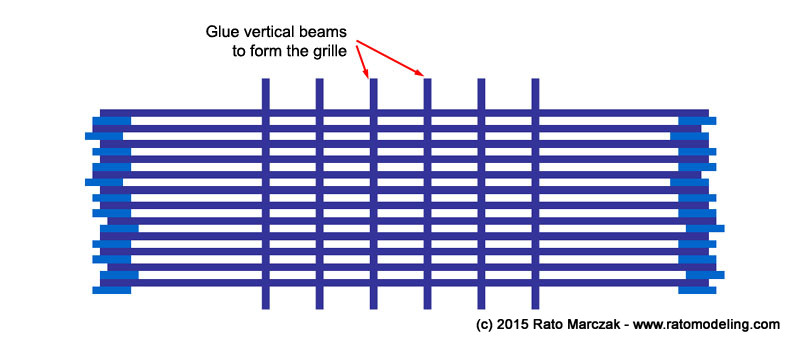
I then glued the vertical rods according to the photos:
Once the glue has set, the grille was cut to size in order to fit inside the beam box made earlier. In my case, it was basically an octogon.
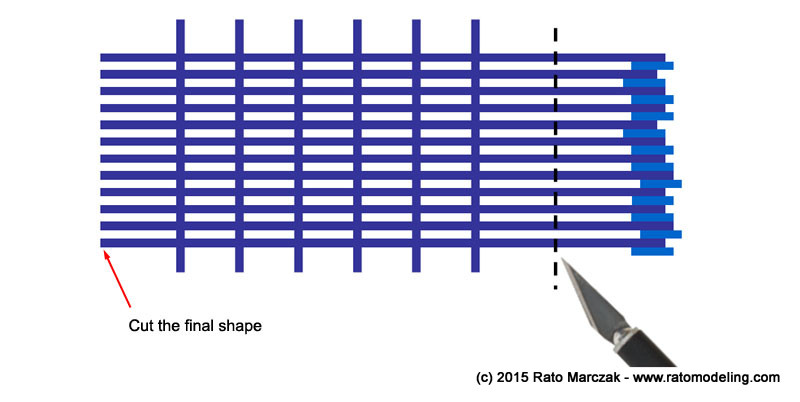
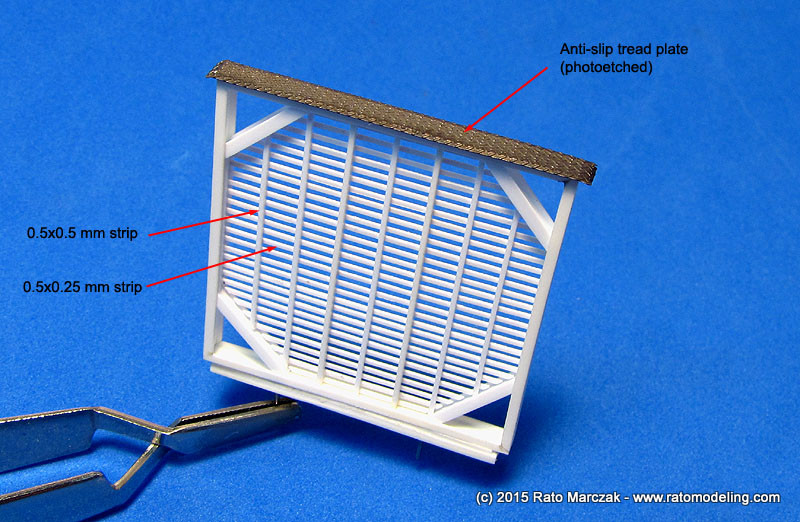
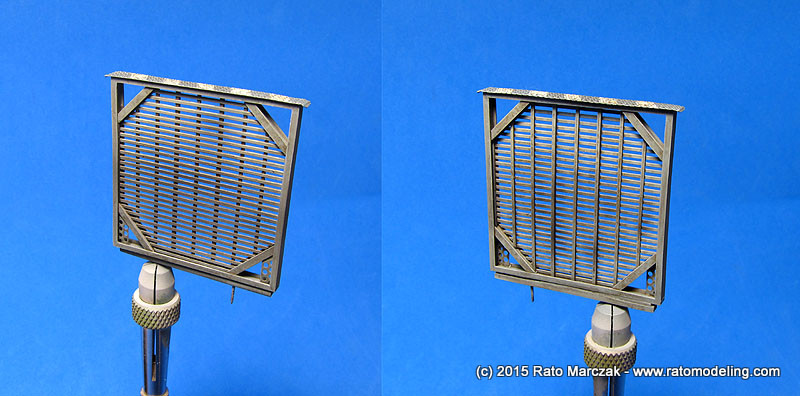
An eagle eye will note another mistake of mine, but at that point I decided to live with it...(I'm not telling). The grille was built with 0.5 x 0.5 mm and 0.5 x 0.25 mm rods, and I liked the final result. The open side of the box was closed with I & U beams, and a anti-slip tread plate cover was simulated with a leftover photoetched part cut to size and bent to shape:
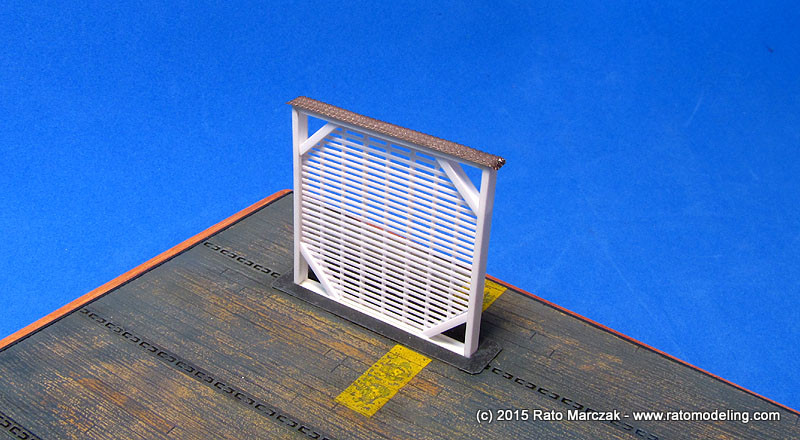
Dry fitting the grille to the base was satisfactory, but I added a couple of piano wires on the bottom of the JBD to anchor it to holes drilled to the base:
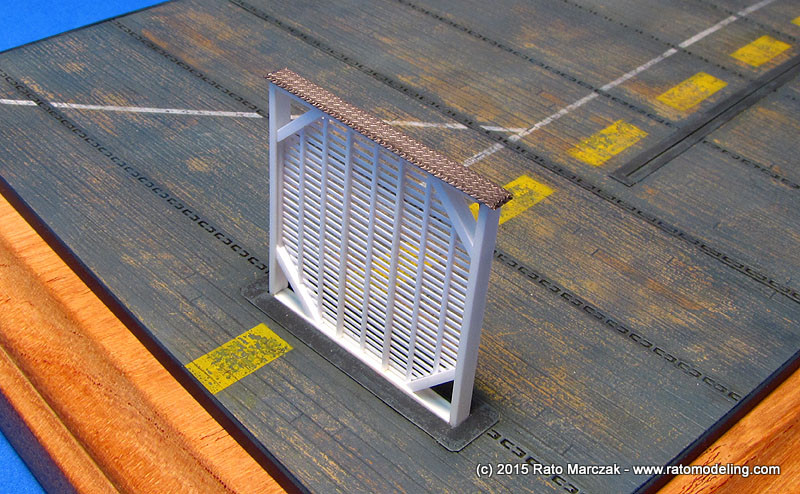
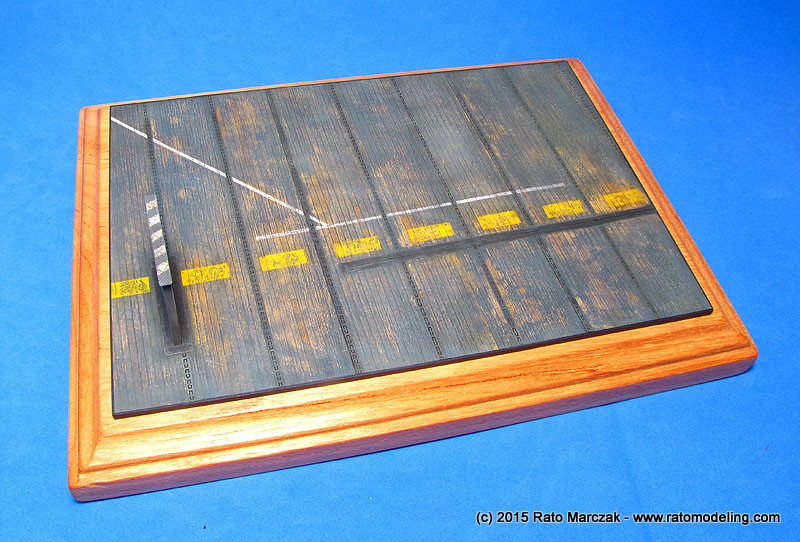
Painting the JBS was straighforward, I just played with two shades of gray, white warning stripes on the anti-slip top, and Gunze's Soot to simulate... well, simulate soot. A flat clear coat followed by a gentle drybrushing with light gray oils finished my 1/72 scale jet blast deflector:
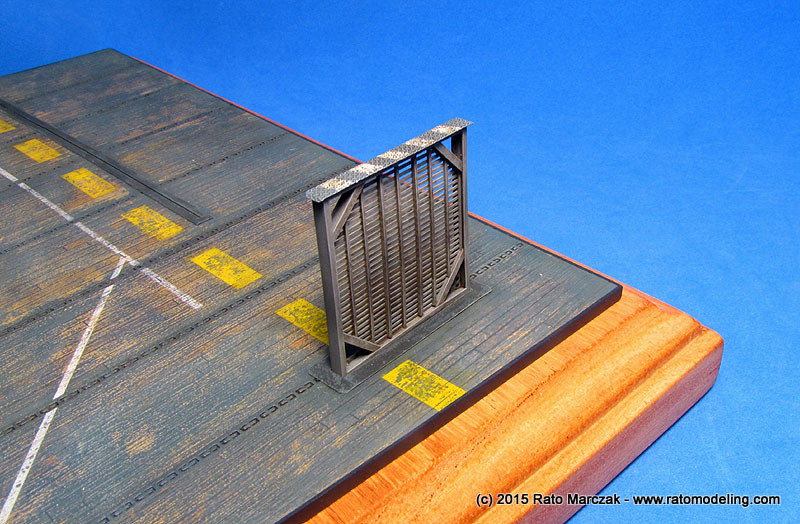
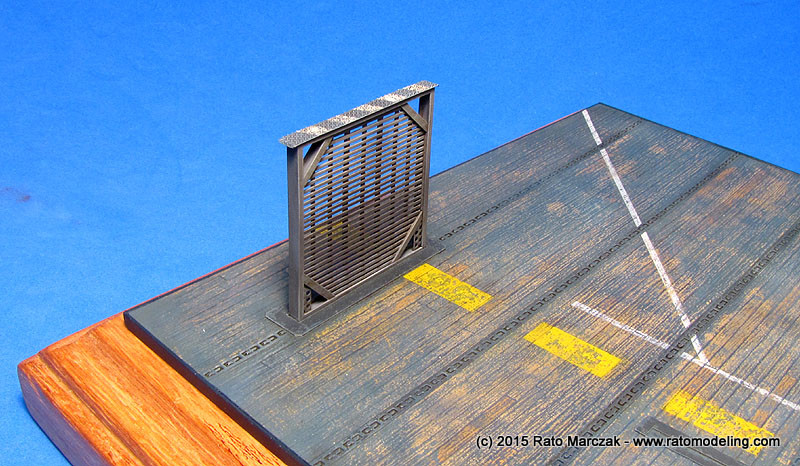
After fixing it to its opening, my Korea War aircraft carrier deck section with JBD was ready to recieve Panthers, Corsairs and Skyraiders. More than that, I learned a simple way to correct paint removed excessively in the hairspray method.
Stay tuned on Antrvm Ratvs to see the diorama finished.
I hope you find this tip useful.
