| Scratchbuilding small control panels in five steps |
During
the building of my old Hasegawa M5 High Speed Tractor I faced the task
of making a new driver's control panel. The kit instructions called for
the application of a decal cut directly from the decal sheet (without
dipping in water). Not that bad for the kit's age, but after working on
several refinements for this little model, including the removal of the
roof - allowing to see the driver's pit, I wanted something
better.
Today everybody wants something 3D printed to enhance the models. There are some nice companies out there producing interesting (and some not so interesting) cockpits and extra details for modelers less interested in scratchbuilding. But these companies will not release a driver's instrument panel for a kit of 1975 vintage, I'm sure. Here, I will show you a simple method to make your control panels using essentially plastic bits and decals.
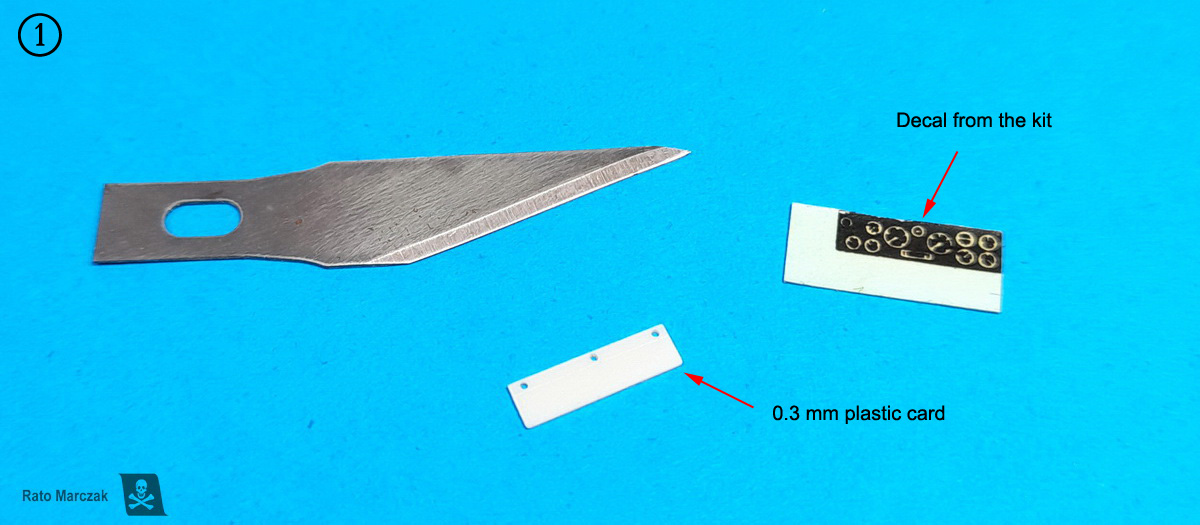
Step 1 - You need a base. Cut the control panel shape out of a plastic card of suitable thickness. In my case, it was simply a 0.3 mm thick rectangle:
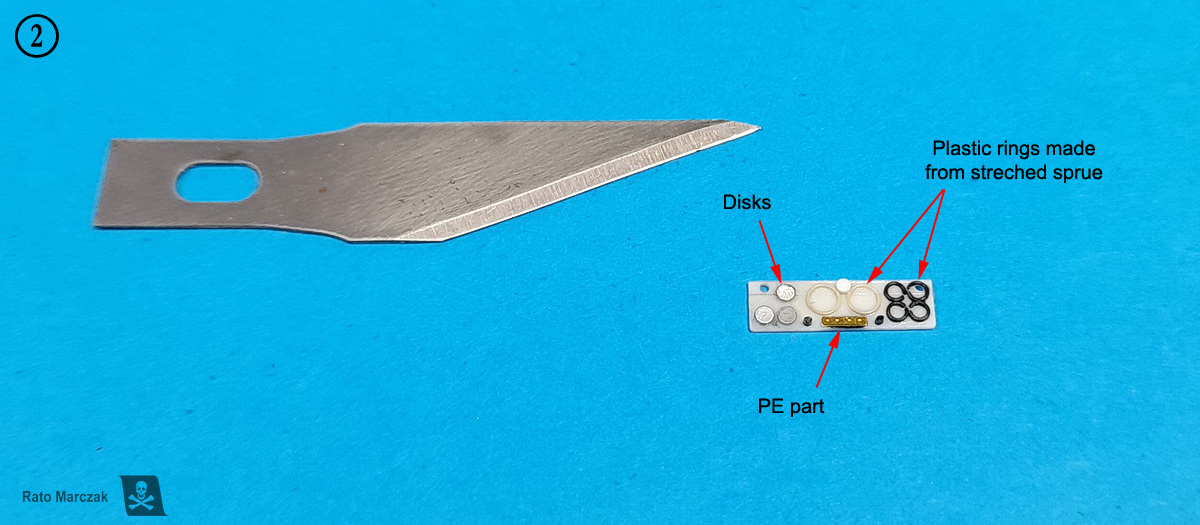
Step 2 - Add the relief. I mean, the instruments and buttons. I have a stock of plastic rings made from stretched sprue, of several diameters and thicknesses. I used them to create the instrument bezels, as well as a few disks punched out of plastic/foil sheets to make raised instruments. The nice thing about plastic rings is that you can use liquid cement to glue them in place. Sometimes, cockpit details and leftover PE parts help to add particular details (Reheat Models used to have them). Dedicated PE gauges are nice too, but they are expensive and can be messy to install. Then, a couple of knobs glued here and there, and it's done:
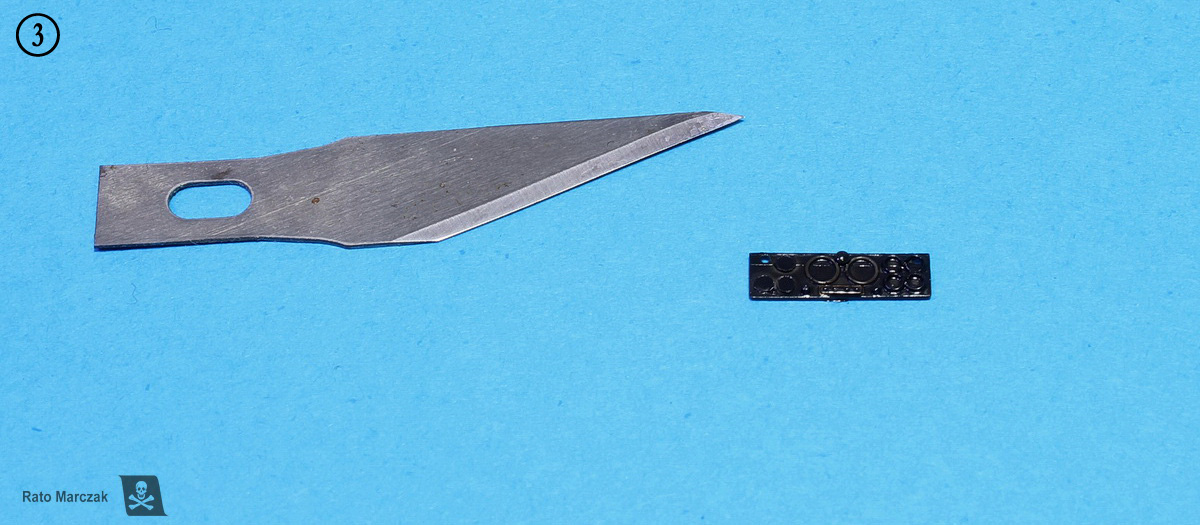
Step 3 - Panel color. The color of the panel may vary depending on the subject. In my case, it should be black, but I used dark grey instead. Pure black never looks right on scale models. Whenever possible, use gloss paints, in preparation for the next step.
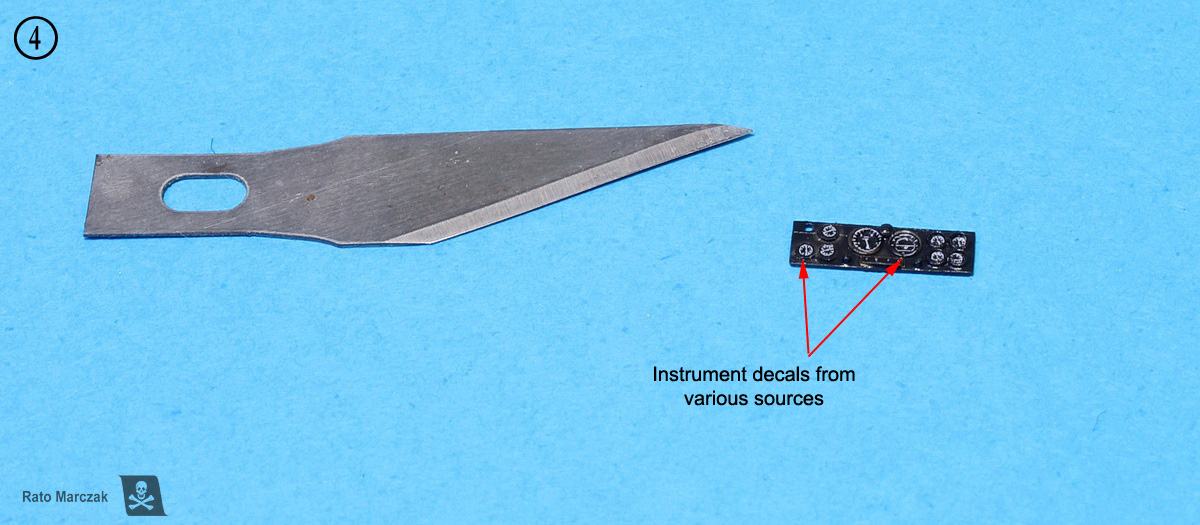
Step 4 - Instruments. Over the years, I collected a good number of instrument decals, and some of them are printed in continuous clear film. They don't need to be circular. I simply cut them as squares and apply them with a decal softening solution. They will conform over the bezels nicely. Mike Grant's decals was my choice in this case. They are designed for aircraft, but in 1/72 scale, you probably will not see the difference:
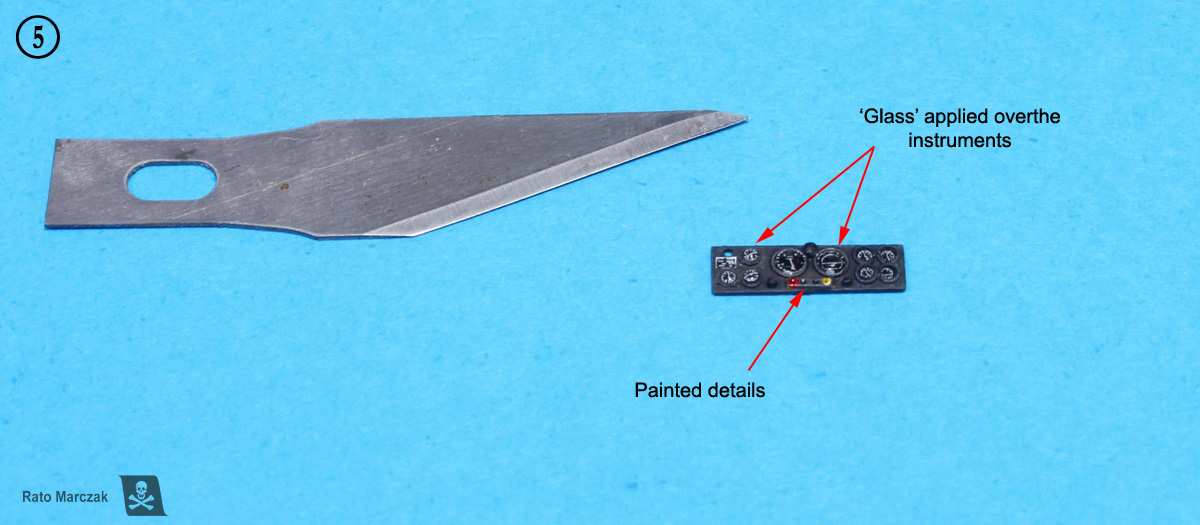
Step 5 - Finishing. The last things are the ones that make all the difference. First, a flat clear coat and a gentle drybrushing with a grey color make the bezels stand out. Then, apply some sort of transparent gloss product over the instruments to simulate the glasses. Future, gloss varnishes, transparent nail enamel, UV curing resin, you name it. I used UV resin. Some knobs were painted in different colors, and a small data plate was added.
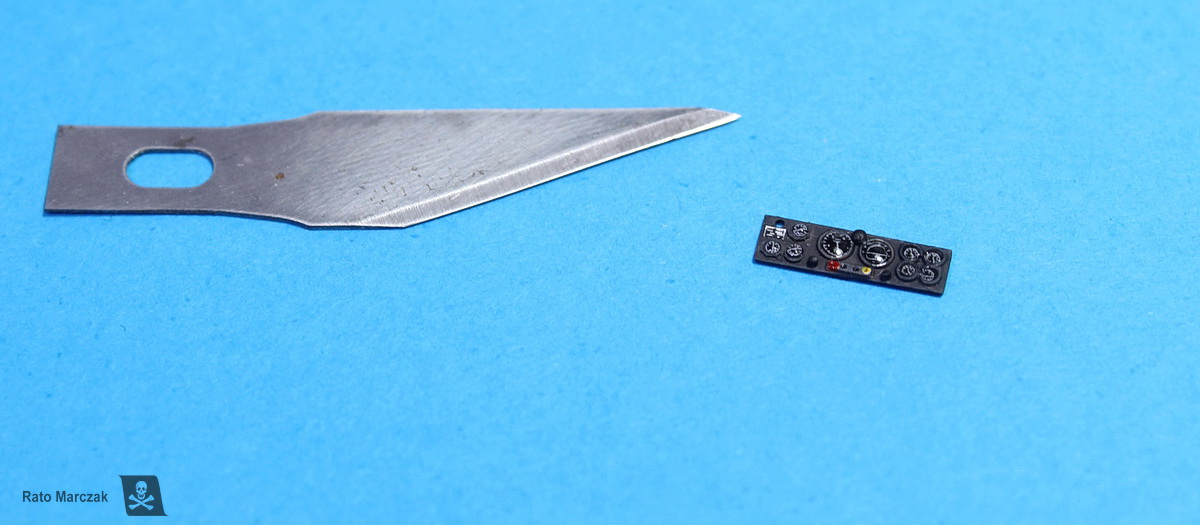
And there you have it. I made my panel in one night. It is that simple and way better than the kit decal:
I would love to have individual instruments 3D printed in color for such situations, but so far no manufacturer has made them available.
I hope you find this article useful for your next project. Let me know what you think.
Rato
Marczak
© 2022Today everybody wants something 3D printed to enhance the models. There are some nice companies out there producing interesting (and some not so interesting) cockpits and extra details for modelers less interested in scratchbuilding. But these companies will not release a driver's instrument panel for a kit of 1975 vintage, I'm sure. Here, I will show you a simple method to make your control panels using essentially plastic bits and decals.
Step 1 - You need a base. Cut the control panel shape out of a plastic card of suitable thickness. In my case, it was simply a 0.3 mm thick rectangle:
Step 2 - Add the relief. I mean, the instruments and buttons. I have a stock of plastic rings made from stretched sprue, of several diameters and thicknesses. I used them to create the instrument bezels, as well as a few disks punched out of plastic/foil sheets to make raised instruments. The nice thing about plastic rings is that you can use liquid cement to glue them in place. Sometimes, cockpit details and leftover PE parts help to add particular details (Reheat Models used to have them). Dedicated PE gauges are nice too, but they are expensive and can be messy to install. Then, a couple of knobs glued here and there, and it's done:
Step 3 - Panel color. The color of the panel may vary depending on the subject. In my case, it should be black, but I used dark grey instead. Pure black never looks right on scale models. Whenever possible, use gloss paints, in preparation for the next step.
Step 4 - Instruments. Over the years, I collected a good number of instrument decals, and some of them are printed in continuous clear film. They don't need to be circular. I simply cut them as squares and apply them with a decal softening solution. They will conform over the bezels nicely. Mike Grant's decals was my choice in this case. They are designed for aircraft, but in 1/72 scale, you probably will not see the difference:
Step 5 - Finishing. The last things are the ones that make all the difference. First, a flat clear coat and a gentle drybrushing with a grey color make the bezels stand out. Then, apply some sort of transparent gloss product over the instruments to simulate the glasses. Future, gloss varnishes, transparent nail enamel, UV curing resin, you name it. I used UV resin. Some knobs were painted in different colors, and a small data plate was added.
And there you have it. I made my panel in one night. It is that simple and way better than the kit decal:
I would love to have individual instruments 3D printed in color for such situations, but so far no manufacturer has made them available.
I hope you find this article useful for your next project. Let me know what you think.
