| Producing your
own decals with a laser printer |
This is a summary of how to make decals at home using
a good quality laser printer. Some time ago, our friend Nei Biazeto
asked me to make some laser decals for his Dornier Do-18. The project
was dropped after a while. A couple of months ago, Flavio Estrella
asked
the same in order to built his little Nieuports 11 flown by the well
known aces Navarre and Barraca. Since I had then recently acquired a
laser printer at the office, I decided to give it a go.
Step 1: Do your homework
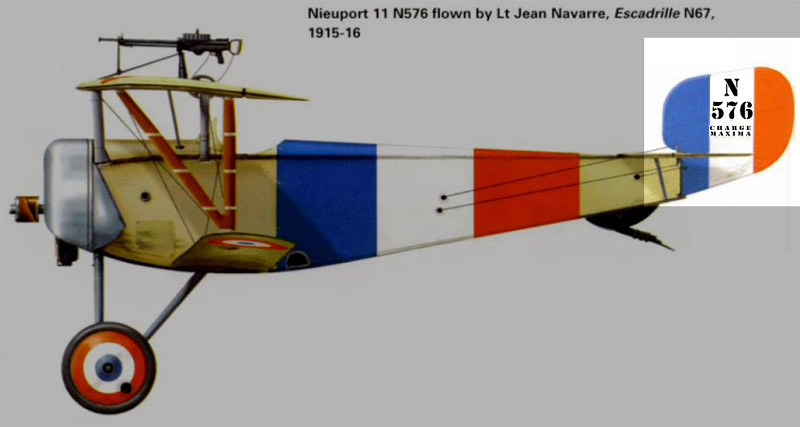
Any serious modeling task starts with a good research. Making decals is no exception. After checking a number of references, we ended up with the profiles from Osprey's Aircraft of the Aces #33 - Nieuport Aces of WWI. In order to avoid relying on a single reference, these profiles were checked against other books and photos of the period. So, here are the planes we are interested in:
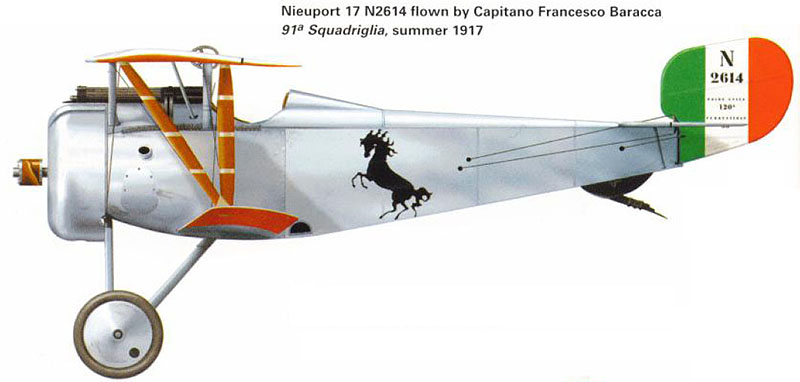
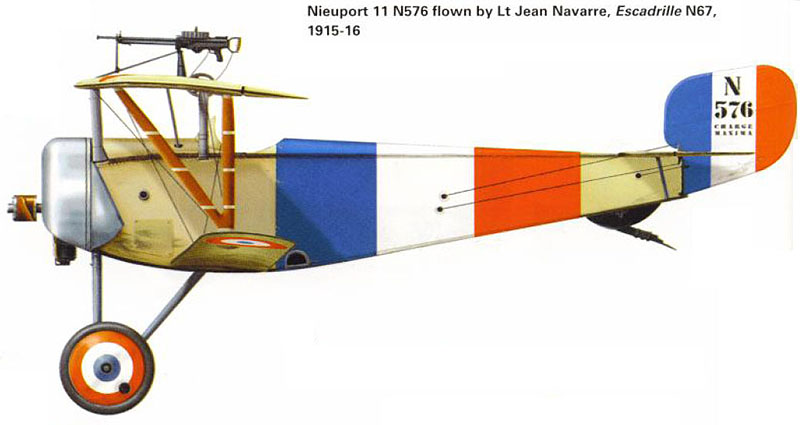
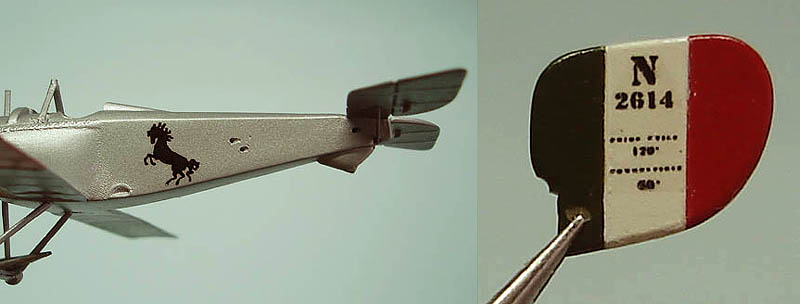
Flavio had the common markings, so he was interested in the tail markings and personal artworks. Therefore, Barraca's plane would need the tail markings as well as the famous Cavalino Rampante (which brings some relation to the Ferrari's logo, but that's another story), while Navarre's plane needed just the tail markings. Being all black, these markings make a good test bed for home-made decal testings.
Step 2: Reproducing artwork markings
Now let's start by revisiting a simple sequence to reproduce artwork aften seen in combat aircrafts. The recipe works well for single color artworks, only, but that's a start. We will show how we did to reproduce Barraca's poney. I have used Photoshop 7.0, but any other good image editing software will suffice.
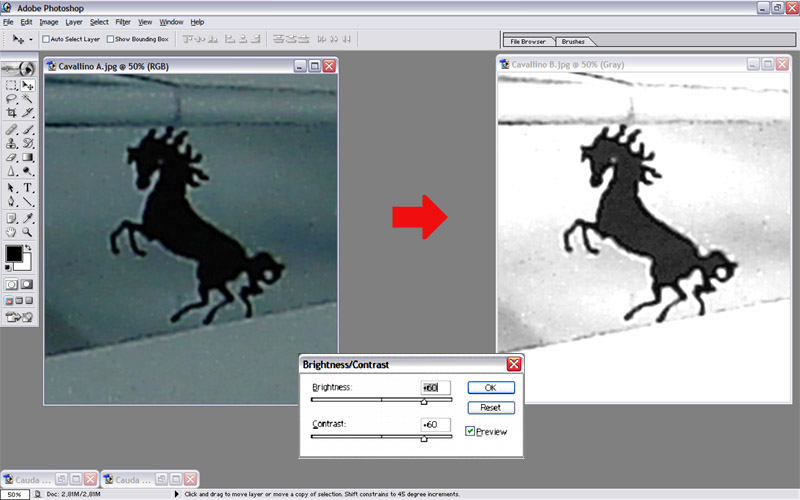
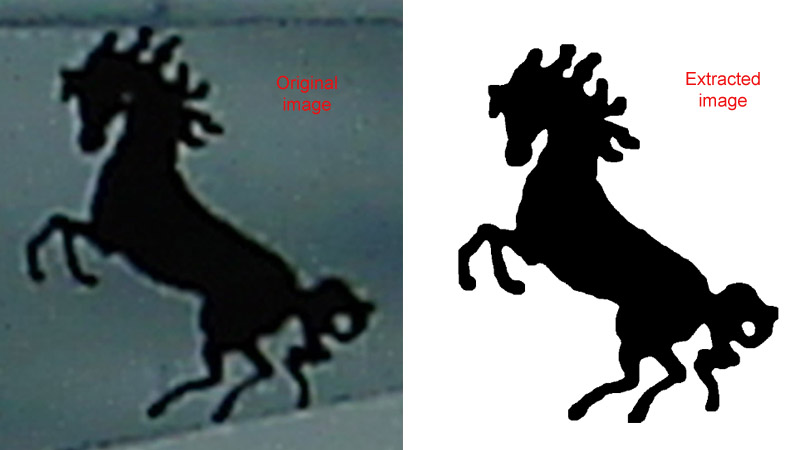
Using the profiles above, we copied an enlarged piece of the image containing the poney. The image was transformed to greyscale mode, removing all colors. Next, the greys were almost completely elimintated by increasing the brightness and the contrast of the image:
Now we have the poney highlighted in black. In order to make it stand even more, we adjust the channel curves for the grey colors, as shown below:
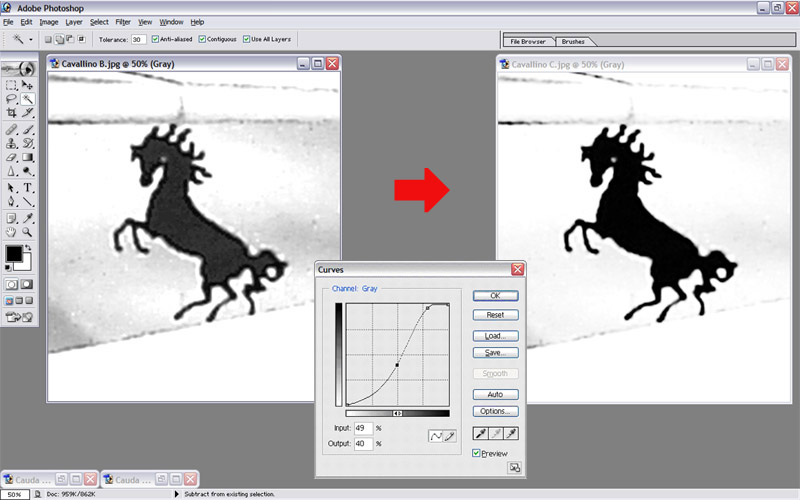
The poney now can be easily selected with magic pen tools (or similar), to select areas withing the same color range.
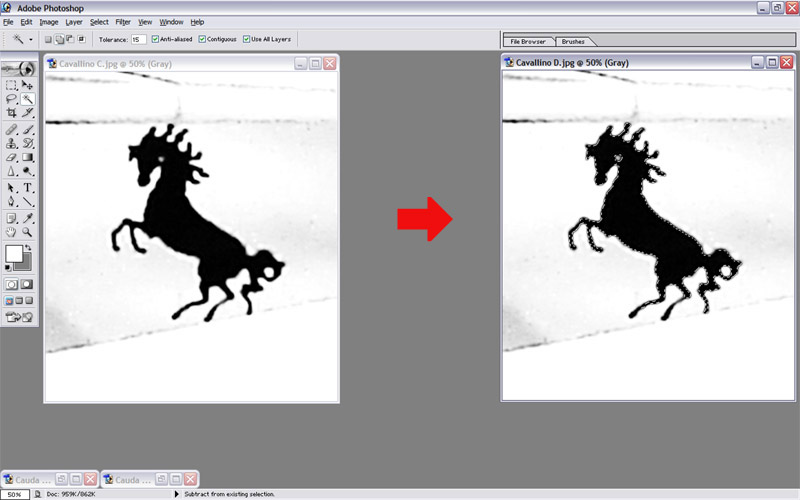
The image selected now is slightly thinner than the original, but most softwares have a grow tool to make it a bit fatter. A couple of retouches later, this is the result we got:
Now save the image in a file to use later.
Step 3: Reproducing stencil markings
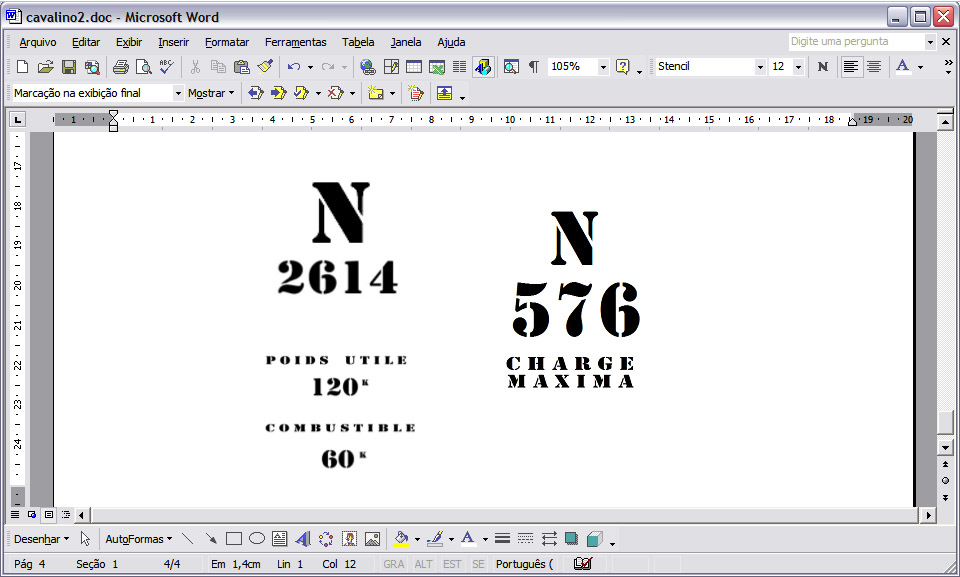
This is the easy one. All you need is the correct stencil font. Over the years I've been collecting a number of them, and I got a bit of everything: Amarillo (USAF), Luftwaffe, RAF, RCAF and also a number of stencil fonts, mostly derived from the Barrel or Stencil font types. You can find many variations of them through the internet. In our example, the Barrel reproduced fairly well the lettering style of the Nieuport tail markings. I typed the required text in a word processor and copied each group of words of the same size in a separated bitmap (I'll adjust the size in step 4).
Step 4: Adjusting the size
Next, using the profile of the aircrafts as a background, I copied each image (stencils and artwork) on the profile and adjusted their size. It is important to lock the aspect ratio of the images in the case of artworks, but for the stencils it may be very useful to adjust the heigh and width separately to fit the dimensions of the original image. The images produced in steps 2 and 3 were then layed over the profiles and adjusted accordingly. Here are the profiles with the new images (highligthed areas) overlaid:
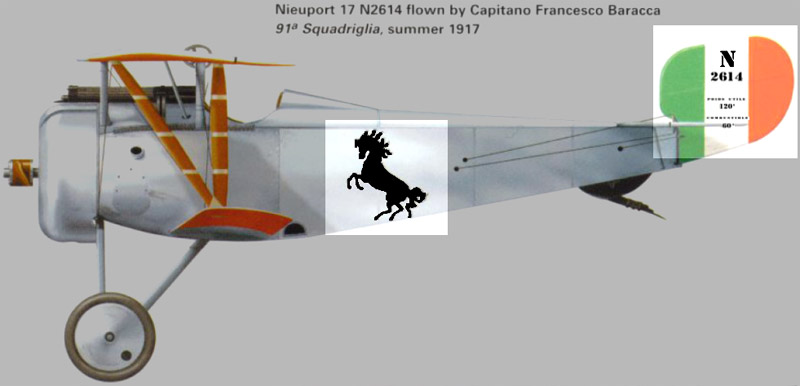
So far, the actual size of the decals were not taken into account. This is easily done. First, group all the images (including the profiles) in a single image. Then, knowing a reference dimension of the aircraft, reduce the size of the grouped image to match the size of the kit. For instance, the Nieuport had a length of 5640 mm. So, in 1/72 scale it should have approximately 78.5 mm. The grouped image was then reduced so that a printed version would have that length. We are done here.
Next, you can ungroup the image and delete the background profile. All that is left are the final artwork to be printed as decals. Rearrange them - without changing the dimensions - to avoid waisting clear decal sheet. Now all images are in the correct size, in absolute and relative terms. Here is mine (not to scale):
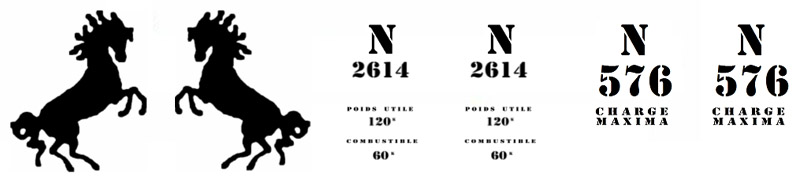
This is the graphics to be printed.
Step 5: Printing the decals
Step 1: Do your homework
Any serious modeling task starts with a good research. Making decals is no exception. After checking a number of references, we ended up with the profiles from Osprey's Aircraft of the Aces #33 - Nieuport Aces of WWI. In order to avoid relying on a single reference, these profiles were checked against other books and photos of the period. So, here are the planes we are interested in:
Flavio had the common markings, so he was interested in the tail markings and personal artworks. Therefore, Barraca's plane would need the tail markings as well as the famous Cavalino Rampante (which brings some relation to the Ferrari's logo, but that's another story), while Navarre's plane needed just the tail markings. Being all black, these markings make a good test bed for home-made decal testings.
Step 2: Reproducing artwork markings
Now let's start by revisiting a simple sequence to reproduce artwork aften seen in combat aircrafts. The recipe works well for single color artworks, only, but that's a start. We will show how we did to reproduce Barraca's poney. I have used Photoshop 7.0, but any other good image editing software will suffice.
Using the profiles above, we copied an enlarged piece of the image containing the poney. The image was transformed to greyscale mode, removing all colors. Next, the greys were almost completely elimintated by increasing the brightness and the contrast of the image:
Now we have the poney highlighted in black. In order to make it stand even more, we adjust the channel curves for the grey colors, as shown below:
The poney now can be easily selected with magic pen tools (or similar), to select areas withing the same color range.
The image selected now is slightly thinner than the original, but most softwares have a grow tool to make it a bit fatter. A couple of retouches later, this is the result we got:
Now save the image in a file to use later.
Step 3: Reproducing stencil markings
This is the easy one. All you need is the correct stencil font. Over the years I've been collecting a number of them, and I got a bit of everything: Amarillo (USAF), Luftwaffe, RAF, RCAF and also a number of stencil fonts, mostly derived from the Barrel or Stencil font types. You can find many variations of them through the internet. In our example, the Barrel reproduced fairly well the lettering style of the Nieuport tail markings. I typed the required text in a word processor and copied each group of words of the same size in a separated bitmap (I'll adjust the size in step 4).
Step 4: Adjusting the size
Next, using the profile of the aircrafts as a background, I copied each image (stencils and artwork) on the profile and adjusted their size. It is important to lock the aspect ratio of the images in the case of artworks, but for the stencils it may be very useful to adjust the heigh and width separately to fit the dimensions of the original image. The images produced in steps 2 and 3 were then layed over the profiles and adjusted accordingly. Here are the profiles with the new images (highligthed areas) overlaid:
So far, the actual size of the decals were not taken into account. This is easily done. First, group all the images (including the profiles) in a single image. Then, knowing a reference dimension of the aircraft, reduce the size of the grouped image to match the size of the kit. For instance, the Nieuport had a length of 5640 mm. So, in 1/72 scale it should have approximately 78.5 mm. The grouped image was then reduced so that a printed version would have that length. We are done here.
Next, you can ungroup the image and delete the background profile. All that is left are the final artwork to be printed as decals. Rearrange them - without changing the dimensions - to avoid waisting clear decal sheet. Now all images are in the correct size, in absolute and relative terms. Here is mine (not to scale):
This is the graphics to be printed.
Step 5: Printing the decals
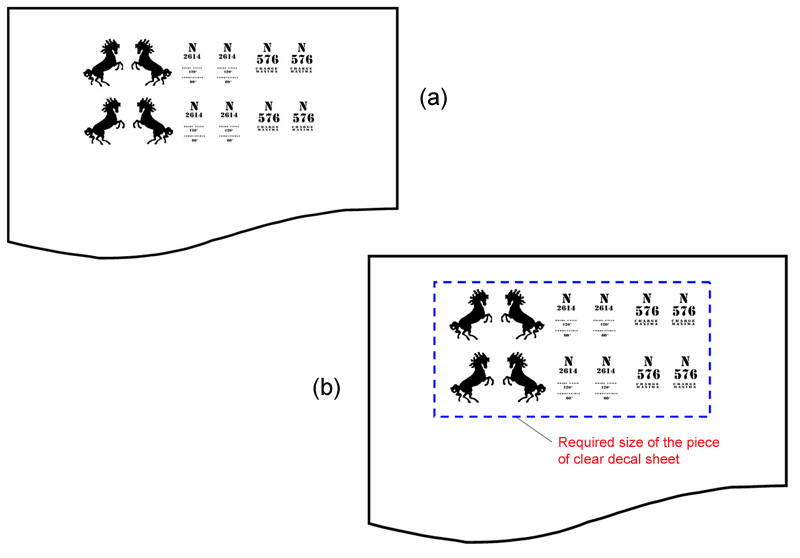
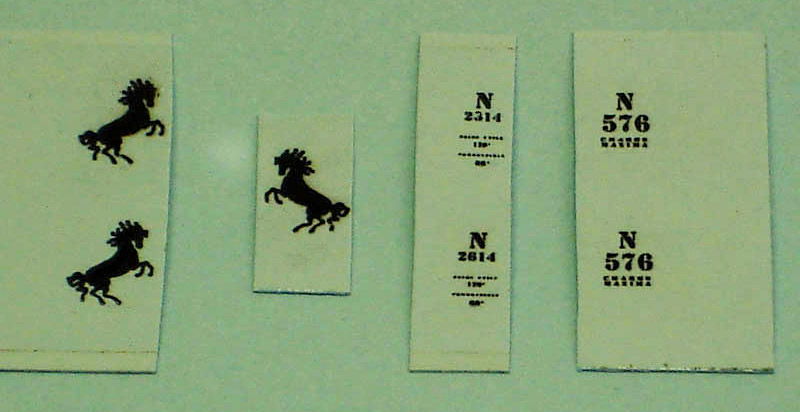
Well, I guess all of you already have printed a document using a computer. This is about the same thing. You need a good laser printer. By good I mean sufficient resolution, or dpi (dots per inch). Cheaper types deliver 600 dpi, and that may be more than enough for most large decals. However, for tiny stencils and detailed artwork, I recomend the use of a 1200 dpi printer. I've used a HP Deskjet 1022 (1200 dpi). Here is the sequence: Print the final graphics in a plain white paper to check for any problems and correctness (a). Don't throw it away. Measure the surrounding box required to cover the whole graphics (b), leaving some safety margins around the graphics.
Now cut a piece of clear decal roughly with the same size of that box (yes, I'm a cheap guy). Fix the clear decal over the area to be printed using a good quality tape (c). Avoid those gummy, sticky types - they may leave glue residue on your printer's cylinder. Now insert the paper sheet in the printer's tray as if you would print the image over the previous one, and on the same side of the paper. The printer will produce the image precisely on the piece of decal.
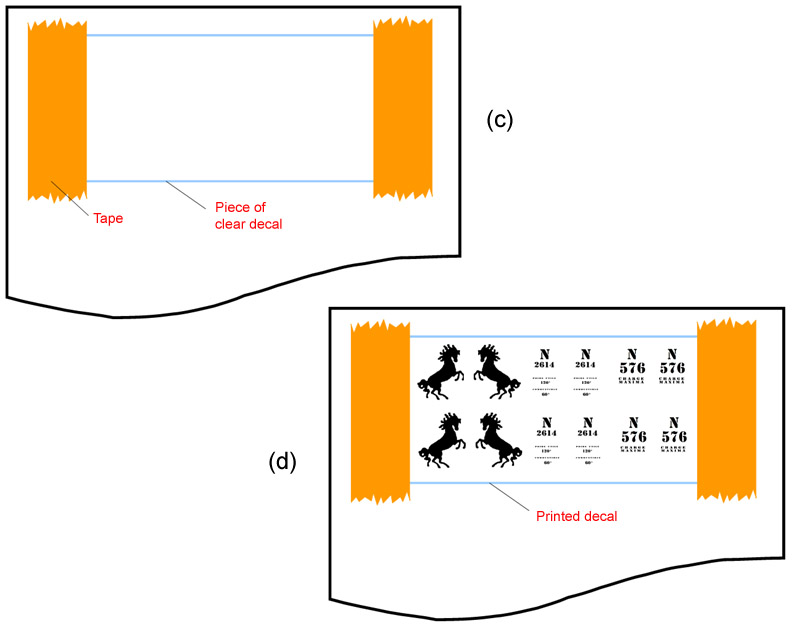
Remove the tape carefully and... voilá, we have a decal sheet.
Results
And so we printed a tiny decal sheet. Fortunately, Flávio took some pictures of the sheet before using it (because I didn't... doh!). He reported that in contact with the water, the printer toner chipped on a few spots. I haven't found this probem on my experiments, but he solved the issue by brushing a coat of Microscale Liquid Decal Film over the sheet. In any case, it is a good advice. Here's the result:
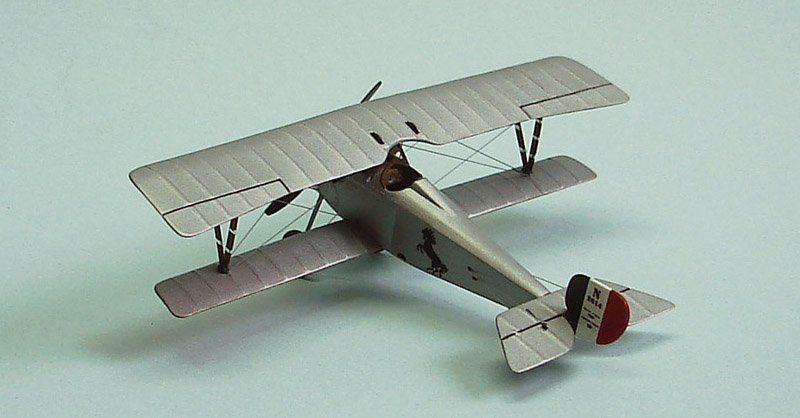
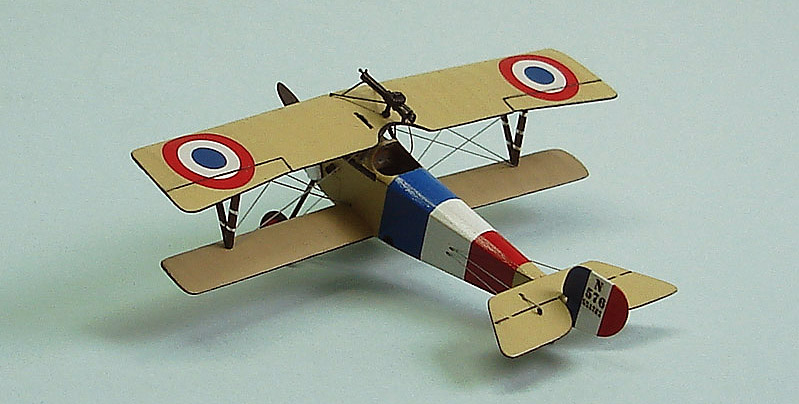
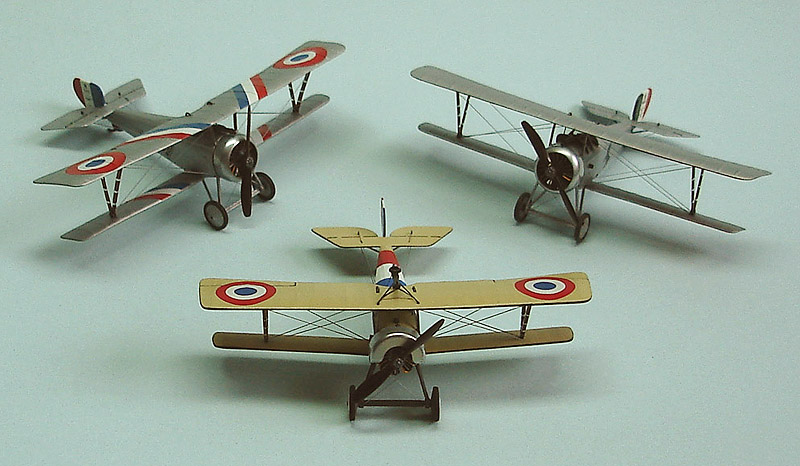
The application follows the same rules of any regular decal, just remember that this is a continuous decal film, and therefore you have to cut each marking before using it. Flavio has successfully used these decals on his models. Take a look (remember, this is 1/72):
Additional comments
Folks, this is not the only way to produce decals. I know some nuts who are silk-screening decals... But if you are going to print them, the recipe described here will work with minor adjustments. A few additional comments, though:
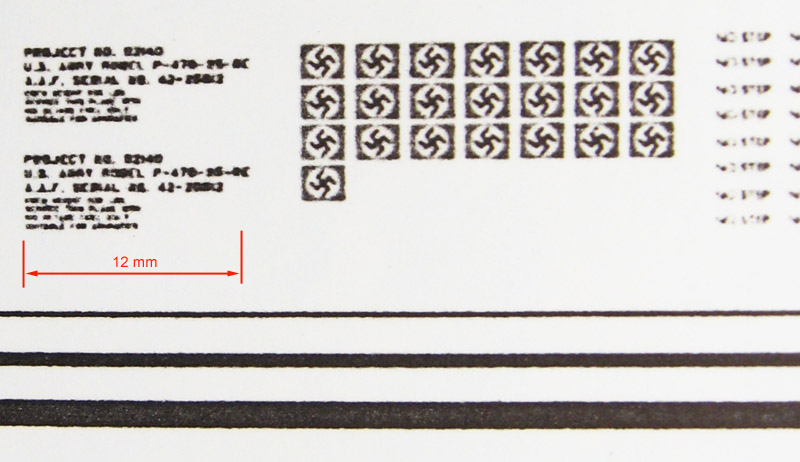
I've been reading about producing decals by photocopying B&W originals. I tried it a while ago with a brand new machine for a 1/32 project. The image below is an enlarged photo of the actual decal produced with that method. Although the stencils would be acceptable for a well worn aircraft, it is very difficult to achieve a crisp result. Note that even straight lines become visibly irregular.
By now, you all already have heard about using inkjet printers, special inkjet clear decal film, and this and that. My advice is: don't waist your time. Although inkjet printers do can produce decals, they are not comparable with what you get with a good laser printer. Even if you are using an inkjet with, say, 1200 dpi, it will not match the quality of a laser printer with the same resolution. Simply because it is impossible to make all ink droplets to land on the sheet in a perfectly aligned manner. Laser printers handle this much easier. I mean, it is a matter of different technologies. I've had a moderate success with the Epson C63/C65 inkjet series, but you must guarantee that the ink is water proof (Durabrite© or similar).
As for colored decals, the same comments hold. Except that you need a color laser printer - much more expensive. Inkjet printers are a pain in the ass to match the digital colors against what is actually printed on your sheet, while in color laser printers this is an easier task. The photo below show the results of my tests with the Epson C63. As you can see, you can get better results than photocopying, but the mentioned color saturation problem is evident. I still have to try it on a color laser printer...

Whatever is your need, I think these home-made decals open a great opportunity to have models sporting unique markings in your collection. And besides, many times it is your only choice for a particular subject, like Flavio's WWI aces collection in 1/72 testify:
We hope you will find this tip useful in a future project. We haven't finished with these experiments, yet. We are planning some other things (color decals, placards, instruments, etc.) and of course I will post the results in the Antrvm. Stay tuned.
Rato Marczak © 2007
