| Photoetching
propellers for 1/700 ship models |
My personal stash of
model ships has been growing steadly during the last years. With a
couple of exceptions, I settled with 1/700 scale for personal reasons.
In such small scale, many details found in the kits are disappointing.
This is understandable from the injection point of view, but I still
think the manufacturers could add photoetched details. One of such
cases are the propellers. In most of my models (those modeled with full
hull, of course) they are merely a cruciform part. I may be ok for many
of you, but propellers are prominent details, let alone when painted
with brass or bronze colors contrasting against a generally dark
colored hull.
This tip was invented during my Hobby Boss Gato submarine project in 1/700 scale. I needed better propellers and was not willing to go throughout the whole PE process. Instead, I opted for a shortcut based on my previous photoless photoetching tricks, which I will describe here.
Having a good assortment of dry-transfer letters, I found one with several letters with umlaut (umlaut diacritic are that pair of dots above a vowel) like ü and ä, and the sheet also carried "a" letters with the ångström symbol - the small circle over the letter. I found that the diameter spacing between the umlaut dots were about the same of the propeller blades. The idea was to apply a umlaut on a brass sheet, then apply another umlaut centered with the first one and rotated by 90 degrees to form the second pair of blades. Finally, another dot would make the center of the propeller. Here is the idea, graphically:
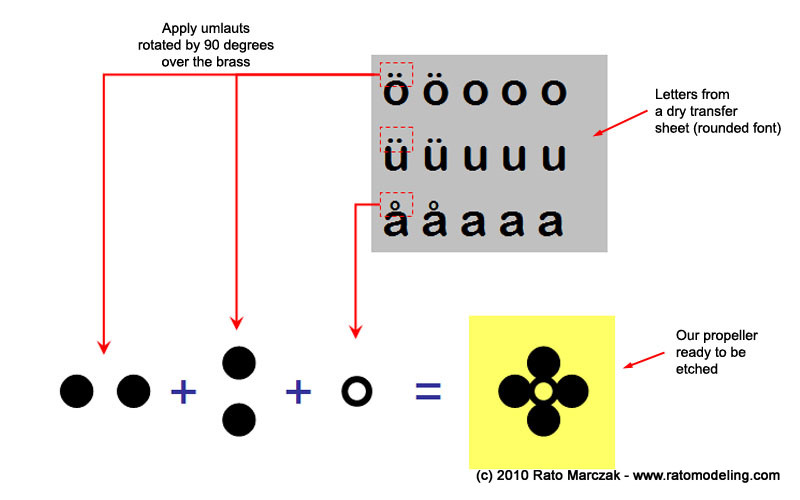
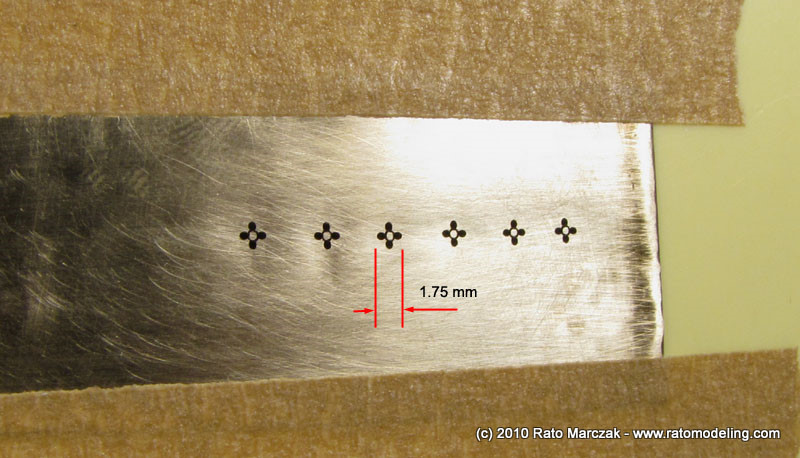
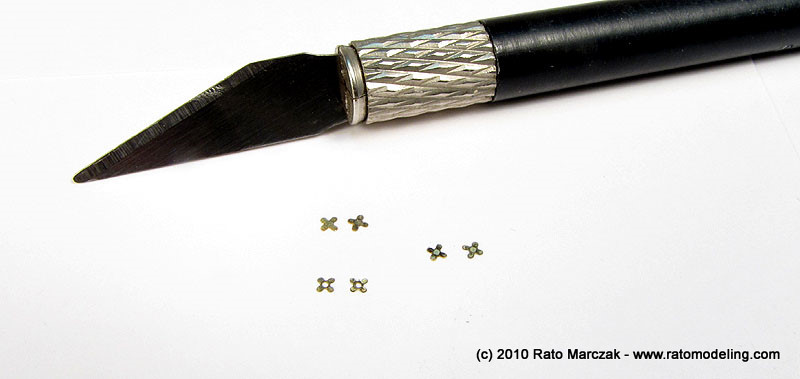
The propeller image will be our mask, which otherwise would have to be photographically registred over the brass sheet. Of course you could use 4 individual dots to make the final image, but it will be more difficult to accurately space the blades. It took less than 10 minutes to make six of them. They are far from perfect in shape and size, I know, but it is way better than the kit parts:
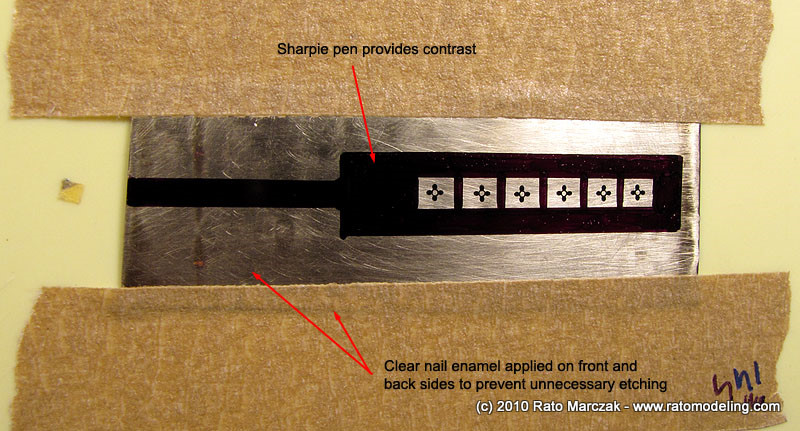
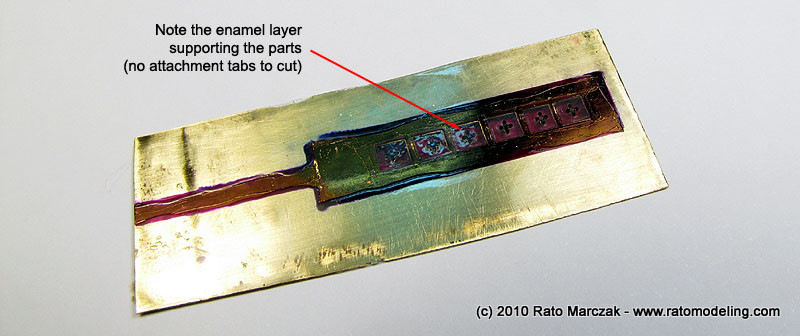
Next, I used a sharpie pen to draw a frame around each propeller, but then I realized that there was still a lot of brass around and it would be unecessary etching that only make your etching soluition dirtier. So I brushed a good coat of clear nail enamel to protect the remaining areas, as well as the whole back side of the sheet. This is important because I didn't want supporting tabs that would be difficult to trim perfectly in this scale afterwards. So the backing enamel layer would hold the parts, instead:
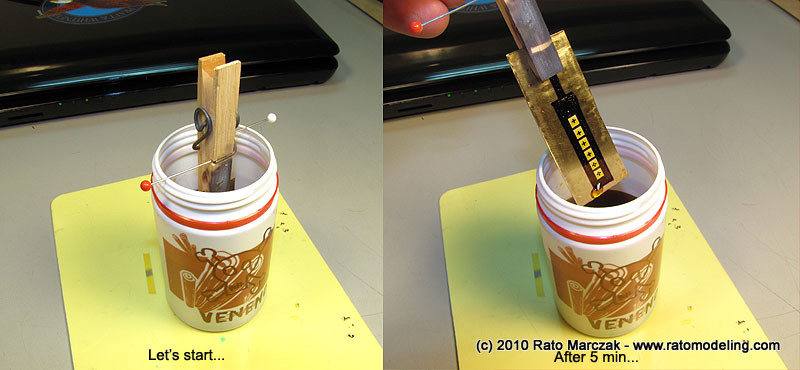
I microwaved the etching solution for 20 seconds to make it warm (that will speed up the process). And so the acid started its job:
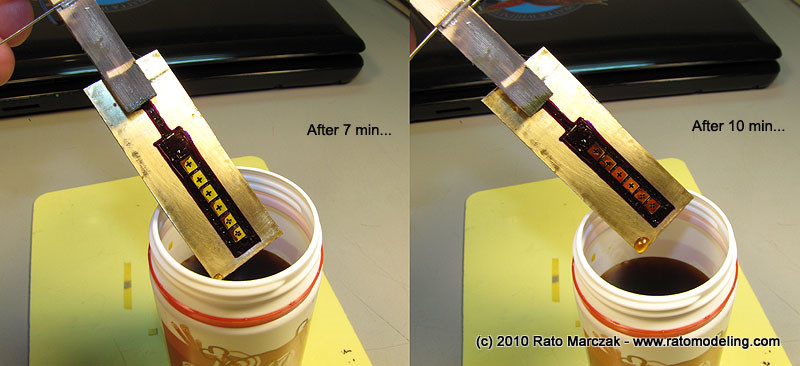
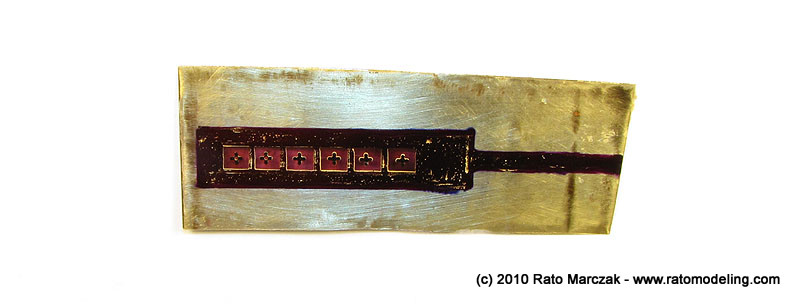
Once the propellers were correctly etched, I removed the brass from its acid bath, washed it with tap water and checked for faults. If necessary, I could put it back in the acid:
As you can see, the backing enamel layer is the only thing holding the propellers:
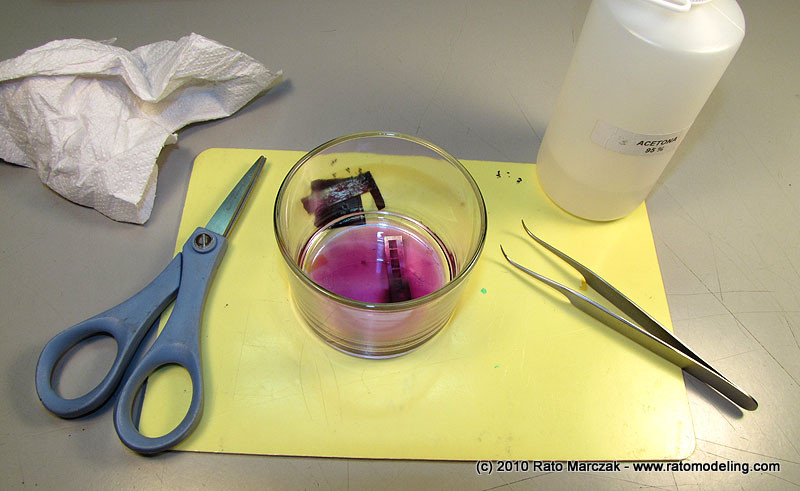
In order to free them from the backing layer, the brass plate is dipped in acetone to melt the enamel:
Here is the result:
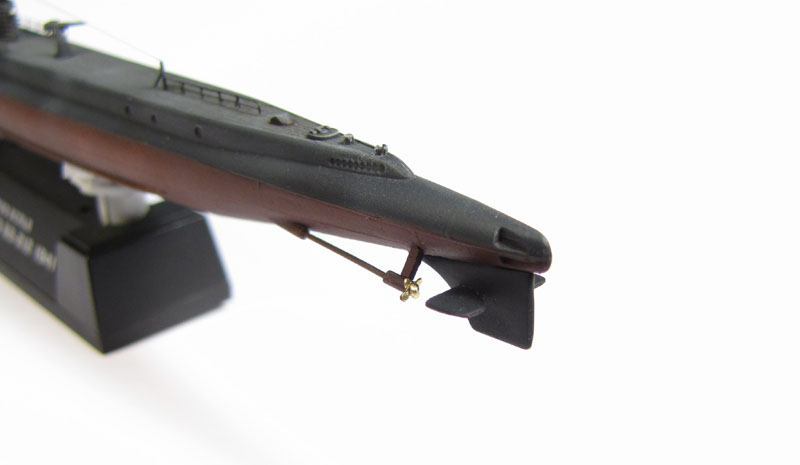
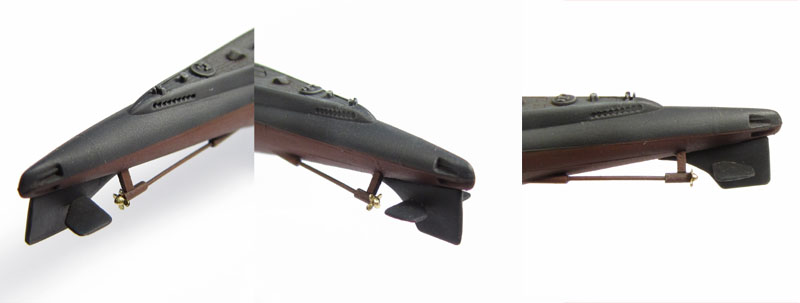
The blades were twisted and a small cone shaped in my Dremel was glued in its center. It was painted with Model Master Brass metalizer and installed on my SS-212:
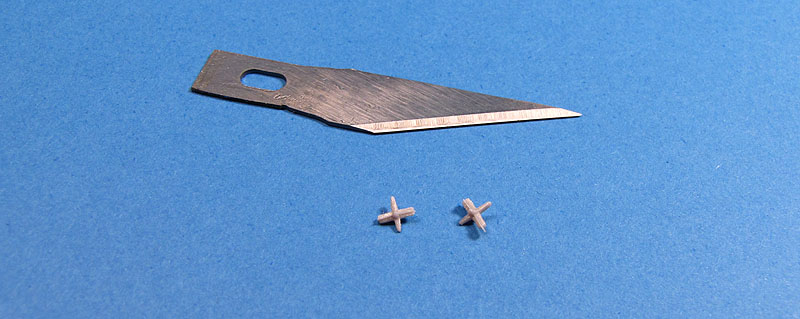
In case you are wondering, here are the kit parts:
I hope you find this article useful in your next project.
Rato
Marczak
© 2010This tip was invented during my Hobby Boss Gato submarine project in 1/700 scale. I needed better propellers and was not willing to go throughout the whole PE process. Instead, I opted for a shortcut based on my previous photoless photoetching tricks, which I will describe here.
Having a good assortment of dry-transfer letters, I found one with several letters with umlaut (umlaut diacritic are that pair of dots above a vowel) like ü and ä, and the sheet also carried "a" letters with the ångström symbol - the small circle over the letter. I found that the diameter spacing between the umlaut dots were about the same of the propeller blades. The idea was to apply a umlaut on a brass sheet, then apply another umlaut centered with the first one and rotated by 90 degrees to form the second pair of blades. Finally, another dot would make the center of the propeller. Here is the idea, graphically:
The propeller image will be our mask, which otherwise would have to be photographically registred over the brass sheet. Of course you could use 4 individual dots to make the final image, but it will be more difficult to accurately space the blades. It took less than 10 minutes to make six of them. They are far from perfect in shape and size, I know, but it is way better than the kit parts:
Next, I used a sharpie pen to draw a frame around each propeller, but then I realized that there was still a lot of brass around and it would be unecessary etching that only make your etching soluition dirtier. So I brushed a good coat of clear nail enamel to protect the remaining areas, as well as the whole back side of the sheet. This is important because I didn't want supporting tabs that would be difficult to trim perfectly in this scale afterwards. So the backing enamel layer would hold the parts, instead:
I microwaved the etching solution for 20 seconds to make it warm (that will speed up the process). And so the acid started its job:
Once the propellers were correctly etched, I removed the brass from its acid bath, washed it with tap water and checked for faults. If necessary, I could put it back in the acid:
As you can see, the backing enamel layer is the only thing holding the propellers:
In order to free them from the backing layer, the brass plate is dipped in acetone to melt the enamel:
Here is the result:
The blades were twisted and a small cone shaped in my Dremel was glued in its center. It was painted with Model Master Brass metalizer and installed on my SS-212:
In case you are wondering, here are the kit parts:
I hope you find this article useful in your next project.
