| Simulating
turning propelers in scale models |
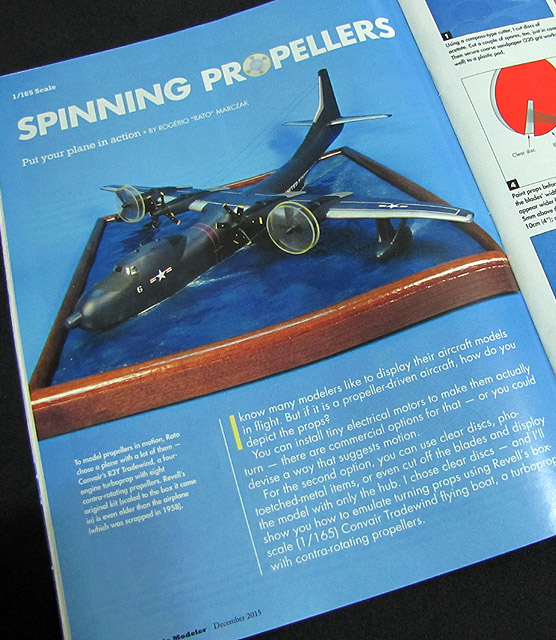
I know many modelers
like to display their aircraft models in flight. But if it is a
propeler aircraft, there are only to ways to go, realism apart: install
tiny electrical engines to make them actually turn (and there are
rather sophisticated
comercial options for that), or simulate the propeler motion
somehow. Among the later, one can find the use of clear discs, photoetched accessories, and even
those who prefer to simply remove the propeler blades and display the
model only with the propeler hub. All methods have their merits (and
price). In this short article, I'll show you how I made the turning
propelers of my old Revell Tradewind (scale 1/165) using the clear
discs method.
I recall a past article in Fine Scale Modeler magazine, where Paul Boyer showed how to use clear discs and flat varnish to simulate the effect. Having failed to find my copy of the magazine, I had to improvise, and I ended up with an acceptable result. The proof is the fact that what you are going to see here is my very first attempt at it. If I did, you surely will too.
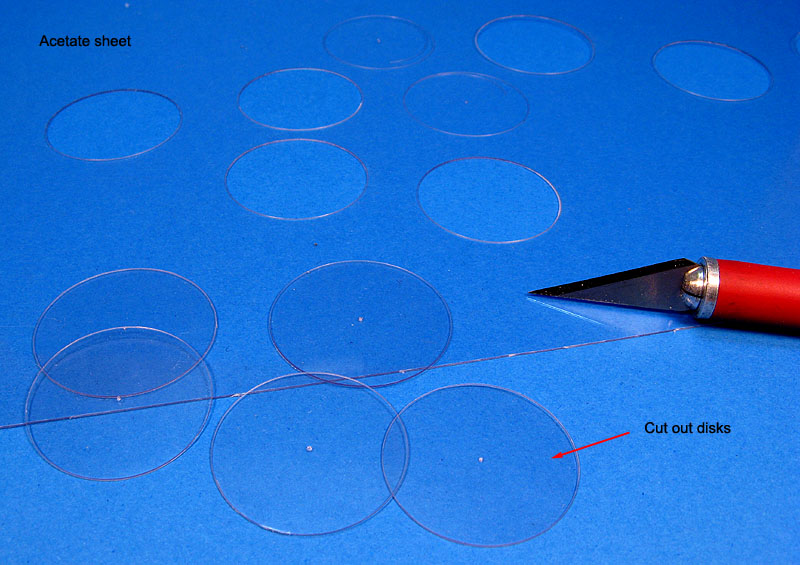
In my particular case, I had to simulate the turning counter propelers of my Tradewind. Using the kit parts to retrieve the diameter of the propelers, I started by cutting discs of acetate using a compass-type cutter. I is important to mark precisely the center of the discs. Remember to cut a couple of spares, too, just in case.
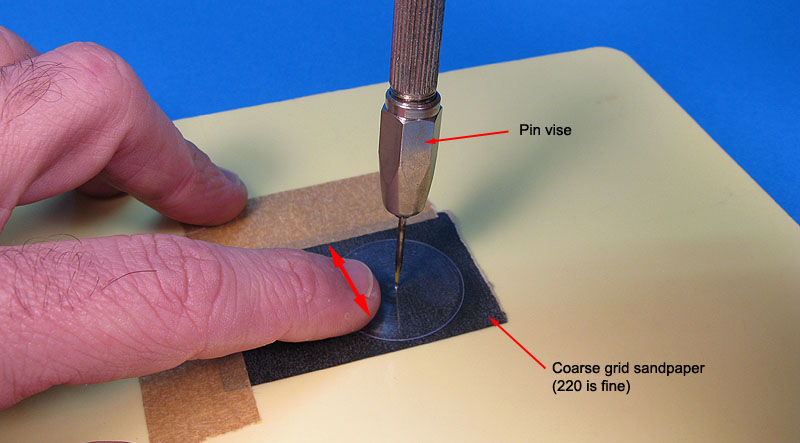
Next comes the trick of my method: how to add some action to the propelers? I discovered it by accident, but it is very easy. Start by securing a piece of coarse grid sandpaper (220 or 230 is fine) over a plastic pad. Then, using a needle mounted on a pin vise or a compass needle, peforate the clear disk on its center while resting on the sandpaper. Put some pressure on it so that the needle go all the way through the thickness of the disk and anchor on the sandpaper. Hold the needle there during the whole process using one hand. Now you have a disk which will spin freely over the sandpaper (but do not do that yet). Using your index finger in the free hand, press an area of the disk and make short alternating movements. Do not turn the disk too much. Just about enough to allow the sandpaper scratch parallel arcs slightly larger than the width of the propeler blade. Now gently rotate the disk and repeat the operation. You have to repeat this step for as many fractions of the disk as many blades your propeler has. In my case, each propeler had three blads, so I pressed three areas roughly spaced by 120 degrees. You do not need to measure anything here, a good old eyeball Mk.I is more than enough.
And the result is this:
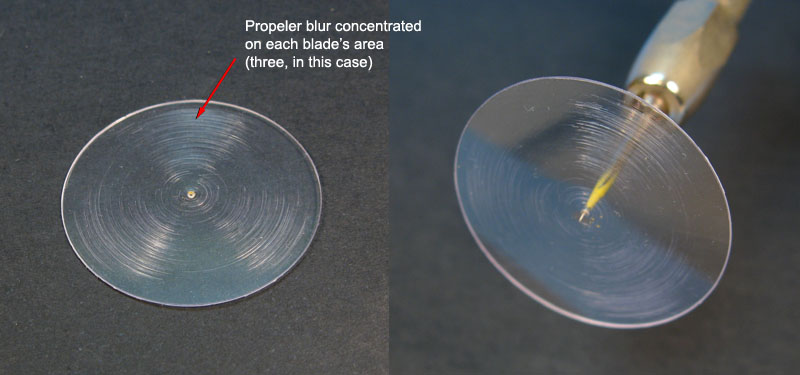
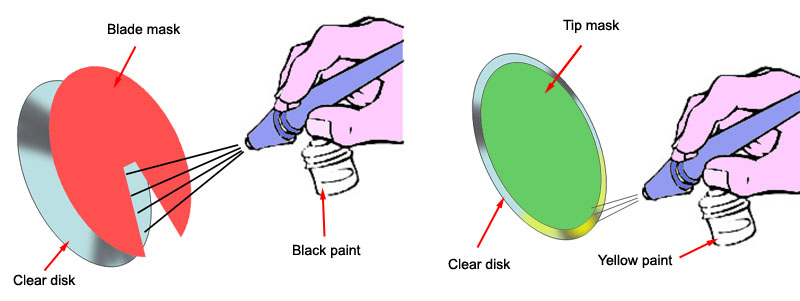
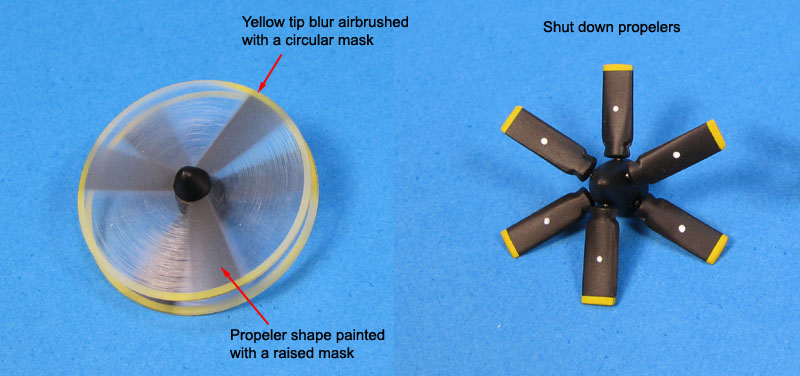
It is better to paint your propeler at this point, before the assembly. I cut a mask of cardpaper with a slot slightly larger than the actual width of the blades, tapered in the radial direction (to make the blur appear wider as it gets far from the center). This mask was used raised, about half a centimeter from the disk, and very thin black or dark gray paint was airbrused from a good distance (about 10 cm). Repeat the operation for each blade, by rotating the mask., trying to make the mask match roughly the edge of the blur marks (I mean, the marks will look like trailing the blades). Contrary to the sandpaper marks, here it is very important important to use the mask respecting the angular spacing between each blade, otherwise your propeler will look awkward. The lifted mask allows some overspraying, exactly what we are looking for.
Onde the paint is dry, cut another circular mask, but slightly smaller than the clear disk to simulate the yellow tips. Use this one as a regular mask (not raised), and airbrush the outer ring of the clear disk, concentrating on the black areas just painted. Here is a figure to help you to translate better my funny English:
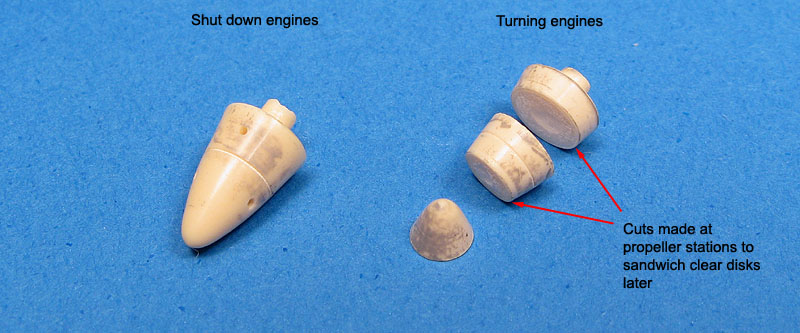
The propeler hubs have to be prepared too. It is just a matter of using your favorite saw and slicing the hup along the blades' stations. In my case two slices were necessary (counter rotating propelers, remember?), because I will use two disk for each engine:
After painting the hubs, you can install the disks. Use epoxy glue or other slow drying glue to allow minor adjustments - you do not want an excentric propeler:
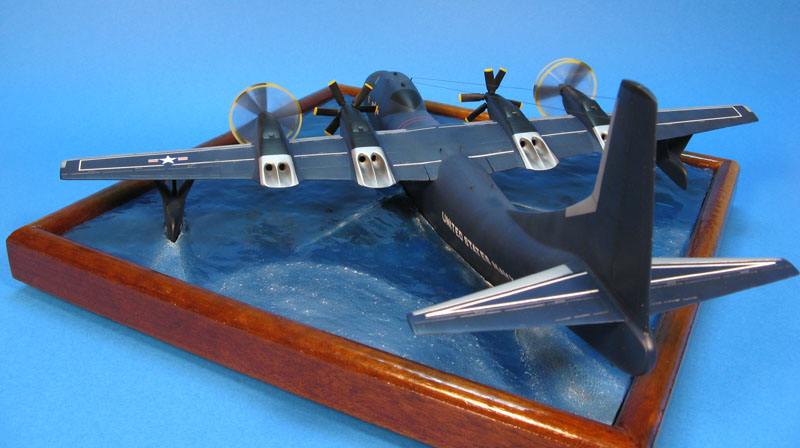
And finally install them to your model:
I am sure this is not the most realistic method to simulate turning propelers, but it is easy and convincing enough. In retrospect, I should have used the paint thinned even more, but as I said, this was my first attempt at it.
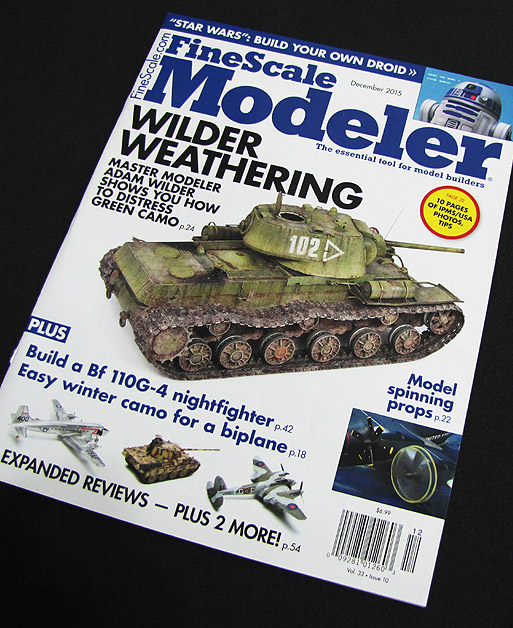
This article was published on Fine Scale Modeler magazine, volume Dec/2015.
I hope you find this tip useful.
Rato
Marczak
© 2009 (revised March/2023)I recall a past article in Fine Scale Modeler magazine, where Paul Boyer showed how to use clear discs and flat varnish to simulate the effect. Having failed to find my copy of the magazine, I had to improvise, and I ended up with an acceptable result. The proof is the fact that what you are going to see here is my very first attempt at it. If I did, you surely will too.
In my particular case, I had to simulate the turning counter propelers of my Tradewind. Using the kit parts to retrieve the diameter of the propelers, I started by cutting discs of acetate using a compass-type cutter. I is important to mark precisely the center of the discs. Remember to cut a couple of spares, too, just in case.
Next comes the trick of my method: how to add some action to the propelers? I discovered it by accident, but it is very easy. Start by securing a piece of coarse grid sandpaper (220 or 230 is fine) over a plastic pad. Then, using a needle mounted on a pin vise or a compass needle, peforate the clear disk on its center while resting on the sandpaper. Put some pressure on it so that the needle go all the way through the thickness of the disk and anchor on the sandpaper. Hold the needle there during the whole process using one hand. Now you have a disk which will spin freely over the sandpaper (but do not do that yet). Using your index finger in the free hand, press an area of the disk and make short alternating movements. Do not turn the disk too much. Just about enough to allow the sandpaper scratch parallel arcs slightly larger than the width of the propeler blade. Now gently rotate the disk and repeat the operation. You have to repeat this step for as many fractions of the disk as many blades your propeler has. In my case, each propeler had three blads, so I pressed three areas roughly spaced by 120 degrees. You do not need to measure anything here, a good old eyeball Mk.I is more than enough.
And the result is this:
It is better to paint your propeler at this point, before the assembly. I cut a mask of cardpaper with a slot slightly larger than the actual width of the blades, tapered in the radial direction (to make the blur appear wider as it gets far from the center). This mask was used raised, about half a centimeter from the disk, and very thin black or dark gray paint was airbrused from a good distance (about 10 cm). Repeat the operation for each blade, by rotating the mask., trying to make the mask match roughly the edge of the blur marks (I mean, the marks will look like trailing the blades). Contrary to the sandpaper marks, here it is very important important to use the mask respecting the angular spacing between each blade, otherwise your propeler will look awkward. The lifted mask allows some overspraying, exactly what we are looking for.
Onde the paint is dry, cut another circular mask, but slightly smaller than the clear disk to simulate the yellow tips. Use this one as a regular mask (not raised), and airbrush the outer ring of the clear disk, concentrating on the black areas just painted. Here is a figure to help you to translate better my funny English:
The propeler hubs have to be prepared too. It is just a matter of using your favorite saw and slicing the hup along the blades' stations. In my case two slices were necessary (counter rotating propelers, remember?), because I will use two disk for each engine:
After painting the hubs, you can install the disks. Use epoxy glue or other slow drying glue to allow minor adjustments - you do not want an excentric propeler:
And finally install them to your model:
I am sure this is not the most realistic method to simulate turning propelers, but it is easy and convincing enough. In retrospect, I should have used the paint thinned even more, but as I said, this was my first attempt at it.
This article was published on Fine Scale Modeler magazine, volume Dec/2015.
I hope you find this tip useful.
