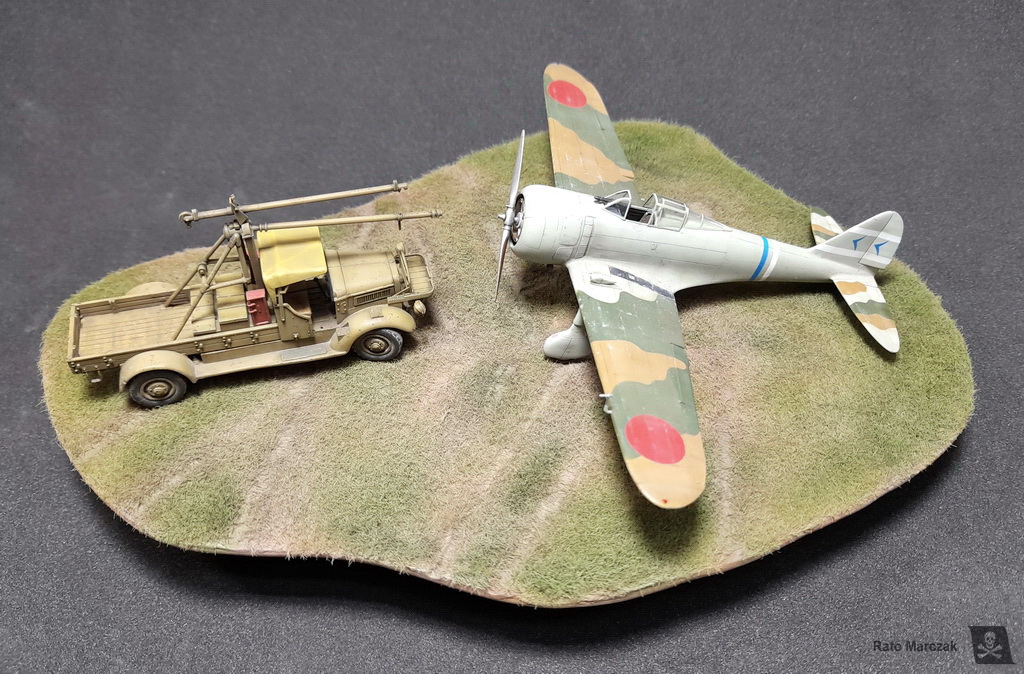
| Burma, 1942 diorama in 1/72 scale with ICM Nakajima Ki-27 Nate and Hasegawa Toyota GB starter truck |
| Finished: May/2021 |
This diorama was not really planned as such. I simply finished my ICM Ki-27 Nate and decided to build the Toyota starter truck
too. Only then I realized that it would be a nice diorama of the
Imperial Japanese operations in early 1942. This is a very obscurely
documented phase of World War II in the China-Burma-India (CBI)
theatre. The famous Flying Tigers squadron would be absorbed by the
23rd FG soon, and the IJA campaign seemed unstoppable.
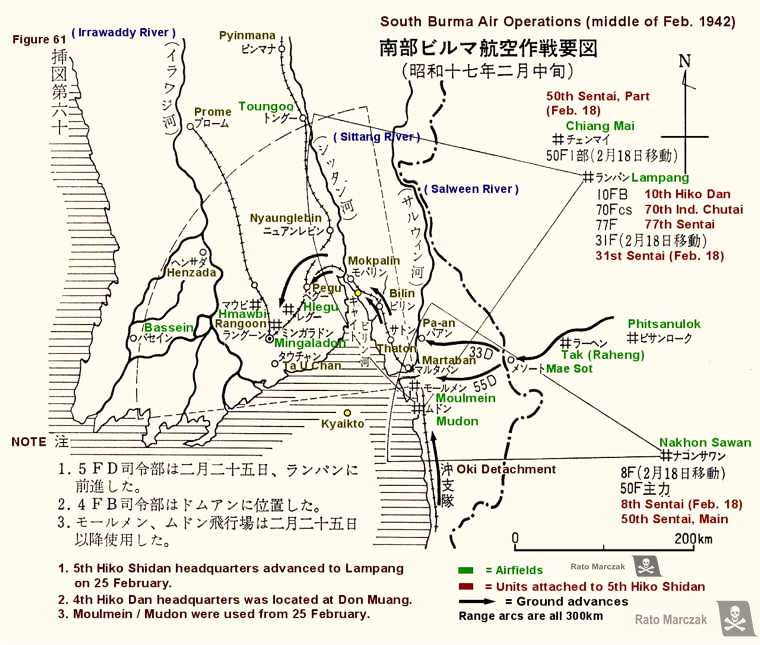
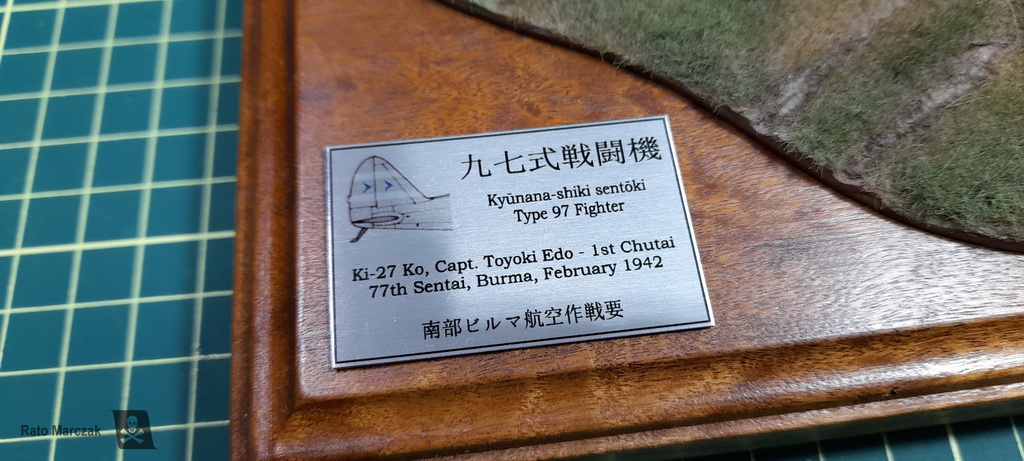
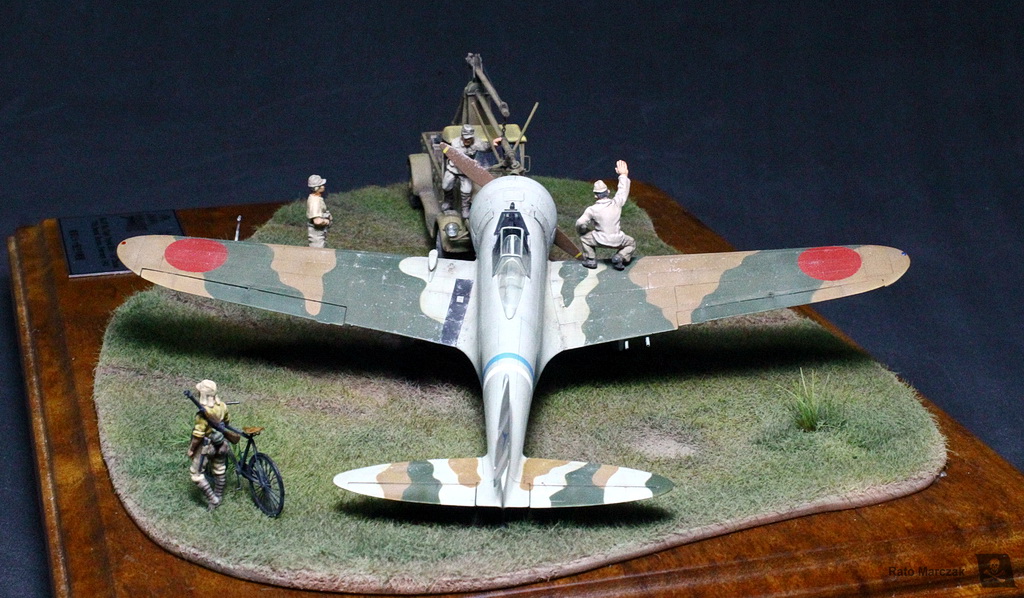
The basic historical setting is described in the Ki-27 construction, and I will not repeat everything here. Suffices to mention that the 77th Sentai used the Ki-27 from October 1939 until August 1943. It was based in Northern China in 1937-38, then moved on to central China, Manchuria, Cambodia and in December 1941 it moved to Thailand. First Daum Muang then Raheng, and finally Lampang, where the group stayed and fought important battles. This Ki-27 color scheme most probably represents the livery used by the Nate of the 1st Chutai's leader, Capt. Toyoki Eto. Eto led the 77th's 1st Chutai from March 1940 until May 1943. The diorama depicts my interpretation of Eto's aircraft during February 1942, when based in Lampang. Later the 77th would move again, this time to invade Burma in March 1942, where they served until going to Manchuria in mid-1943.
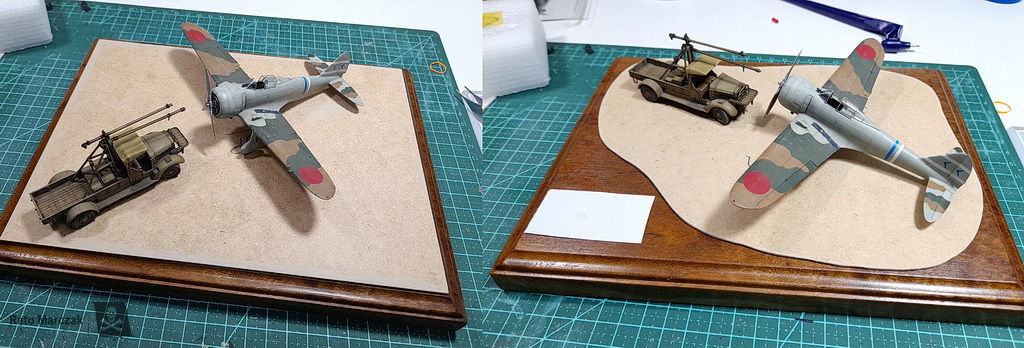
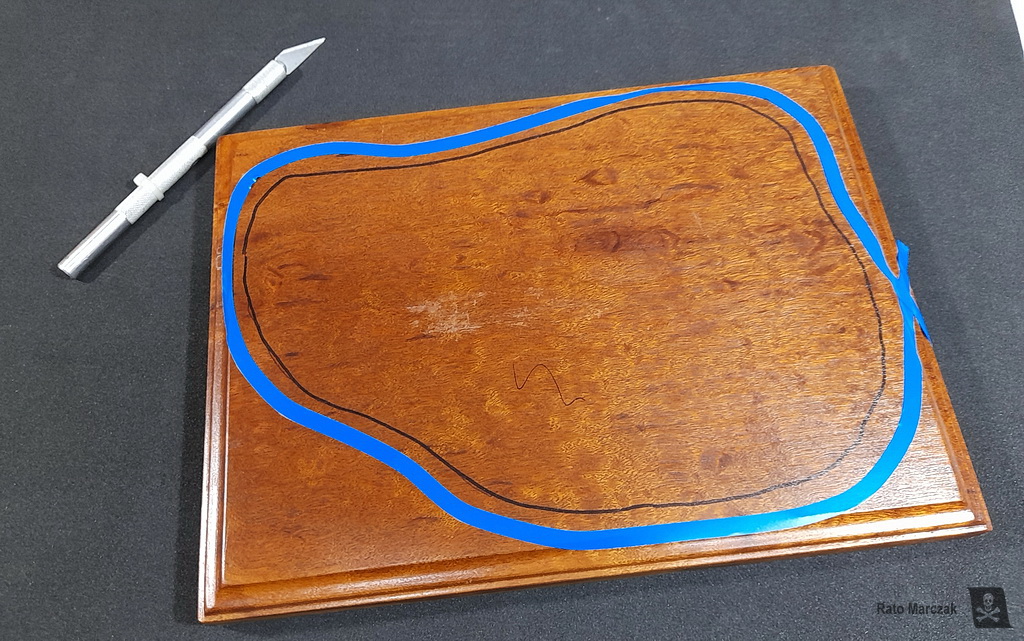
Of course, the first moves involved some measurements. I reasoned that the relative position of the truck and the Nate would leave two corners of the base difficult to fill. Then a more 'artistic' base was tried, with an irregular ground shape over one of my standard wood bases. The photo below shows both styles. The second option seemed more pleasant to me and left a nice spot to glue a plaque. So I chose the second layout.
After cutting a 2 mm wood board sheet in the desired shape, and rounding off any sharp corners around its perimeter, I spread a thick coat of acrylic paste using a spatula. This layer was applied purposedly irregularly so as to avoid a too flat surface, after all, it was an airstrip in the middle of a mountainous area... Anyway, after waiting for the paste to dry for half an hour or so, I rolled wheels from my spare box to simulate the tire prints left by vehicles traveling around the dispersion area of the airfield during rainy days.
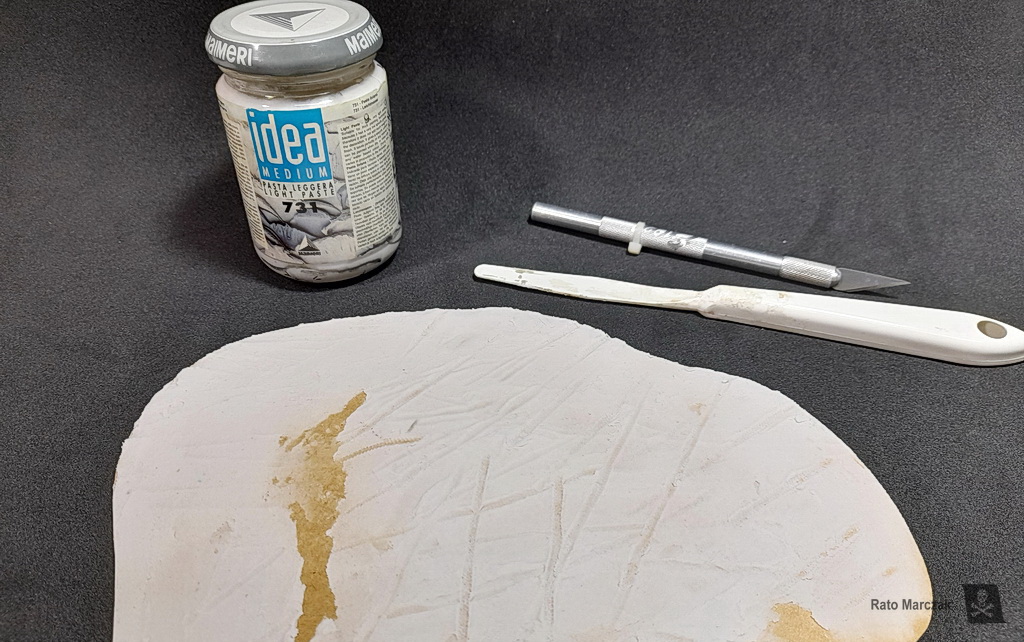
At this point, I started to try something different than my usual recipe for grass areas. The idea was to do all the color treatment (or most of it) only with the airbrush.:
1. Coat the whole base with earth tones colors. Try to use some color variation. If you applied a brown-colored putty, this step is not necessary. Its purpose is to remove all white areas and allow checking for flaws.
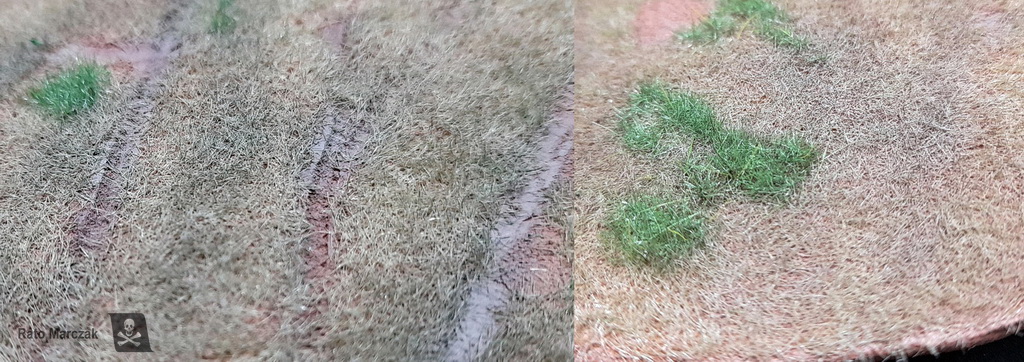
2. Apply static grass (2 mm,m in this case). Try to avoid grass from falling in the tire marks. It is important to have the tire print uncovered. Don't worry about the grass color.
3. Apply more static grass, this time with an electrostatic applicator, on top of the first layer. This is done only on some selected spots, to simulate high grass and isolated tufts here and there. I used the same 2 mm static grass, but green, to make this step visible in the photos below.
4. A coat of very diluted earth colors is airbrushed as soon as the glue is set. This is an important step, as it will later help to replicate that grass layer right over the ground, or less green layer if you will.
5. A dark brown wash treatment is done to the tire marks, followed by dry-brushing with a lighter earth/send color to make the tire prints stand out. If you have rocks or holes, use the same treatment.
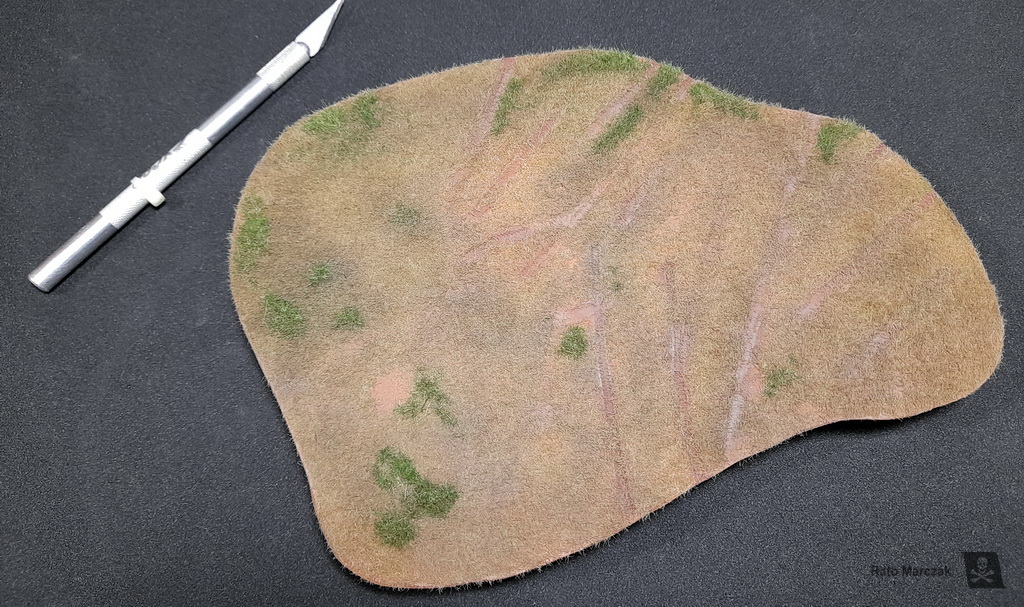
6. Now the fun really begins. Start with a few drops of the earth tones that you just used, and add green to it. With the airbrush, use this mix to bring the ground to a greenish color, but still matching the ground color. Again, avoid hitting the tire marks. And use a very thin mix - you don't want to cover it in only one pass. The progressive coloring of this and the next step is an important part of the process.
7. From now on, you will add progressively more green(s) to the mix. You can do it directly in the airbrush cup. If necessary, remove some of the previous color from the cup. And don't forget to add thinner. You will do this step two or three more times, each time concentrating more on the greener tones to higher spots.
8. Repeat step 7 but replacing the green for yellow to add more color variations.
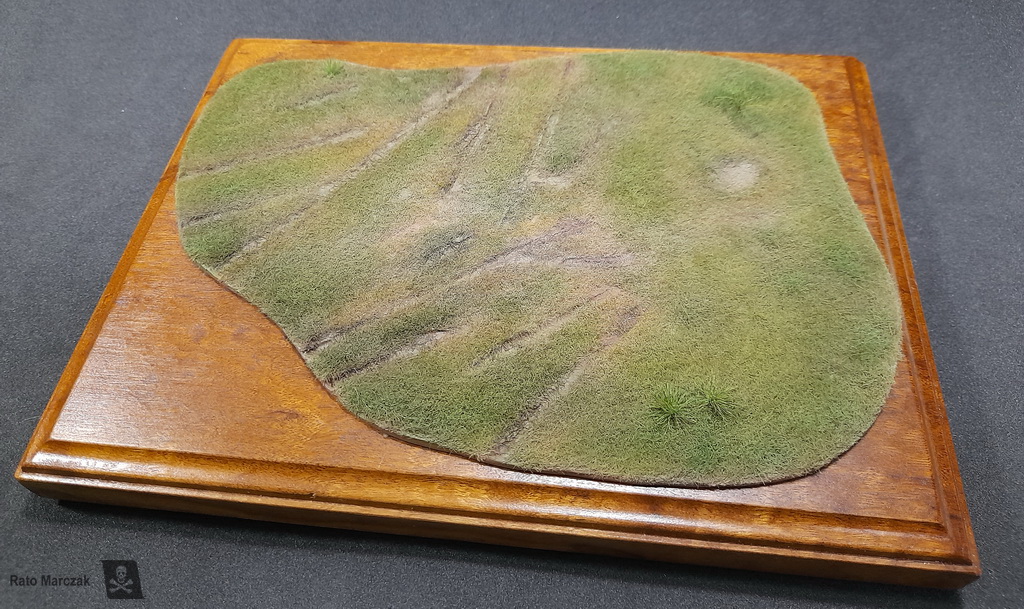
These seven steps will help anyone to build a very convincing base very easily and very quickly. Of course, depending on the subject you are working on, you can vary the colors. Occasionally, you may need more drastic color variations on top of some grass tufts, and then only dry-brushing will give you such a localized effect, but this was not necessary in my case. The important things are: (a) leaving the base with the static grass without treatment results in a very artificial aspect of the grass; (b) the earth/brown layer is important to integrate the grass to the soil, and (c) tonal variations with the green color are key to achieve a vivid result of the grass layer.
Of course, we have to take into account other things like time of the year, lighter/dusty/dry or darker/wet, etc... but the difference to the straight application of the static grass is huge:
And, of course, I could not resist and ... Caution: spoiler below!
Ok, enough playing. Back to our super-serious hobby, I applied contact glue to a wood base in preparation for attaching the airfield section. A flexible tape avoided smearing glue where it shouldn't.
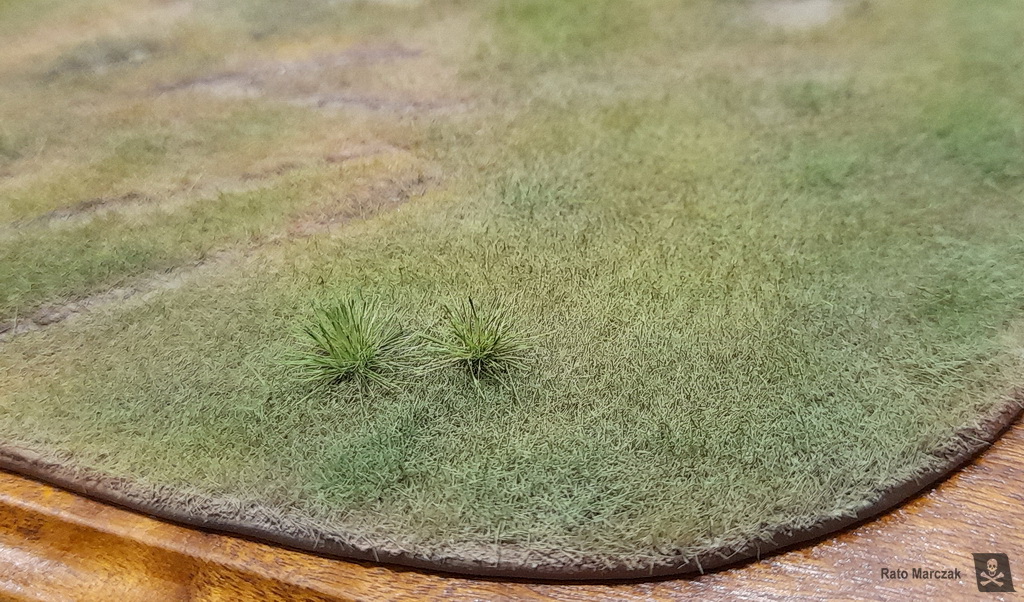
At this point, I finalized the grass field with two or three tall grass tufts. I used commercial ones from a brand called GI Joe. They added interest to the scene. Don't overdo it though. I've seen airfield dioramas filled with these tufts, but it is important to remember that it is an airfield. Even if a dispersal area, large clumps of grass can be disastrous for taxiing aircraft:
So far, so good, but here was where my problems really started.
Dioramas need figures. Not because of IPMS rules (well, that too), but because it really adds life, environment, and a sense of pace to the scene. Not to mention the idea of scale that a figure imparts to the diorama. I mean, even though I am not a very good figure painter, I think it is important to add people to a diorama scene whenever possible.
To make things worse, finding IJA ground personnel in 1/72 scale is not like shopping a panzer crew. I had a Red Box WWII IJA ground crew set which was pretty close to what I needed, but it was manufactured in a very soft type of plastic. It was simply impossible to perform any clean-up or sanding whatsoever! Let alone small modifications to fit the figure to the scene, as generally is required. After spending a few hours on the internet trying to find an alternative, it finally became clear to me that my only option would be to cast copies of the selected figures. And so I did, at the cost of two boring, gummy, sticky days of unproductive modeling.
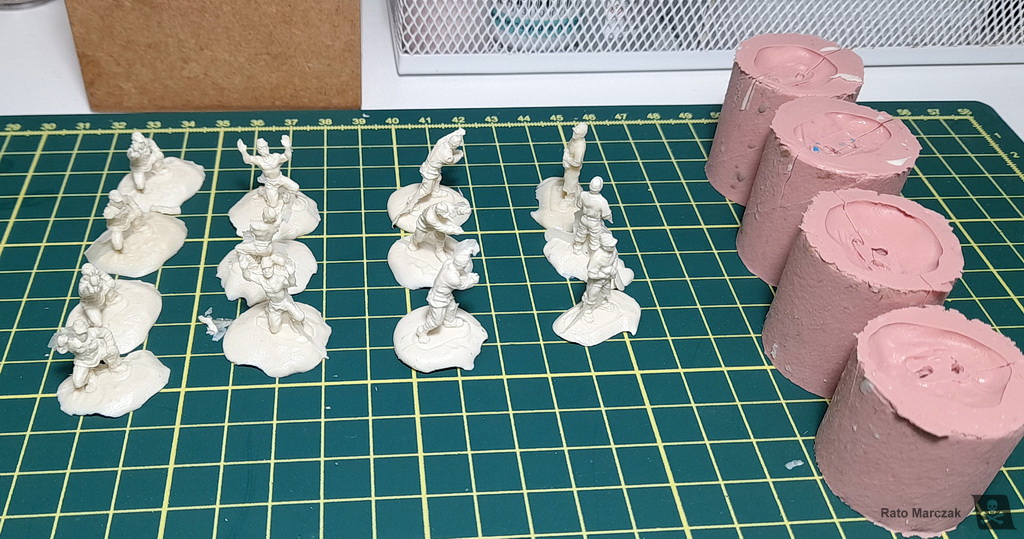
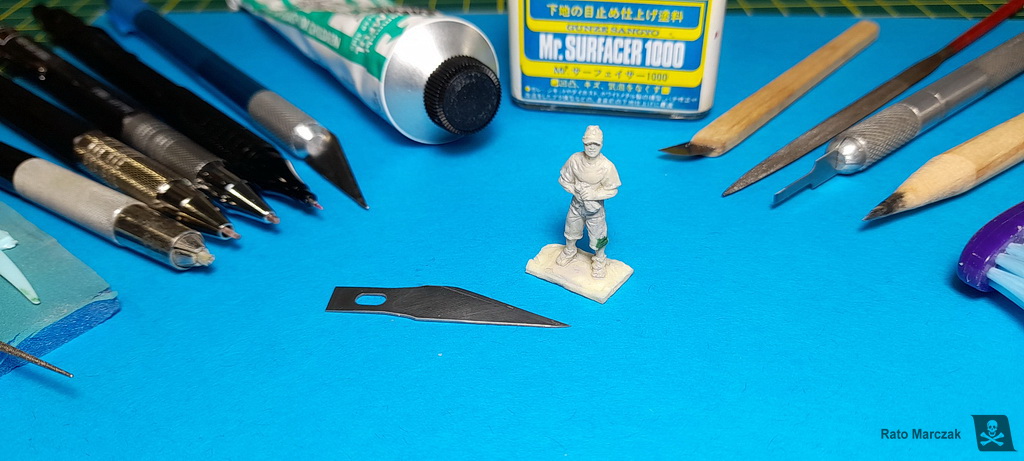
Only then I started cleaning the best copies, correcting bubbles, and making small modifications. The posing in these figures is really interesting. For example, the standing guy is cleaning his hands with a piece of cloth, and has those characteristic Japanese sandals, like if he was staring at the aircraft he just fixed...
It is a pity that we don't have better options for this type of subject. Came on 3D guys, where are you???
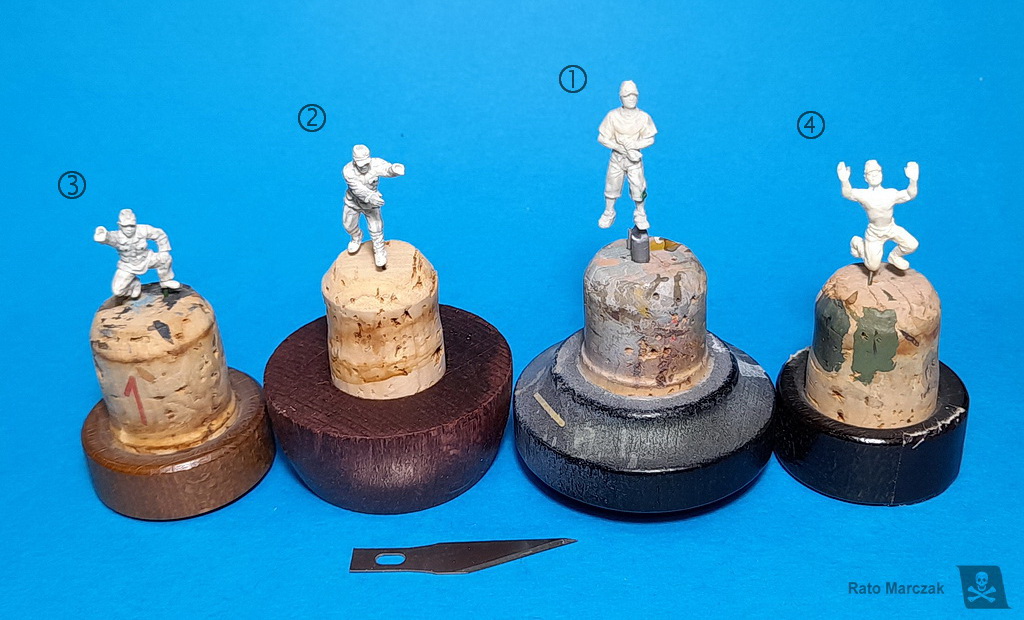
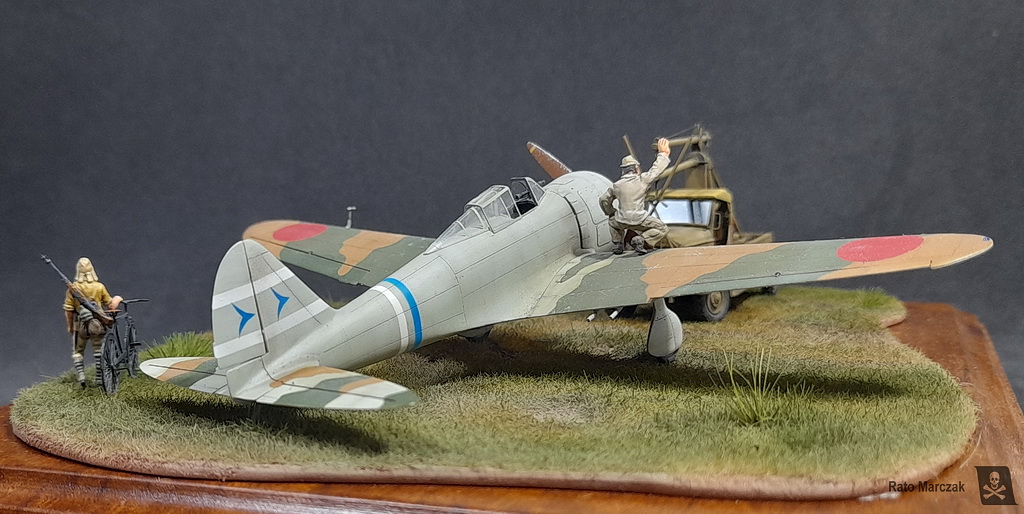
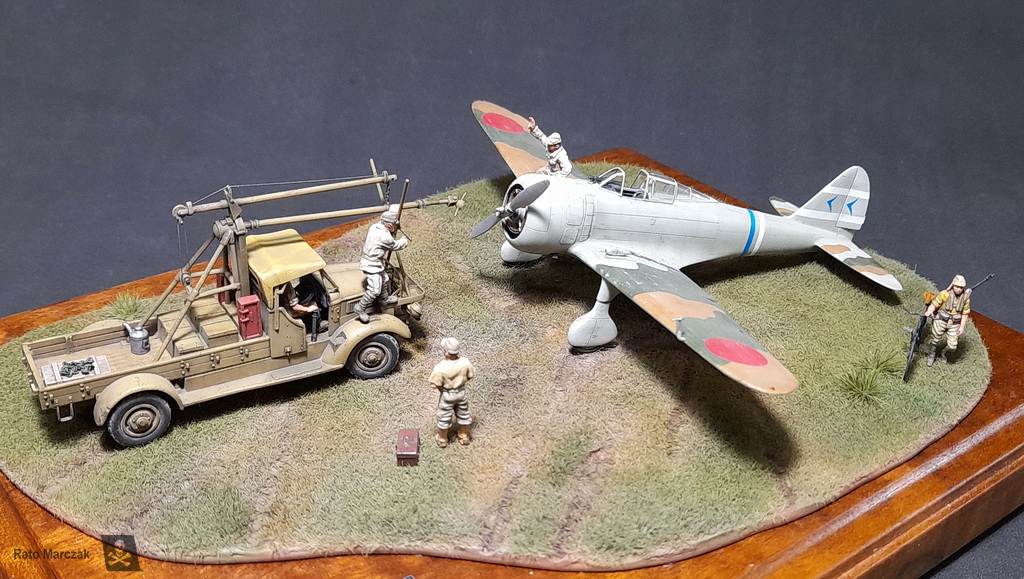
I planned to use these figures as follows: a crew chief (1) standing on the ground, beside the aircraft; a ground crew (2) over the port wing; another one (3) over the starboard wing, signaling the starter truck driver; and a fourth crew (4) which I was not sure where to put at this point...
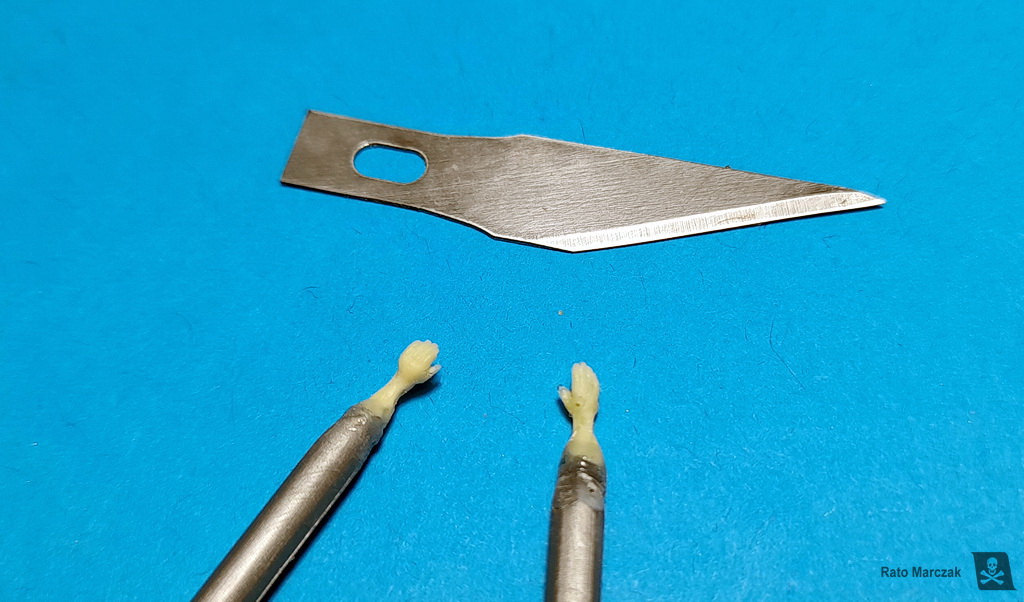
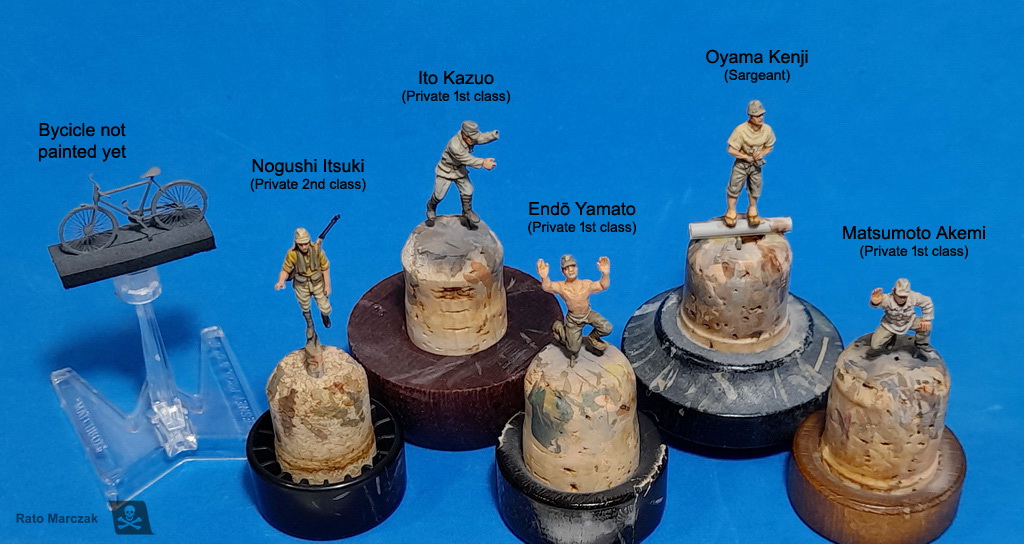
Things that really take your precious time when you do not have good diorama accessories are the modification and fabrication of members to suit the scene. I had to replace the hands of two of the above figures. Meanwhile, I stumbled upon a figure of a young IJA private - sorry, I just cannot remember where it came from, but it is injected plastic. I found the posing very relaxing, and I figured that it could represent a sentinel returning from a down patrol around the airfield with his bicycle. Yes, a bicicle. I wanted to use one Airfix bicycle from their new airfield set, but besides being very crude (and with no representation of the wheel spokes), I think it is actually 1/76 scale...
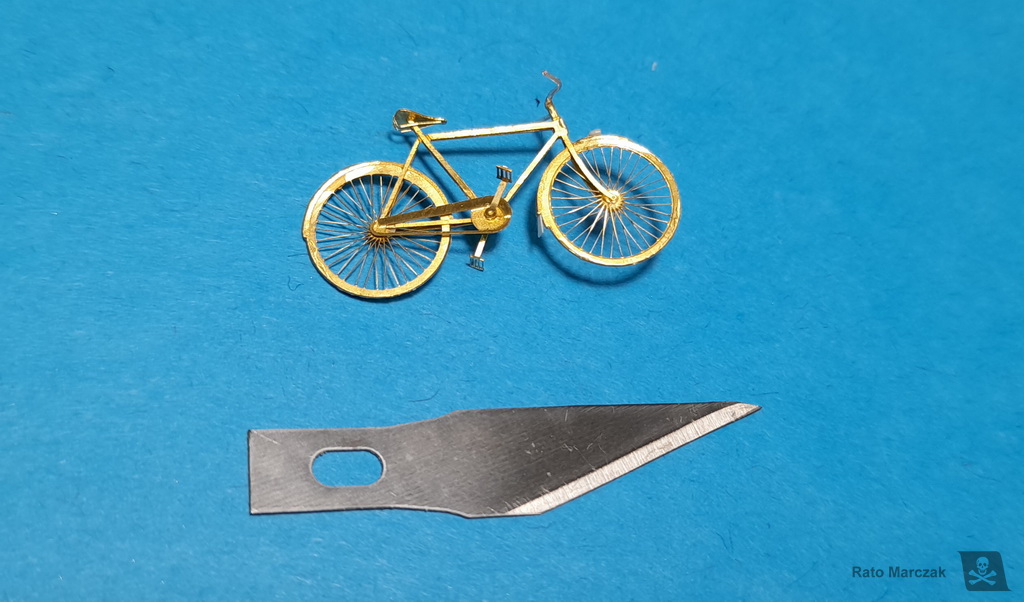
Anyway, I ended using a bicycle from Hauler. A very good bicycle, although a bit flat in some details, as one would expect from a PE accessory. The right arm of the sentinel had to be changed to hold the handlebar of the bicycle.
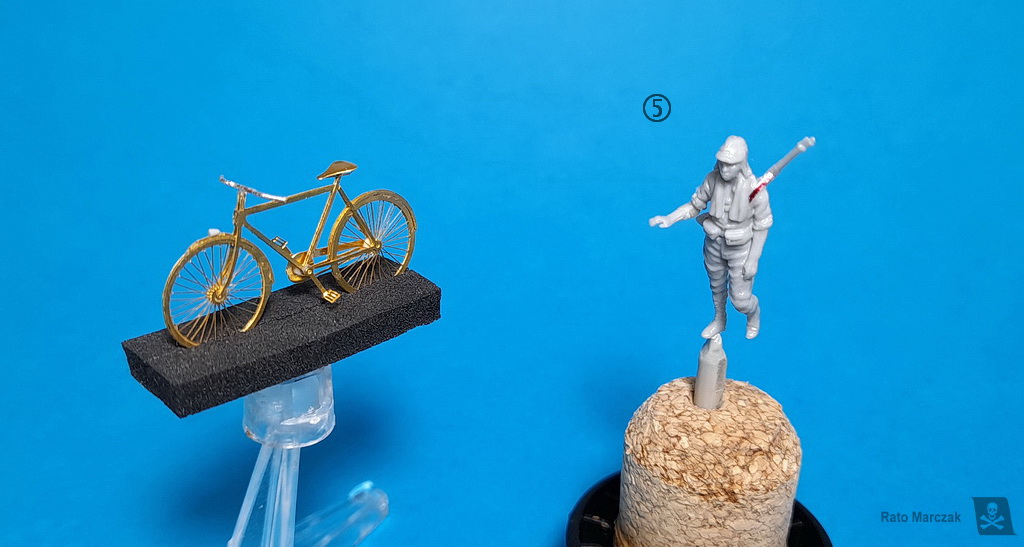
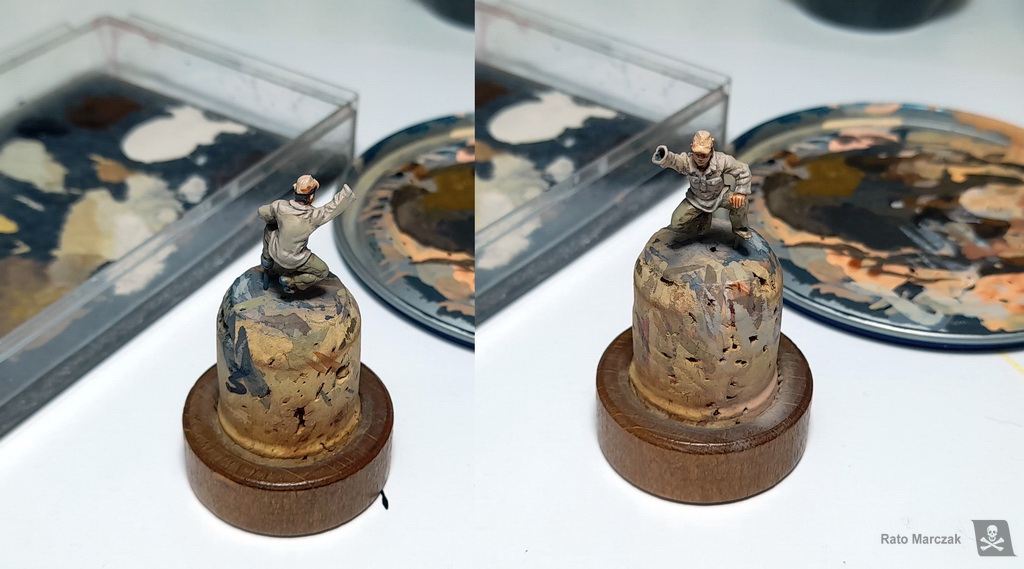
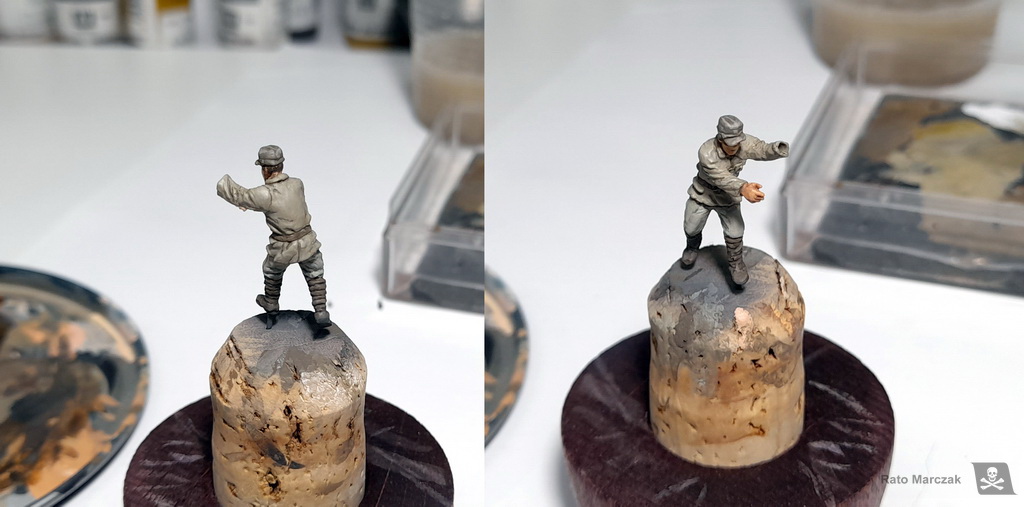
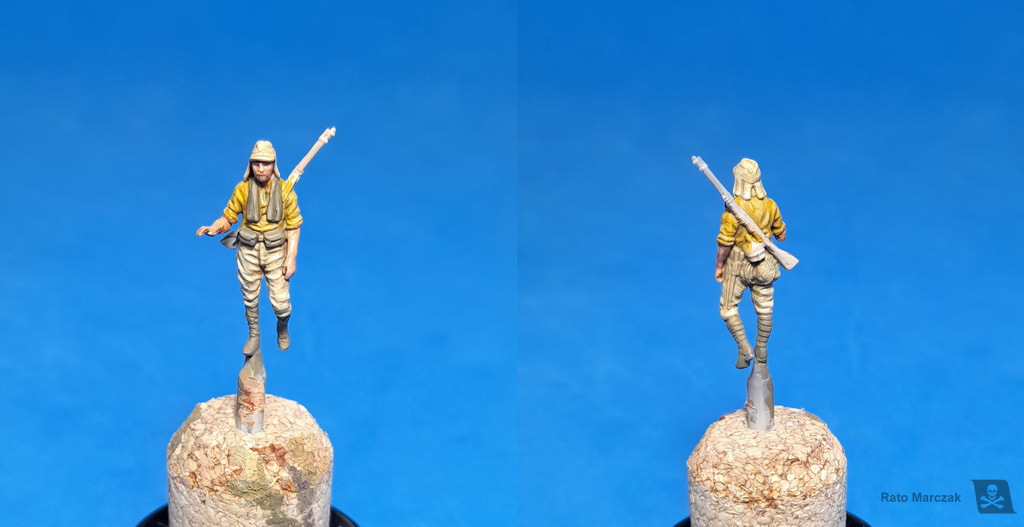
After priming the figures, I started painting them. Although I am not a figure painter, I try to do a presentable job because anyone interested in dioramas will have to paint them sooner or later. I am starting to develop my own style for painting 1/72 scale figures, but crispy details will always help a lot. Here are them in various painting stages:


Once finished, I took a family photo for posterity. And, of course, I could not resist and baptized them all. That's what happens when you work for too long in a diorama project, you end up calling the figures by their names. In the end, I left P1C Endō out of the diorama for bad behavoir:
Meanwhile, I finally found a company which does a fine job at plates, for a fair price:
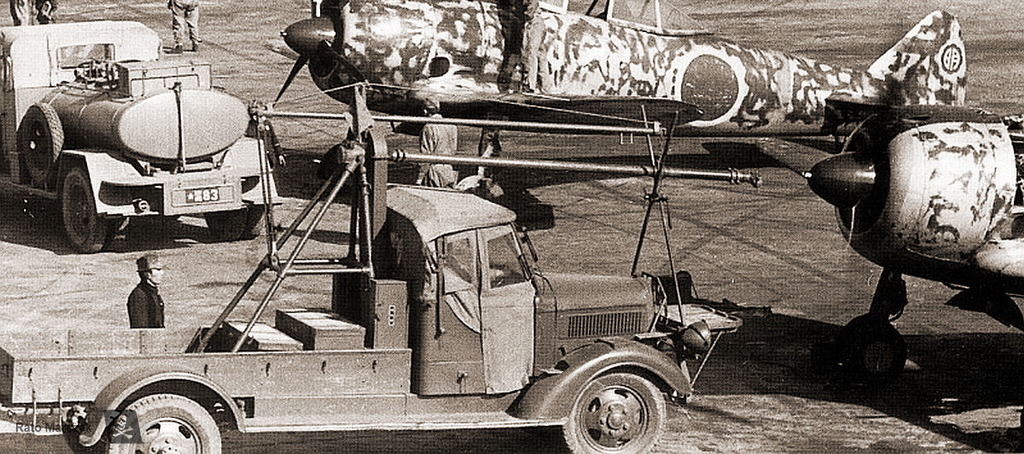
All set, it was time to start working on the final layout. Period photos showing the starter truck in action help to place both, the truck and the crew in such a way that it looks credible.
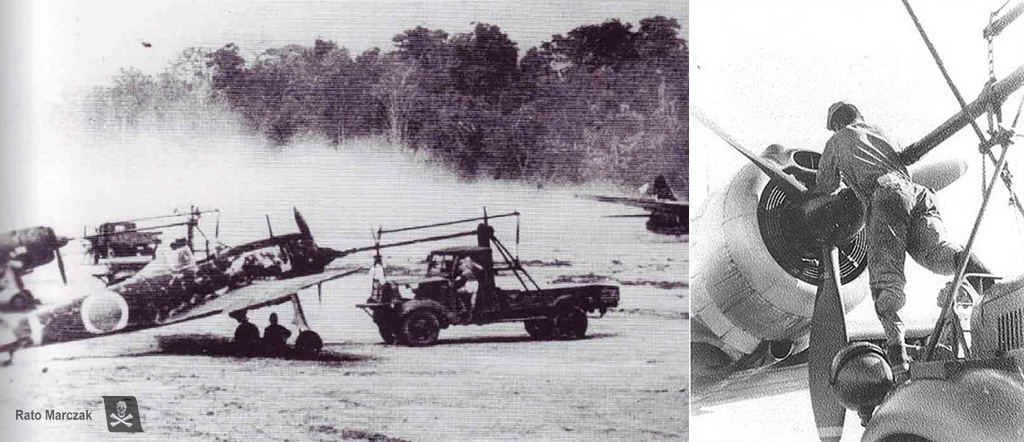
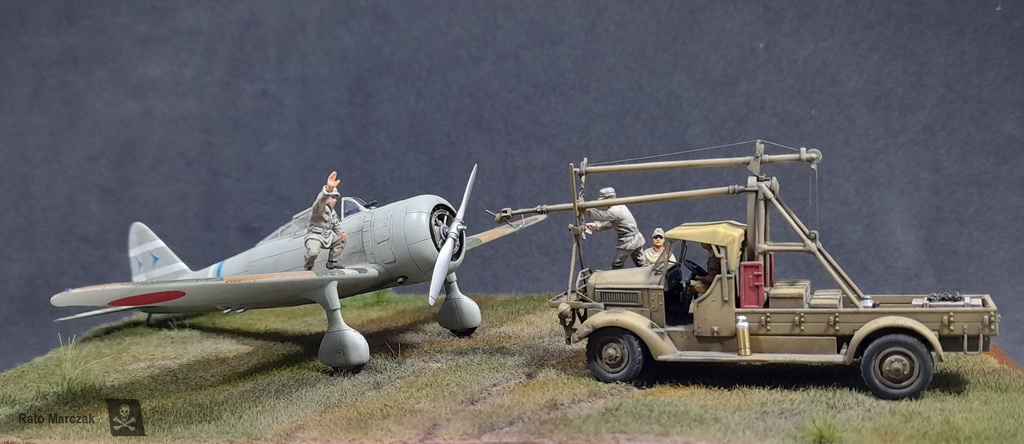
Three things seemed constant in wartime photos: (1) the truck would approach the aircraft head-on; (2) it was usual to have a mechanic on the truck platform to adjust the spindle to the aircraft spinner; and (3) there is always someone on the wing/cockpit of the aircraft prior the startup. The rest, as they say, is artistic freedom...
Evidently, I have some limitations given the pre-defined poses of the figures, but in the end, I figured out what seemed more natural and cemented them to their positions before I changed my mind:
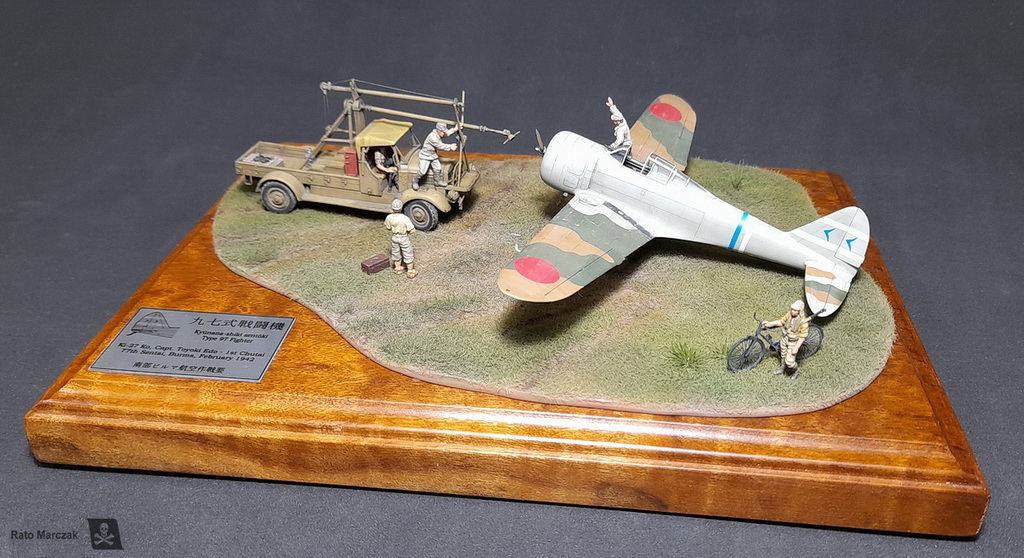
I use to be pretty critical of myself and my projects, but somehow I liked this particular scene. Probably because I translated to the diorama almost exactly what I had in mind from the outset. After taking these photos, I added the wheel chocks to the Nate, and off it went to my display case.
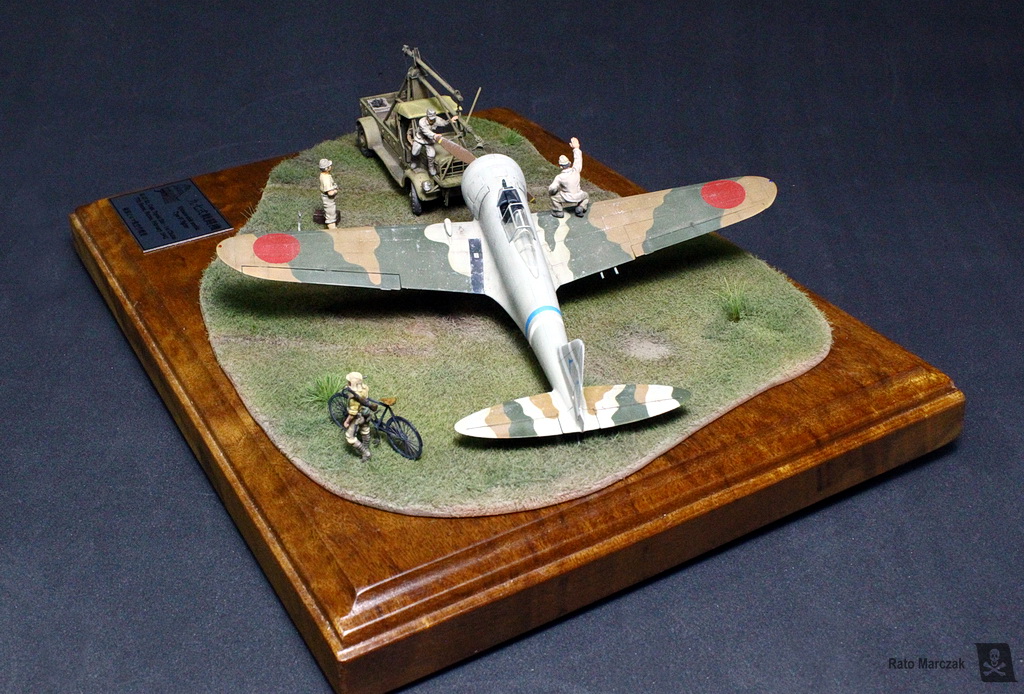
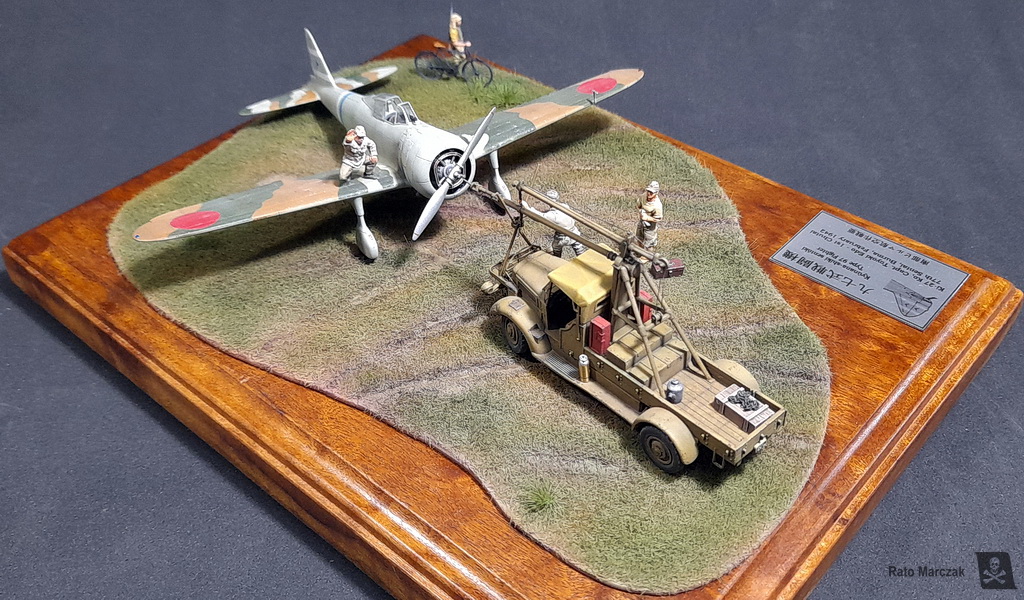
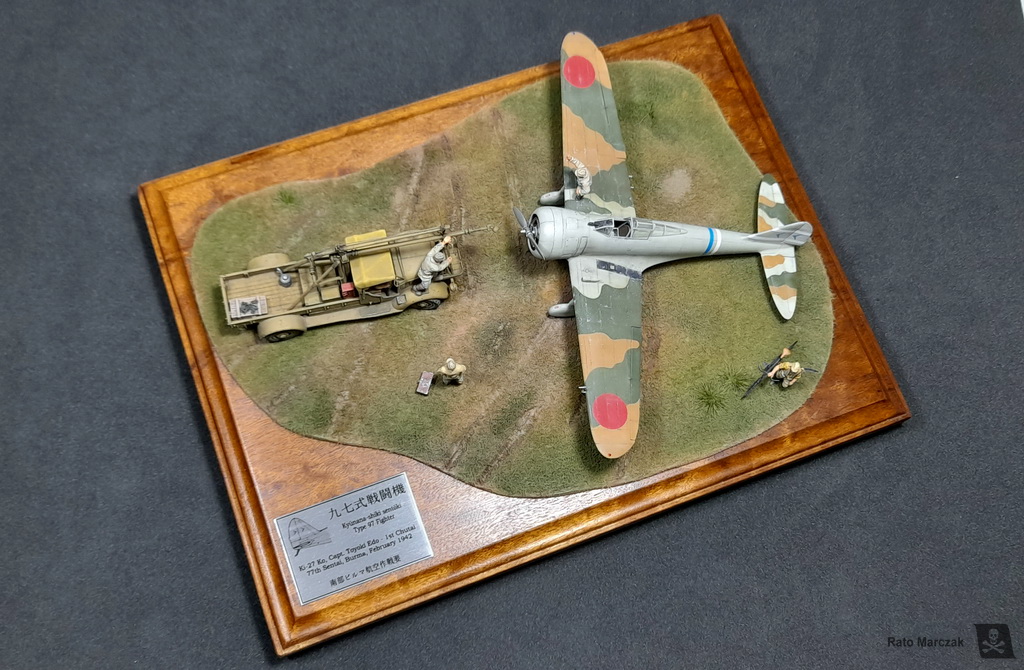
A few more shots with varying exposures:
I hope you liked this project, and if you have any questions or comments, drop me a line by email or through my Facebook page.
The basic historical setting is described in the Ki-27 construction, and I will not repeat everything here. Suffices to mention that the 77th Sentai used the Ki-27 from October 1939 until August 1943. It was based in Northern China in 1937-38, then moved on to central China, Manchuria, Cambodia and in December 1941 it moved to Thailand. First Daum Muang then Raheng, and finally Lampang, where the group stayed and fought important battles. This Ki-27 color scheme most probably represents the livery used by the Nate of the 1st Chutai's leader, Capt. Toyoki Eto. Eto led the 77th's 1st Chutai from March 1940 until May 1943. The diorama depicts my interpretation of Eto's aircraft during February 1942, when based in Lampang. Later the 77th would move again, this time to invade Burma in March 1942, where they served until going to Manchuria in mid-1943.
Of course, the first moves involved some measurements. I reasoned that the relative position of the truck and the Nate would leave two corners of the base difficult to fill. Then a more 'artistic' base was tried, with an irregular ground shape over one of my standard wood bases. The photo below shows both styles. The second option seemed more pleasant to me and left a nice spot to glue a plaque. So I chose the second layout.
After cutting a 2 mm wood board sheet in the desired shape, and rounding off any sharp corners around its perimeter, I spread a thick coat of acrylic paste using a spatula. This layer was applied purposedly irregularly so as to avoid a too flat surface, after all, it was an airstrip in the middle of a mountainous area... Anyway, after waiting for the paste to dry for half an hour or so, I rolled wheels from my spare box to simulate the tire prints left by vehicles traveling around the dispersion area of the airfield during rainy days.
At this point, I started to try something different than my usual recipe for grass areas. The idea was to do all the color treatment (or most of it) only with the airbrush.:
1. Coat the whole base with earth tones colors. Try to use some color variation. If you applied a brown-colored putty, this step is not necessary. Its purpose is to remove all white areas and allow checking for flaws.
2. Apply static grass (2 mm,m in this case). Try to avoid grass from falling in the tire marks. It is important to have the tire print uncovered. Don't worry about the grass color.
3. Apply more static grass, this time with an electrostatic applicator, on top of the first layer. This is done only on some selected spots, to simulate high grass and isolated tufts here and there. I used the same 2 mm static grass, but green, to make this step visible in the photos below.
4. A coat of very diluted earth colors is airbrushed as soon as the glue is set. This is an important step, as it will later help to replicate that grass layer right over the ground, or less green layer if you will.
5. A dark brown wash treatment is done to the tire marks, followed by dry-brushing with a lighter earth/send color to make the tire prints stand out. If you have rocks or holes, use the same treatment.
6. Now the fun really begins. Start with a few drops of the earth tones that you just used, and add green to it. With the airbrush, use this mix to bring the ground to a greenish color, but still matching the ground color. Again, avoid hitting the tire marks. And use a very thin mix - you don't want to cover it in only one pass. The progressive coloring of this and the next step is an important part of the process.
7. From now on, you will add progressively more green(s) to the mix. You can do it directly in the airbrush cup. If necessary, remove some of the previous color from the cup. And don't forget to add thinner. You will do this step two or three more times, each time concentrating more on the greener tones to higher spots.
8. Repeat step 7 but replacing the green for yellow to add more color variations.
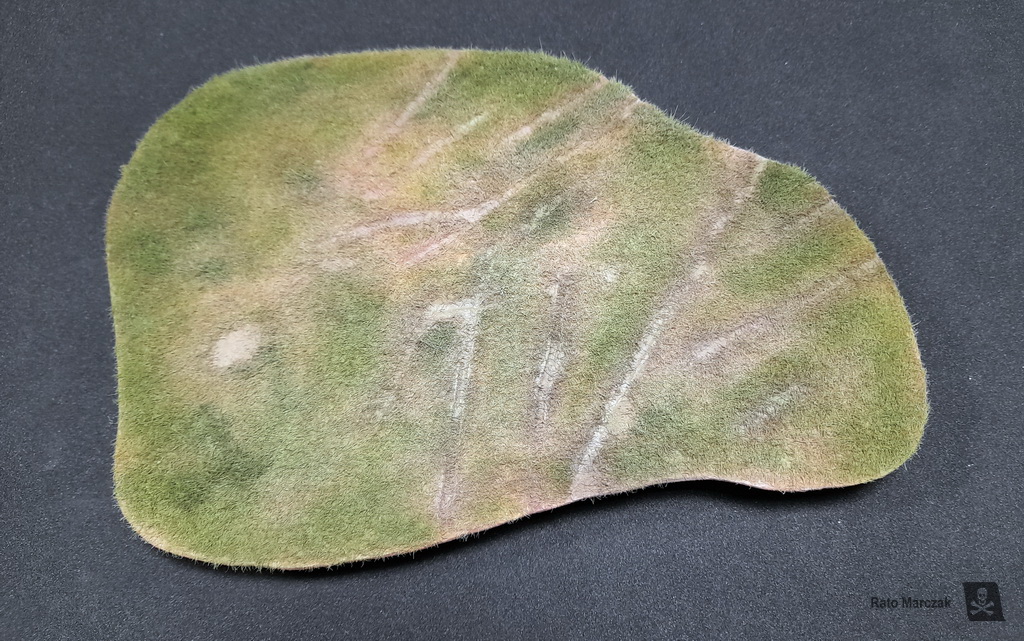
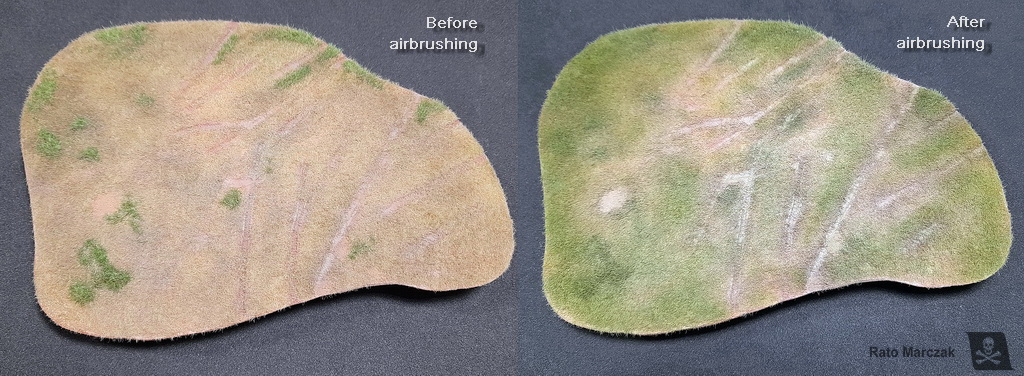
These seven steps will help anyone to build a very convincing base very easily and very quickly. Of course, depending on the subject you are working on, you can vary the colors. Occasionally, you may need more drastic color variations on top of some grass tufts, and then only dry-brushing will give you such a localized effect, but this was not necessary in my case. The important things are: (a) leaving the base with the static grass without treatment results in a very artificial aspect of the grass; (b) the earth/brown layer is important to integrate the grass to the soil, and (c) tonal variations with the green color are key to achieve a vivid result of the grass layer.
Of course, we have to take into account other things like time of the year, lighter/dusty/dry or darker/wet, etc... but the difference to the straight application of the static grass is huge:
And, of course, I could not resist and ... Caution: spoiler below!
Ok, enough playing. Back to our super-serious hobby, I applied contact glue to a wood base in preparation for attaching the airfield section. A flexible tape avoided smearing glue where it shouldn't.
At this point, I finalized the grass field with two or three tall grass tufts. I used commercial ones from a brand called GI Joe. They added interest to the scene. Don't overdo it though. I've seen airfield dioramas filled with these tufts, but it is important to remember that it is an airfield. Even if a dispersal area, large clumps of grass can be disastrous for taxiing aircraft:
So far, so good, but here was where my problems really started.
Dioramas need figures. Not because of IPMS rules (well, that too), but because it really adds life, environment, and a sense of pace to the scene. Not to mention the idea of scale that a figure imparts to the diorama. I mean, even though I am not a very good figure painter, I think it is important to add people to a diorama scene whenever possible.
To make things worse, finding IJA ground personnel in 1/72 scale is not like shopping a panzer crew. I had a Red Box WWII IJA ground crew set which was pretty close to what I needed, but it was manufactured in a very soft type of plastic. It was simply impossible to perform any clean-up or sanding whatsoever! Let alone small modifications to fit the figure to the scene, as generally is required. After spending a few hours on the internet trying to find an alternative, it finally became clear to me that my only option would be to cast copies of the selected figures. And so I did, at the cost of two boring, gummy, sticky days of unproductive modeling.
Only then I started cleaning the best copies, correcting bubbles, and making small modifications. The posing in these figures is really interesting. For example, the standing guy is cleaning his hands with a piece of cloth, and has those characteristic Japanese sandals, like if he was staring at the aircraft he just fixed...
It is a pity that we don't have better options for this type of subject. Came on 3D guys, where are you???
I planned to use these figures as follows: a crew chief (1) standing on the ground, beside the aircraft; a ground crew (2) over the port wing; another one (3) over the starboard wing, signaling the starter truck driver; and a fourth crew (4) which I was not sure where to put at this point...
Things that really take your precious time when you do not have good diorama accessories are the modification and fabrication of members to suit the scene. I had to replace the hands of two of the above figures. Meanwhile, I stumbled upon a figure of a young IJA private - sorry, I just cannot remember where it came from, but it is injected plastic. I found the posing very relaxing, and I figured that it could represent a sentinel returning from a down patrol around the airfield with his bicycle. Yes, a bicicle. I wanted to use one Airfix bicycle from their new airfield set, but besides being very crude (and with no representation of the wheel spokes), I think it is actually 1/76 scale...
Anyway, I ended using a bicycle from Hauler. A very good bicycle, although a bit flat in some details, as one would expect from a PE accessory. The right arm of the sentinel had to be changed to hold the handlebar of the bicycle.
After priming the figures, I started painting them. Although I am not a figure painter, I try to do a presentable job because anyone interested in dioramas will have to paint them sooner or later. I am starting to develop my own style for painting 1/72 scale figures, but crispy details will always help a lot. Here are them in various painting stages:
Once finished, I took a family photo for posterity. And, of course, I could not resist and baptized them all. That's what happens when you work for too long in a diorama project, you end up calling the figures by their names. In the end, I left P1C Endō out of the diorama for bad behavoir:
Meanwhile, I finally found a company which does a fine job at plates, for a fair price:
All set, it was time to start working on the final layout. Period photos showing the starter truck in action help to place both, the truck and the crew in such a way that it looks credible.
Three things seemed constant in wartime photos: (1) the truck would approach the aircraft head-on; (2) it was usual to have a mechanic on the truck platform to adjust the spindle to the aircraft spinner; and (3) there is always someone on the wing/cockpit of the aircraft prior the startup. The rest, as they say, is artistic freedom...
Evidently, I have some limitations given the pre-defined poses of the figures, but in the end, I figured out what seemed more natural and cemented them to their positions before I changed my mind:
I use to be pretty critical of myself and my projects, but somehow I liked this particular scene. Probably because I translated to the diorama almost exactly what I had in mind from the outset. After taking these photos, I added the wheel chocks to the Nate, and off it went to my display case.
A few more shots with varying exposures:
I hope you liked this project, and if you have any questions or comments, drop me a line by email or through my Facebook page.
| Technical file | |
| Kits:
|
- ICM 72201 - Hasegawa MB017 |
| Additions:
|
- Red Box 72052 - 1/72 - WWII Japanese Army Aviation Pilots And Ground Crew Kit |
| Basic
colors: |
For the terrain and buildings: - Various Vallejo, Andrea, Pactra and MiG water-based paints. - Flat coat: Testors Dullcote and Humbrol Flat Coat For the aircraft and truck, see their construction logs. |
| Notes: |
-
Several scratchbuilt details (see text). |
Rato Marczak © 2021
