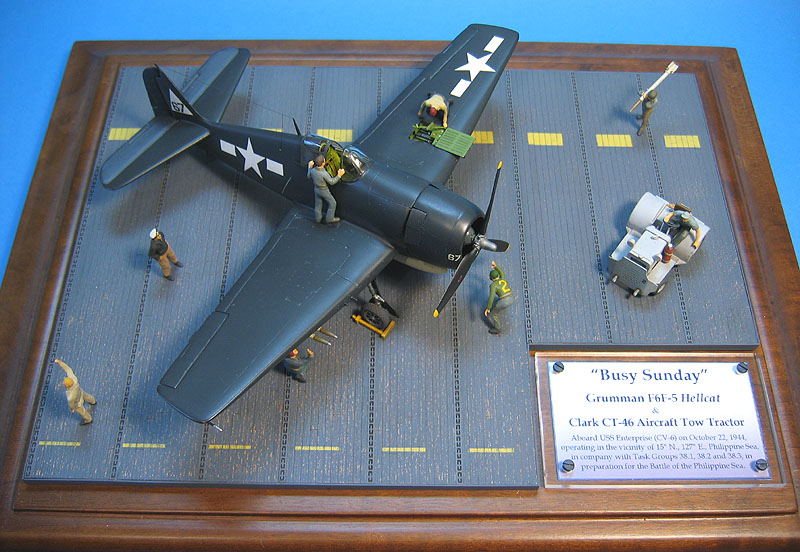
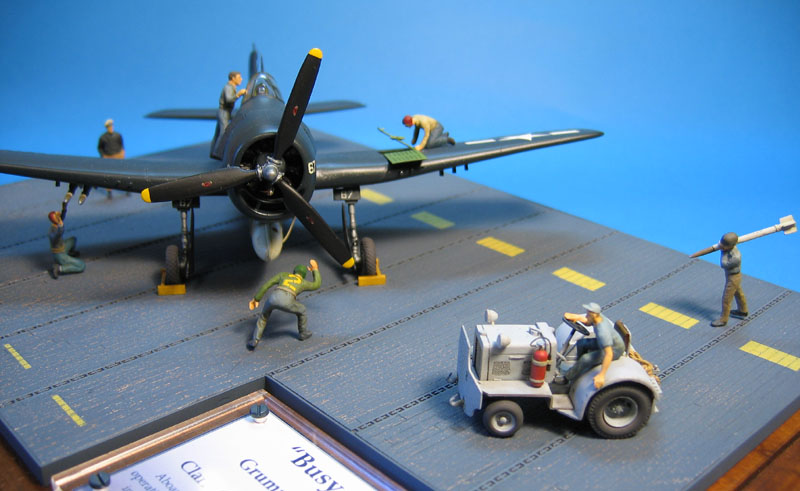
| Busy Sunday Heller Grumman F6F-5 Hellcat and scratchbuilt Clark CT-46 tow tractor diorama in 1/72 |
| Started: June/1986 (yep,
eighty six... don't ask!) Finished: January/2004 |
The Hellcat
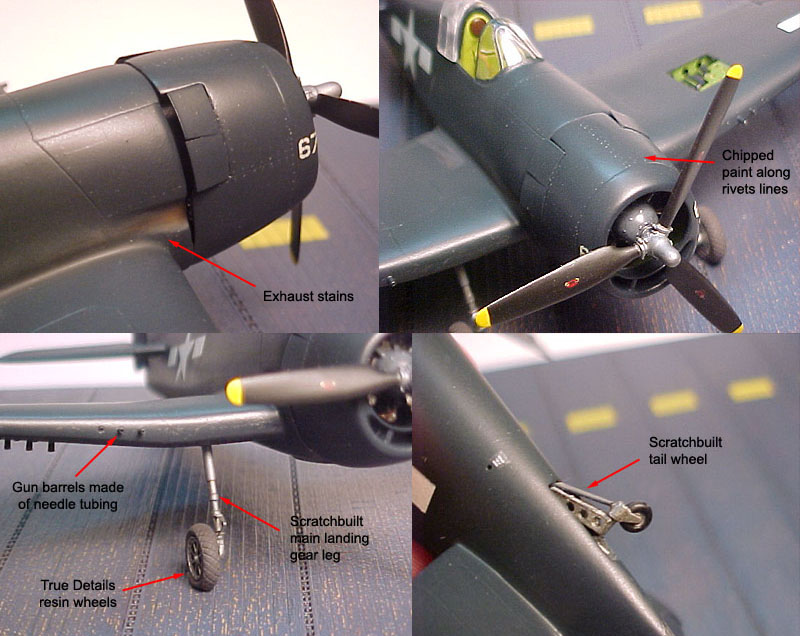
Well, this is an epic for me. During my college days, I virtually abandoned modeling. You know, women and a party every day... But somehow I kept myself working on a Heller F6F-5 Hellcat in 1/72, mostly during vacations at my parents house. And the story goes on, but suffices to say that sometime during 1996-98 timeframe I finished the beast. Far from my best model, but I like to think in this model as a link which kept my interest in the hobby during my undergrad days. Pure nostalgia. No photoetched parts, no special accessories whatsoever. My Hellcat has a basic, completely scratchbuilt cockpit, as are the gun bay and the landing gear (including the tailwheel). At the time, a hobby knife was the most advanced tool in my small modeling case. In the end, though, I managed to install True Details bulged wheels, and an engine resin copied from the Hasegawa F4U, from which I also have stolen a propeler.
In spite of being a not very
good model not very well built and finished, it marks a lot of 'first
times' to me:
- my first model painted exclusively with hobby paints
- my first scratchbuilt gun bay
- my first rescribing job
- my first use of acrylic paints
- my first model incorporating my own resin parts
- my first scratchbuilt landing gear using brass tubing
- my first use of silver pencils for paint chipping
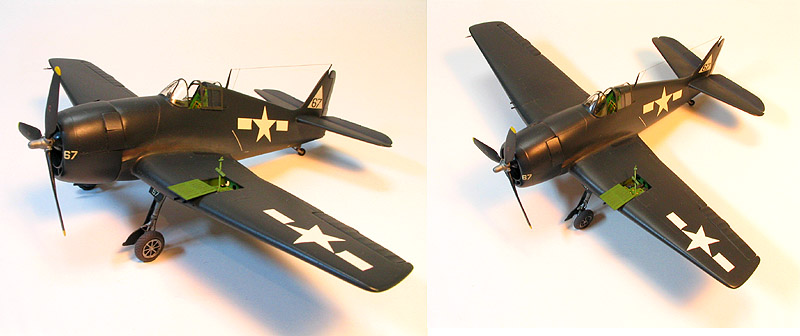
and the list goes on. That's why it wouldn't win any contest. Anyway, I'm proud of the result:
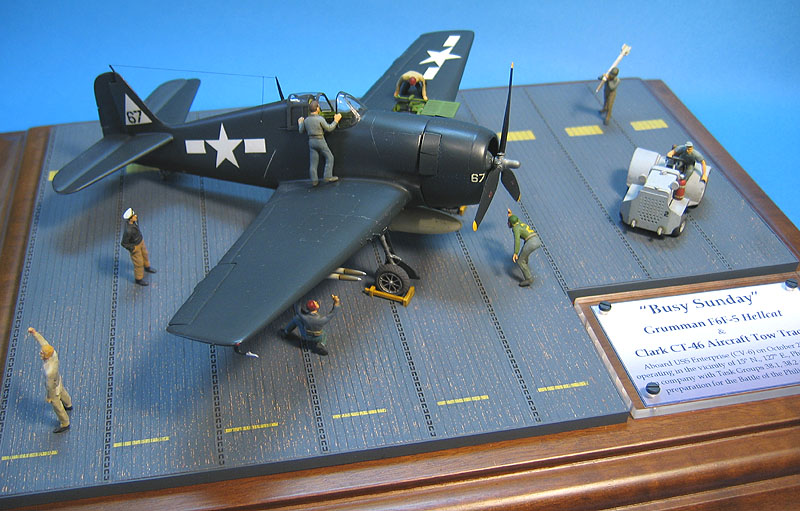
The carrier deck
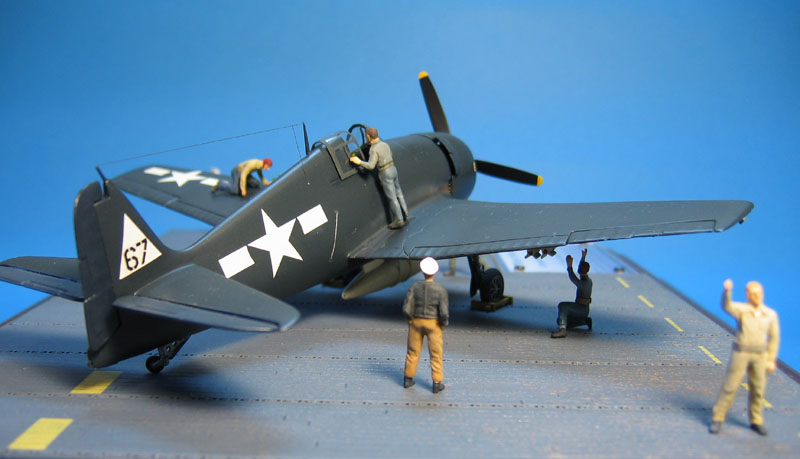
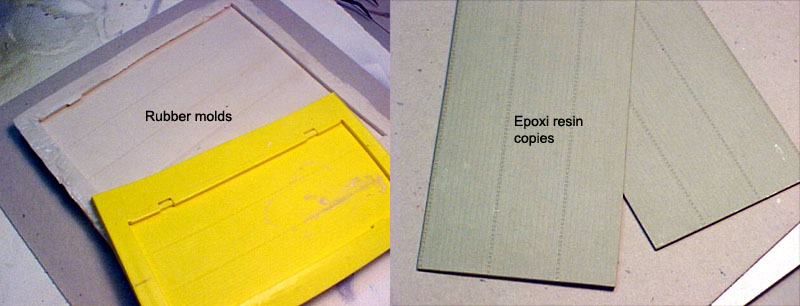
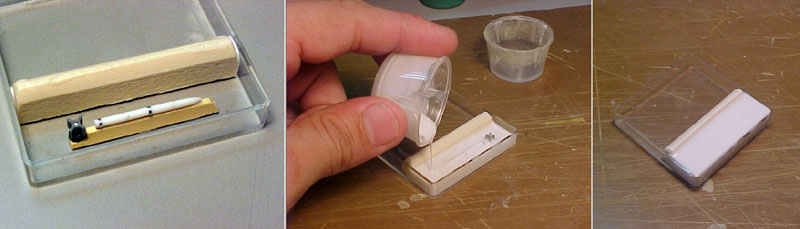
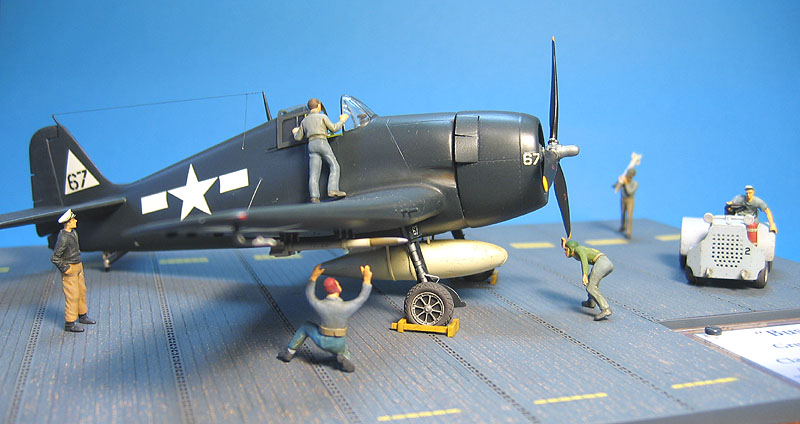
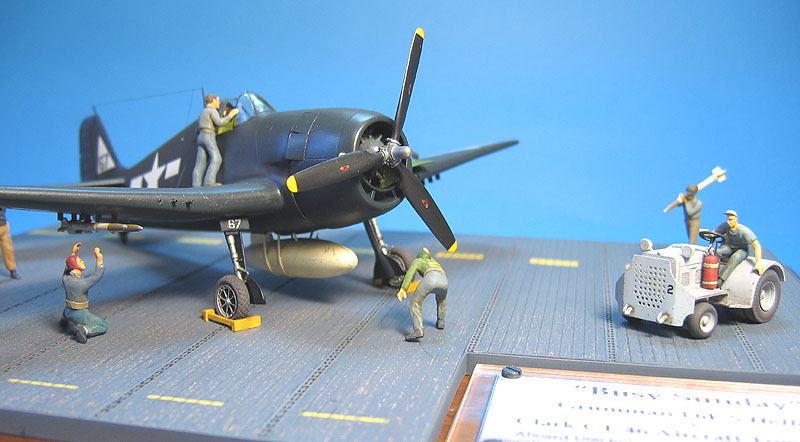
Some years after finishing it, I decided to include the Hellcat in a diorama depicting it onboard its mother ship, the USS Enterprise (CV-6) on Sunday, Septemper 22nd, 1944, right before the famous Battle of the Philippine Sea. Hence the name, 'Busy Sunday'. But before, I needed a carrier deck. I copied the carrier deck sections which come with the Hasegawa F2A Buffalo in automotive epoxy putty:
- my first model painted exclusively with hobby paints
- my first scratchbuilt gun bay
- my first rescribing job
- my first use of acrylic paints
- my first model incorporating my own resin parts
- my first scratchbuilt landing gear using brass tubing
- my first use of silver pencils for paint chipping
and the list goes on. That's why it wouldn't win any contest. Anyway, I'm proud of the result:
The carrier deck
Some years after finishing it, I decided to include the Hellcat in a diorama depicting it onboard its mother ship, the USS Enterprise (CV-6) on Sunday, Septemper 22nd, 1944, right before the famous Battle of the Philippine Sea. Hence the name, 'Busy Sunday'. But before, I needed a carrier deck. I copied the carrier deck sections which come with the Hasegawa F2A Buffalo in automotive epoxy putty:
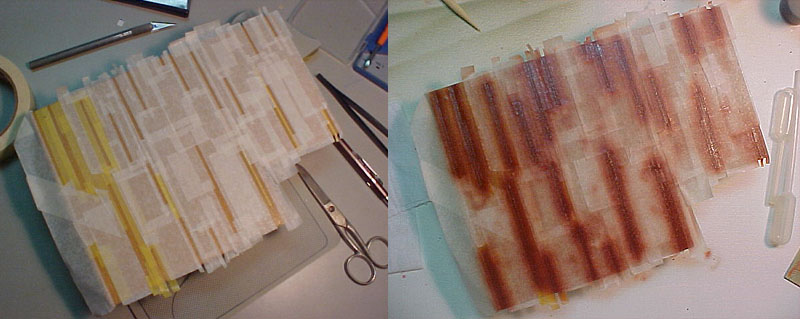
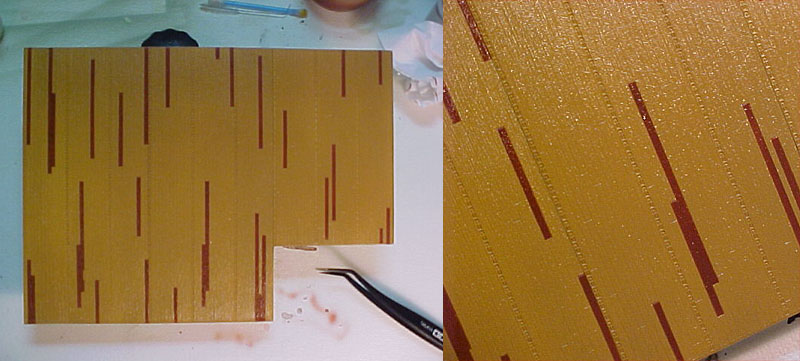
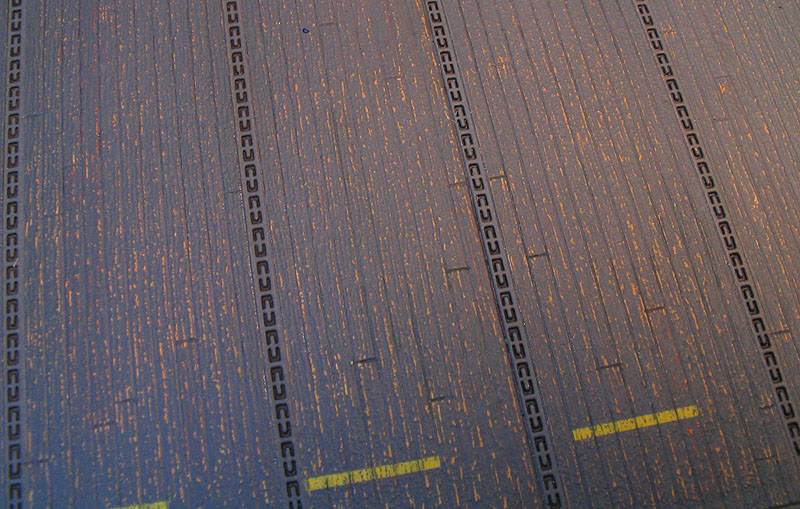
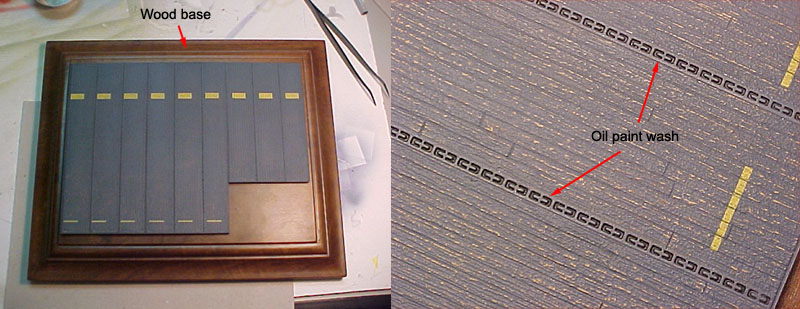
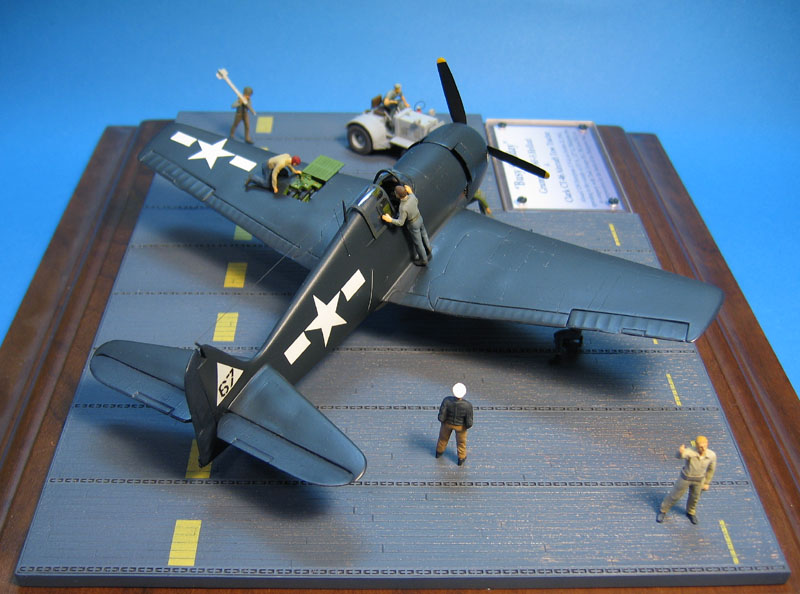
I then removed the masks and sprayed the deck with my own mix of Gunze acrylic colors simulating the H-5 wood deck stain, to comply with the cammo measure applied on the Enterprise during Sept/1944. The deck markings were masked and painted in yellow. The deck section was then slightly sanded to reveal the wood color under the H-5 stain. I tryied to concentrate this effect on the center sections of the deck, after what I saw in wartime photos. After a protective coat of Future, the deck was then washed to highlight the planking joints and the tie-down rails.
A final flat coat sealed
everything, and the deck was glued to a custom made wood base:
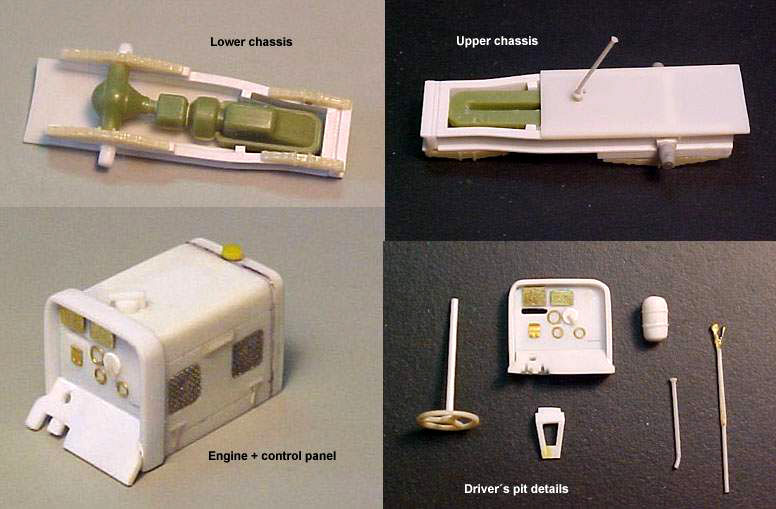
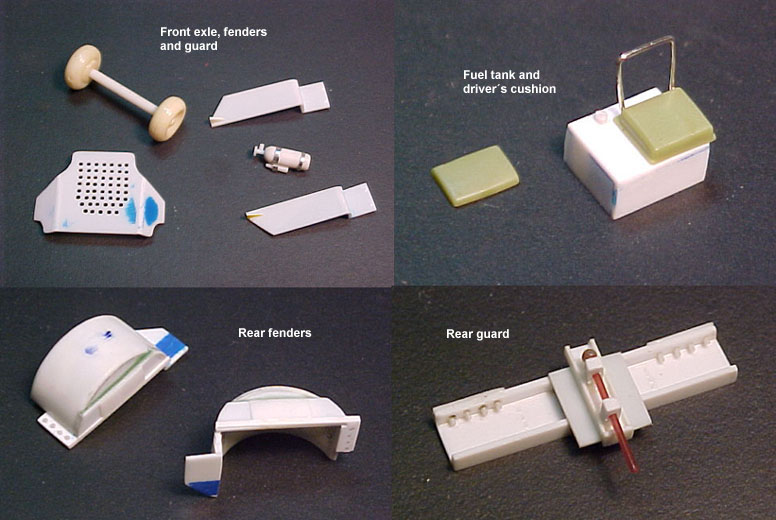
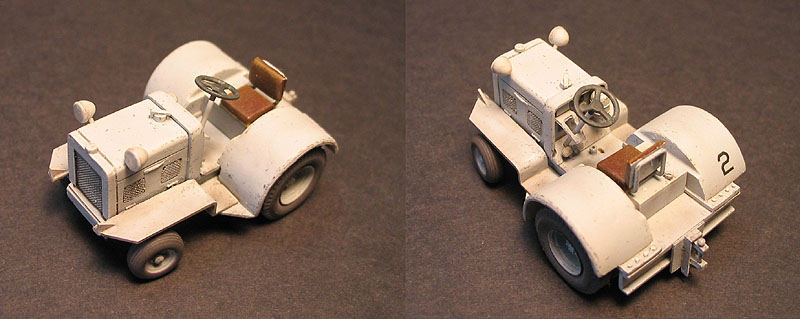
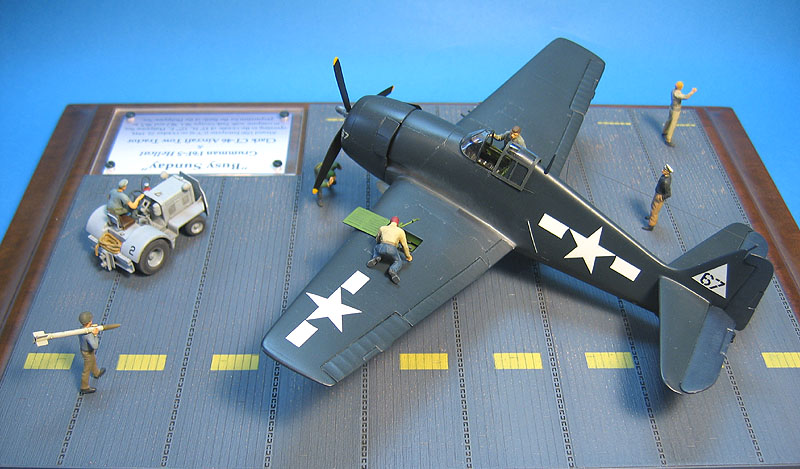
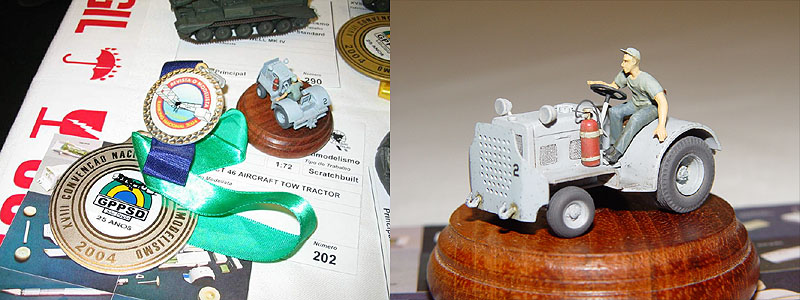
The tow tractor
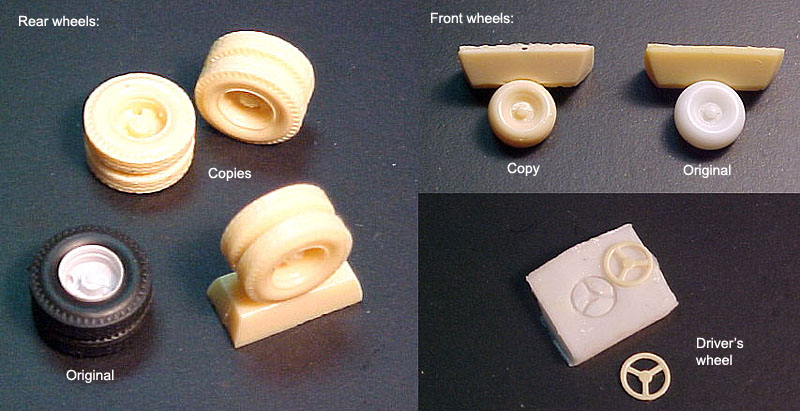
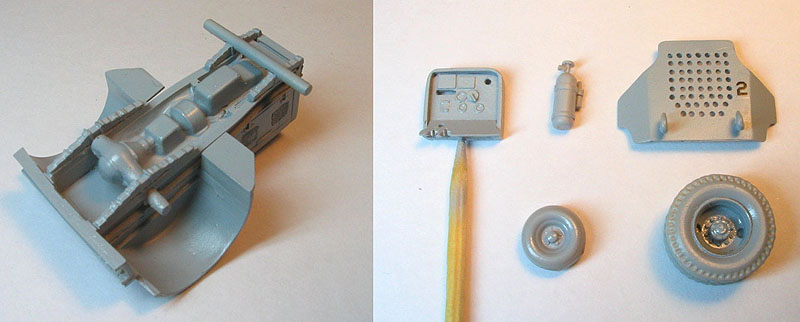
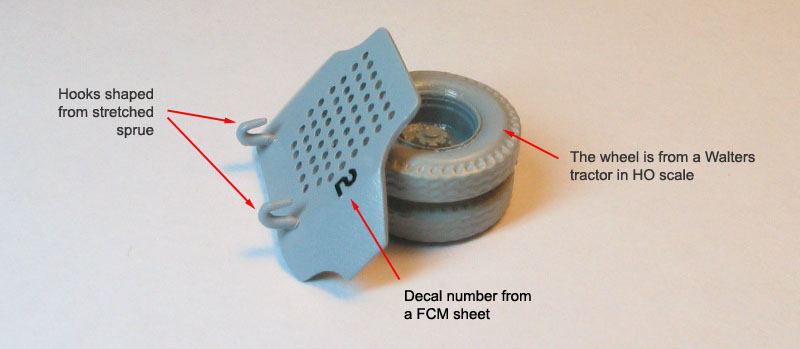
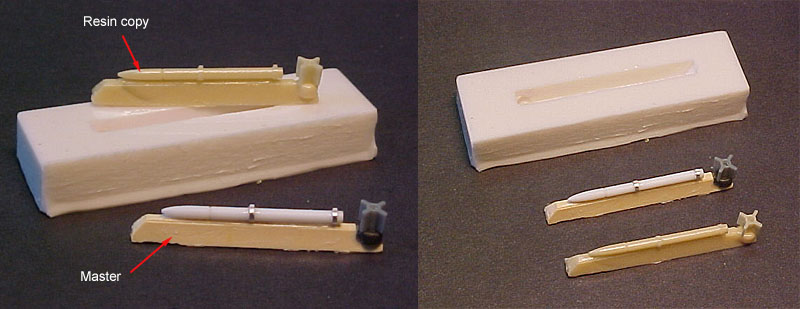
Another item of the diorama would be a naval tow tractor. A decent one in this scale can be obtained only by scratchbuild. I chose the Clark CT-46 simply because it was the one for which I had more references. Although the US Navy had a preference for the Fordsons, the 'Clarktors' (as the CT-46s were called by the crews) were not rare aboard US Navy carriers. It took me a few months to finish all the parts. I started by the chassi/suspension/wheels and moved up from there. The only items stolen are the front wheels (from an old Revell tractor) and the rear wheels (they are Walters 1/87 truck wheels). The driver's pit was decorated with some photoetched items, pedals and handles.
Having many other naval aircrafts in my stash, I couldn't use these masters. So I decided to reproduce all parts in resin.
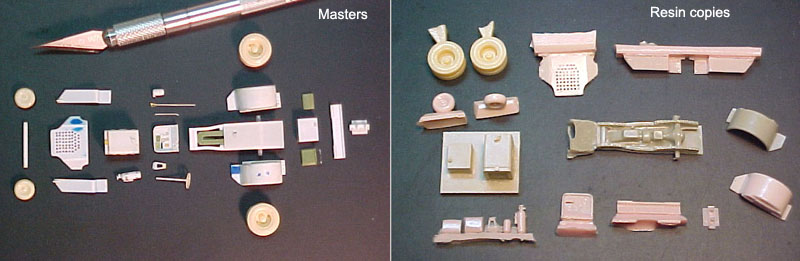
These are not easy items to be cast at home, without professional equipment. I got decent copies in polyester resin. Next time, I'll do with the epoxy kind...
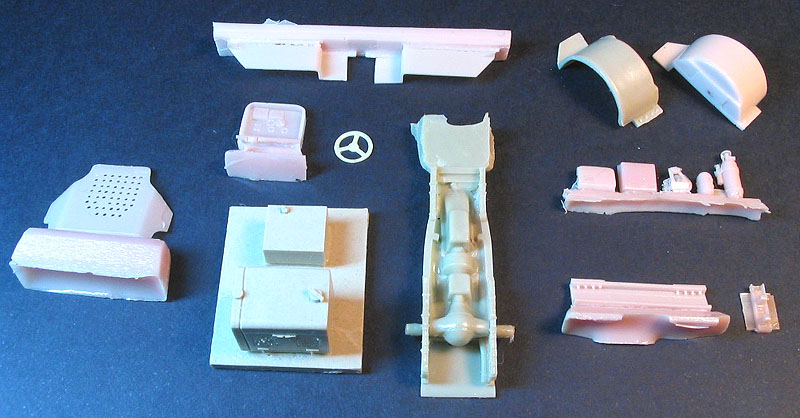
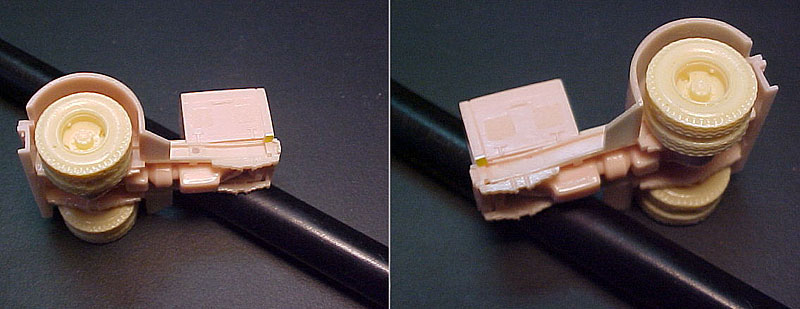
A common problem with polyester resin is the severe contraction during curing. In a multi-part project, this may be an issue. What I did was to choose the best fitting parts from many casting runs. Small plastic tabs glued here and there helped to keep everything aligned:
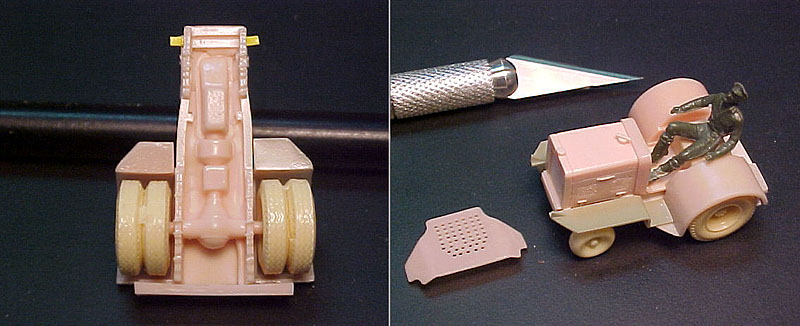
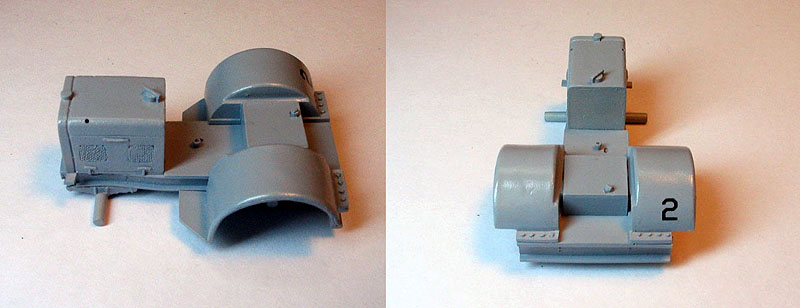
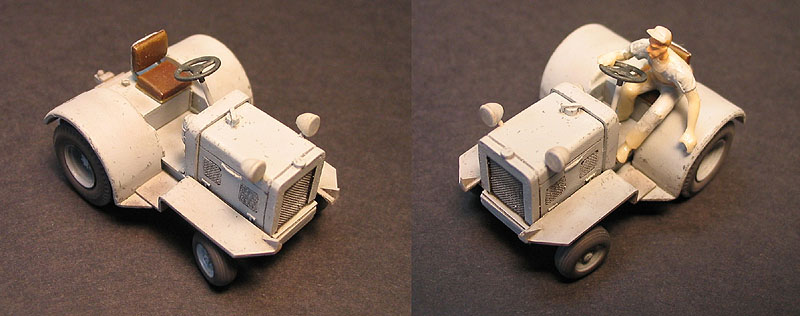
The basic color was applied after priming the little stuff. I still don't have an official source about the exact color of these tractors. They could be painted in grey or blue, but the few color photos I found indicate a color similar to the Haze Blue used to camouflage the ships. I simply mixed Intermediate Blue with some Light Grey to achieve the hue I was after.
I then painted the details like driver's instruments, wheels, fire extinguisher and seats. Next, a flat clear coat was applied to provide a rough surface for chipping.
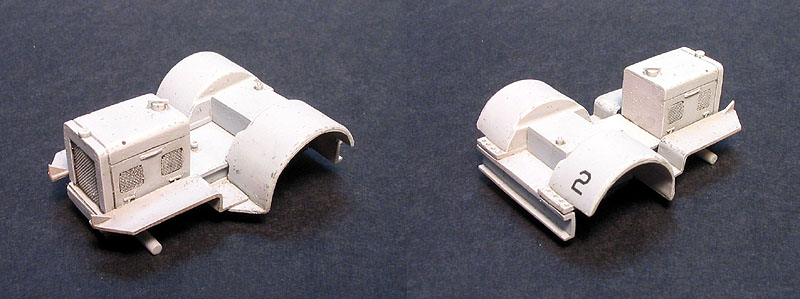
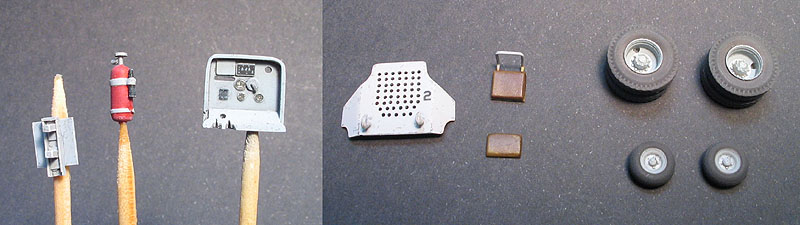
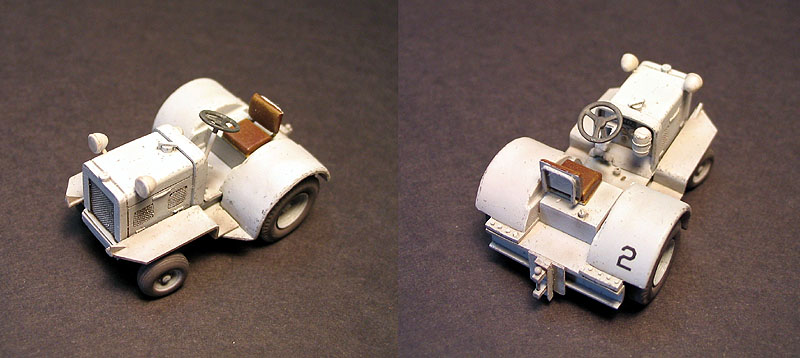
The chipping was done essentially with a 4B pencil, and nothing more. I scratched it around corners and high traffic areas to simulate wear and exposed metal. The details were glued to place and I declared my Clarktor finished:
The details
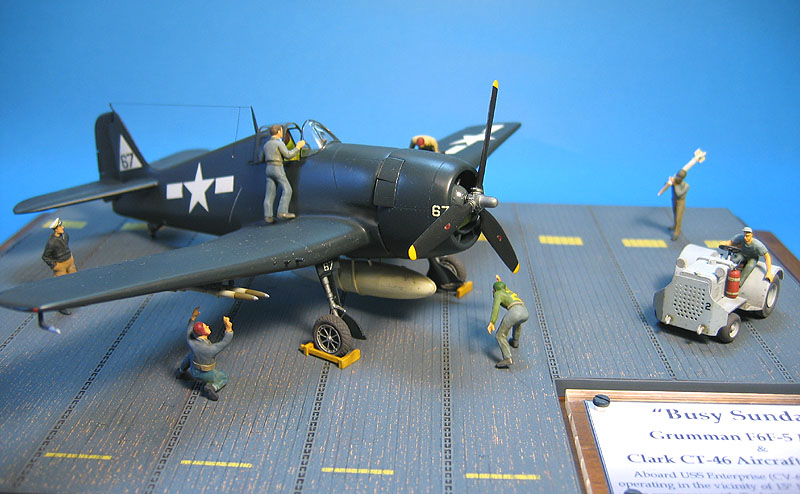
My F6F-5 should carry a load of 5" HVARs. I wasn't really satisfied with the injected rockets I found, and decided to make my own from plastic stock, Aluminum and the fins of the HVARs included in the Tamiya F4U-1D kit.
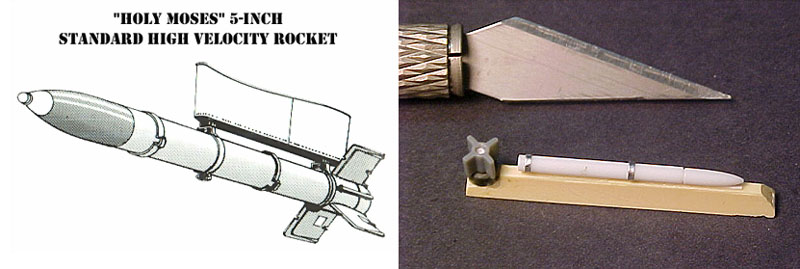
I prepared a silicon mold and poured a half-dozen copies of the HVAR. Two of them will be installed under the Hellcat wing, and another will be carried on the shoulder of an armourer crew.
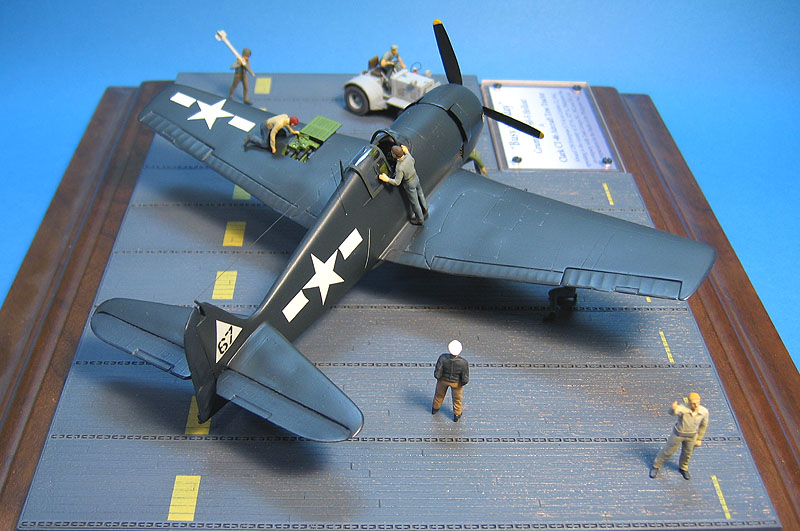
Most of the figures to be used in the diorama are Preiser and Airfix, in some cases converted to a more casual attitude. I swap the heads of the flying officer and the armorer carrying a HVAR (and before you ask, yes, I have photos of these rockets being carried on shoulders).
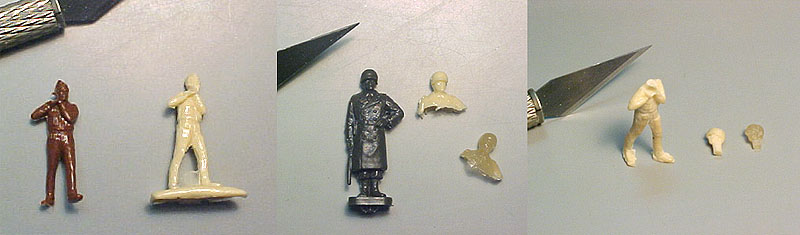
I also added the
characteristic tool belt to some of the crew and painted them using
acrylics and enamels. Here's the gang ready for action:

And then the Hellcat received a load of HVAR, a white belly tank borrowed from another tri-tone F6F, and wheel shocks made from plastic stock. Everything was glued to the base and the engine warm-up can start.
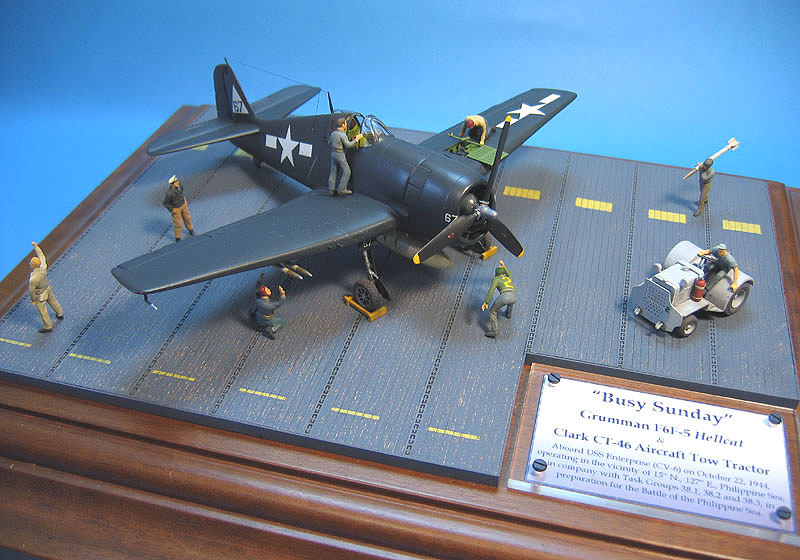
The award at the Brazilian IPMS National Convention in 2004
The Clark tractor was awared during the Brazilian IPMS Nats in 2004, grabbing a double silver medal in Military Vehicles - 1/72 scale category.
| Technical file | |
| Kit:
|
-
Heller item #6114 |
| Acessories:
|
-
Preiser and Airfix figures - True detail wheels |
| Stolen
parts: |
- Propeler from the Hasegawa F4U-1D |
| Basic
colors: |
- Dark Sea Blue: Testors Dark Sea
Blue enamel - FS15042 (#1717) - Flat coat: Testors Clear Flat acrylic (#50150) and Gunze Clear Flat acrylic - Figures' colors: various Humbrol and Testors enamels - Diorama base colors: custom mix of Gunze acrylics |
| Notes: |
- Scratchbuilt items: Hellcat's sliding canopy, cockpit, gun bay, landing gear and tail wheel (engine resin copied from the Hasegawa F4U-1D), Clark CT-46, and HVARs. |
Rato Marczak © 2008
