| Hasegawa Dewoitine D.520 in 1/72 |
|
Start: January / 2010 Current state: March / 2010 |
While
living in USA, far from my workbench, I looked for simple projects
which I could accomplish without all the tools I got used to have
around, so I could enter a model in MosquitoCon 2010.
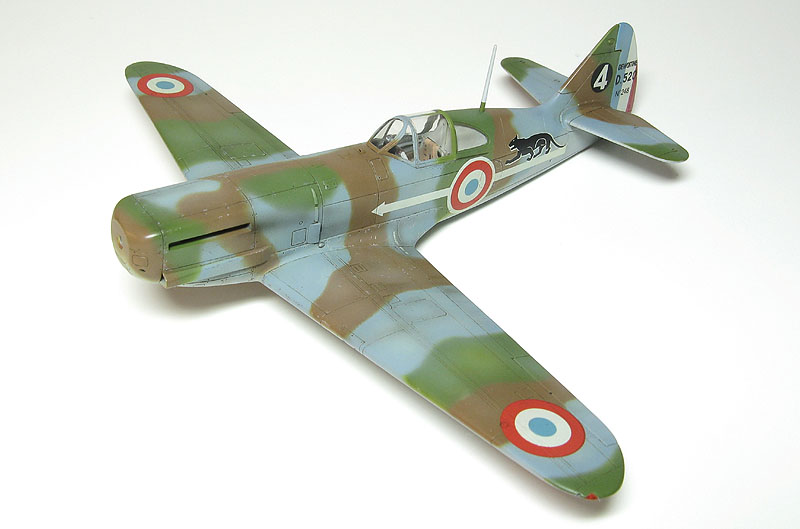
When I spotted the tiny Hasegawa D.520 on the shelf of Avenel Hobby
Shop, I though "That will do". More than that, I could test the new
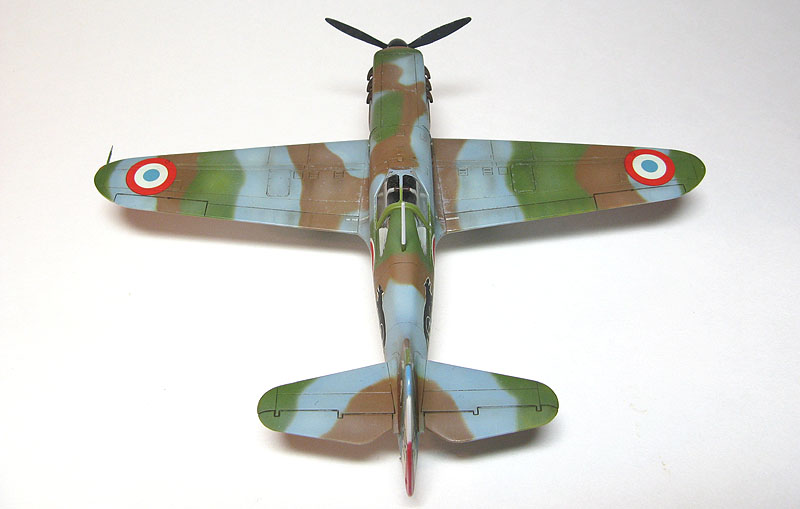
Badger Renegade airbrush with its three-color upper camouflage. Being
such a small aircraft, it would be a great test.
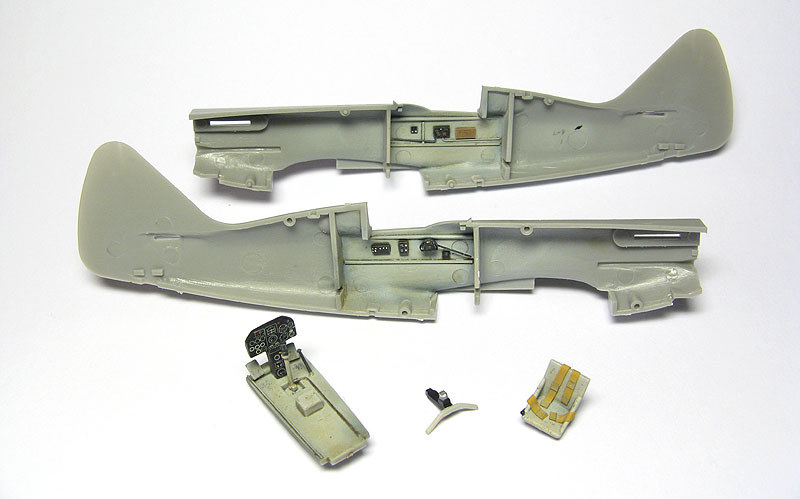
Hasegawa kit AP47 is a good one, with recessed panel lines and crisply injected (my sample had no flash at all). The clear parts are good, but you can't display the cockpit open. This is understandable, since the cockpit is devoid of sidewall details and the seat has nothing to do with the actual thing. The decals are the weak point of the kit: well printed by overly thick for the scale.
My initial goal was to keep the project as out of the box as possible. Afterall, I didn't have the luxury of all my modeling supplies as I said. But I couldn't resist adding a radio, a circuit box, a map case, the throttle and other details using an old cutaway drawing as reference.

Willing to close the fuselage as soon as possible, I painted the interior following the instructions. And since I was trying to avoid research on the subject as much as possible, I simply airbrushed a medium gray color mixed from Tamiya acrylics. A sludge wash was applied and once dry the details were picked out using Vallejo paints. The control panel was decorated with the decal which comes in the kit. The kit seat was used, and I tried for the third of fourth model in the last two years to make it simple by adding seat belts from tape, as OOB IPMS rules state.
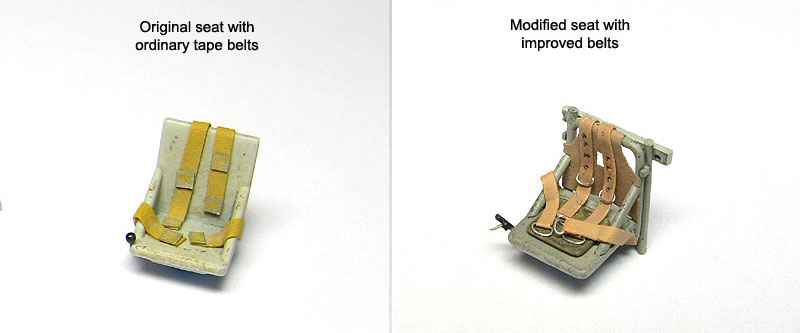
At that point I started to be really annoyed by the chunky seat and my boring representation of the seat belts. And so I broke up with my initial commitment and went after some reference material.
A very handy reference for this project was an interesting text by Francis Nicole on the colors used by the D.520. It indicates clearly the lack of decent standardization concerning the camouflage of French aircraft during those messy days, but it seems clear that my interior color should be much darker. I decided to live with that, but after looking a few photos of the cockpit I concluded that I had to do something about that seat. In the end I scratchbuilt a new seat from plastic card and rod, and added fake belts using wire and tape. Even with the closed cockpit, I'm glad I replaced the seat. A trim tab wheel was also added to the port side of the cockpit and the fuselage halves were finally glued.
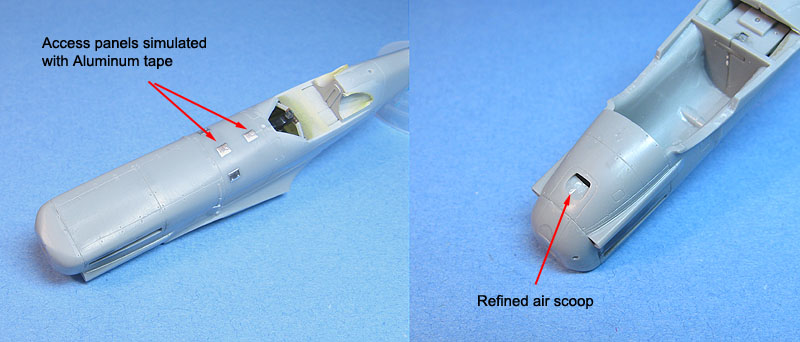
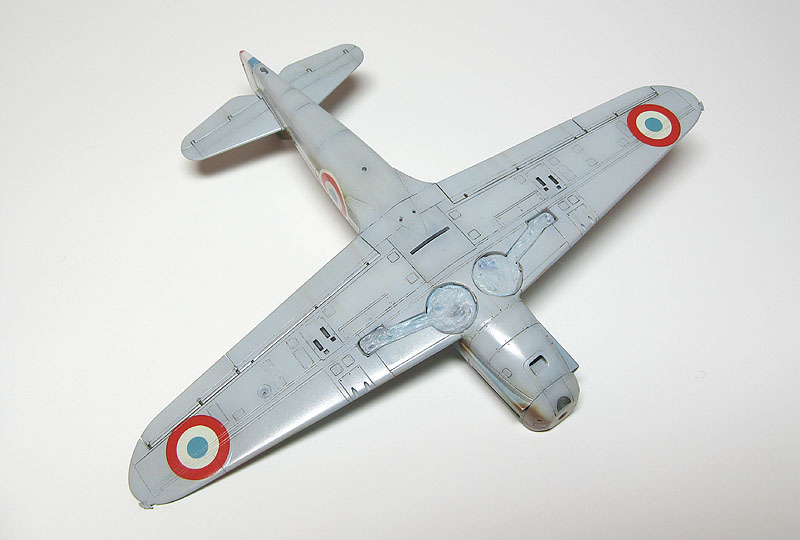
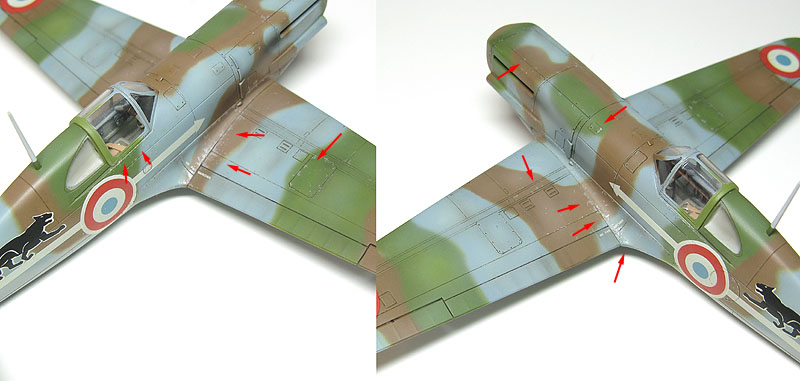
On the fuselage, Hasegawa had strangely missed four access panels in front of the cockpit. I made them with adhesive Aluminum foil, and embossed the corresponding fasteners. The little pilot's fresh air scoop in front of the windscreen was sanded away - I would add one made of Aluminum sheet later. The oil cooler air intake was worked out with files, as they resulted slighted misaligned, even though the rest of the fuselage was matching perfectly.
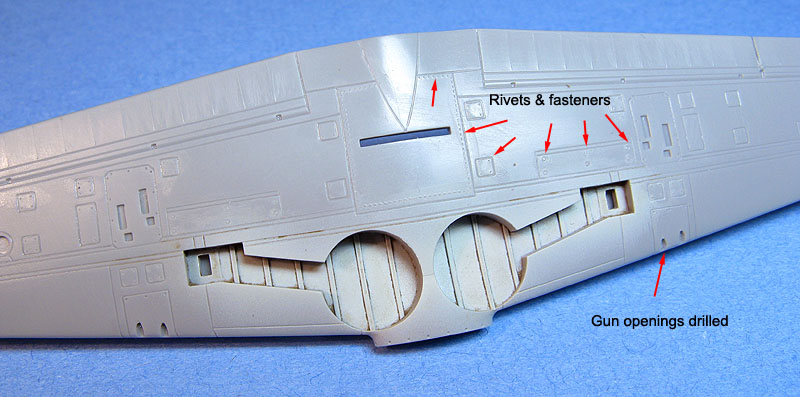
Moving to the wings, I added several rivets on access panels and around the radiator base plate. The gun ports were drilled, too. The wheel bays were painted and dirtied, but be aware that Hasegawa added spurious structural details there. Again, I decided to live with what was in the kit. The wing parts were assembled as per instructions. No putty was necessary.
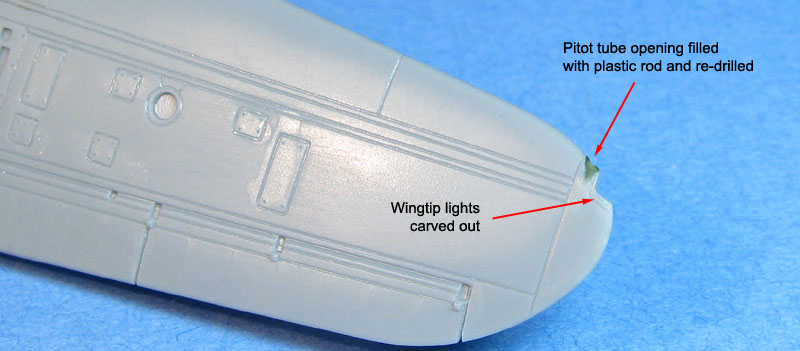
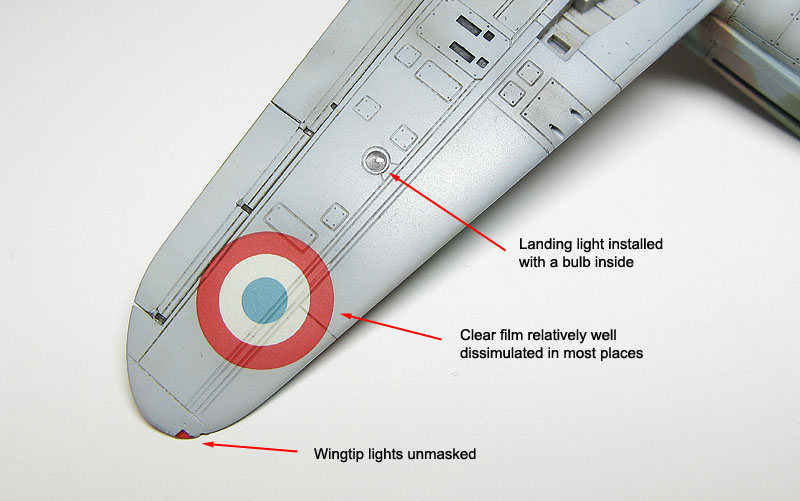
I carved the wing tip lights out to add new ones made of clear plastic later. The Pitot tube mounting hole was not well formed, so I filled it with a piece of stretched sprue. After the glue has dried, I sanded flush and re-opened the hole with a small drill.
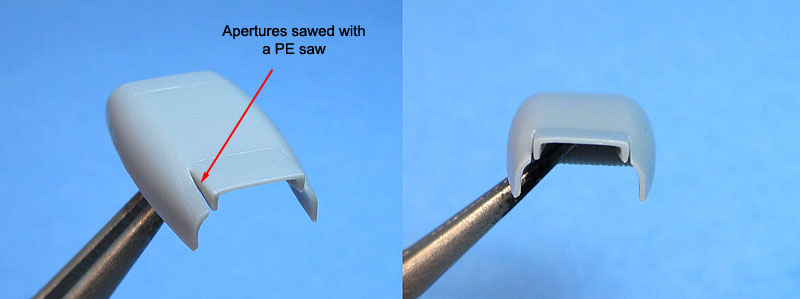
The fuselage subassembly literally clicked over the wings, resulting a perfect wing root joint. On the underside I had to apply a bit of Mr. Dissolved Putty to bridge a small gap between the rear wing and the fuselage. The radiator is molded in open position. I sliced the sides of the radiator venting door with a fine PE saw, giving a better impression that that was a movable part. I also drilled two holes to accept the actuating arms of the door, but those would be added at the end of the project. Meanwhile, I painted the interior of the radiator with a dark gray color, washed with black acrylic paint and dry brushed a lightly with gray oils.
With the basic airframe ready, I masked the canopy and glued it in place. The rear windows are molded without any frame. I simply don't understand why manufacturers insist with this formula instead of molding the whole section of the fuselage in clear plastic. That would be much easier for masking, and would avoid the "visible edge" effect around the windows. To make things worse, one of the windows refused to fit well. Therefore I elected to glue them in position and apply a slightly undersized mask. The small fresh air scoop removed earlier was cut and shaped from Aluminum sheet and glued in front of the windscreen. The wheel wells were masked with Tamiya tape and Blu-Tak. The wingtip lights were installed using pieces of blue and red clear plastic, sanded flush and polished, then masked.
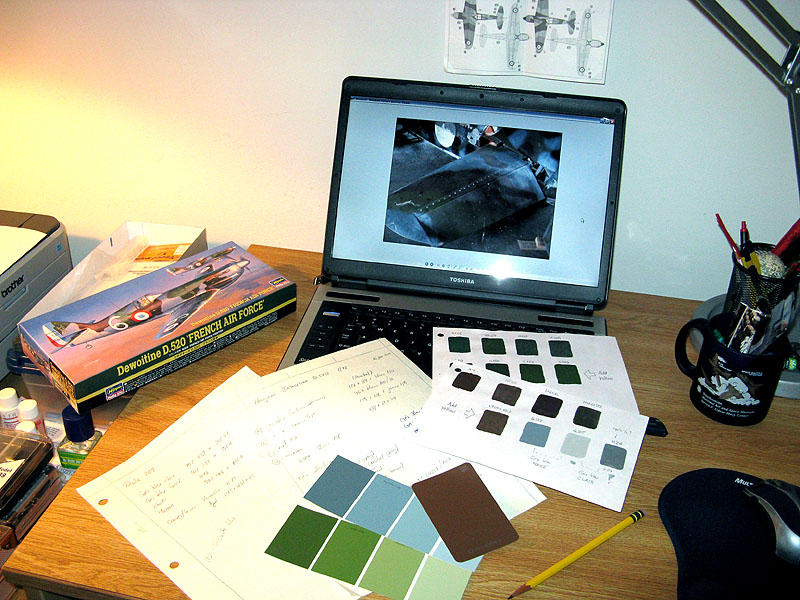
Using a Grex Genesis XN airbrush, the whole airframe was primed with Mr. Surfacer 1200 and checked for flaws. A pre-shading was then applied along panel lines using Tamiya Gloss Black X-1, and I started to study the camouflage colors for this bird. An excellent compilation by Eric Deluy published on Replic 164 proved a valuable resource to find the correct colors. The kit's instructions provide GSI Gunze paint mixes (both acrylic and lacquer), while Replic 148 gives the recipes for Humbrol paints, and Replic 209 provides the paint mix tables for GSI Gunze acrylics. There are many other resources, but keep in mind that definitive official French camouflage colors documents does not exist, and they varied significantly for each aircraft type. Useful conversion tables can be found in Urban Fredriksson's Color Reference Charts - Part I, Part II, and The Ultimate Model Paint Conversion Chart. I had a very limited selection of hobby paints to start from and I was not willing to duplicate all my paint stash while away from home. Armed with a few color photos from WWII I made a quick research similar to what I did in my AVG camouflage colors research. Mind you that I was after 'starting points' instead of exact matches, since these colors would be post-shaded, washed, pin-washed, filtered etc. I also took into account the opinion of a very experienced modeler which told me only good things about Model Master colors for this particular subject. To make the story short, I needed four colors:
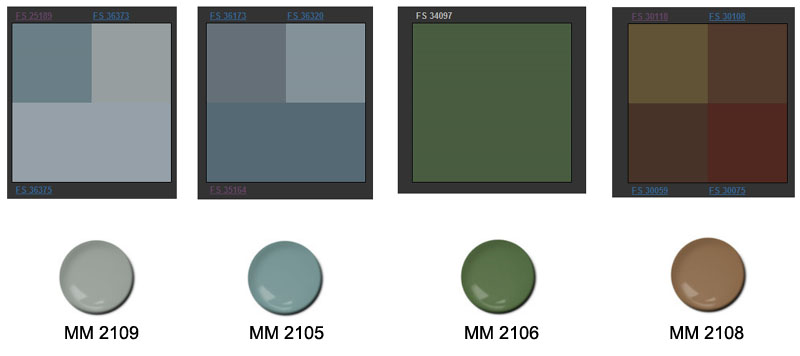
I found that color A is close to FS 36373, but need a bit of white. Color B is very close to Intermediate Blue, and a blueish tone of FS 36320 or a lighter version of FS 36173 or FS 35164 are good starts. The green was a problem, as it seems to vary immensely from photo to photo, ranging from dark green to almost khaki. I stuck with FS 34097, but it needs a touch of yellow. The brown also seemed to vary a lot, and I decided that FS 30108 or 30059 were the best starting points, although they also needed a bit of yellow or cream color. As an additional note, Model Master colors really seem to be good matches (so to speak), but I would enlighten MM 2109 a tad for my taste. The picture below compares the examined FS colors with Model Master digital samples:
Well, as the old saying says, necessity is the mother of invention, so I ended working with what I had in hand, mostly GSI Gunze Mr. Color lacquers and a few Tamiya acrylics. A long time ago I abandoned the habit of trying to be exact in what concerns model colors. I learned to pick a good match and correct it with post shading and filters if necessary (you will use them anyway).
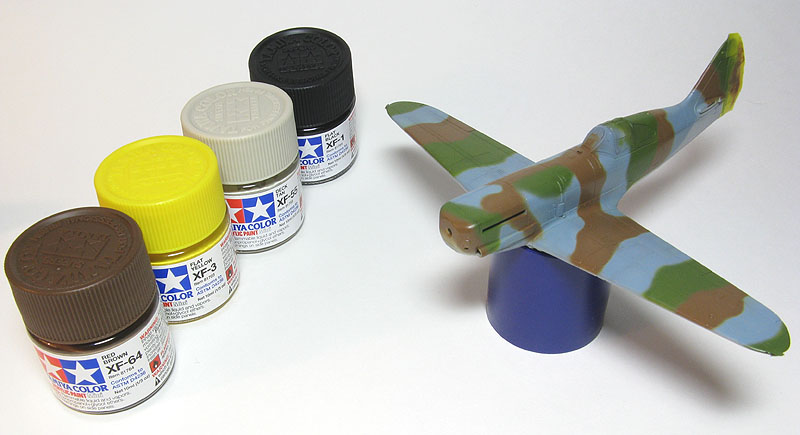
In order to produce these shades, I used the following colors:
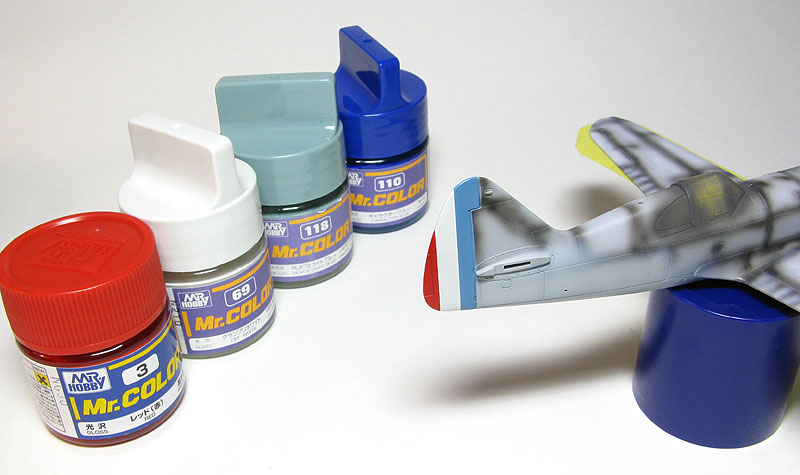
I started
applying color A, again using the Grex XN airbrush, and trying to
preserve the pre-shading. Not relying on the decals, I painted the
rudder stripes using the colors G3 Red for the red, G69 Off White for
the white and a mix of G118, G110 and G69 until the resulting blue
matched the color on the kit decals.
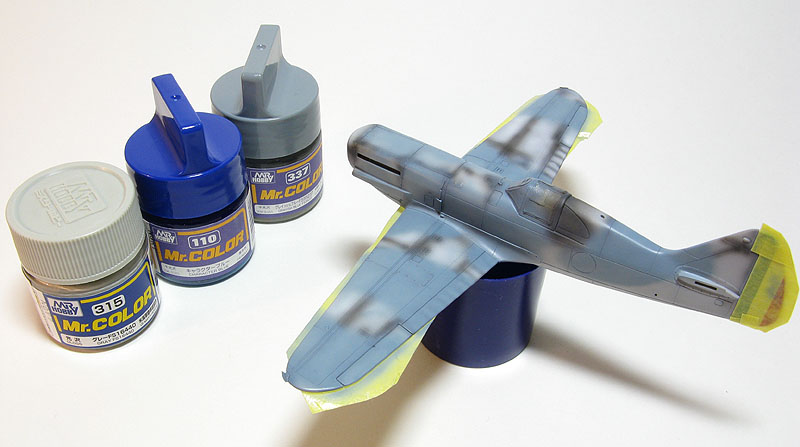
After these colors dried (pretty fast - ah, the beauty of lacquers!), my Badger Spirit airbrush had its debut on a model. First, the camouflage blue:
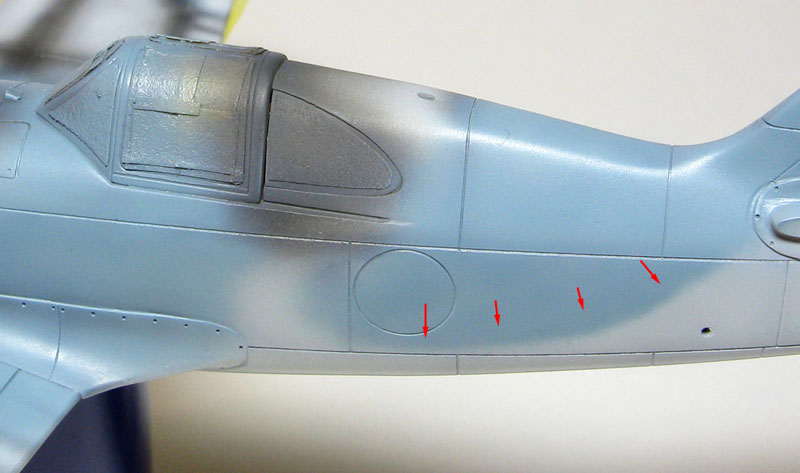
Working on thinner ratio and pressure variations, I was able to apply a reasonably thin demarcation line without significant overspray:
Next I proceeded to the green, and then finally the brown:
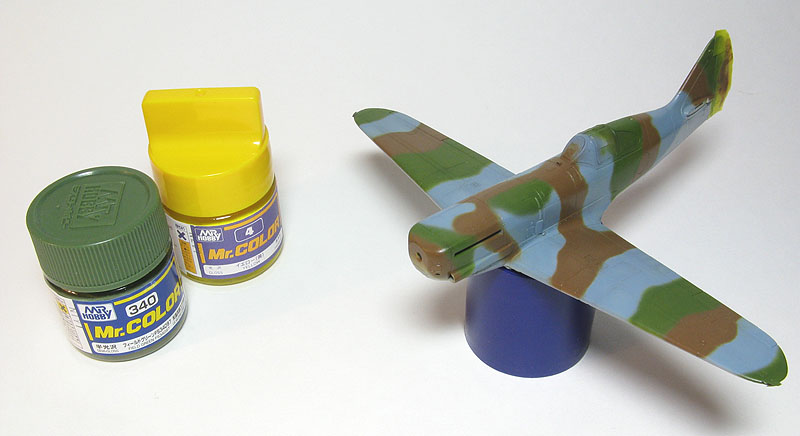
I didn't quite reached the ideal thinning ratio/pressure combination for the brown. I even added X-22 Clear Gloss to improve the flow, but it didn't make things much better, with a visible overspray here and there. Maybe if I tryied harder... However, the two previous colors were lacquers, while the brown was acrylic. That allowed me to remove all the overspray with a cotton swab moistened in Windex. Worked like a charm and I declared the camouflage done.
The rudder masks were removed. After examining the paint job, I concluded that all three camouflage colors were too stark, particularly the blue. Instead of post-shading each camouflage color individually, I prepared a very thin mix of color B and added white. This color - almost a light gray - was airbrushed deliberately over all upper surfaces, concentrating on the center of selected panels. This not only reduced the hue of all colors, but also blended them somewhat and simulated the fading on certain panels:
Once
satisfied with the effect, I applied a light coat of GSI Gunze H46
Clear to prepare the
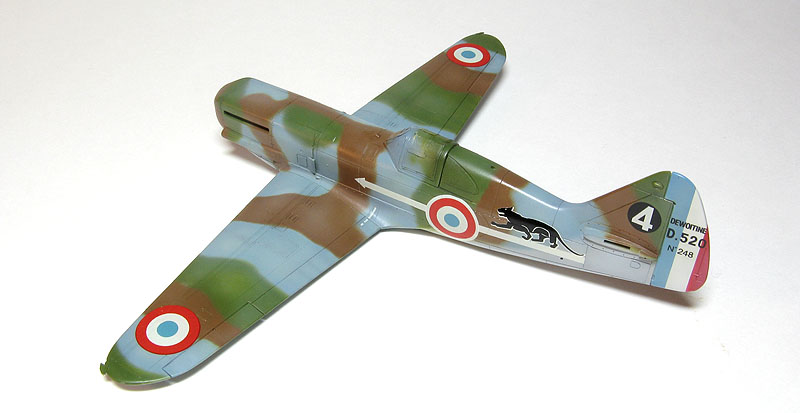
model to the decals. I don't like Hasegawa decals, but I decided to
give it another try. After my experience with the Polikarpov I-16,
I didn't remove the clear border of the decals (except for the white
arrows), since they are pretty thick and the "step" along the cut would
be visible under certain angles:Hasegawa kit AP47 is a good one, with recessed panel lines and crisply injected (my sample had no flash at all). The clear parts are good, but you can't display the cockpit open. This is understandable, since the cockpit is devoid of sidewall details and the seat has nothing to do with the actual thing. The decals are the weak point of the kit: well printed by overly thick for the scale.
My initial goal was to keep the project as out of the box as possible. Afterall, I didn't have the luxury of all my modeling supplies as I said. But I couldn't resist adding a radio, a circuit box, a map case, the throttle and other details using an old cutaway drawing as reference.
Willing to close the fuselage as soon as possible, I painted the interior following the instructions. And since I was trying to avoid research on the subject as much as possible, I simply airbrushed a medium gray color mixed from Tamiya acrylics. A sludge wash was applied and once dry the details were picked out using Vallejo paints. The control panel was decorated with the decal which comes in the kit. The kit seat was used, and I tried for the third of fourth model in the last two years to make it simple by adding seat belts from tape, as OOB IPMS rules state.
At that point I started to be really annoyed by the chunky seat and my boring representation of the seat belts. And so I broke up with my initial commitment and went after some reference material.
A very handy reference for this project was an interesting text by Francis Nicole on the colors used by the D.520. It indicates clearly the lack of decent standardization concerning the camouflage of French aircraft during those messy days, but it seems clear that my interior color should be much darker. I decided to live with that, but after looking a few photos of the cockpit I concluded that I had to do something about that seat. In the end I scratchbuilt a new seat from plastic card and rod, and added fake belts using wire and tape. Even with the closed cockpit, I'm glad I replaced the seat. A trim tab wheel was also added to the port side of the cockpit and the fuselage halves were finally glued.
On the fuselage, Hasegawa had strangely missed four access panels in front of the cockpit. I made them with adhesive Aluminum foil, and embossed the corresponding fasteners. The little pilot's fresh air scoop in front of the windscreen was sanded away - I would add one made of Aluminum sheet later. The oil cooler air intake was worked out with files, as they resulted slighted misaligned, even though the rest of the fuselage was matching perfectly.
Moving to the wings, I added several rivets on access panels and around the radiator base plate. The gun ports were drilled, too. The wheel bays were painted and dirtied, but be aware that Hasegawa added spurious structural details there. Again, I decided to live with what was in the kit. The wing parts were assembled as per instructions. No putty was necessary.
I carved the wing tip lights out to add new ones made of clear plastic later. The Pitot tube mounting hole was not well formed, so I filled it with a piece of stretched sprue. After the glue has dried, I sanded flush and re-opened the hole with a small drill.
The fuselage subassembly literally clicked over the wings, resulting a perfect wing root joint. On the underside I had to apply a bit of Mr. Dissolved Putty to bridge a small gap between the rear wing and the fuselage. The radiator is molded in open position. I sliced the sides of the radiator venting door with a fine PE saw, giving a better impression that that was a movable part. I also drilled two holes to accept the actuating arms of the door, but those would be added at the end of the project. Meanwhile, I painted the interior of the radiator with a dark gray color, washed with black acrylic paint and dry brushed a lightly with gray oils.
With the basic airframe ready, I masked the canopy and glued it in place. The rear windows are molded without any frame. I simply don't understand why manufacturers insist with this formula instead of molding the whole section of the fuselage in clear plastic. That would be much easier for masking, and would avoid the "visible edge" effect around the windows. To make things worse, one of the windows refused to fit well. Therefore I elected to glue them in position and apply a slightly undersized mask. The small fresh air scoop removed earlier was cut and shaped from Aluminum sheet and glued in front of the windscreen. The wheel wells were masked with Tamiya tape and Blu-Tak. The wingtip lights were installed using pieces of blue and red clear plastic, sanded flush and polished, then masked.
Using a Grex Genesis XN airbrush, the whole airframe was primed with Mr. Surfacer 1200 and checked for flaws. A pre-shading was then applied along panel lines using Tamiya Gloss Black X-1, and I started to study the camouflage colors for this bird. An excellent compilation by Eric Deluy published on Replic 164 proved a valuable resource to find the correct colors. The kit's instructions provide GSI Gunze paint mixes (both acrylic and lacquer), while Replic 148 gives the recipes for Humbrol paints, and Replic 209 provides the paint mix tables for GSI Gunze acrylics. There are many other resources, but keep in mind that definitive official French camouflage colors documents does not exist, and they varied significantly for each aircraft type. Useful conversion tables can be found in Urban Fredriksson's Color Reference Charts - Part I, Part II, and The Ultimate Model Paint Conversion Chart. I had a very limited selection of hobby paints to start from and I was not willing to duplicate all my paint stash while away from home. Armed with a few color photos from WWII I made a quick research similar to what I did in my AVG camouflage colors research. Mind you that I was after 'starting points' instead of exact matches, since these colors would be post-shaded, washed, pin-washed, filtered etc. I also took into account the opinion of a very experienced modeler which told me only good things about Model Master colors for this particular subject. To make the story short, I needed four colors:
A. Gris bleu clair (lower surfaces)
B. Gris bleu foncé
C. Vert kaki
D. Terre foncé or marron
B. Gris bleu foncé
C. Vert kaki
D. Terre foncé or marron
I found that color A is close to FS 36373, but need a bit of white. Color B is very close to Intermediate Blue, and a blueish tone of FS 36320 or a lighter version of FS 36173 or FS 35164 are good starts. The green was a problem, as it seems to vary immensely from photo to photo, ranging from dark green to almost khaki. I stuck with FS 34097, but it needs a touch of yellow. The brown also seemed to vary a lot, and I decided that FS 30108 or 30059 were the best starting points, although they also needed a bit of yellow or cream color. As an additional note, Model Master colors really seem to be good matches (so to speak), but I would enlighten MM 2109 a tad for my taste. The picture below compares the examined FS colors with Model Master digital samples:
Well, as the old saying says, necessity is the mother of invention, so I ended working with what I had in hand, mostly GSI Gunze Mr. Color lacquers and a few Tamiya acrylics. A long time ago I abandoned the habit of trying to be exact in what concerns model colors. I learned to pick a good match and correct it with post shading and filters if necessary (you will use them anyway).
In order to produce these shades, I used the following colors:
- GSI Creos Mr.Color lacquers:
- G1: White
- G4: Yellow
- G110: Character Blue
- G315: Gray FS16440
- G317: Grayish Blue FS35237
- G340: Field Green FS34097
- Tamiya acrylics:
- XF-1: Flat Black
- XF-3: Flat Yellow
- XF-55: Flat Deck Tan
- XF-64: Flat Red Brown
- X-22: Gloss Clear
| Color |
Mix |
| A |
5*G315 +
3*G1 + 2*G337 |
| B |
5*G337 + 4*G315 + 1*G110 |
| C |
4*G340 + 1*G4 |
| D |
6*XF-64 + 2*XF-3 +
1*XF-55 + 1*XF-1 |
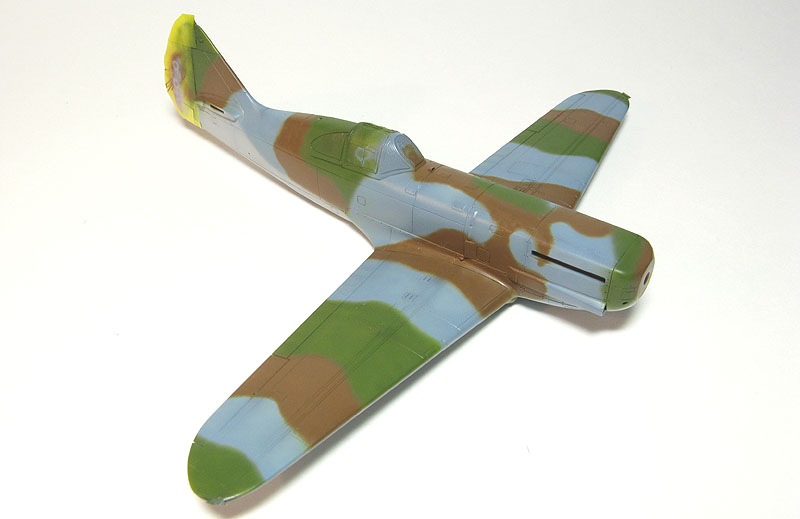
After these colors dried (pretty fast - ah, the beauty of lacquers!), my Badger Spirit airbrush had its debut on a model. First, the camouflage blue:
Working on thinner ratio and pressure variations, I was able to apply a reasonably thin demarcation line without significant overspray:
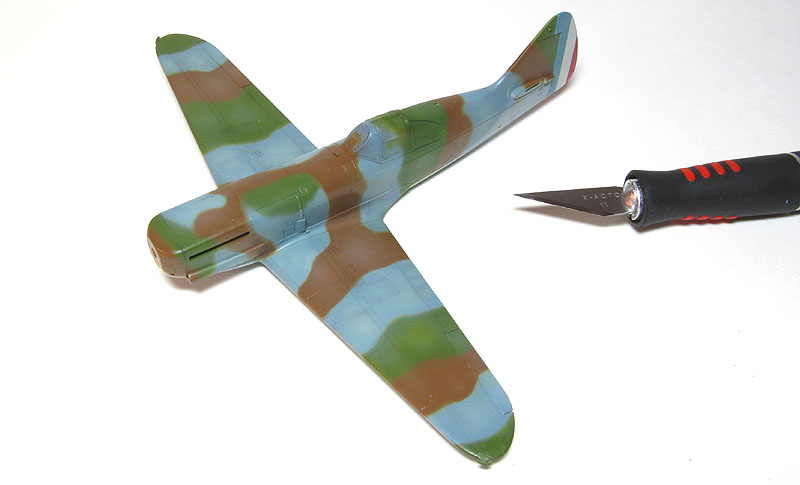
Next I proceeded to the green, and then finally the brown:
I didn't quite reached the ideal thinning ratio/pressure combination for the brown. I even added X-22 Clear Gloss to improve the flow, but it didn't make things much better, with a visible overspray here and there. Maybe if I tryied harder... However, the two previous colors were lacquers, while the brown was acrylic. That allowed me to remove all the overspray with a cotton swab moistened in Windex. Worked like a charm and I declared the camouflage done.
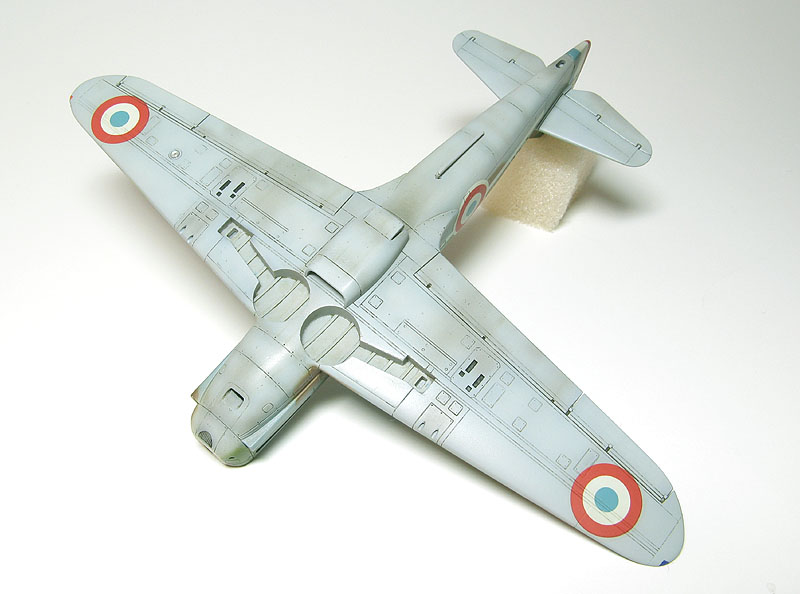
The rudder masks were removed. After examining the paint job, I concluded that all three camouflage colors were too stark, particularly the blue. Instead of post-shading each camouflage color individually, I prepared a very thin mix of color B and added white. This color - almost a light gray - was airbrushed deliberately over all upper surfaces, concentrating on the center of selected panels. This not only reduced the hue of all colors, but also blended them somewhat and simulated the fading on certain panels:
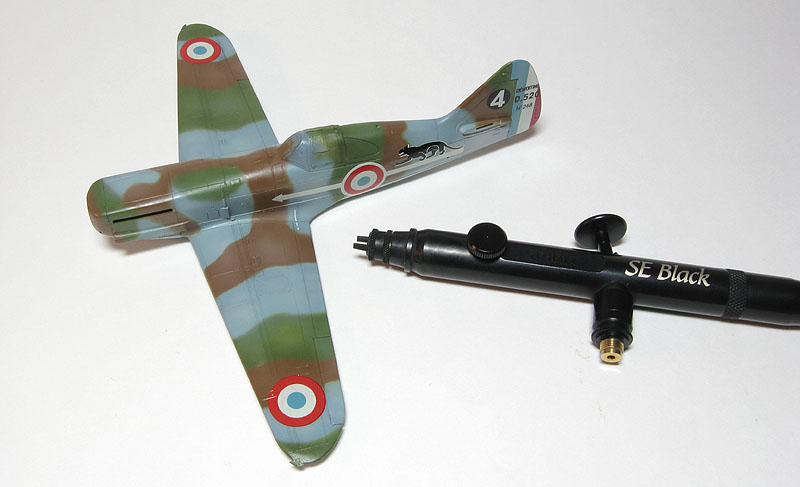
After three sections of Microscale Micro Sol, the decals still refused to conform to the panel lines on a few places. As a last solution, I applied Mr. Mark Softer. This is a very strong setting solution, designed to subdue even Tamiya and Hasegawa decals. It worked better, but I'm still not satisfied. I hoped the final gloss coat would helps to alleviate the problem, later.
After waiting the decal dry overnight, I cleaned any setting solution residue with a moistened rag and applied a good coat of Pledge Future in preparation for the washes. This sequence that I've been using for years (paint-gloss-decal-gloss-wash-flat) tends to reduce the crispness of the panel lines on the decaled areas, so this time I concentrated the use of Future along the edges of the decal films. This helped to reduce the step along the decals' borders... I washed the model with Burnt Umber and Black artists oils. As usual, I made the effect heavier on movable surfaces, on engine panels lines and around the landing gear:
Fluid staining was simulated on several spots by applying a tiny amount of oil paint and sweeping it in the direction of the airflow using a flat brush moistened in white spirit.
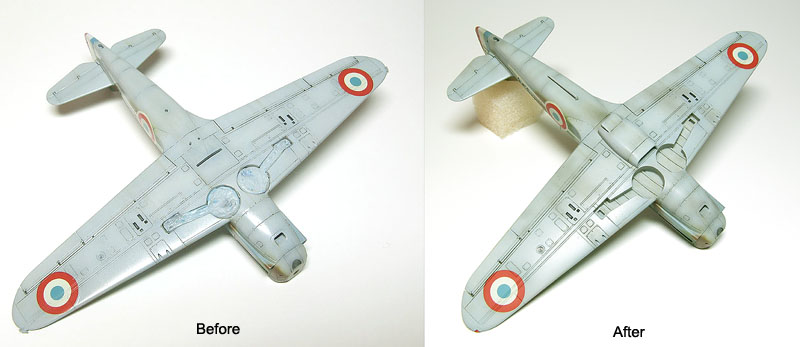
Once the oils dried, I applied the "air wash" (that very thin mix of brown and black) along selected panel lines to increase their dirtiness. I like to use the air wash trailing gun muzzles, shell ejector chutes and under the wings, about the same span of the landing gear in order to indicate some dirt swirled by the wheels during take-offs and landings:
The photo below shows the effectiveness of the air wash (in spite of the bad illumination):
I then focused on minor tasks. The landing gear wells were unmasked and the ventral (bendable) and upper fuselage antenna masts were installed. The radiator was glued in place with the internal actuating arms made of stretched sprue. I like to install these smaller items before the final clear coat to better blend them to the airframe. The clear coat was then applied, consisting in a mix of Testors Dullcote and Glosscote, roughly in a 1:1 mix. By one side, this flat-but-not-much coat seems more realistic for aircraft, but on the other hand it may reveal the decal borders under certain light angles.
The landing light received a bulb of stretched clear sprue mushroomed with a candle flame, and its clear cover was attached using Pledge Future. The wingtip lights were unmasked, and the final weathering could start.
I used Prismacolor artists pencils for paint chipping. Cool Grey color was used over lighter camouflage colors, while Light Grey and Silver were used on the rest of the airframe. Silver was applied more heavily along the wing roots, access panels, and around the cockpit areas.
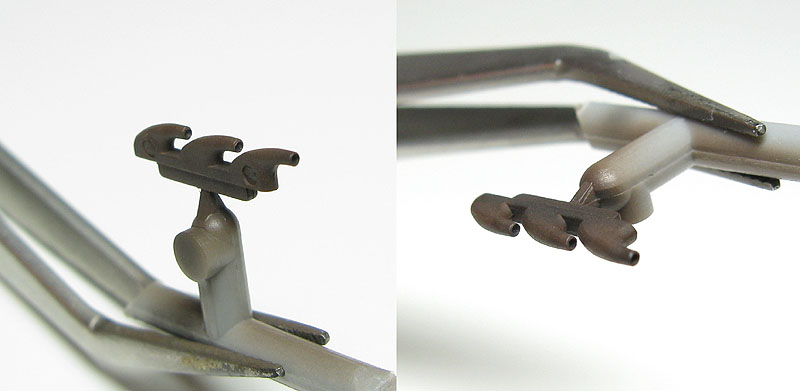
Back to the smaller parts, I drilled the openings of the exhaust stacks and applied diffusive brown and black colors, with a coat of Rustall between them. A black wash on the openings finished these parts:
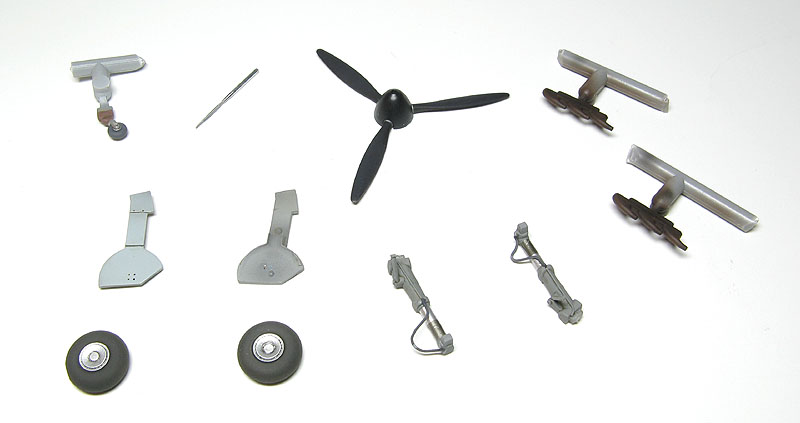
The landing gear legs received break lines, and I tried to simulate the short stroke of the oleos. The propeler blades were painted with a very dark flat grey (mixed with Tamiya XF-1 and XF-2) and Aluminum (GSI Gunze G8) hubs. The brightness of the Aluminum was reduced with a very thin coat of flat black. The blades would receive some paint chipping later. The spinner was painted with semi-gloss black (G92) to replicate wartime photos. The wheels hubs were painted with Aluminum (G8) and whased with oils. Once dry, the hubs were masked and a coat of rubber color was airbrushed. Over these, a light mist of Tamiya Buff (XF-57) helped to make them more realistic. The new Pitot tube was turned from a metal pin on a Dremel.
The Pitot tube was painted, the landing gear doors weathered, and then I proceeded with the installation of all these details. I had to tweak a bit with the landing gear until the wingtips were perfectly at the same height from the ground. The D.520 also had a strange wheel camber, and Hasegawa's tight fitting of the wheels with the struts helped here. Interestingly, the kit's landing gear don't even get close to fitting inside the wheel bays, but that's Hasegawa's fault... Prismacolor pencils were used to add some additional chipping here and there, and pigments were sparingly used to add dirt to the walking area of the wing root and under the wings.
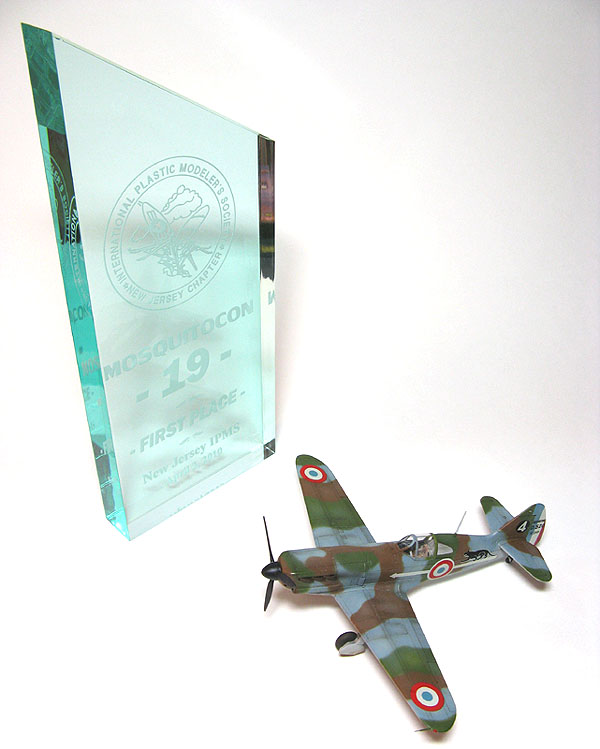
At a first glance, I thought the weathering was a bit overdone, but on a second look, I'm pretty satisfied with the way it came out. I'm strongly trying to avoid the current trend of overweathering aircraft models, a common mistake these days, in my opinion. Here are the final pics:

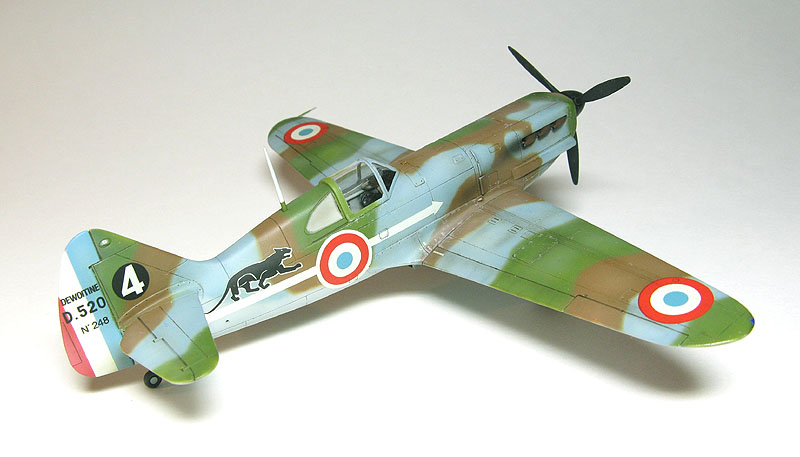
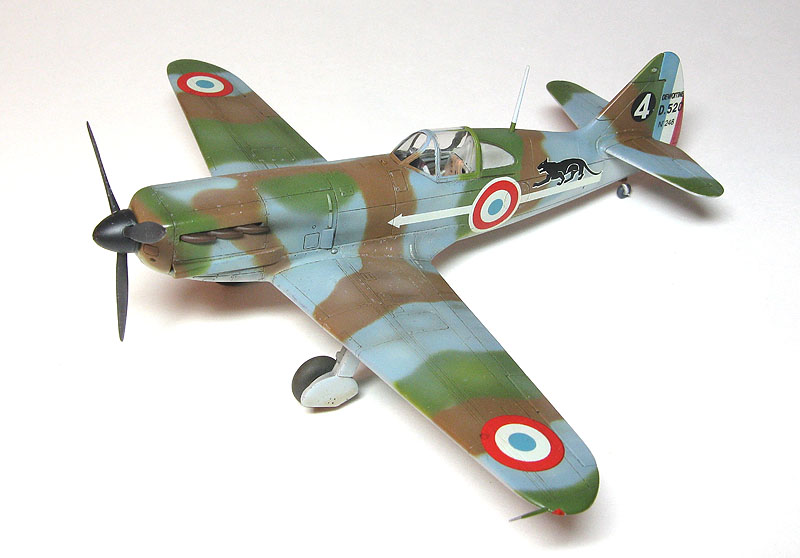
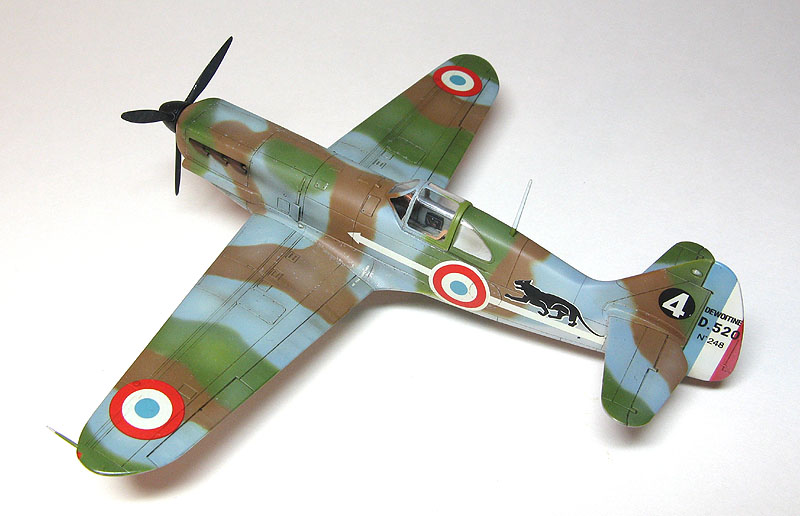
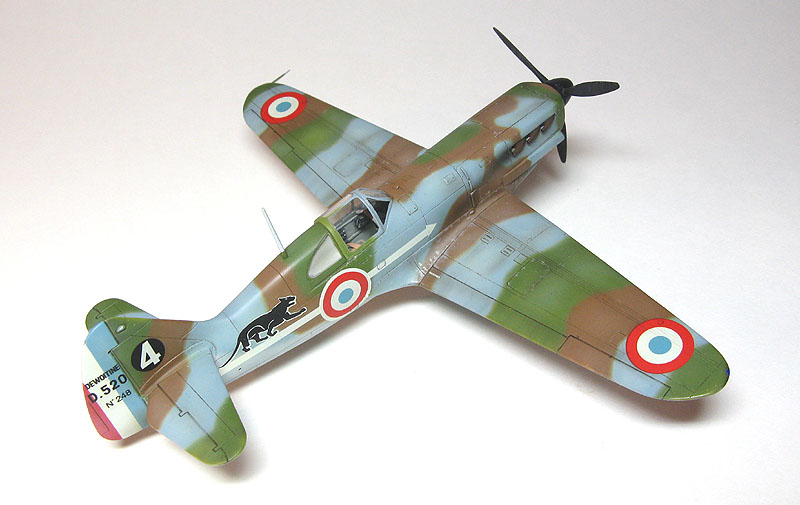
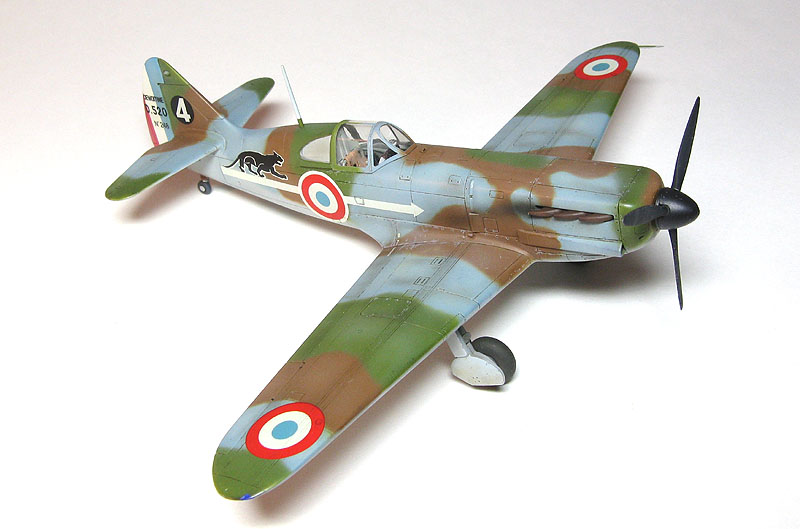


I finished this model on the day before MosquitoCon XIX, held at Wayne NJ, USA, on April 3rd 2010. It was awarded 1st place in Propeller Aircraft - 1/72 and smaller category. I'm really proud of it, considering the improvised workbench on which it was built.
| Technical file | |
| Kit:
|
-
Hasegawa AP47 |
| Additions:
|
|
| Basic
colors: |
-
Primer: Gunze Mr. Surfacer 1200 - Camouflage: see text - Aluminum (wheels and oleos): GSI Gunze Silver (H8) - Flat Black (propeler and other details): Tamiya Black (XF-1) - Semi-Gloss Black (spinner and other details): GSI Gunze Semi-Gloss Black G92 - Clear coats: Testors Dullcote (#1160) and Glosscote (#1161) Lacquers |
| Notes: |
-
Cockpit sidewalls, pilot's seat, and Pitot tube are scratchbuilt. |
Rato Marczak © 2010
