| RPM Renault FT-17 in 1/72 |
| Started: A long time ago... Finished: December/2013 |
This
little model has been sitting on my workbench for more time than I dare
to mention. It is the Renault FT-17 tank - one of the most successful
tank designs in history:its basic configuration – crew compartment at the front, engine
compartment at the back, and main armament in a revolving turret –
became and remains the standard tank layout .
It was fascinating to discover that, although entering in combat for
the first time in 1918, the FT-17 was used by several armies and was
used in 1988 by the rebels in Afghanistan against the soviet forces!
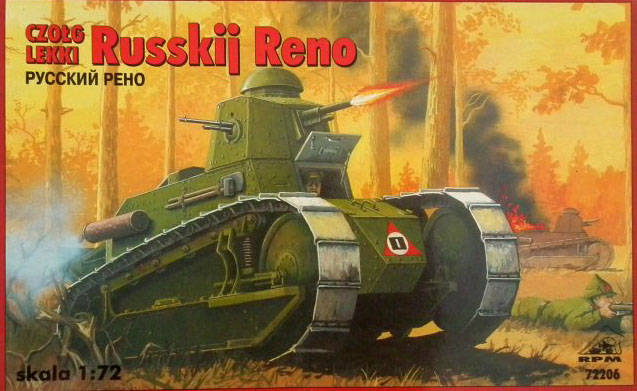
Well, back to the kit, I don't recall when I got it, but it is the RPM offering in 1/72 scale. RPM has traded the basic kit under several boxings, and mine is the russian version, but the parts for almost all versions are there:
I detailed and scratchbuilt many items in the sponsons. While the idle and driving wheels are very good, the suspension wheels are terrible, so I replaced them by punched disks of plastic. I also replaced rivets and bolts...
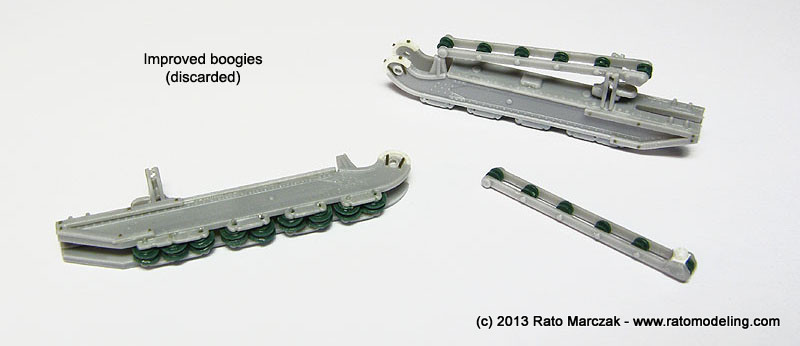
...but when I took a better look at the rubber tracks - well, they were worse than bad. Thick, and devoid of the characteristic details, they made me give up of them right away. I then scratchbuilt three or four individual tracks. The plan was to copy them in resin and make a link by link, workable track. It's been a while since the last time I enjoyed doing rubber molds and resin copies, and in this case I had to make sixty of them! Nope... I needed another option. That was when I put the kit aside - for years.
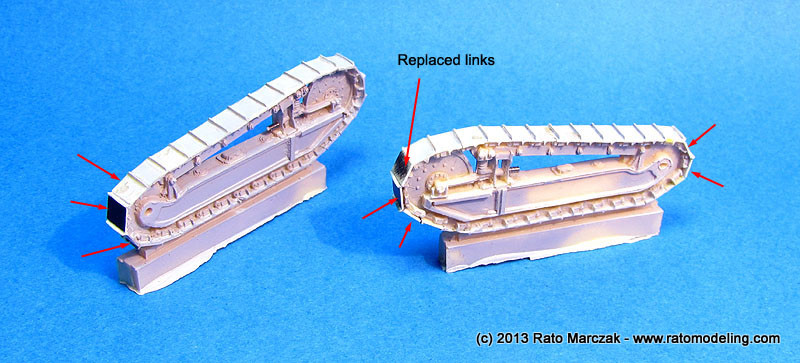
One day, surfing on the internet, I found Modell Trans Modellbau FT-17 tracked gear set (product MT 72005). They looked nice and would save me a lot of problems with the halted project. So I ordered one and resumed working on my little Renault. When the tracks arrived it was a mixed batch: a single resin piece for each sponson with nice details overall, but incomplete mold filling problems here and there as well as some pesky mold marks which I found impossible to clean. I did my best preparing the parts and filling holes with putty, but I also had to sand off completely a few track links and replace them by plastic parts. I reasoned I could dirty up the suspension enough to conceal the mold marks and small imperfections that couldn't be corrected. So I proceeded with the plan...
Well, back to the kit, I don't recall when I got it, but it is the RPM offering in 1/72 scale. RPM has traded the basic kit under several boxings, and mine is the russian version, but the parts for almost all versions are there:
When I started the model I
didn't have any idea of which version I would do, except that I wanted
the Renault turret with the Hotchkiss 7mm machine gun. The parts are
not well molded, with several imperfections over flat parts requiring
criterious sanding, The detail oscillates from good on some parts
to terrible, unidentifiable blobs of plastic on others.
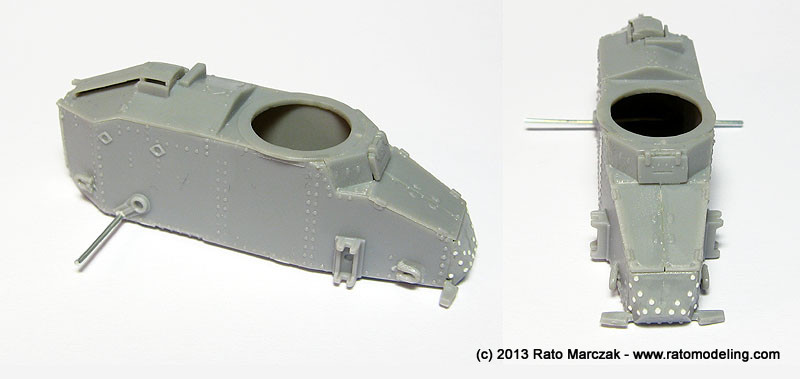
The assembly itself was easy, comprising a few parts. I had to replace rivets on areas where I sanded them off. I also replaced the rear axle by a metal pin for a sturdy anchorage of the sponsons .
The assembly itself was easy, comprising a few parts. I had to replace rivets on areas where I sanded them off. I also replaced the rear axle by a metal pin for a sturdy anchorage of the sponsons .
I detailed and scratchbuilt many items in the sponsons. While the idle and driving wheels are very good, the suspension wheels are terrible, so I replaced them by punched disks of plastic. I also replaced rivets and bolts...
...but when I took a better look at the rubber tracks - well, they were worse than bad. Thick, and devoid of the characteristic details, they made me give up of them right away. I then scratchbuilt three or four individual tracks. The plan was to copy them in resin and make a link by link, workable track. It's been a while since the last time I enjoyed doing rubber molds and resin copies, and in this case I had to make sixty of them! Nope... I needed another option. That was when I put the kit aside - for years.
One day, surfing on the internet, I found Modell Trans Modellbau FT-17 tracked gear set (product MT 72005). They looked nice and would save me a lot of problems with the halted project. So I ordered one and resumed working on my little Renault. When the tracks arrived it was a mixed batch: a single resin piece for each sponson with nice details overall, but incomplete mold filling problems here and there as well as some pesky mold marks which I found impossible to clean. I did my best preparing the parts and filling holes with putty, but I also had to sand off completely a few track links and replace them by plastic parts. I reasoned I could dirty up the suspension enough to conceal the mold marks and small imperfections that couldn't be corrected. So I proceeded with the plan...
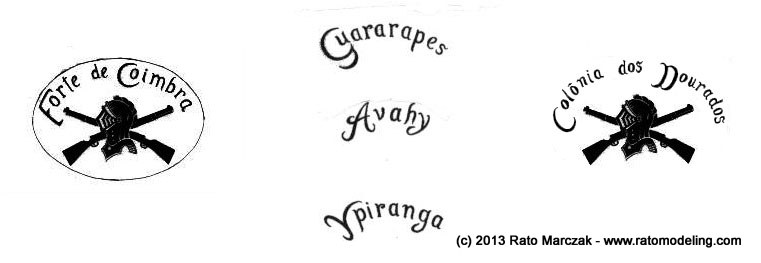
At that point the model was virtually ready for painting. I spent a good amount of time detailing the tail, and started to think about the painting scheme. Digging reference articles saved in my computer, I found a nice text called The Renault FT-17 Fighting Vehicle in the Brazilian Army - 1921-1942 (in Portuguese), by E.C.S. Bastos. Apparently, the original text is no longer online, but I know the author released a book on the subject recently. Anyway, I was fascinated by the fact that the FT-17 was the first tank used by the Brazilian Army, which received 21 of them in, well, 1921. Five were equipped with the Renault hexagonal turret, another was a radio vehicle, and the others had the round Berliet turret with cannon. Even more interesting, during a time each vehicle carried individual badges painted on the sides of the engine compartment. I was particularly hooked by the following photo, showing the Colônia dos Dourados car during the 1924 Revolution.

That meant I had to make my own decals... The problem was to draw the badge correctly, as the only photo of Colônia dos Dourados didn't allow a detailed view of the markings. Fortunately, the mentioned text brought the badge of Forte de Coimbra as well as the lettering used on three other cars (Guararapes, Avahy and Ypiranga). Using some artistic licence I draw my own artwork using the badge from Forte de Coimbra as reference and hand drawing the text to reproduce the same type of font used on the other vehicles.
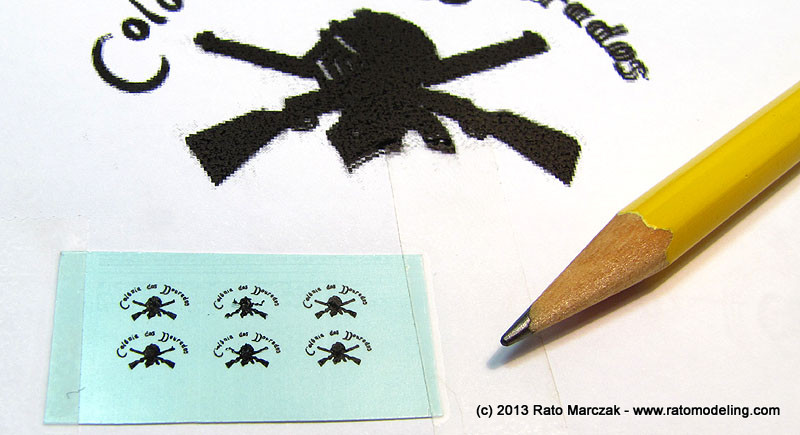
The final artwork was used to make decals with a laser printer on a clear decal:
The mentioned text also brought to light interesting info on the camouflage color. They weren't originally green, like the few preserved examples in Brazilian museums, but brown. Mr. Bastos is also a modeler, and I copied the color he used on one of his FT-17 models. I mixed automotive lacquers for this and applied it over the whole vehicle after a pre-shading with Tamiya Nato Black. I tried to preserve much of the black on the inner side of the tracks, larger bolts and axle caps for an effective false shadow effect. A wash with burnt sienna oils followed by a gentle drybrushing with light brown helped to bring surface details to life.
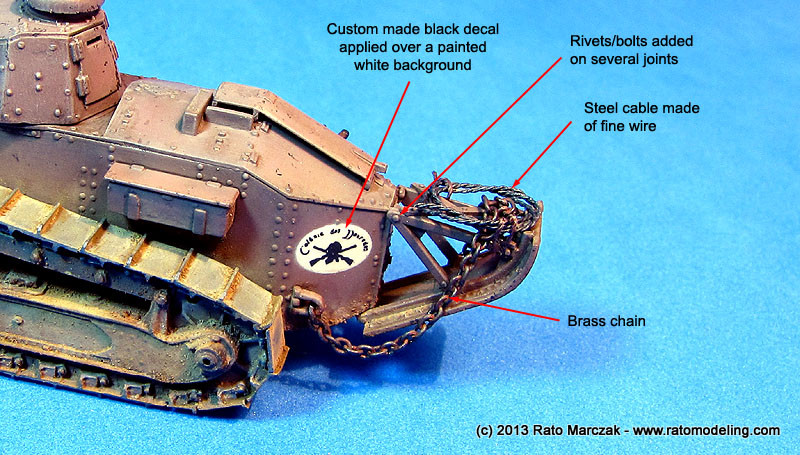
A plastic template containing an oval hole of suitable size was prepared to be used as a mask to paint the white background of the badges. The plastic template trick worked like a charm, and allowed trueing, something a regular mask wouldn't allow. I coated one side of the template with Microscale Foil Adhesive, let it dry, and voilá - I had a ridig, self-adhesive template. Once dry my custom made decals were applied with Micro Set/Sol system.
At that point several light scratches and paint chipping was applied over the hull. I had to weather the subject more than probably these vehicles ever had in order to hide the flaws on the resin sponsons, and it wouldn't make much sense to preserve the hull pristine.
The tracks were hand painted with Humbrol Polished Steel but not polised right away.
Next, I applied dry mud using several pigment brands. I tried to replicate the actual earth of their operational area, so a bit of ochre was used in the mix to make the dirt look lighter. On the track, I used the pigments mixed with fine static grass mixed with Windex. This allowed me to spread the mix along each link, but accumulating more on the teeths of the track links by making use of capillarity. Once dry, I gently removed partially the pigment from the flat areas of the links, allowing some of the polished steel shine to show.
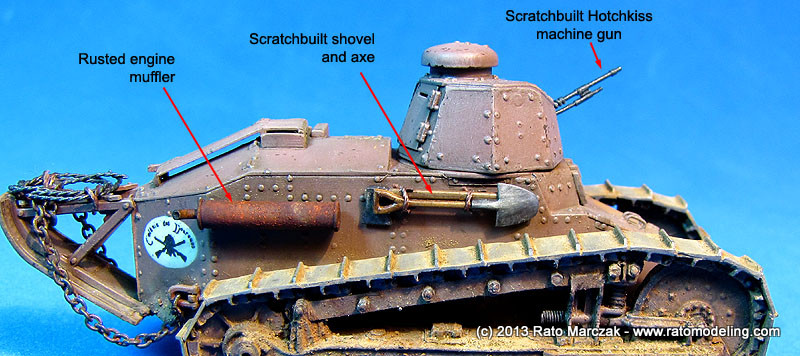
The kit's engine muffler was not good, so I made a new one from plastic tubing. I added some details attached to the tail as well. The characteristic chain is a brass item dirtied and rusted accordingly, while the steel cable is simply a length of wire painted and weathered:
Other items I had to scratchbuild was the shovel and the axe, which were painted, weathered and tied to Aluminum clamps glued to the side of the hull. The Hotchkiss MG was made from pieces of syringe needles and stretched sprue, and attached to it slot on the turret front:
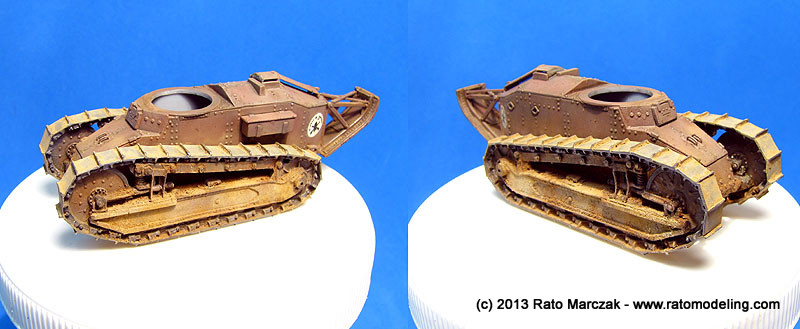
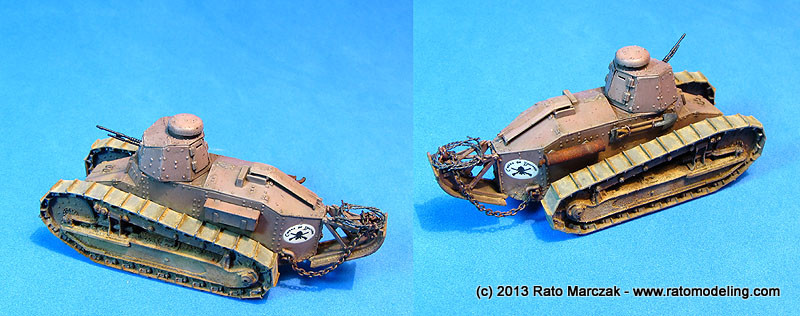
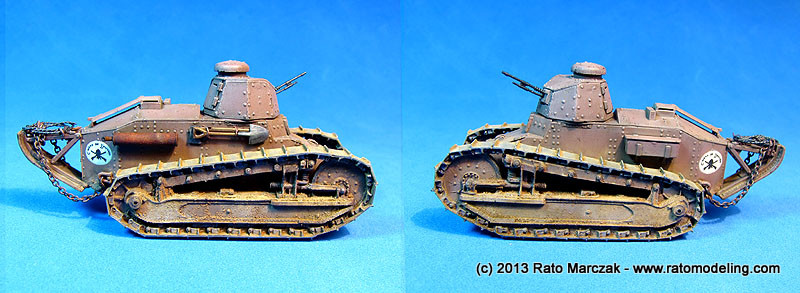
After retouching the mud on a few spots, I declared my little FT-17 done:
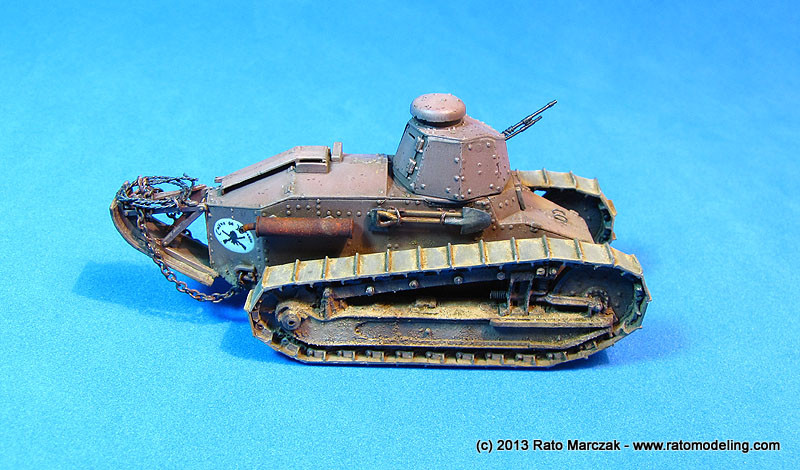
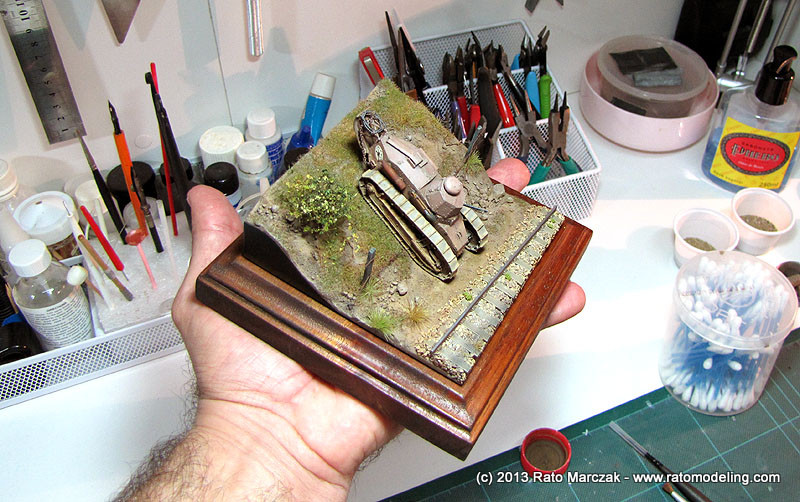
This thing is small, less than 5 cm from tip to tail, so to speak:
With
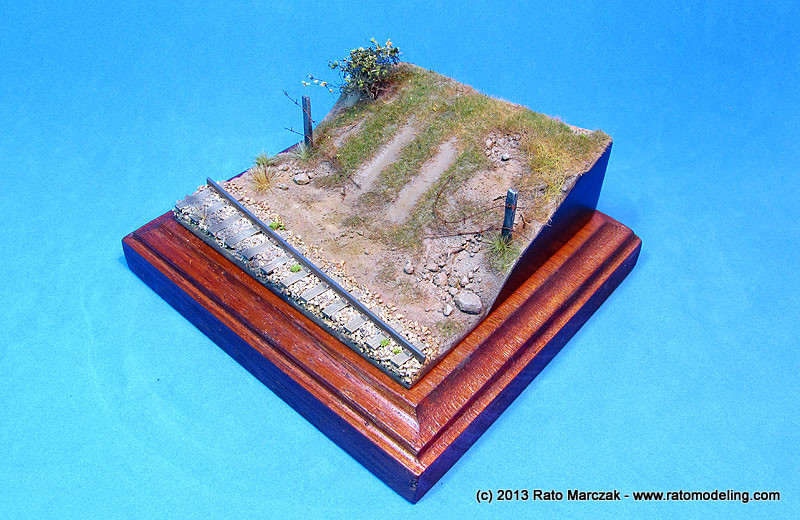
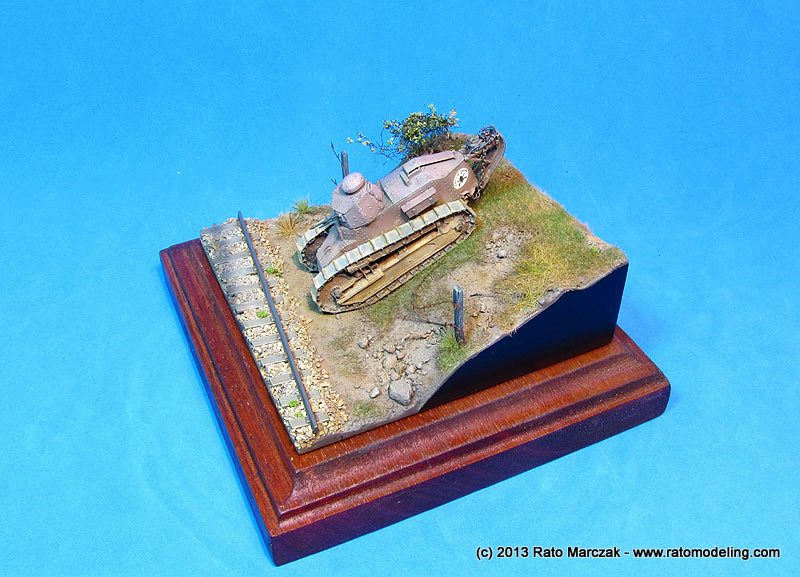
the vehicle done, I started to think on the display base. I used the
aforementioned photo from the 1924 Revolution as a starting point, but
didn't want to make it literal (I wish I could...). The idea was to
pose the FT-17 going down a small bank.
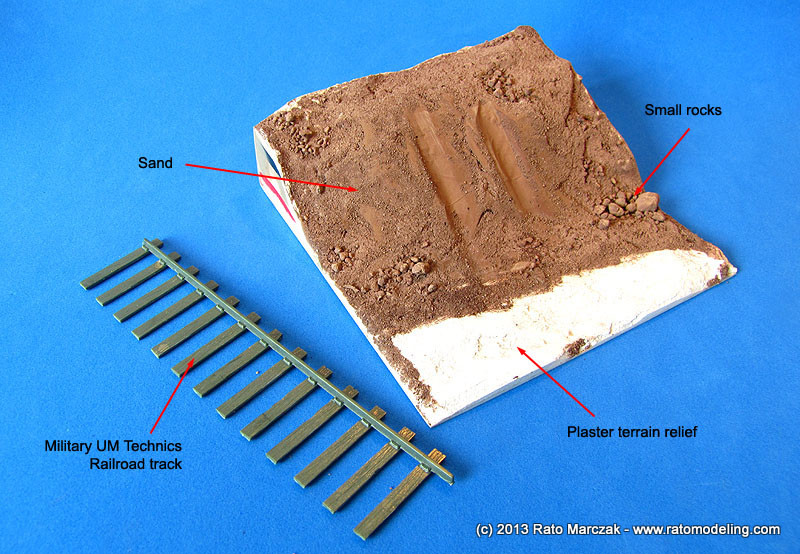
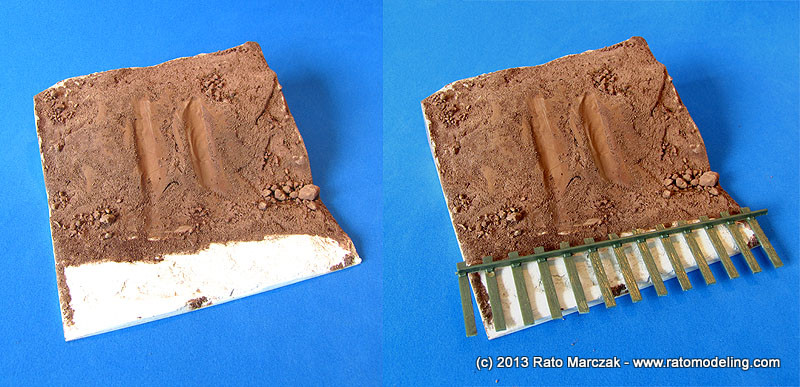
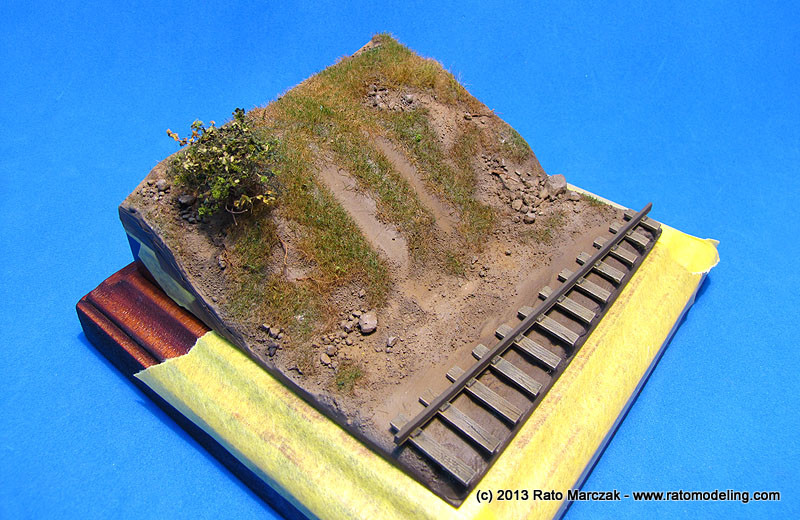
I started making a plastic box with the basic relief cut along the sides. Inside, plaster impregnated paper was used and let to dry thoroughly. Then, water diluted white glue was spreaded liberally and fine sand and small rocks sprinkled over, trying to concentrate the larger rocks on the lower area of the bank. At this point I noticed that the balance of the scene was not good, so I decided to add a length of a railroad track on the lower edge. Fortunately, I found a UM Technics Railroad track on my not-sure-where-I'm-going-to-use-it parts box, and opted for cutting one rail off due to space limitations.
The track was glued angled to the edge of the base, so I had to cut the planks carefully. These items are not well detailed, so I spent some time scribing wood grain marks that would help a lot later during the weathering:
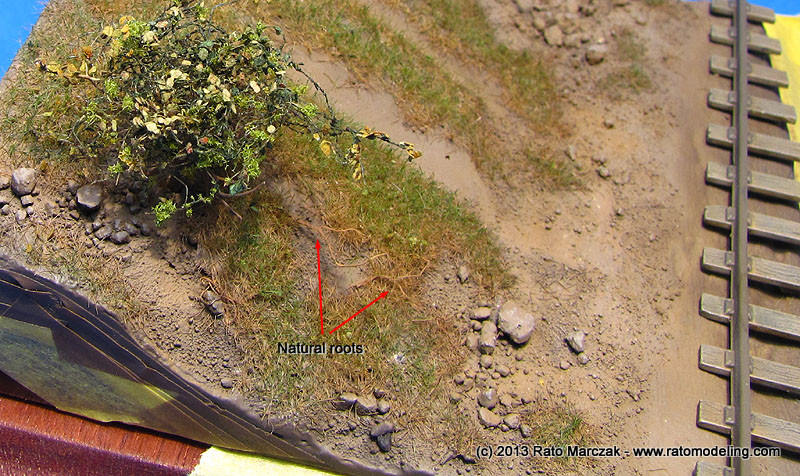
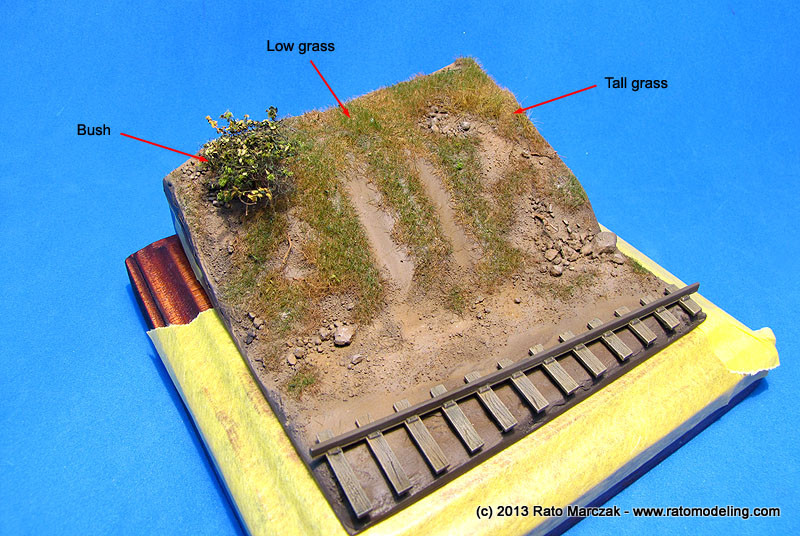
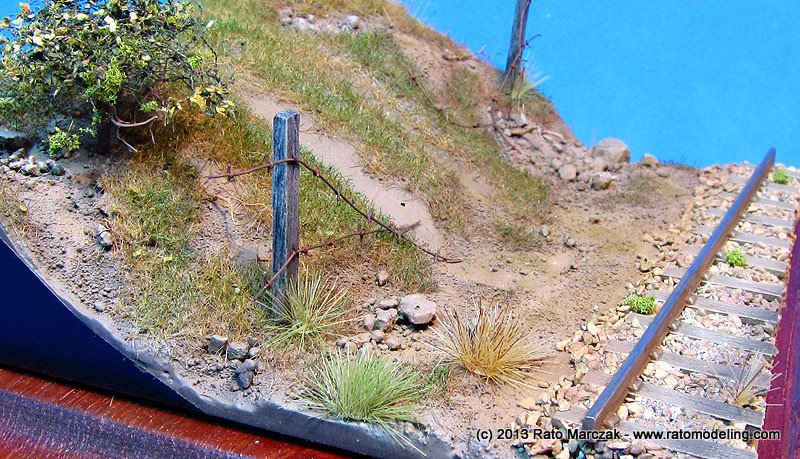
Next, I used a small left over bush from another project and glued it to a previously drilled hole on the top side of the bank. I used low and tall static grass for the ground vegetation. These were glued in place using scenic glue and a home-made grassinator. Some time was spent drilling small holes where I inserted small natural dried roots.
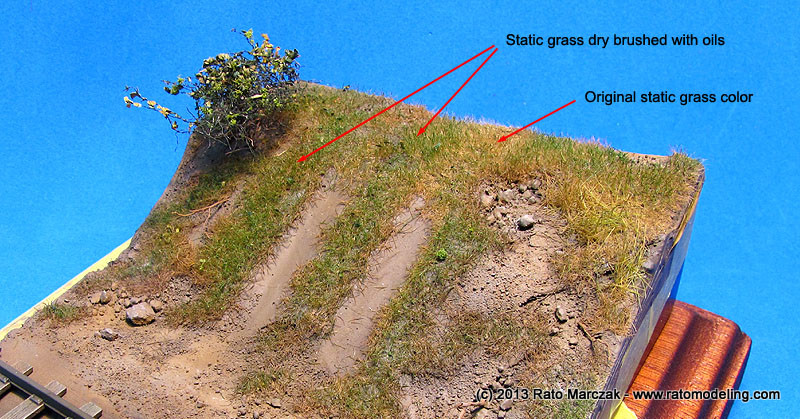
At this point, I didn't have the track glued to the base yet. The reason was that I wanted to paint it separetely, but besides that, I airbrushed light earth all over the base, including the grass areas. This is a technique that I've being mastering for a while. The thing is that static grass had that synthetic shine that I don't like to see in dioramas - but not only that. If you look carefully to the grass on your backyard you will see that no matter how green the grass is, the parts touching the ground are always earth colored, and I wanted to depict that. To airbrush earth tones over the grassed areas solve both problems. The disadvantage is obvious: you loose the color of the grass and have to resource to drybrushing to make it green again. On the other hand, you don't need to have a stash of multi-colored static grass bags anymore - any color will do...
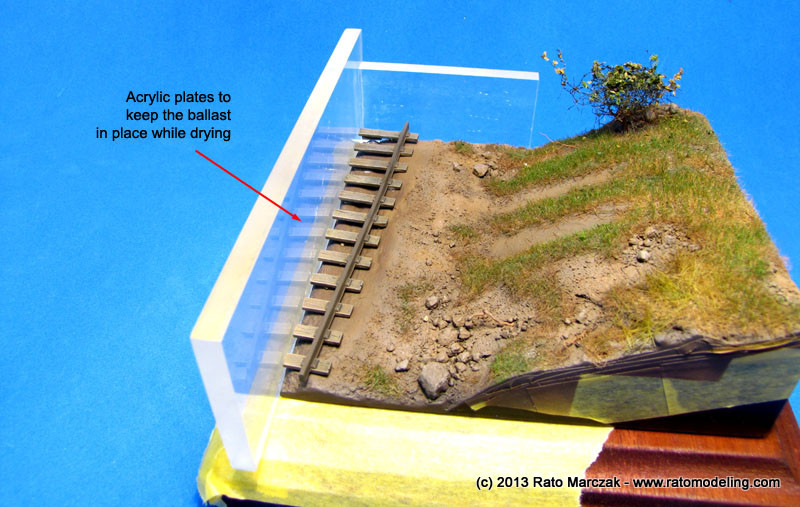
Once
satisfied with the overall appearance, I had to fill the underside of
the tracks with ballast. I used railroad modeling ballast in gray and
brown colors, but they looked too stark. So I washed it with a very
thin mix of dark brown oils and let dry before using. Adding a few
rocks of different color (dark brown, ligh gray) also adds a lot of
realism to the scene. The ballast was poured between the planks and
arranged with a brush handle. In order to hold it in place, I used a
small acrylic jig and then I flowed diluted scenic glue with a syringe.
Once dry, the jig was removed and I proceeded with a gentle drybrushing
over the ballast:
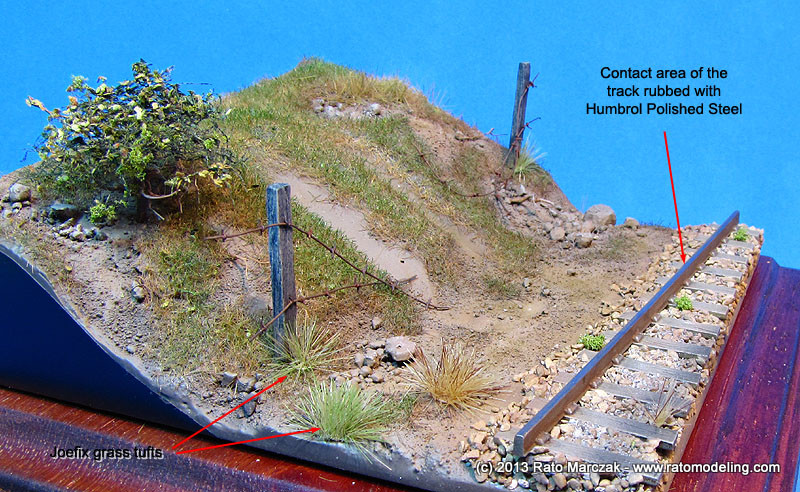
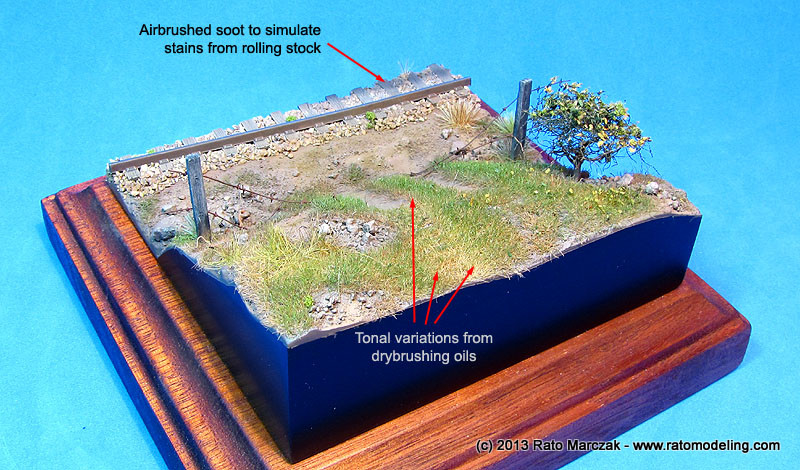
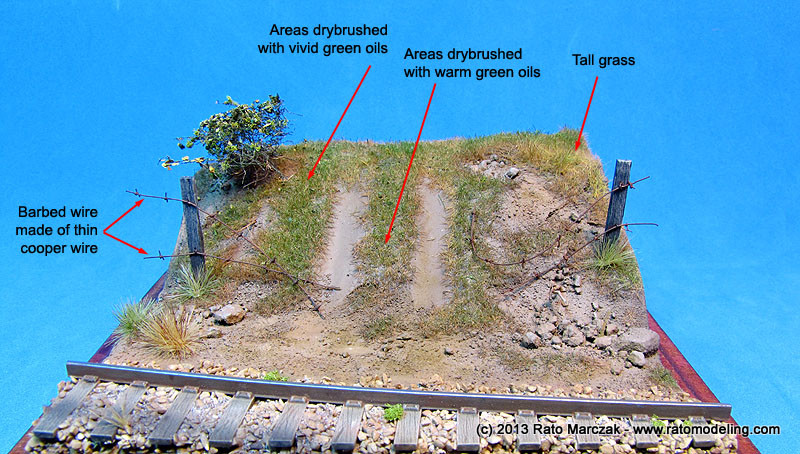
Three
steps finished off the tracks: (a) I airbrushed highly thinned soot
color along the center of the planks to simulate stains; (b) The
same pigment mix used on the FT-17 was lightly airbrushed over the
lower bank in order to dirty up
the rocks along the borders of the ballast and equalize the chromatic
range of the scene; and (c) Humbrol's Polished Steel was rubbed on the
top of the rail with a cotton bud and polished. I also went back and
further dry-brushed more vivid green and yellow tones on the crest of
some grassed areas:
The
final touch on the base was the addition of a barbed wire fence. I made
the poles with two pieces of matchsticks. They were scrubbed with a
steel brush to highlight the grain and treated with black and white
pastels, using a method I learned from Brett Galland, of Sierra West scale models.
They just look perfectly weathered, old dry wood. I tried to use
photo-etched barbed wire, but it simply didn't look good to my eyes. In
the end I made it from fine wire by adding small knots also of wire
along them. They were painted in dark rust color:
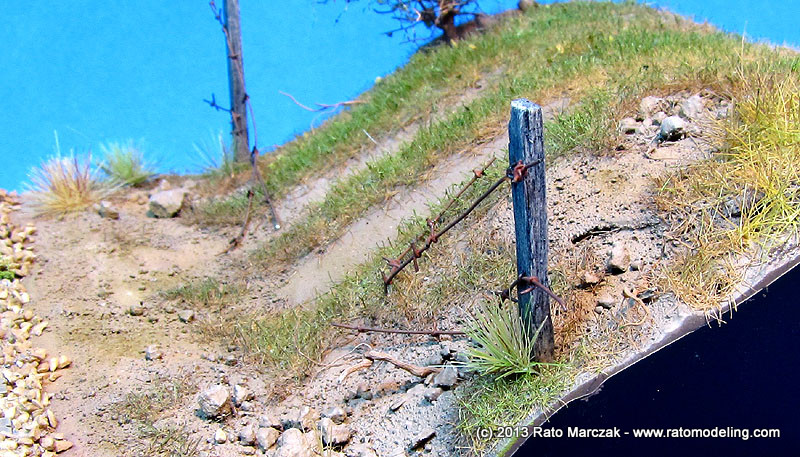
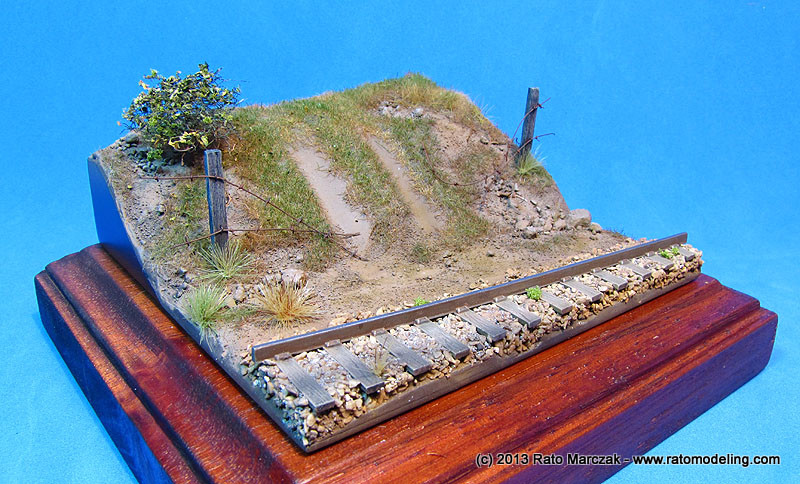
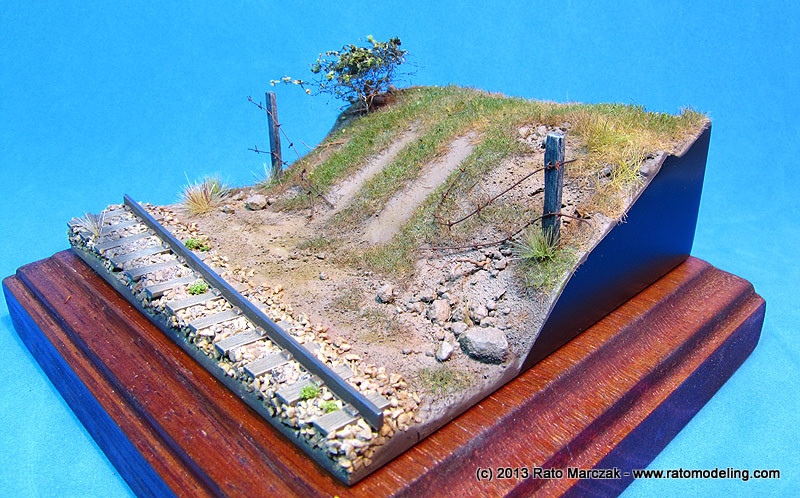
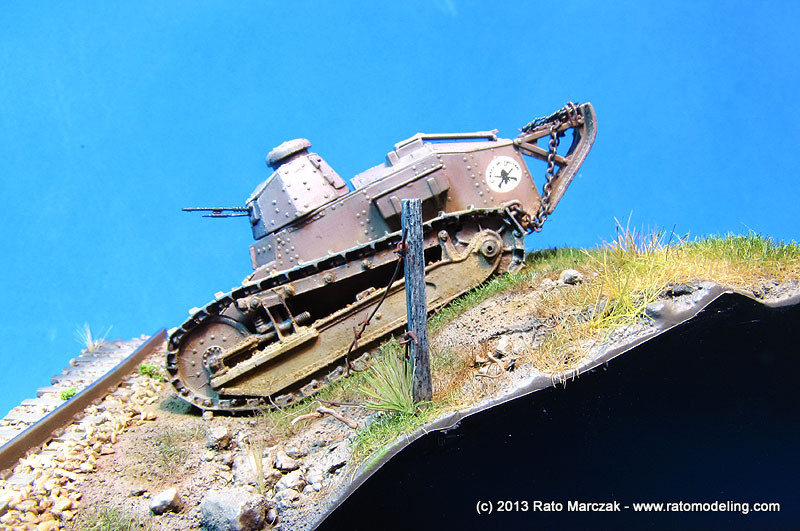
The
poles were superglued to the base, and the barbed wire was fixed on
them using small pieces of wire inserted in holes previously drilled. I
posed the wires to look like if the FT-17 had just broken through the
fence:
Finally,
Joefix grass tufts were glued on a few strategic places, small
vegetation added here and there, and a few dried leaves spreaded under
the bush. The base was done:

The final step was to glue the Renault in its place:
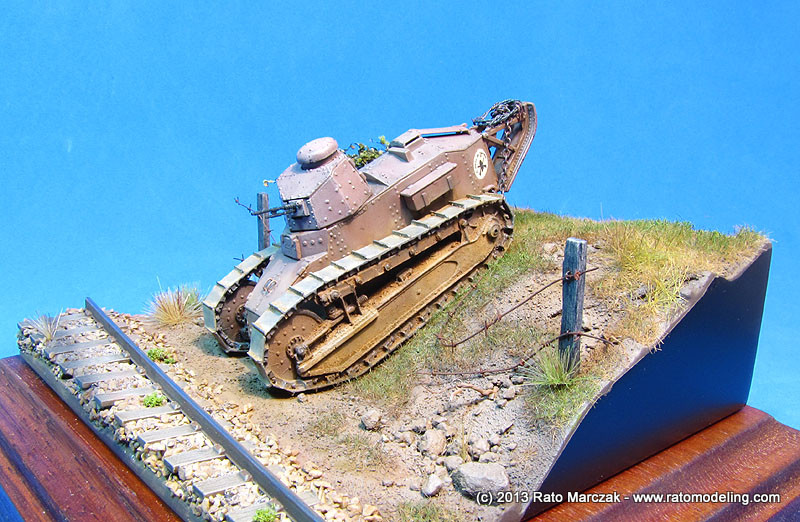
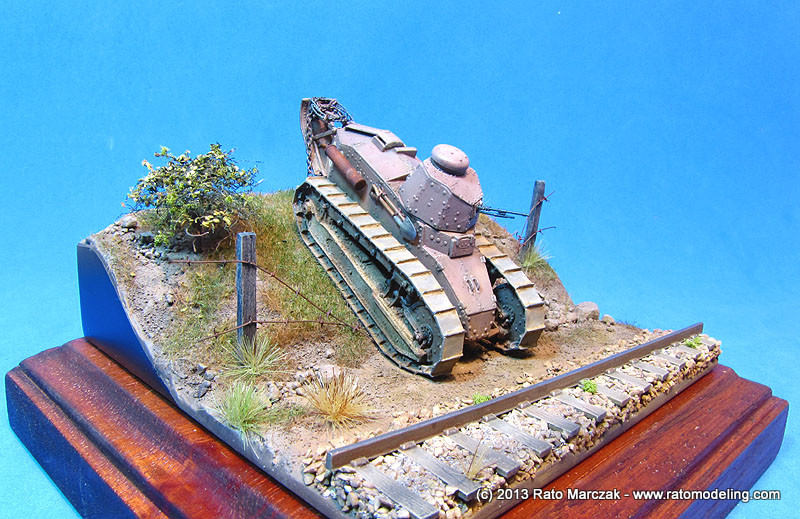
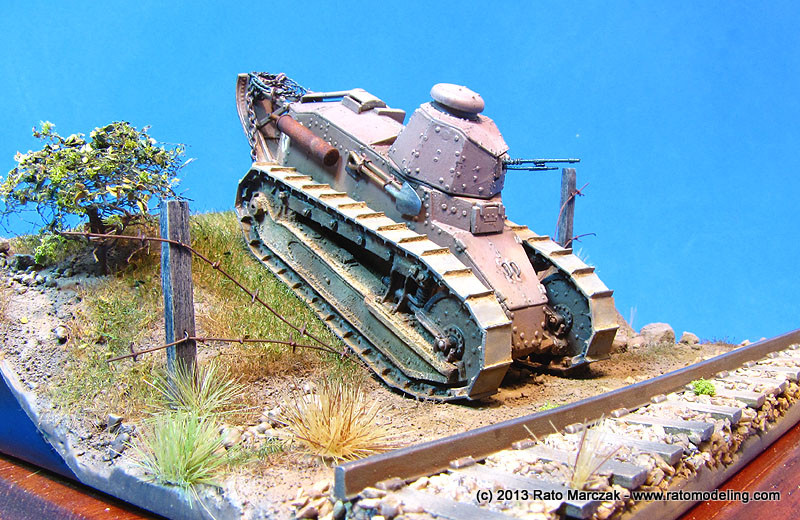
Some photos of the finished model:
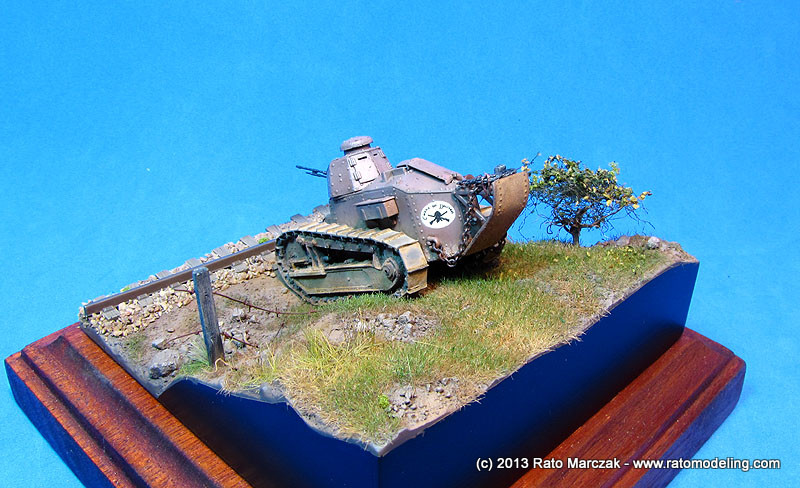
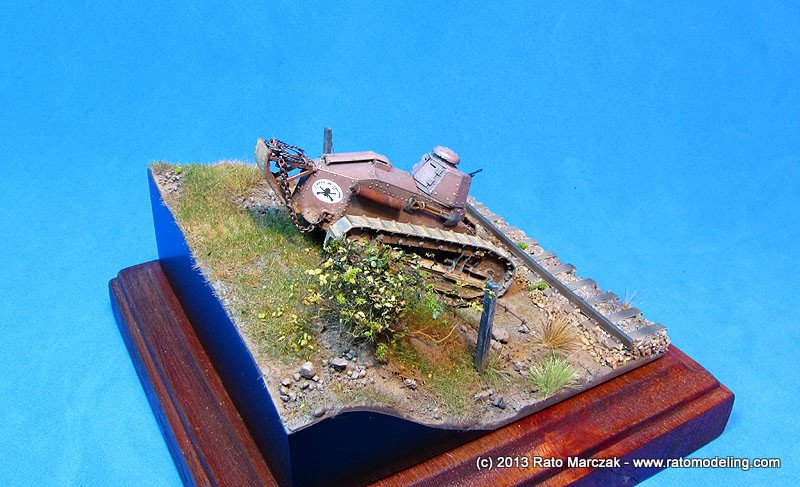


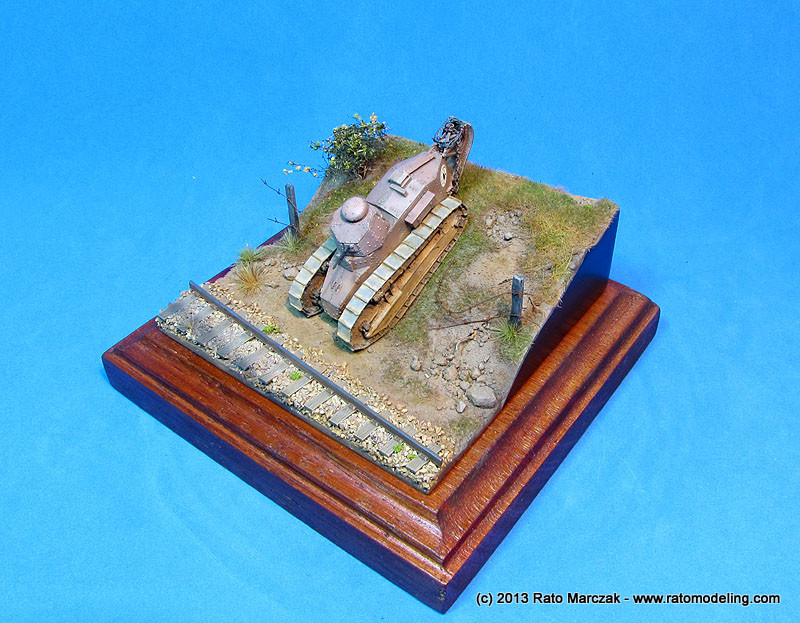
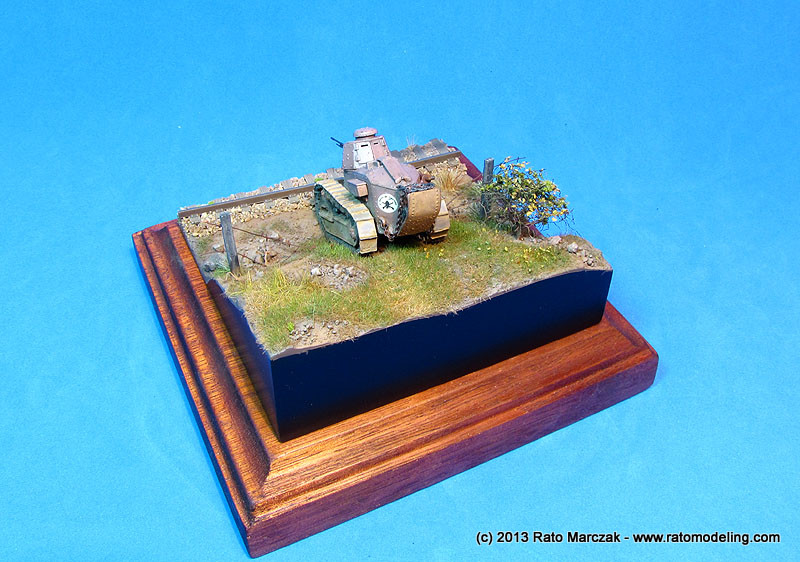
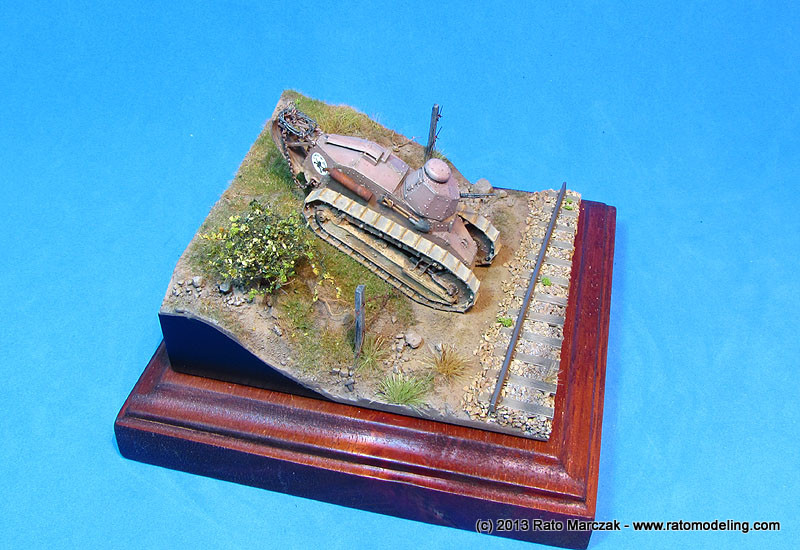
Yes, it is a small scene indeed. But like I always say, a display base adds a lot value to your model:
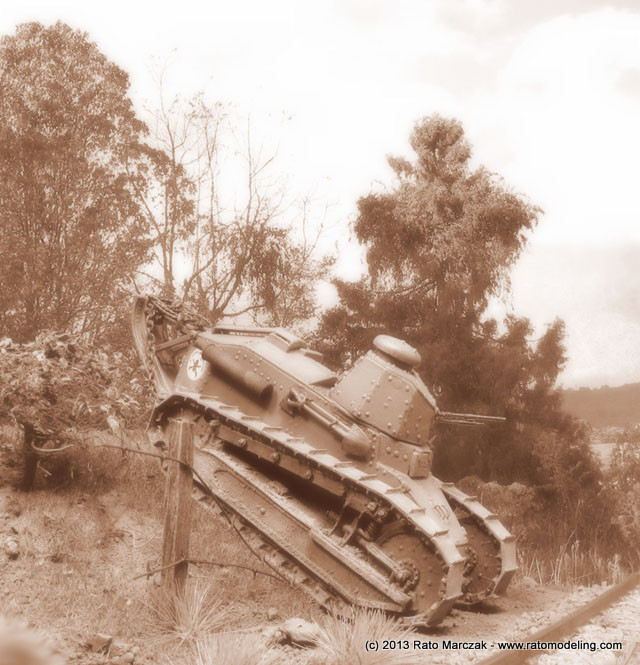
And of course, I couldn't resist the mandatory photoshopped image:
| Technical file | |
| Kit:
|
-
RPM #72206 |
| Additions:
|
-
Modell Trans Modellbau FT-17 tracked gear set (product MT 72005) |
| Basic
colors: |
-
Primer: Mr. Surfacer 1000 in spray can - Basic camouflage: home mixed automotive lacquer. - Flat varnish: Testors Acryl Flat Clear (#2015) |
| Notes: |
-
Several scratchbuiltdetails (see text). |
Rato Marczak © 2013
