| Nam's Taxi - Academy M113A1 ACAV in 1/35 |
If
memory serves me well, this may well be my first 1/35 scale AFV in
decades! I always saw the the M113 as a symbol of Vietnam War, and
decided to give the Academy kit a go during a group build of our
modeling club last year. I didn't finish it in time, so I decided to
put it in a small diorama.
And since it was a group build, I did not worry about taking in progress photos... sorry. I will show you here only pictures of the finished model.
It was a rewarding experience to me, and I must add that - after so many 1/72 projects - the possibility of holding the parts with my bare fingers unfolded a whole new modeling universe to me.
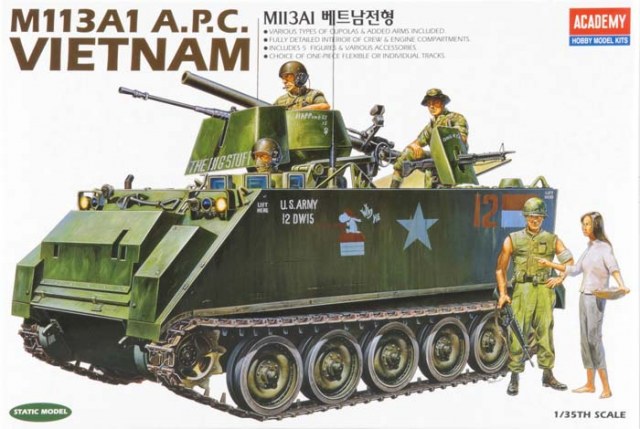
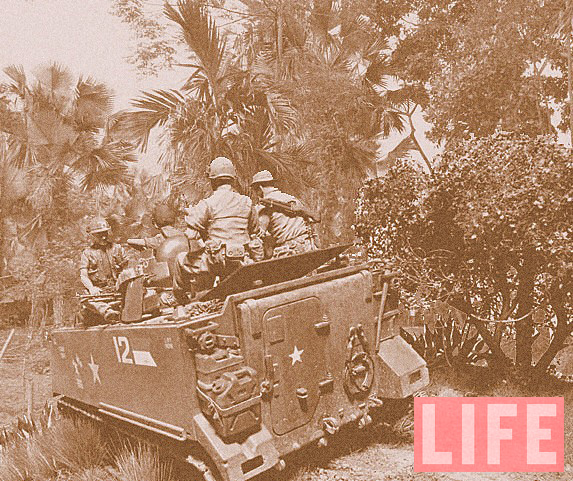
Back to modeling, this is the boxart of my sample:
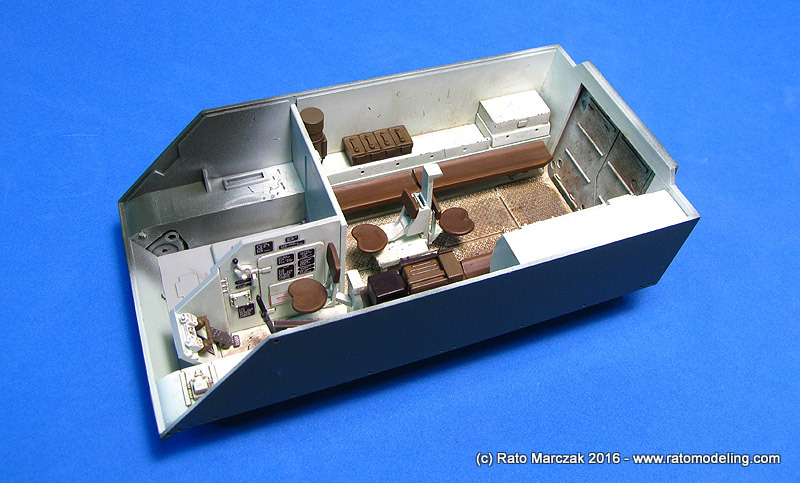
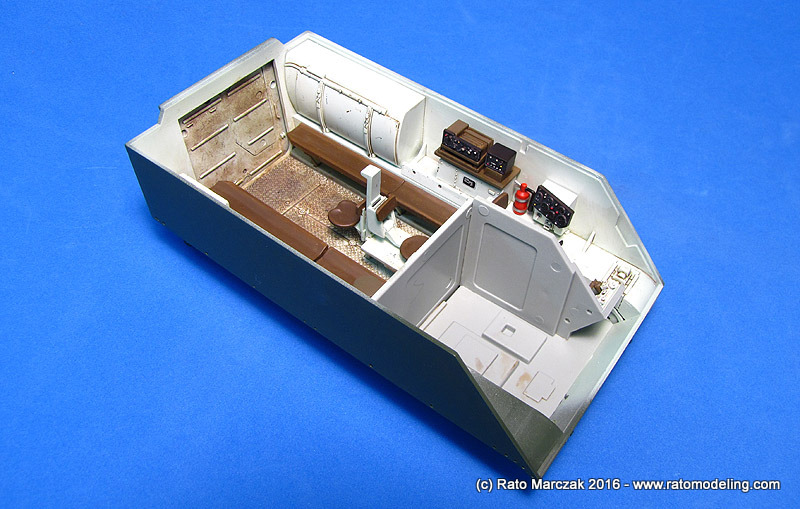
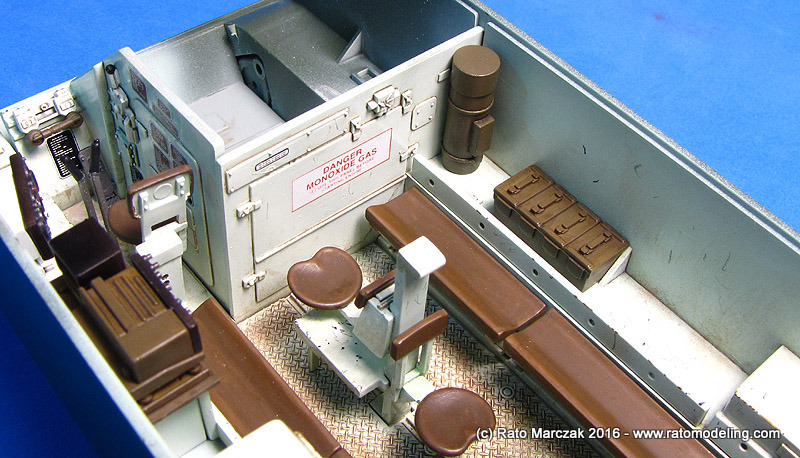
Planning to display the M113 in a vignette, I knew from the outset that I would be using some figures on top of the 'taxi'. Therefore I tried to make a prompt job on the interior, as not much would be visible with the figures riding the vehicle. Leaving the engine out, all I needed was an afternoon and an evening to finish off the interior:
And since it was a group build, I did not worry about taking in progress photos... sorry. I will show you here only pictures of the finished model.
It was a rewarding experience to me, and I must add that - after so many 1/72 projects - the possibility of holding the parts with my bare fingers unfolded a whole new modeling universe to me.
Back to modeling, this is the boxart of my sample:
Planning to display the M113 in a vignette, I knew from the outset that I would be using some figures on top of the 'taxi'. Therefore I tried to make a prompt job on the interior, as not much would be visible with the figures riding the vehicle. Leaving the engine out, all I needed was an afternoon and an evening to finish off the interior:
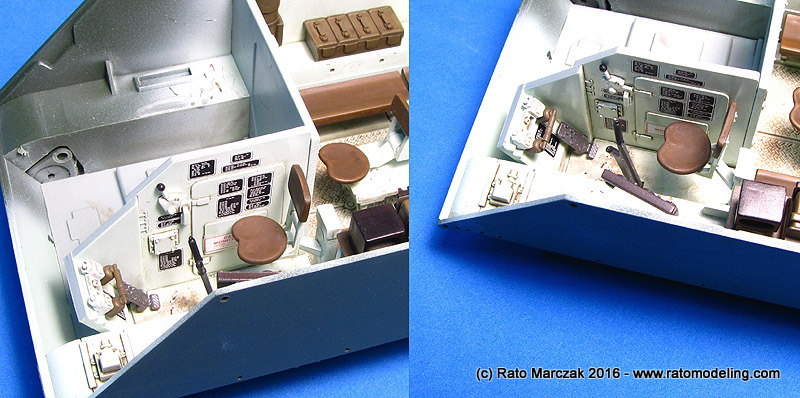
The Academy kit is reasonably well detailed, but I didn't even bothered with ejection pin marks. All I did was to paint the interior, add some weathering and a lot of dirt on the floor. The kit's decals add much to the realism too, particularly the many placards, even though almost nothing will be quite visible with the crew onboard:

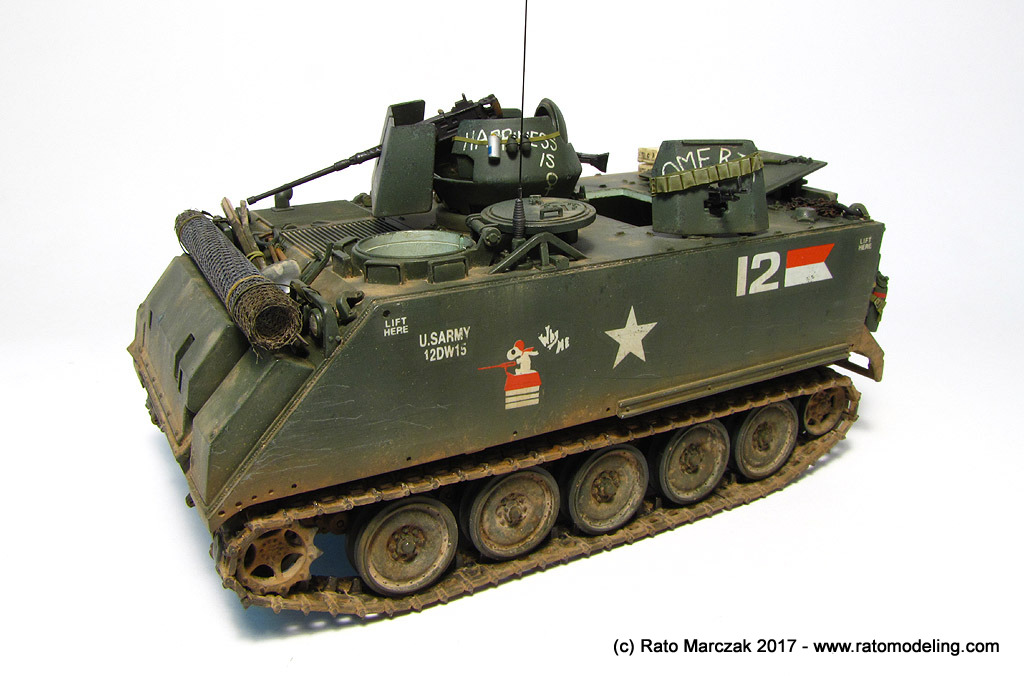
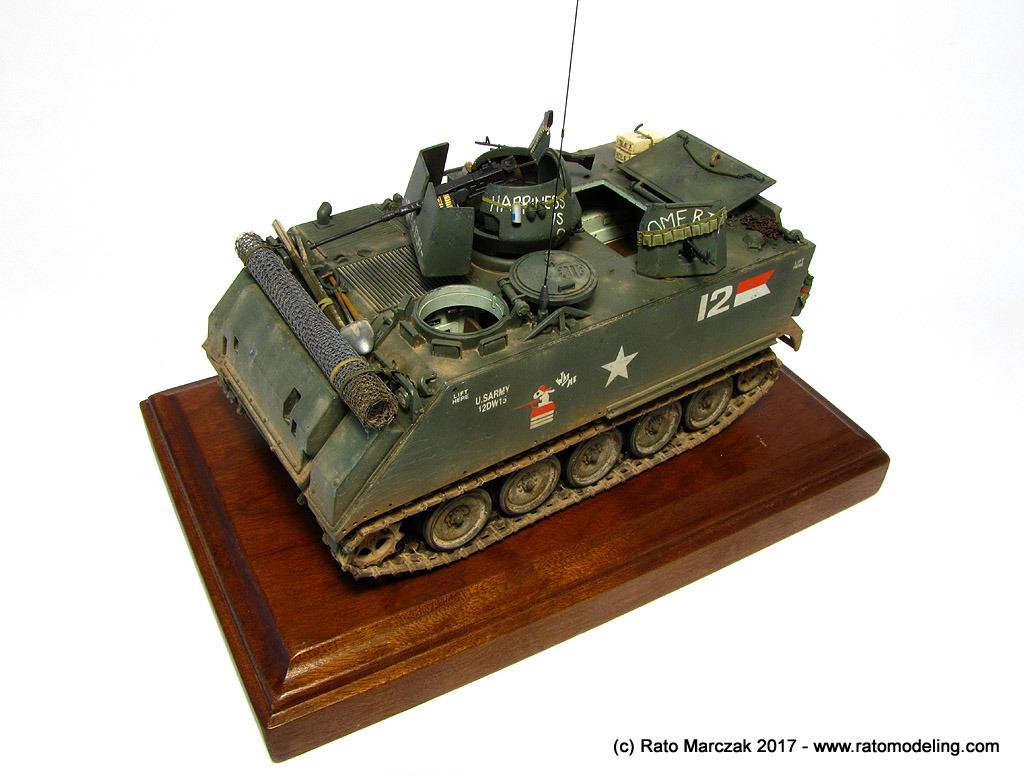
Fast forward a few months and the model was finished, except for the figures and the base. Let me show you some photos of the finished model and then I'll go back to cover the details up close (click for a larger image):
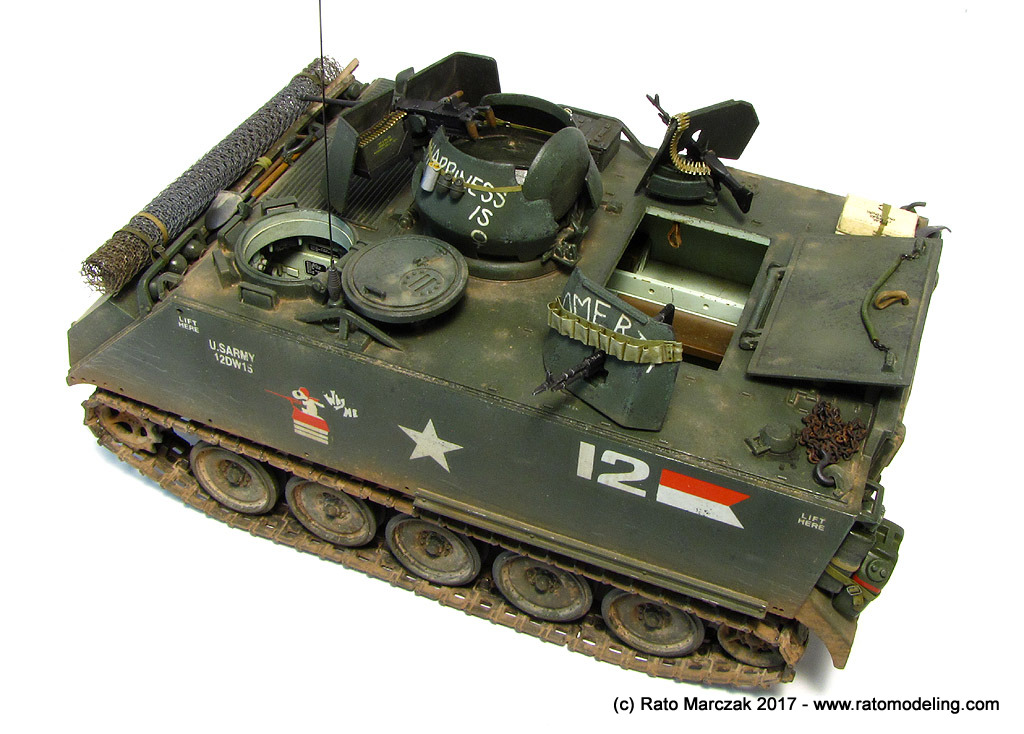
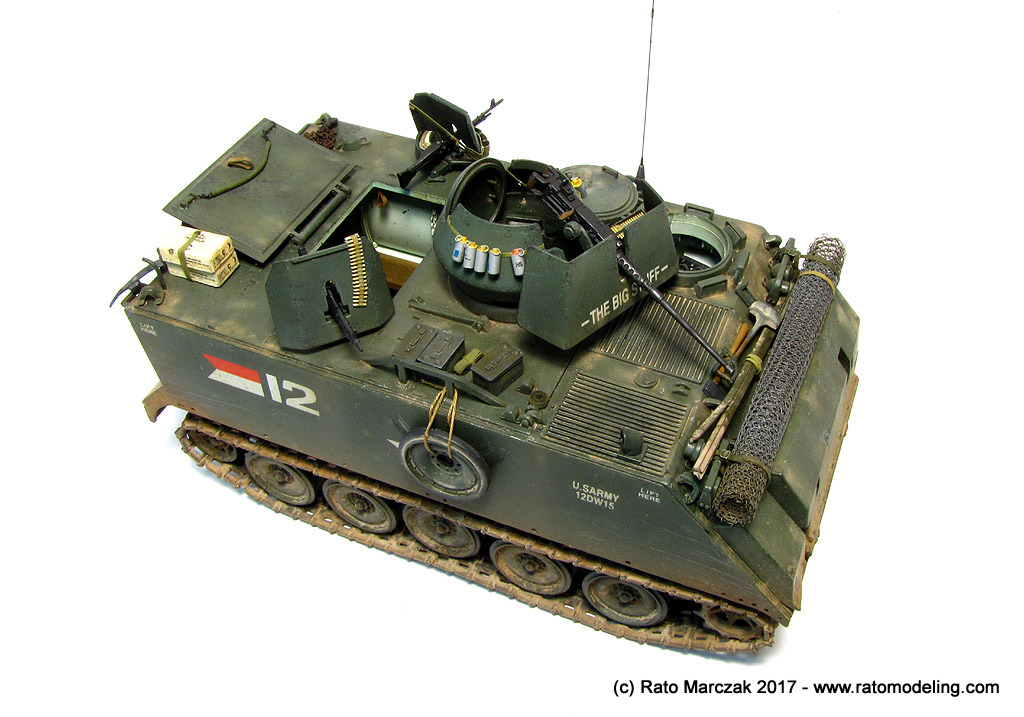
The assembly of the model went pretty fast. All I had to add were more realistic weld fillets along the joints using stretched sprue and liquid cement. The color is my own mix of Tamiya paints starting with the XF-13 J.A. Green and adding yellow, green, and grey. In the end I think I just turned 360 degrees and arrived at the same XF-13... Anyway, this is a perfect start for a Vietnam era olive green, and there are plenty color photos showing that. One thing that I've been doing more and more in my recent models is to add X-22 Gloss Clear to Tamiya paints. This not only results a satin finish to the model - sometimes sparing a clear coat preparatory for the decals, but also leaves a better surface to washes, filters and all the weathering that follow.
Once the main color was dry, I added a bit of white to make a lighter tone and highlighted several panels. This worked as a regular fading, and also as an initial dusting. The next step was to use the sponge method to create paint chipping on the steel parts. I said steel parts, for the M113 hull was made of Aluminum and wouldn't oxidize as dark as the steel. More on that later.
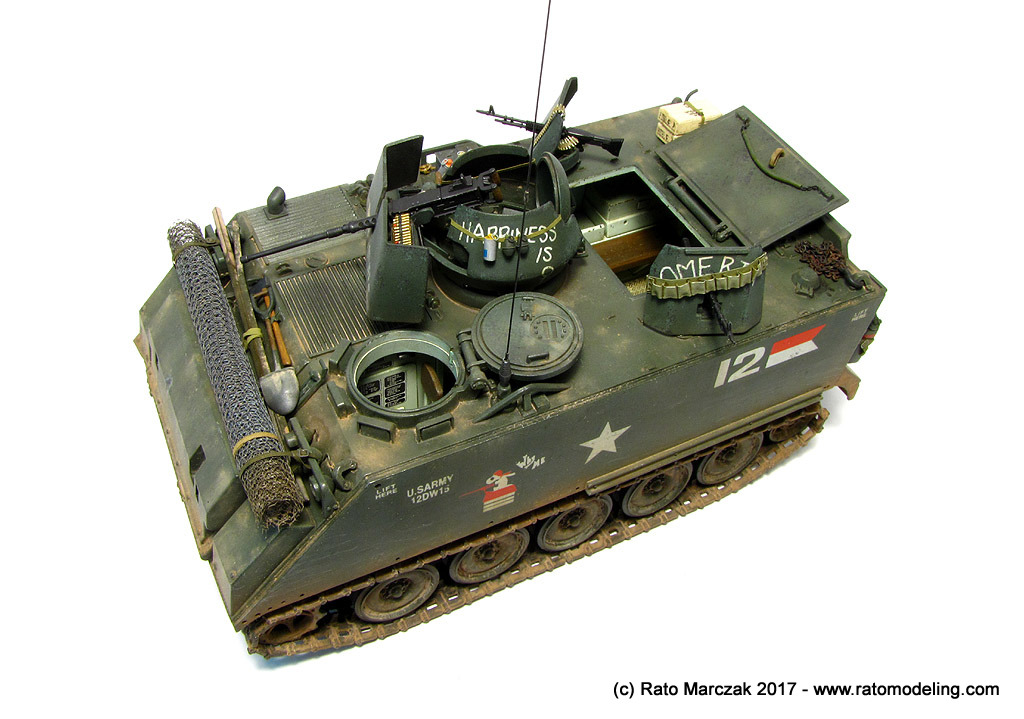
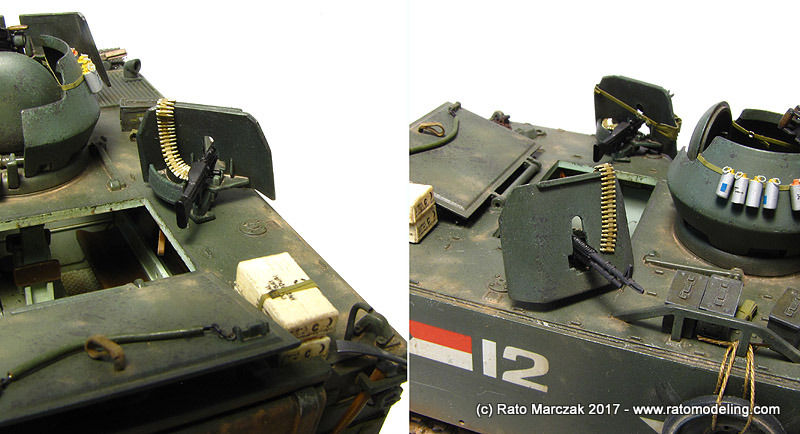
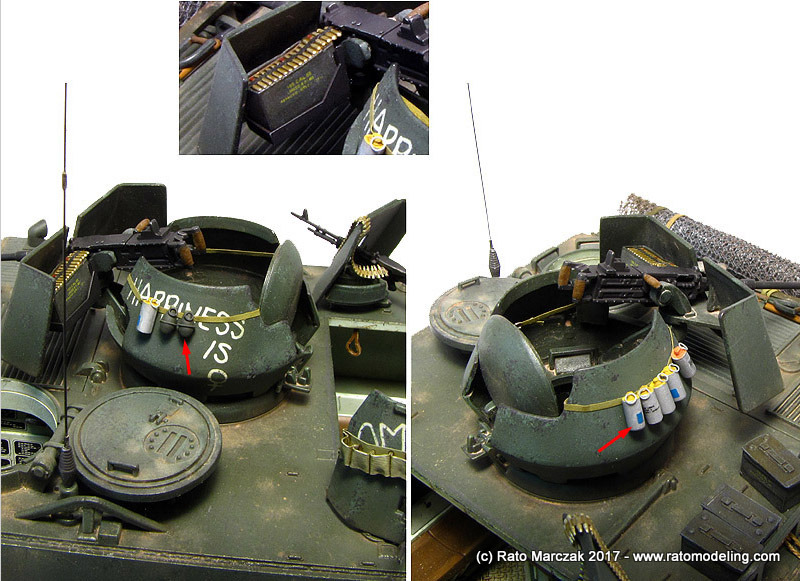
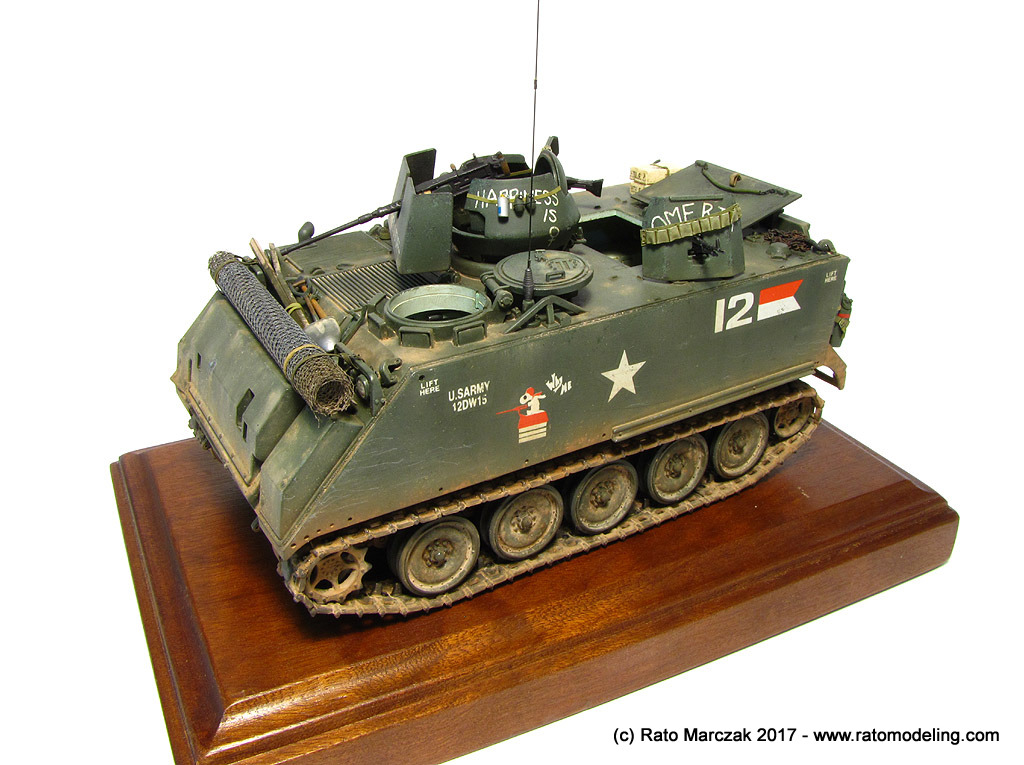
One of the aspects that I like in Vietnam vehicles is the messy disposition of things spread out all over the vehicle. I tried to replicate some of them, following what I saw in the photos. First, canvas belts were tightly tied around the commander cupola. They were made with painted Tamiya tape, pieces of thin plastic and photoetched buckles.
Another item that I saw repeatedly in wartime photos of ACAVs were bandoliers hanging on the M-60 shields. Crews used them to store granades, extra ammo, cigarettes, magazines, bottles, you name it. I thought it would be a learning challenge to scratchbuilt one, which I did using lead foil. Interestingly, I made it right in my first try and really liked the process and the final result. I left my bandolier with empty pockets, though.
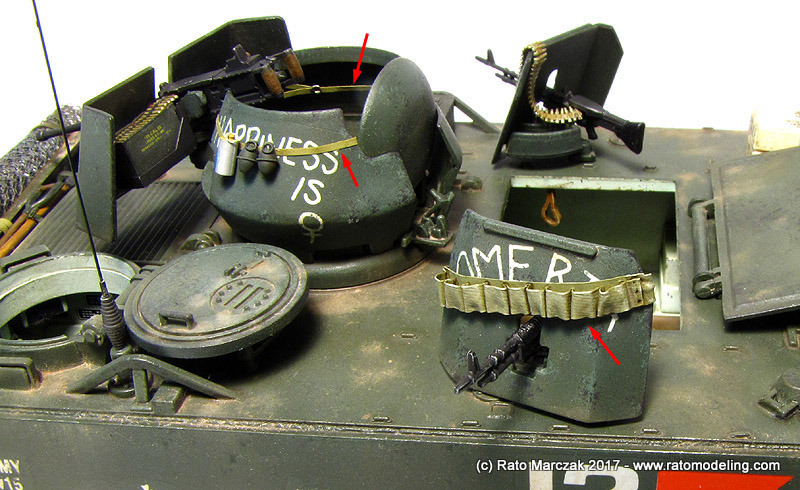
And since I was at it, I also scratchbuilt smoke and fragmentation granades and hanged them along the belts. The ammo belts came from Academy and Dragon gun sets. The later is more detailed but molded in a very brittle plastic, so I had some trouble to pose it draped over the right side M60 shield. Crews used to do it sometimes to keep rounds dry...
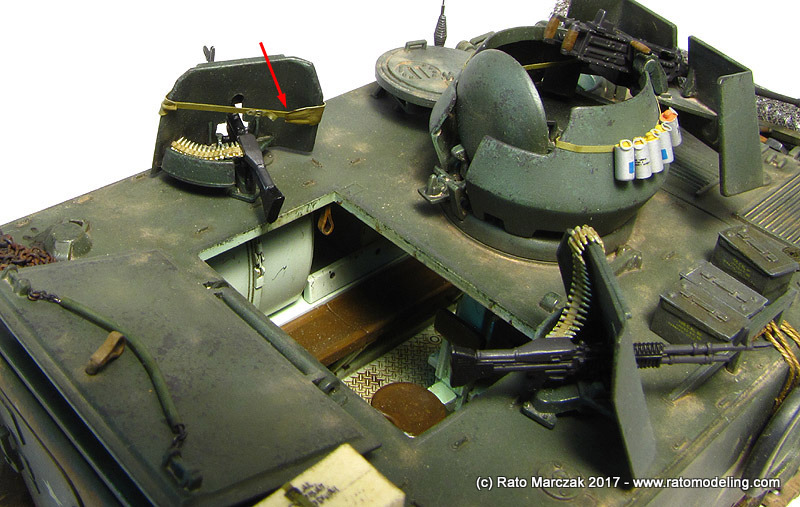
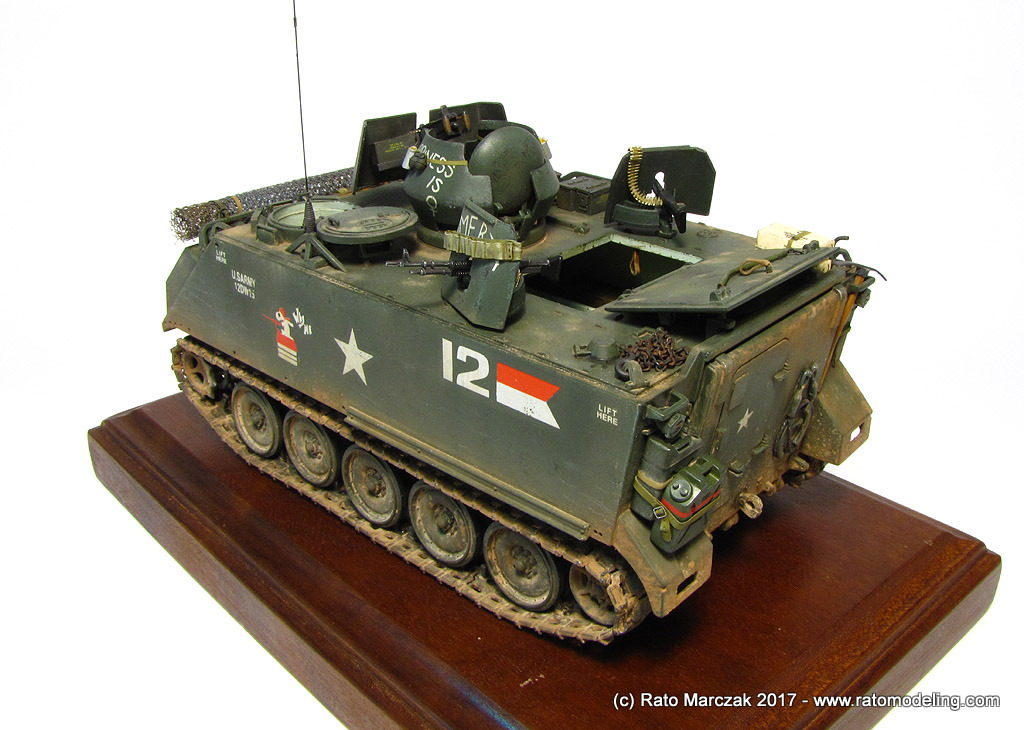
The .50 cal MG assembly was added only at the end, but an eagle eye will note the tracer rounds in the ammo box. It also came from the Academy gun set:
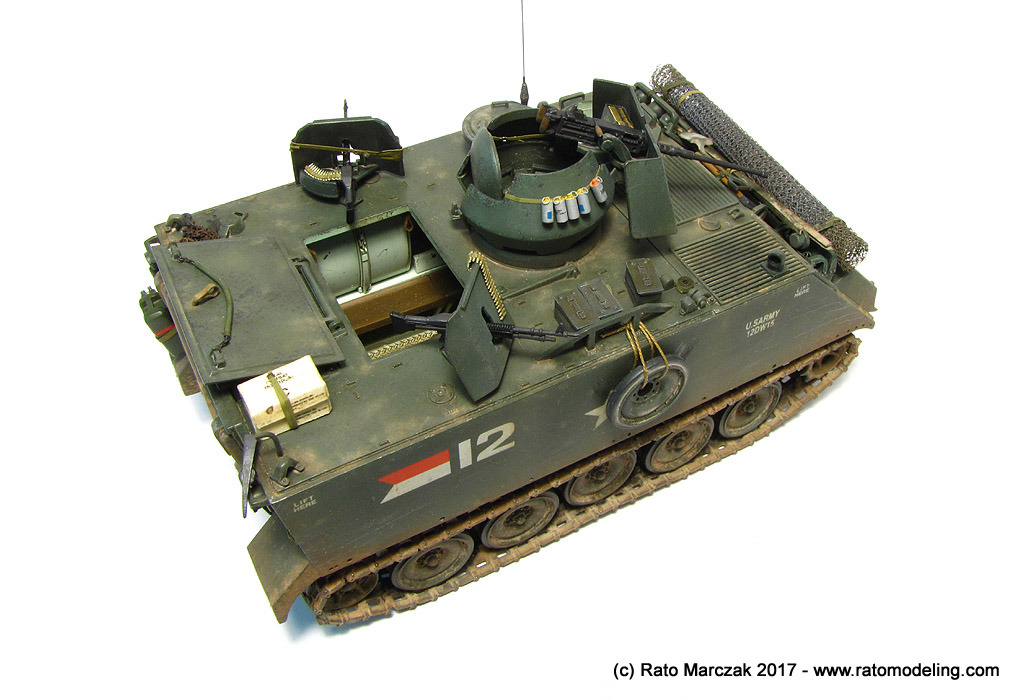
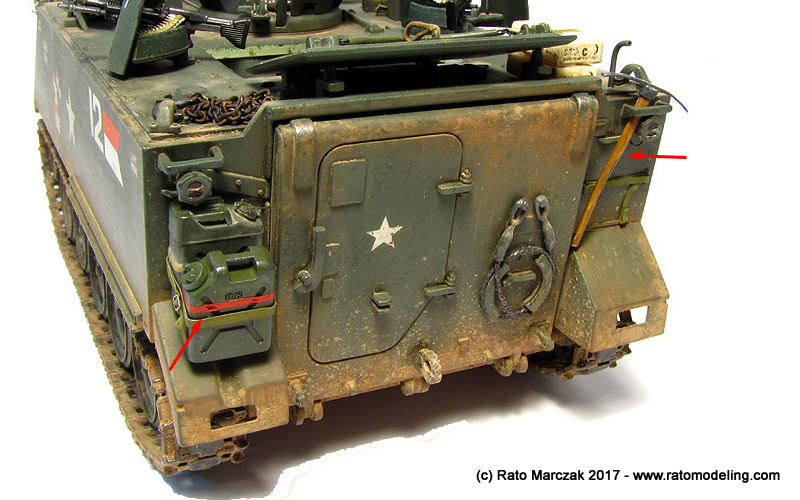
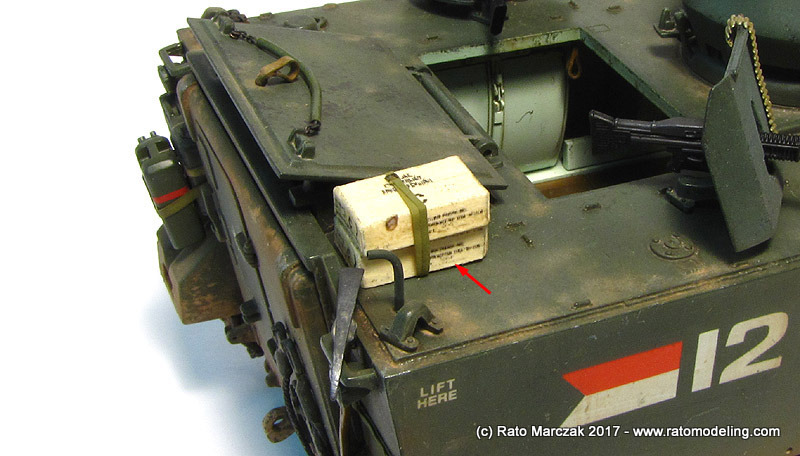
At this point I was really pushing myself to make the hull look realistically busy. Extra fuel/water cans were added to the rear left mudguard, again following photos. I tied them with lead strips and photoetched buckles. A water can was marked with a red tape, simulated by airbrushing not well thinned GSI red paint. This creates a maleable layer of paint, so when I pressed my fingers around the can, the red tape ended up looking like it was stretched.
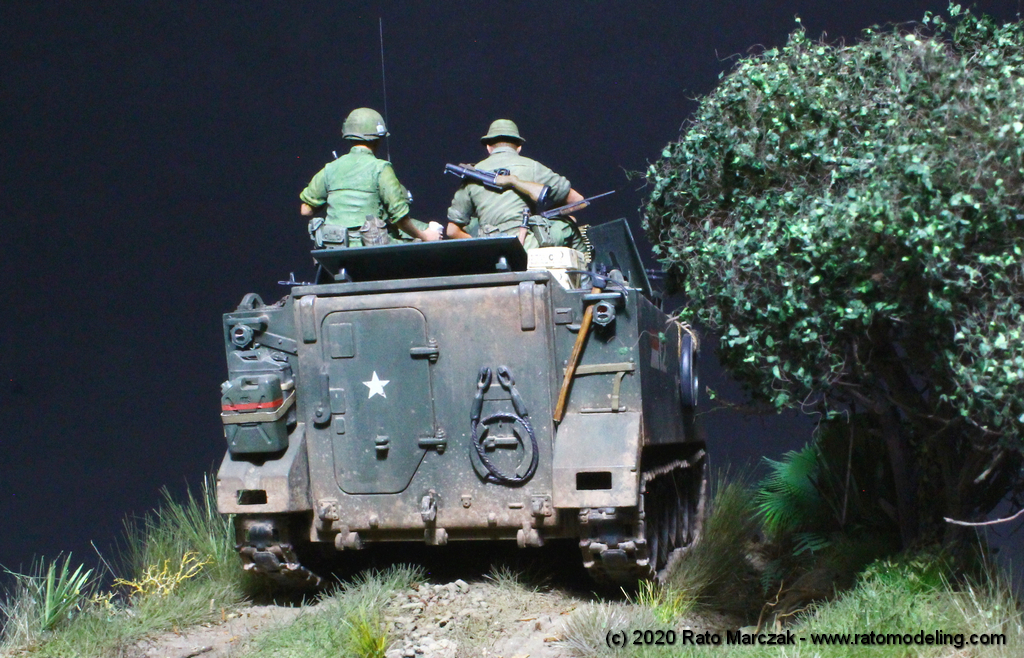
A brass chain was laid on the back of the vehicle, painted and slightly rusted with Rustall. The pickaxe head is from the kit, but I made a new wooden handle using stretched sprue:
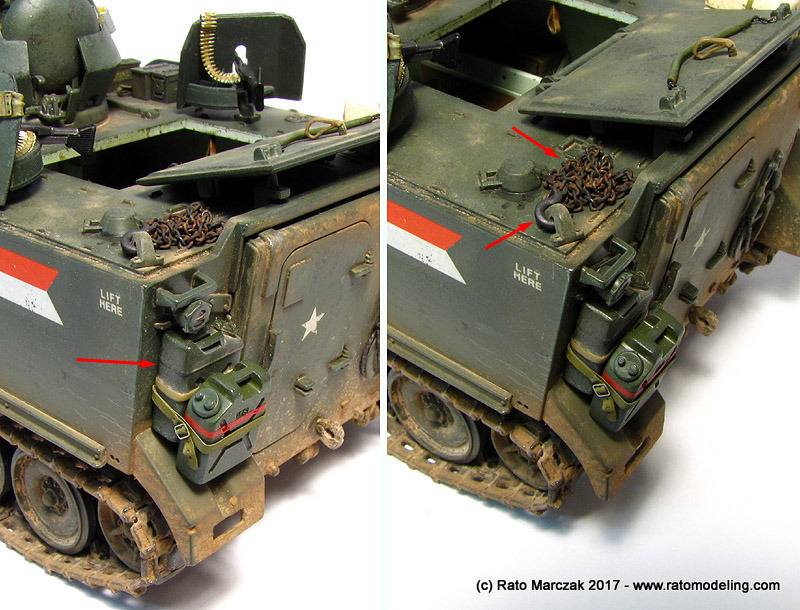
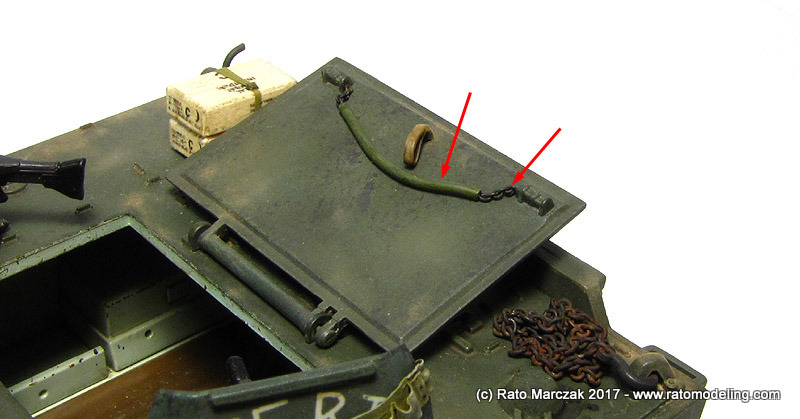
Still trying to make things look busy, I replaced the kit's top hatch opening cord (part B15) by a real metal chain encapsulated by a length of wire insulation. I think it looks now more natural than the kit part:
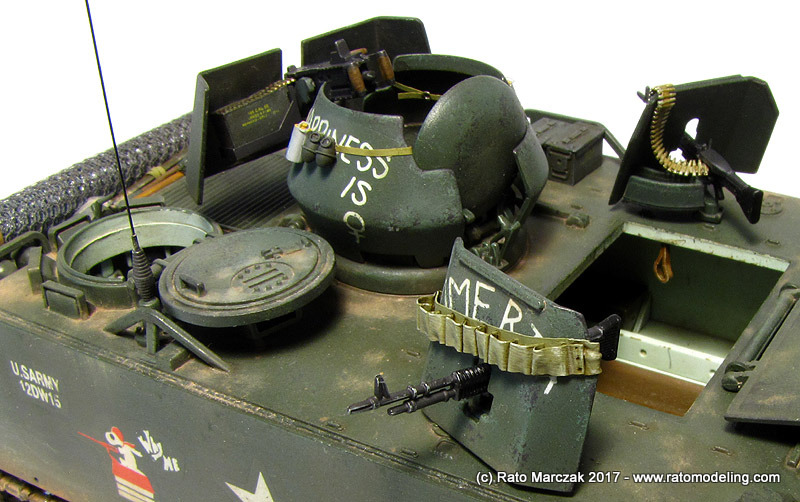
Other items added included a pair of C-ration boxes, tied on the top of the rear hull. These were laser printed in light brown paper, weathered, folded and glued in place. Extra ammo boxes were glued beside the commander cupola, as well as rolls of tying belts. Remember to paint these things in varied colors, ranging from olive drab or kakhi to olive green:
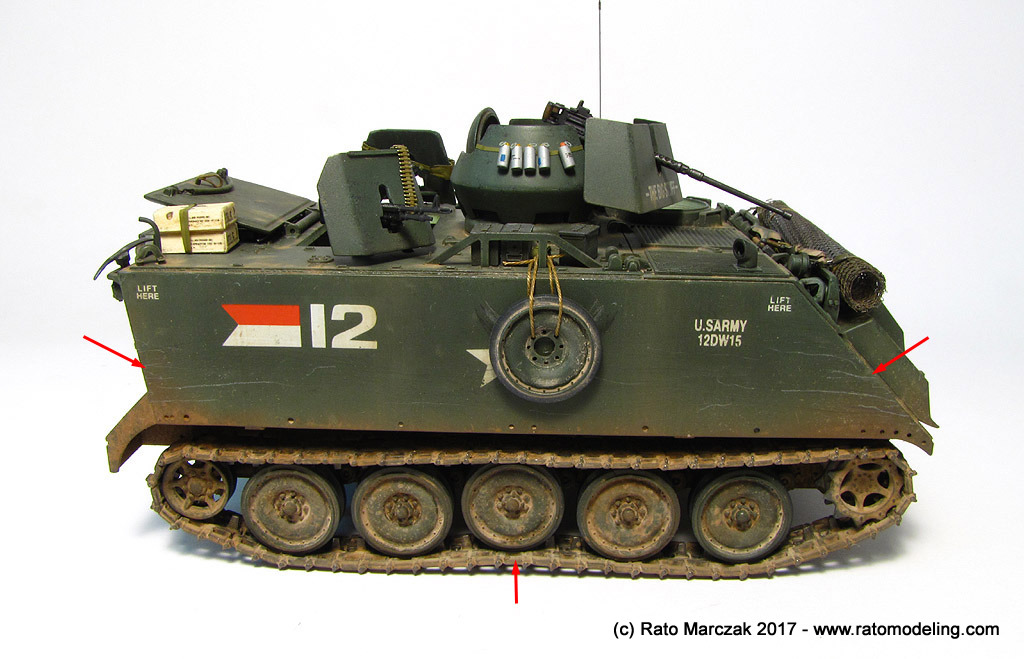
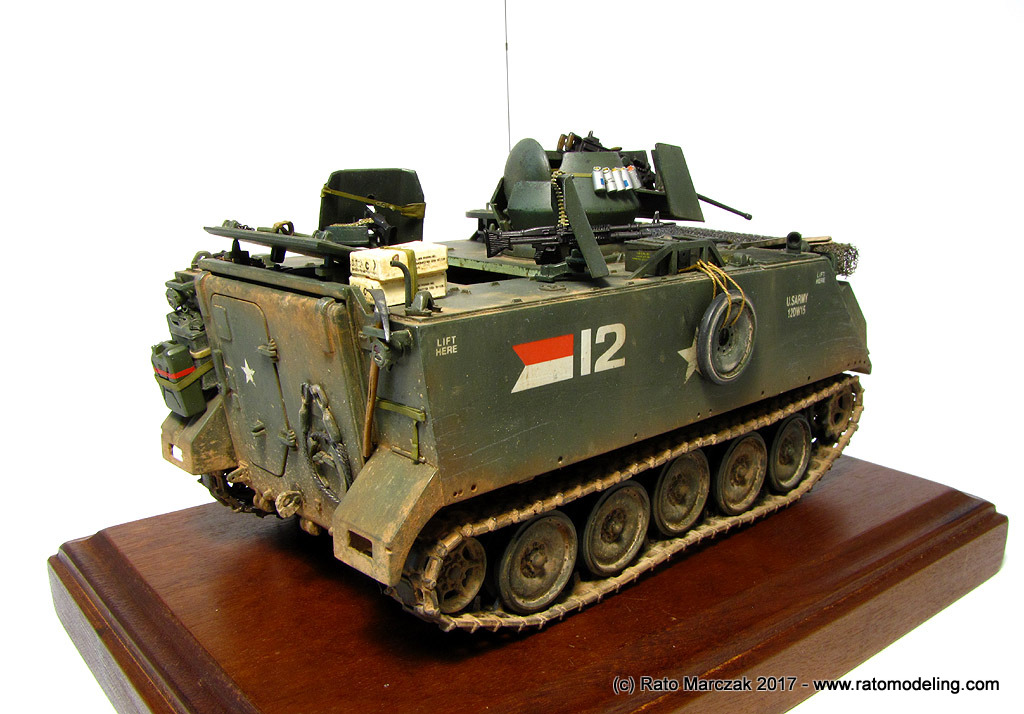
Another interesting find in photos of M113s in action are the usual extra wheel hanging on the sides of the hull. Evidently this was an extra precaution crews adopted to increase the armor protection, but at times also to conceal the white star, an excellent aiming point to the enemy (many M113 had their insignias overpainted in black or olive drab in Vietnam):

The interesting thing is that these wheels were usually hand by ropes, and would swing back and forth during the ride. Whenever the metal rim of the wheel scratched the hull wall, it would leave metalic arc-shaped marks, while the outer rubber band would smudge the wall with black arcs. I reproduced the effect using silver pencil and charcoal pencil over a drafting template (do the math to find where the center of the arc is!):

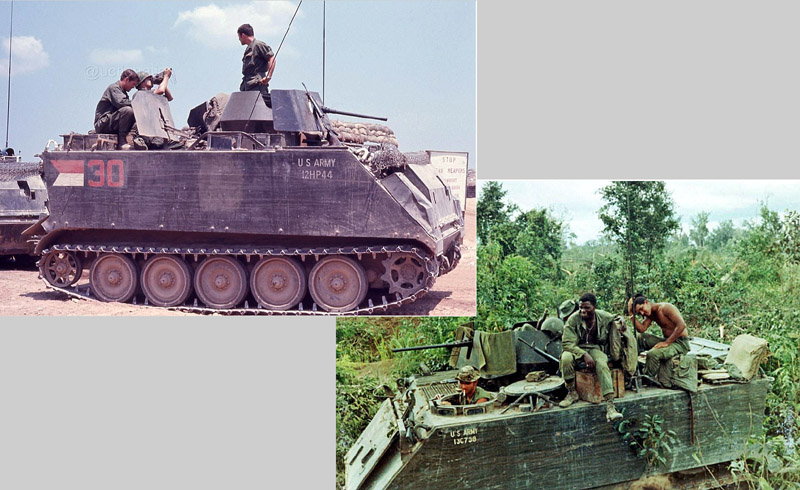
Another signature of the M113 in Vietnam were the heavily scratched hull sides. These marks appear in a number of patterns, and I can only guess that most of them are the result of dense vegetation scrapping the factory paint. Now, mind you, these scratches may be very long - in some cases running all the way along the hull side - but most of the time they seem to be concentrated on the front and rear sides - check these extreme examples:
I simulated the effect in three ways: (a) running a hard bristle scrubber to produce more light scratches; (b) using gray pencils to simulate old scratches, and (c) silver pencils to simulate recent scratches. Don't go overboard, not everything you see in the photos looks nice in scale!
You will also note that one wheel on each side is moved out of the horizontal, I mean, not aligned with the other wheels. This was done purposely, as the diorama road will not be perfectly flat. These little changes make things look more natural in your model. Click to enlarge:
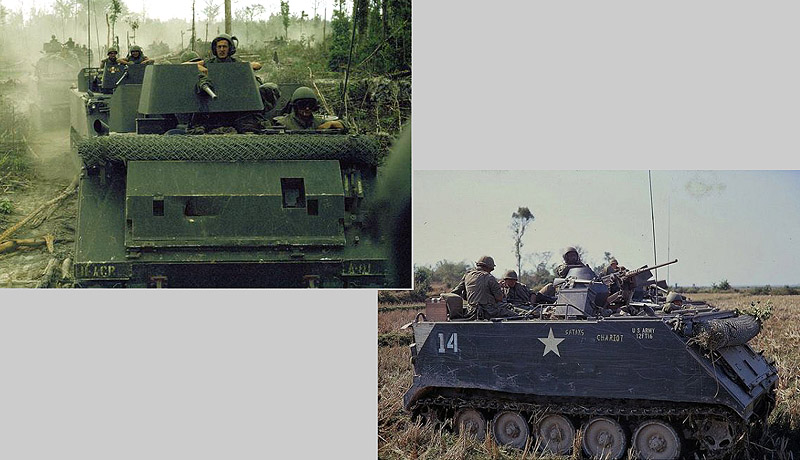
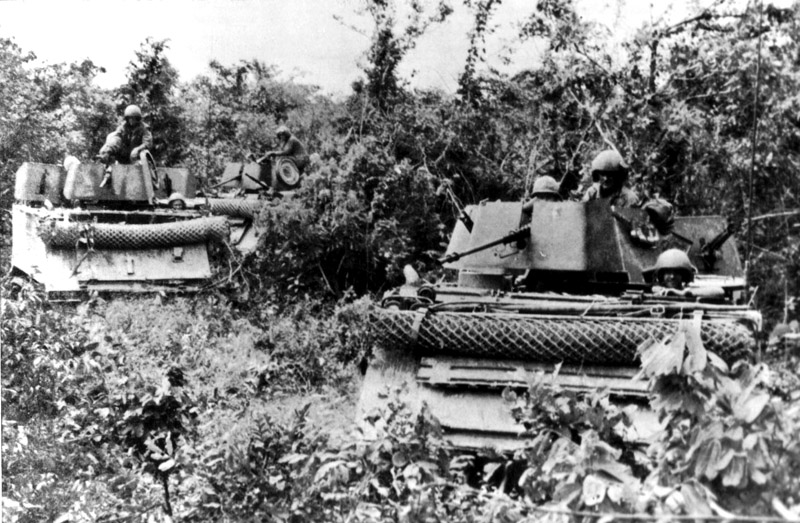
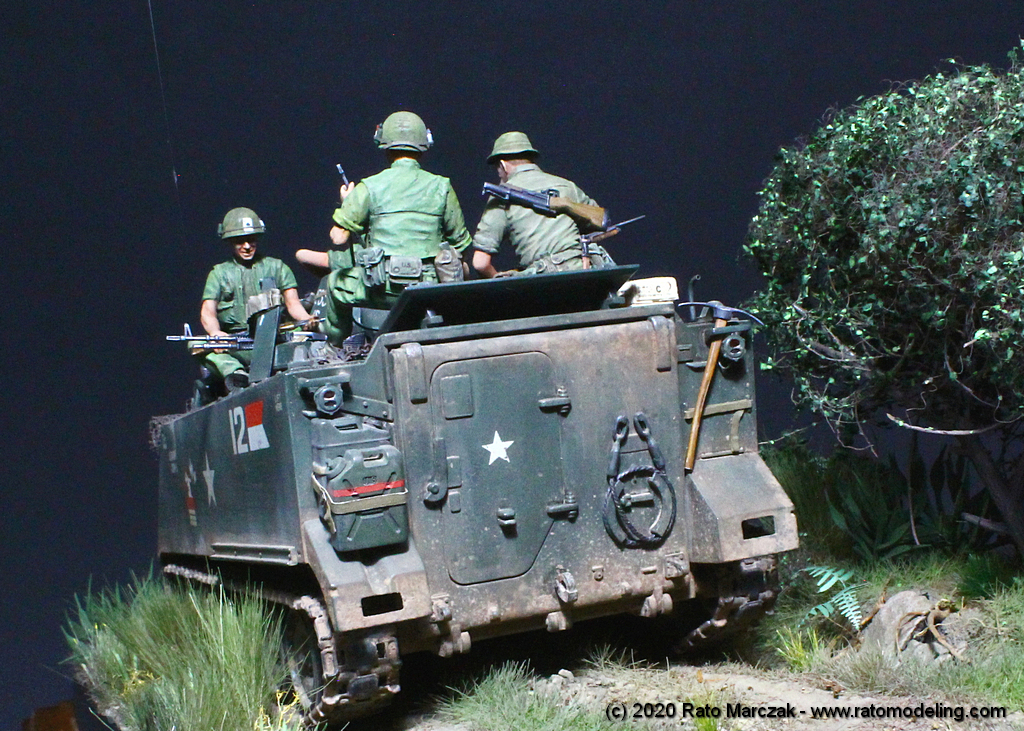
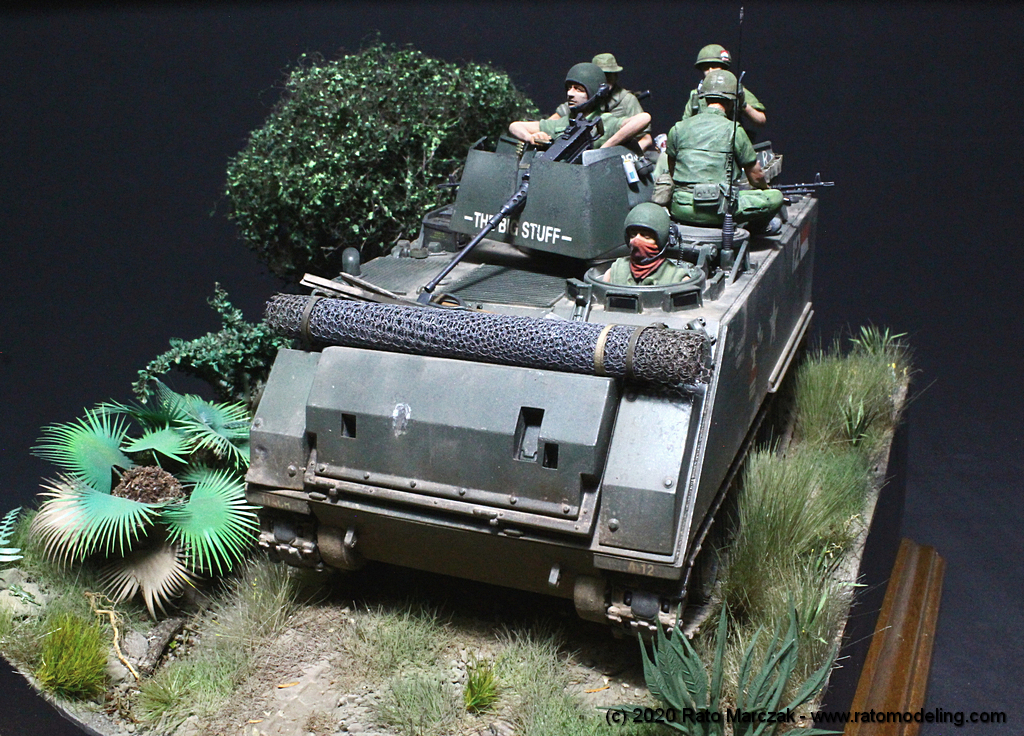
Now the fun part. Early in this project I saw several photos showing M113s with a whole list of stuff on top of it, but many seemed to carry a rolle fence and a set of poles. These fences (called cyclone fences) were mounted with the poles around the vehicle to force premature detonation of RPGs (rocket propelled granades) whenever the crew had to spend the night in the field:
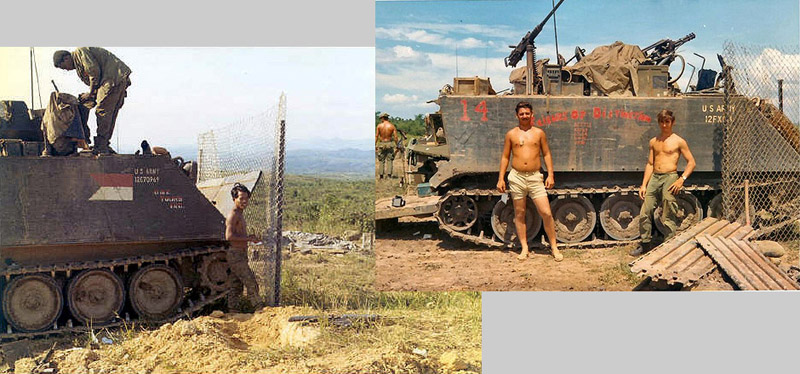
With time, these accessories almost became a mandatory item in the cargo load of most M113s... and it shows in the photos:
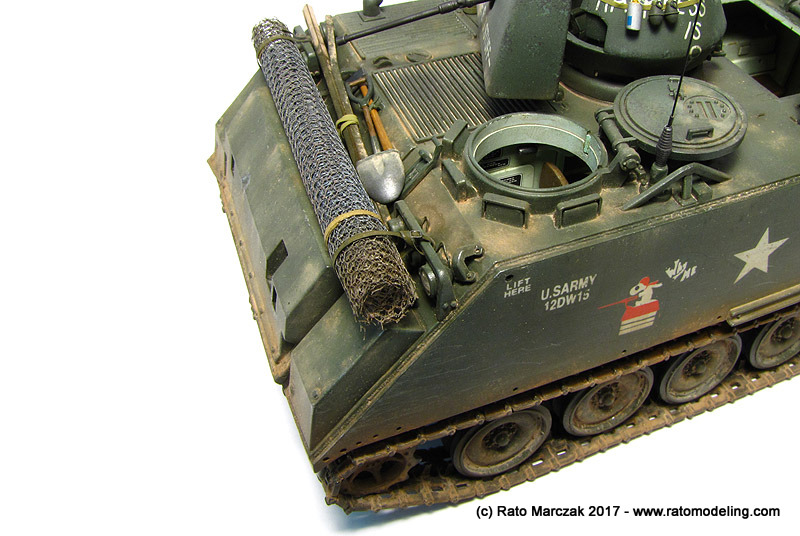
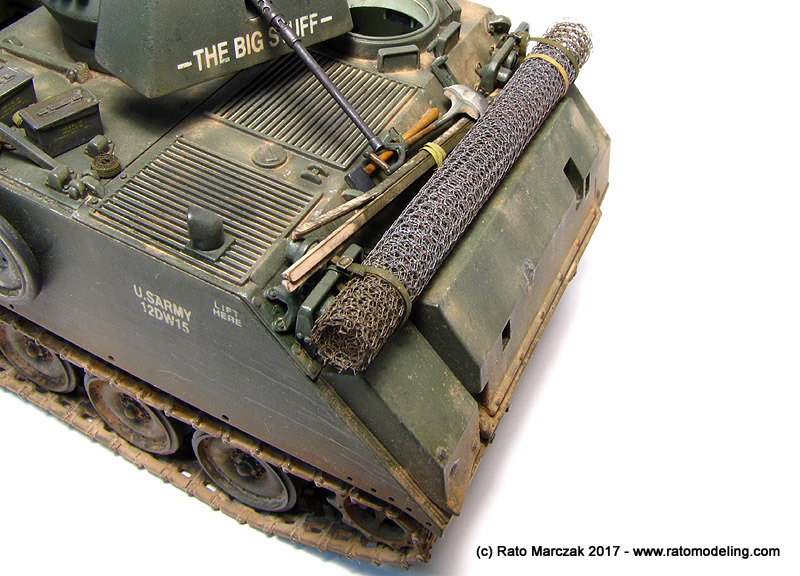
To simulate a fence was the easy part, in my case: I just painted and weathered a length of Tulle fabric, rolled it and attached it to the front hull using lead belts decorated with photoetched buckles. The poles are L shaped plastic beams that I had in my stash, slightly bent, painted and dirtied.
The difficult part was to add a realistic shovel and an axe. These were also mandatory items, as the practice back then was to dig a dugout and then park the vehicle over them, forming a bunker to sleep. I don't remember if the shovel came with the kit or from my spares box...

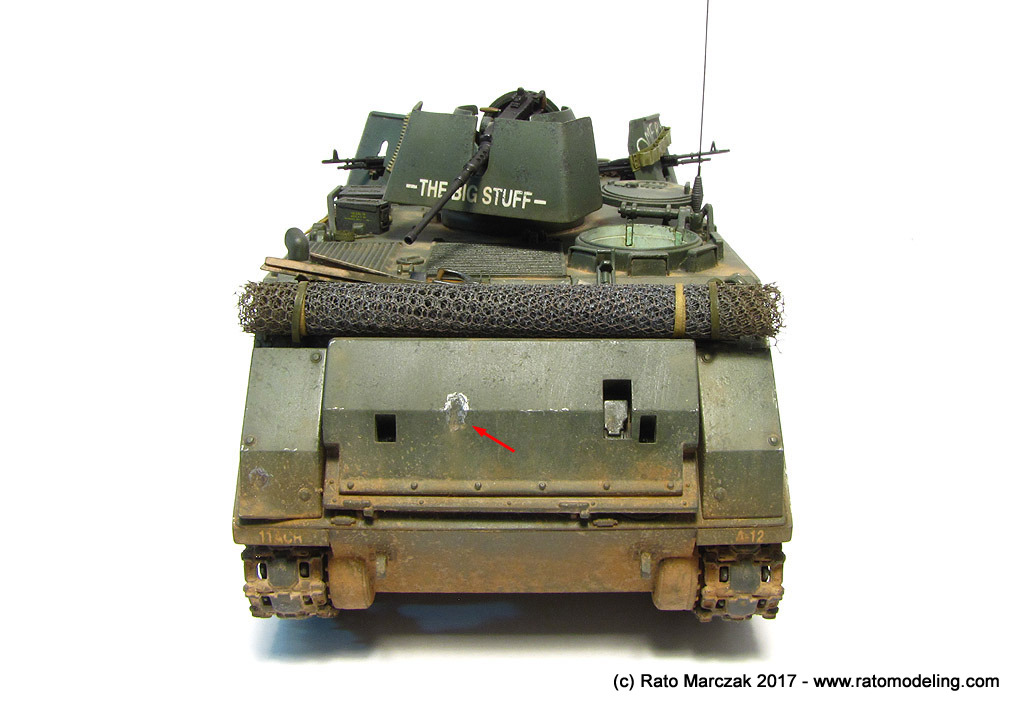
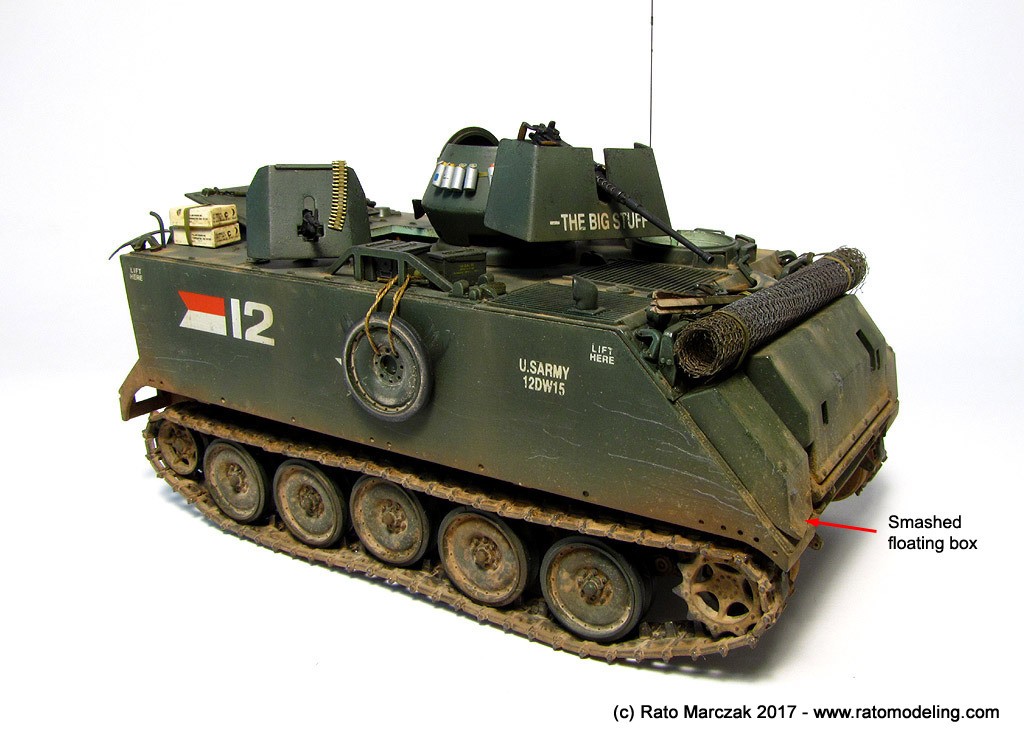
If you look closely at the flotation cells you will note that I added a few dents. They were very thin boxes prone to damaging under the slightest hit (click to enlarge)...
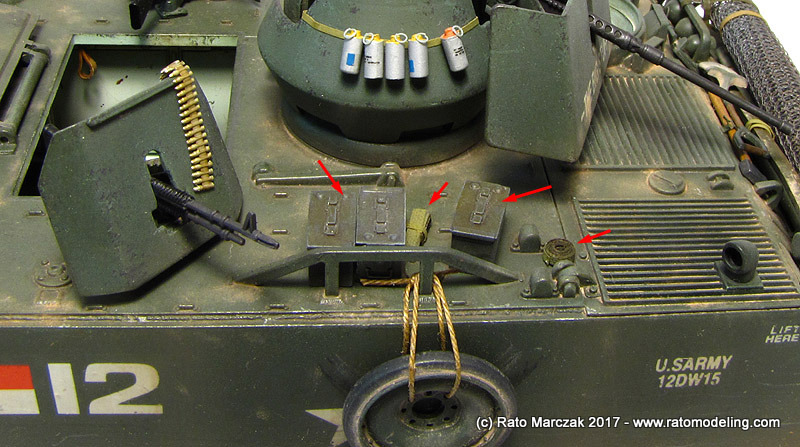
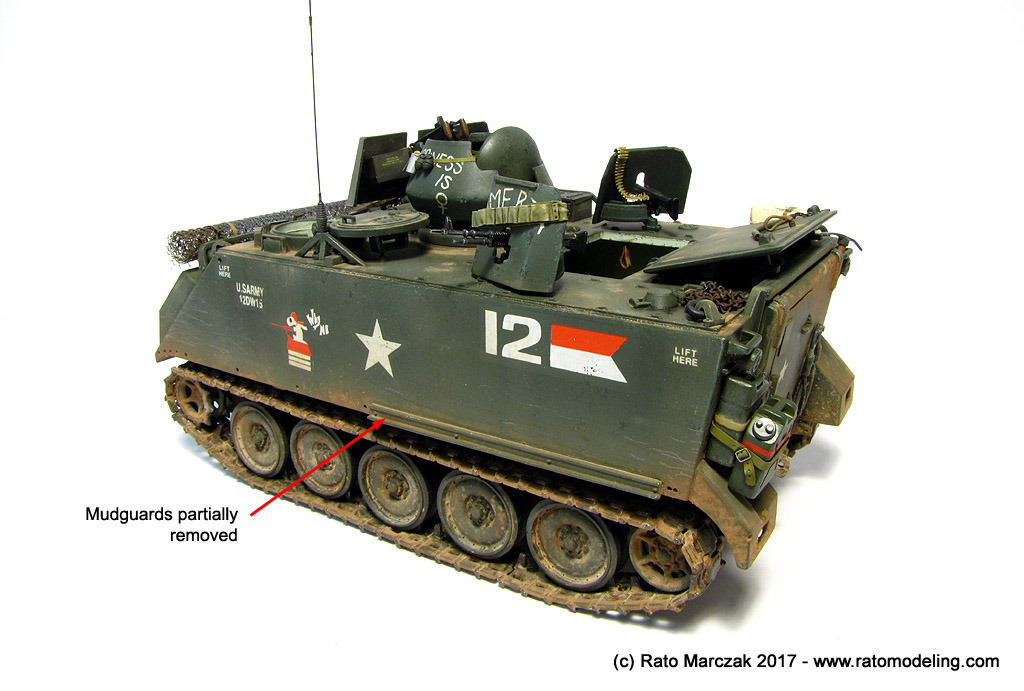
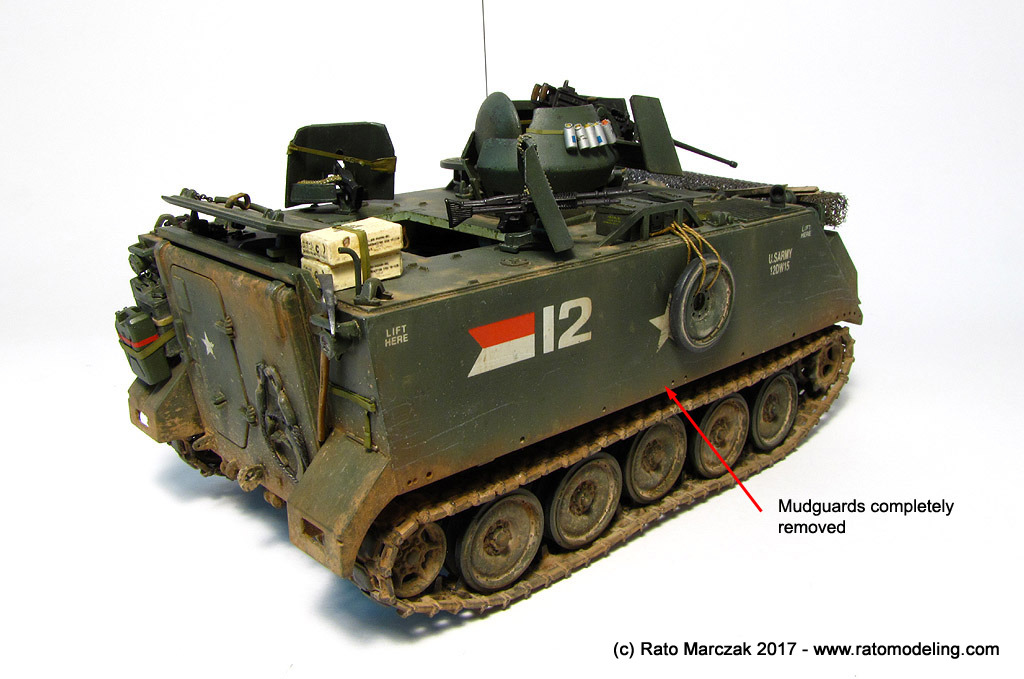
The mudguards were also removed, as they were not very useful in combat. A number of other smaller details were added, too... (click to enlarge):
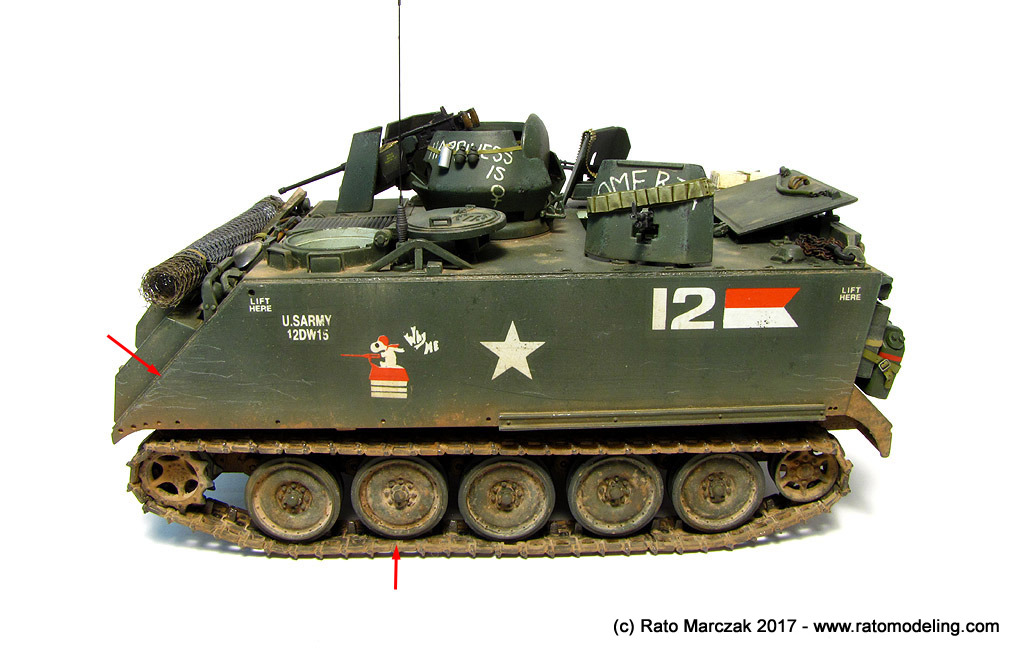
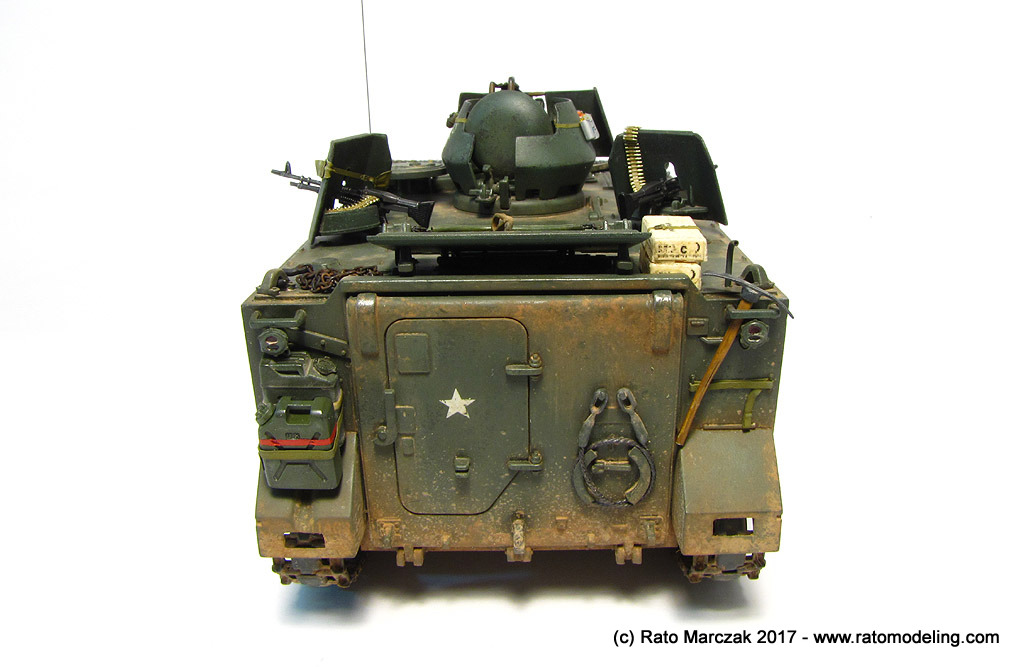
I forgot to mention that the decals came from the kit, but I had to retouch some of them due to the lack of register. Interestinly, the basic color was semi-gloss, but after applying a brush coat of light earth pigment heavily diluted in water over the whole vehicle, plus the several weathering layers, it gradually became flat, with a few variations and shiny spots here and there, just like the real thing (click to enlarge):
Once everything was in place, I added wet pigments from True Earth line. These are actually an acrylic paint with texture, so there is no need to fixing them. On the top of the M113, I used dry pigments of light and dark earth colors, and smudged the effect wherever I found it too exagerated. I could go further, afterall there are plenty of photos showing how filthy the top of an APC could be, but like I said before, not everything in real life looks good in scale.
The last weathering step was to splash diluted pigments around the lower hull and wheels, concentrating the effect on the rear door and mudguards. This was done by blowing a pigment loaded brush with an airbrush. This technique is quite effective, just don't go overboard like many models I have seen lately.
The driver mirrors were not installed in the photos, but I'll add them once the diorama base starts. The .50 cal machine gun mount is just test fitted and will be glued only once the commander figure is cemented in place.
Here are a few glamour photos before I start to work on its base (click to enlarge):
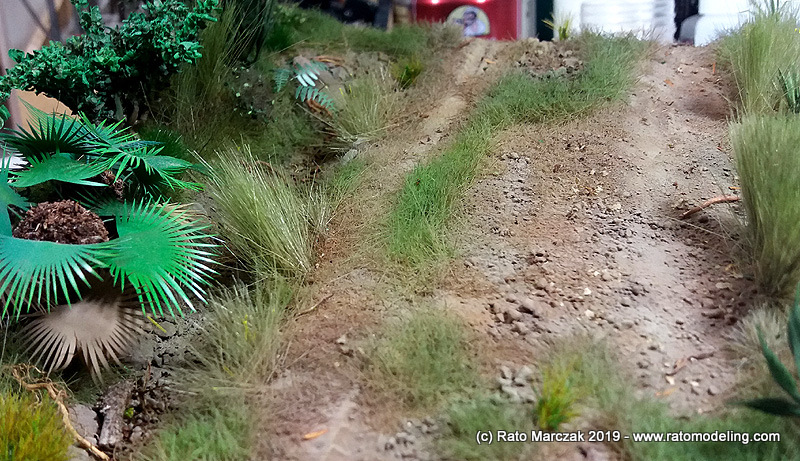
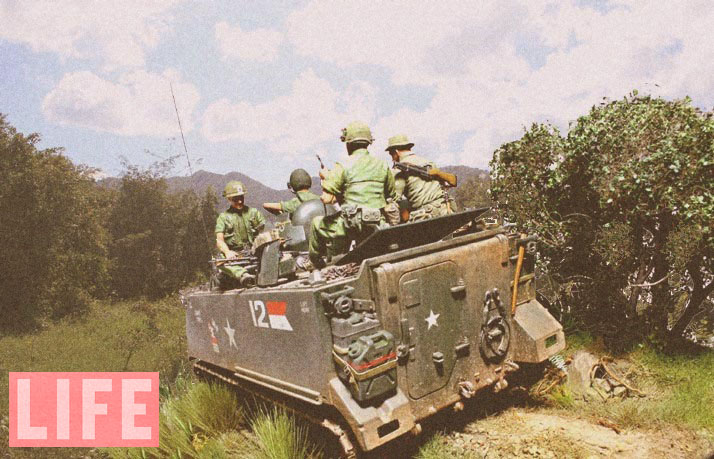
Moving on to the base, I used several types of material to produce ground vegetation, tall and short grass, and small trees representing what I was able to find regarding photos of Loc Ninh area. The 11th ACR took part in several fiercy battles nearby during 1969-70. Details of these operations can be found in the following references:
- E.J. Chesney, The 11th Armored Cavalry Regiment in Vietnam, January 1969 through June 1970, Master thesis, Faculty of U.S. Army Command and General Staff College, Ft. Leavenworth, 2002.
- The Battle of Binh Long Province, August 1969. 1st Cavalry Division, 14th Military History Detachment, Department of the Army, Washington. Declassified Nov. 22nd, 2000.
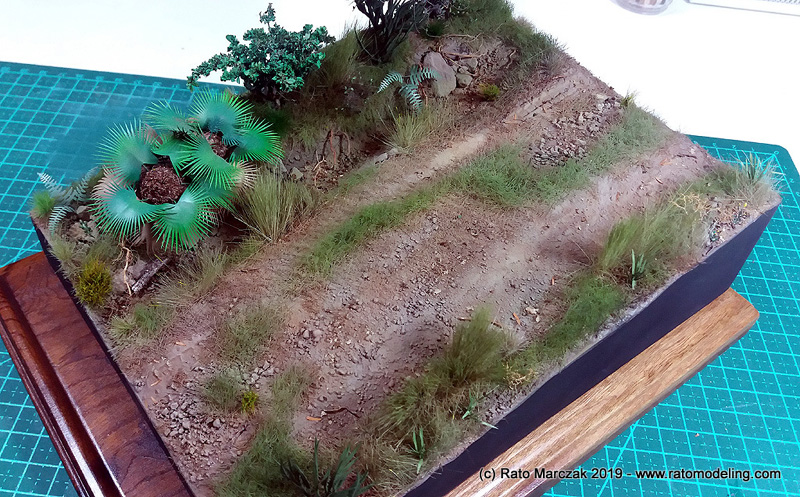
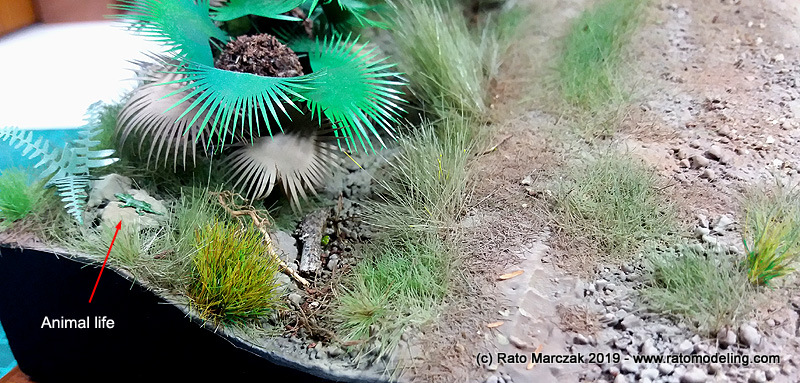
I used a lot of synthetic and natural products to simulate various vegetations, but if you pay attention, you will note that I have not forgotten animal life...
And here a nice photo of my base being tried by a Jeep built by my friend Jackson Bradley during one of our club meetings:

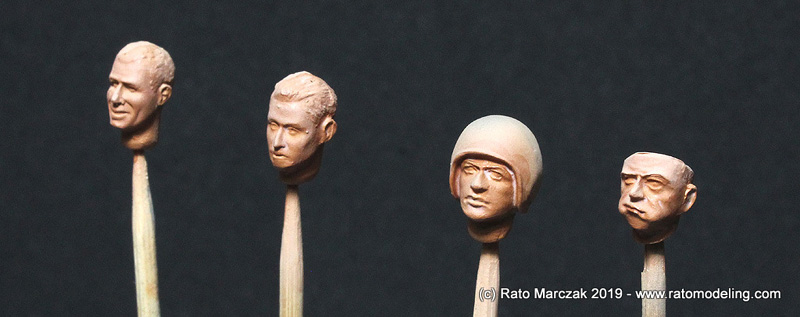
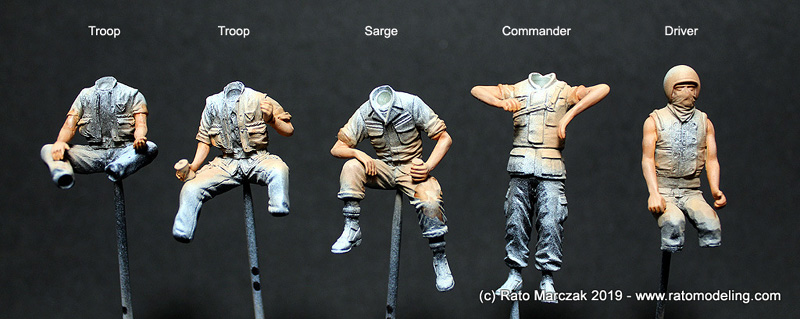
At this point, everything regarding the ACAV and the base was done, but I still had to paint the crew. I postponed as I could for I am a lousy figure painter. But when a modeling convention was announced in my area I decided to use it a good reason to finish this diorama at last. I used the commander, the driver and one of the soldiers from the Academy kit. I think they are more 1/32 scale, as they are big guys. To make things worse, I purchased a set of resin figures from Legend (US AFV Crew) but the heads looked like 1/48, so small they were! I ended up using the bodies from Legend and replaced the heads with Hornet items.
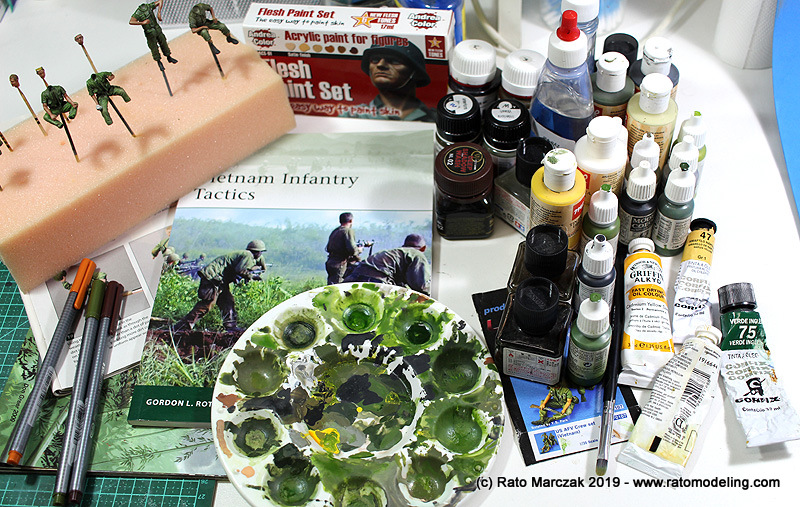
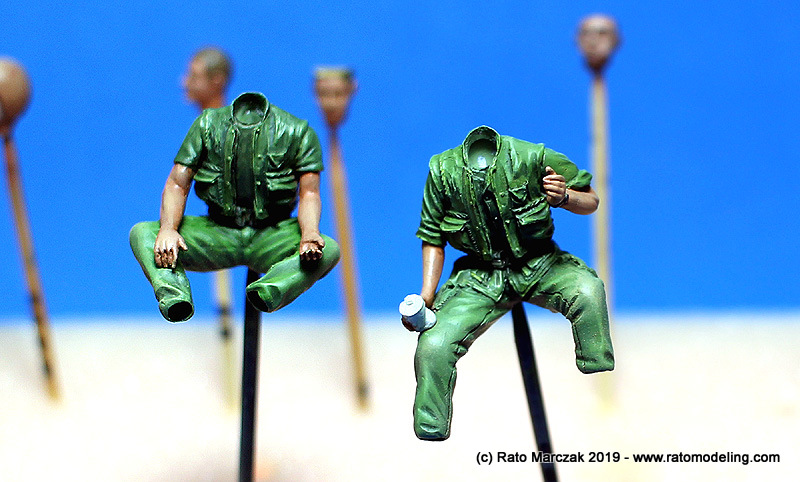
Of course I will not teach you how to paint figures because I don't know neither. I attended two or three worshops with master figure painters in the past and that's all I had under my belt. Anyway, my first step was to airbrush all skin areas with a flesh base color, and then hit again with a lighter tone with the airbrush positioned where I wanted the light source. It worked better that what I would get with a paintbrush:
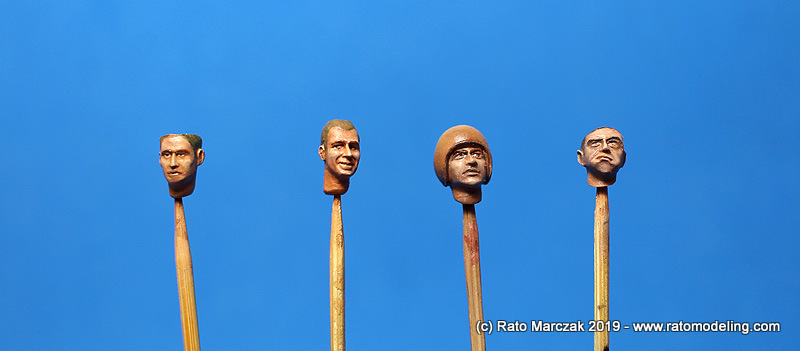
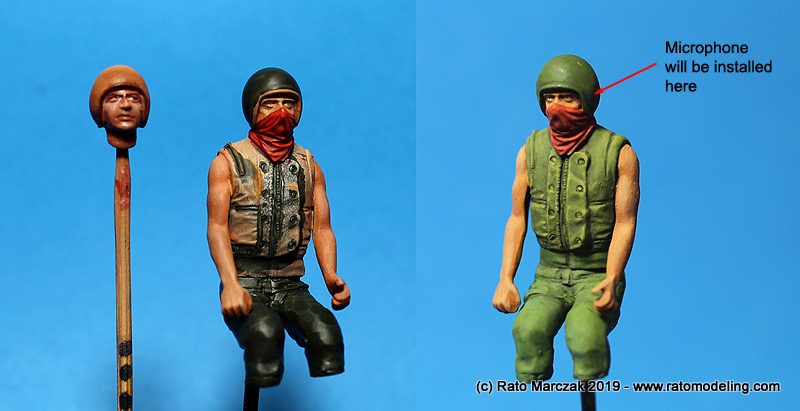
Next, my karma, my nemesis: painting faces. I hate it... I did my best and if something, the experience served me to decide to go back to oils for painting faces. The photo below shows my meager efforts. I formulated a whole context asserting that diorama figures are completely different than busts and standalone figures. That's my excuse from now on. The commander and the driver were painted with acrylics while the others were painted with oils over an acrylics base color. I finished the driver to test which Vallejo colors I wanted to use, as almost nothing of the driver will be visible. Just don't laugh:
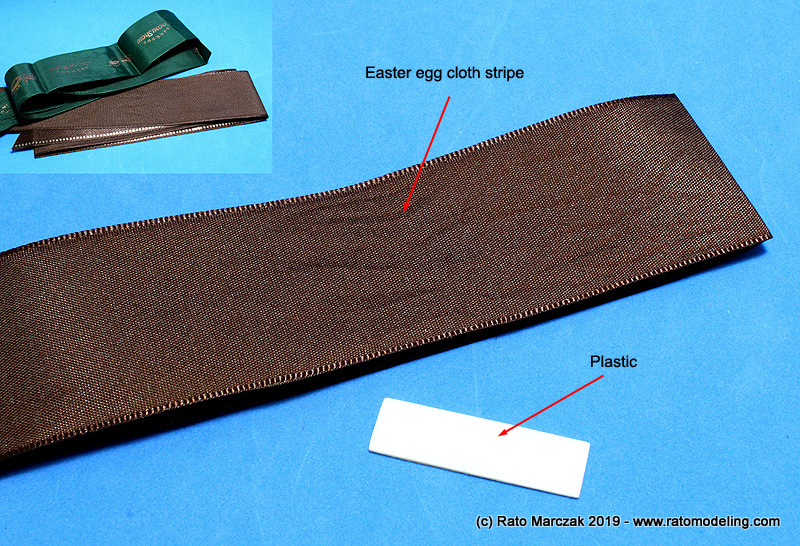
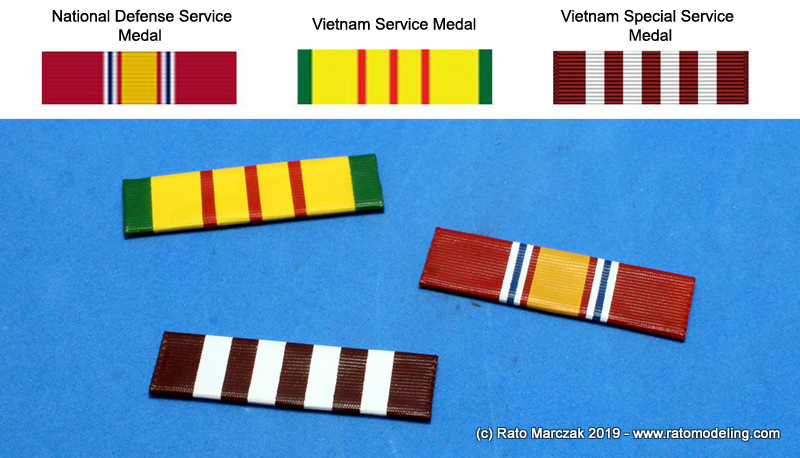
In order to give the base a different touch, I prepared some fake campaign ribbons by wrapping a small rectangle of plastic with Easter egg stripes and securing with CA glue. The stripes would give the textures I was after. Then it was just a matter of masking and painting the various colors. They will be fixed on a reserved area of the base afterwards. And yes, I did my homework and studied what would be a plausible set of ribbons for the Vietnam campaign:
The next important step was to clean, paint and finish all the small details that would go with the figures. For that I used a mixed set of accessories, mostly composed by leftover plastic parts plus a few resin items from Legend. Whenever they were outnumbered, I casted copies of them in resin, even if they would not go ultimately used in the diorama, these are useful things to keep around for other projects as well.
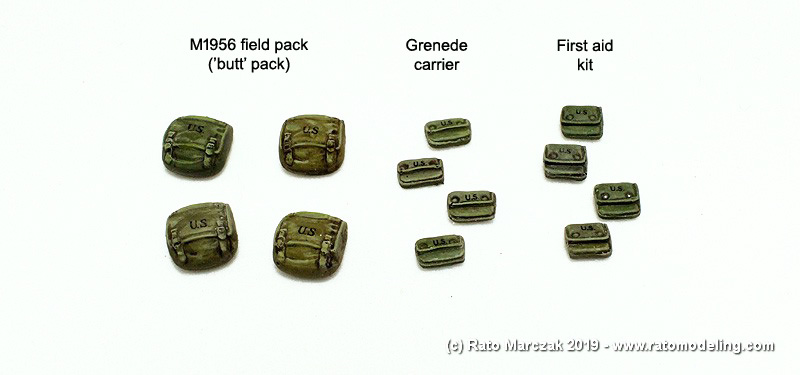
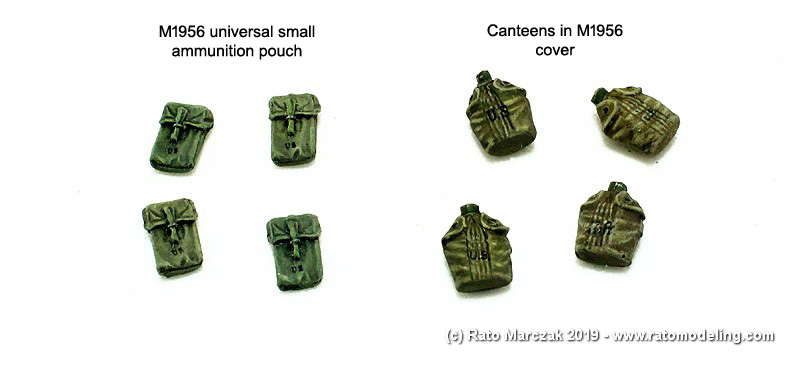
Vietnam combat field accessories varied, with many standard items dating from WWII, others from Korean War and some other modern. Well, let's start by the ones covered in olive/field drab canvas... The M1956 field pack, aka 'butt' pack was the largest troop carrying item that I painted for this diorama. Since they would be seated on the top of the ACAV, some of the packs would be probably end inside the vehicle. First aid kit pouches and grenede carriers were also painted. I tried to vary the tones but my photos failed miserably to capture it... Anyway, I used brown drabs and olive drabs, and added shadows and highlights pretty much like what we do with figures. I also finished canteens and ammunition pouches in the same way.
Luckly, I had an old Hudson & Allen decal sheet with the 'US' letters in several sizes to be used in standard accessories, and they worked like a charm:
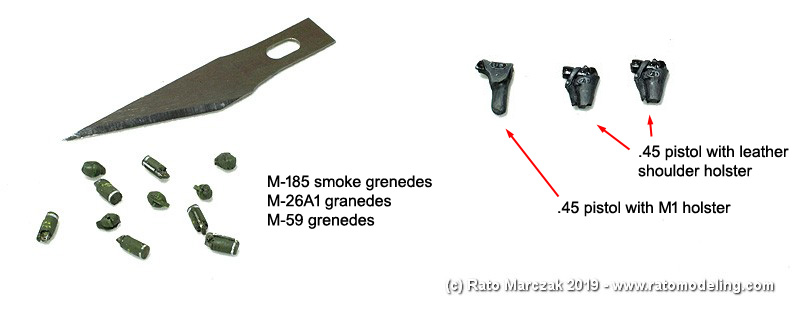
Moving on to more explosive things, I painted and finished three .45 cal pistols in two different holsters. Three types of grenedas were prepared: M-185 smoke grenedes from the Legend figure set (even though their sizes differ considerably from the ones I scratchbuilt before), the standard M-26A1 fragmentation grenedes and a couple of M-59 'baseball' grenedes which were not very well molded, so I didn't know exactly which I would end up using and where:
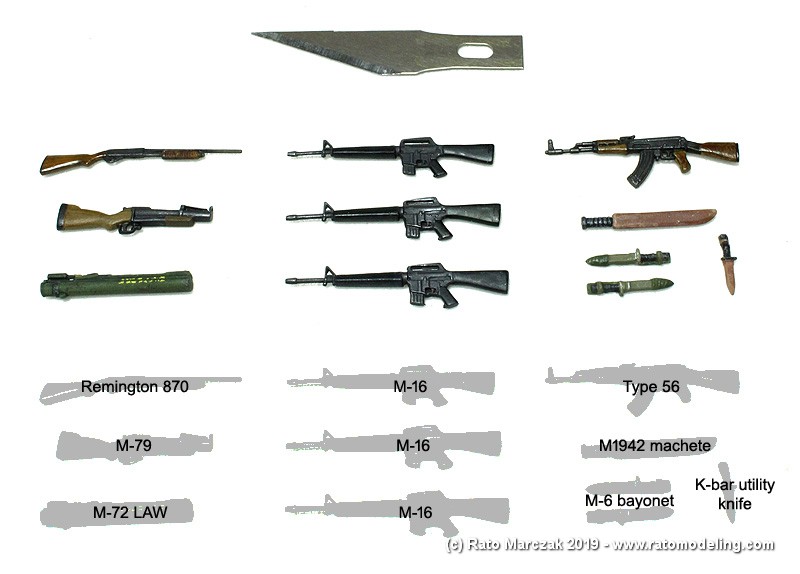
As for the typical Vietnam weaponry, three M-16 were initially finished. I think they also came from the Legend kit. An interesting Remington 870 shotgun was also included, but the barrel was hopelessly bent. I replaced it with syringe needle tubing. Two other items from the spare box or donated by friends were the M-79 grenede launcher and the M-72 66 mm LAW (light anti-tank weapon). My friend Jackson Bradley donated a Type 56 gun, the Chinese copy of the celebrated AK-47. The difference is a foldable bayonet (not installed in the photo below yet) - thanks dude! Some of these weapons would still receive the straps.
To round off things here, a Marine machete, a K-bar utility knife and a pair of standard M-6 bayonets were also painted and finished to improve the troops decoration.
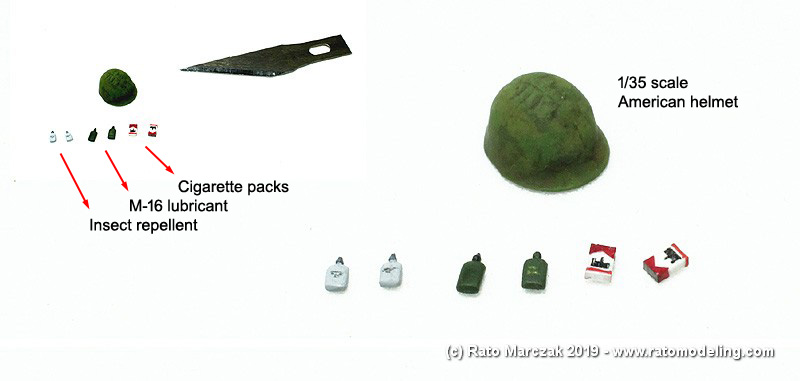
With the figures almost finished, I had to paint their helmets and a bonnie-hat. I could not replicate an authentic 'Nam soldier without the characteristic cigarret pack, insect repellent/gun lubricant bottles and the infamous 'Ace of Spades' deck card... But where to find bottles of repellent in 1/35 scale? I ended up scratchbuilding it.
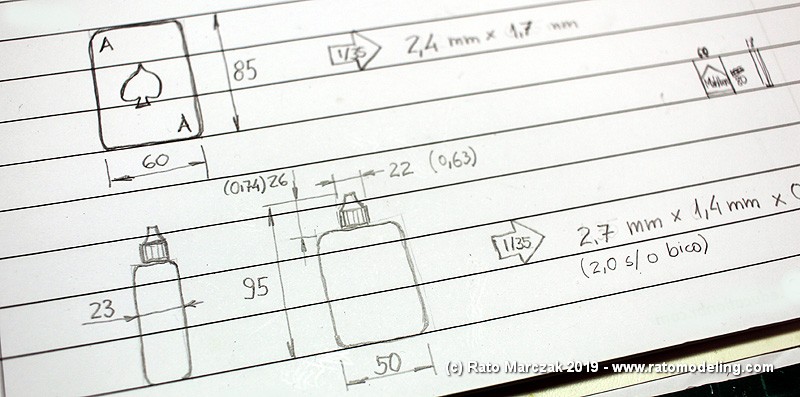
I carved the typical shape, turned the caps in my micro lathe, glued to the body and reproduced them in resin.
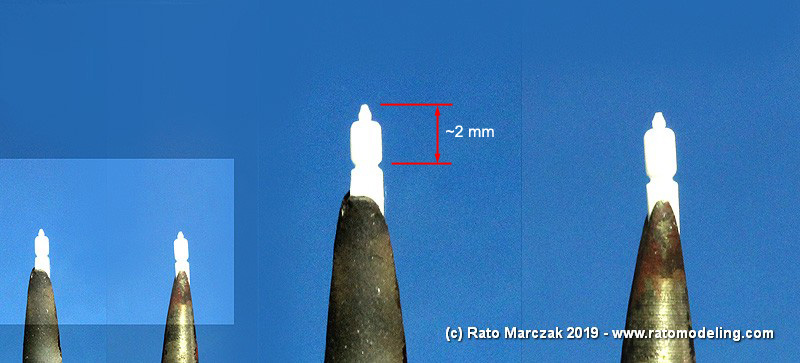

After painting and finishing them, they really look nice:
The figures had their uniforms painted according to photos I found in books and on the internet. Vietnam troops usually were quite monotonic regarding their uniforms, but if you look closely, you will see the greens ranging from bright green to brown drab. However, I reasoned it would look strange to have each troop wearing uniforms too different in color. My option would be to make one or two troops in different colors, but not much, just to represent more or less usage. The same holds for helmets and accessories. Also, some items were left overs from WWII, so it would be natural to have them in a olive drab.
I am no figure painter, but when it comes to dioramas, you have to manage figures somehow. It doesn't matter if you paint them yourself or if you ask a friend to paint them, but you will need figures for your dioramas sooner of later. I am still learning, but with practice I started to like my figures and even better, enjoy the process. Anyway, painting figures is a mess: tonal variations, 1st light, 1st shadow, 2nd light, dirt... my gosh. I did my best, and painted most greens in a couple of nights.
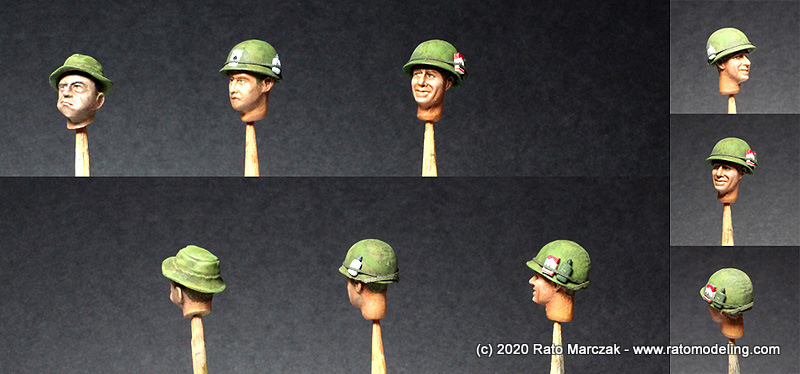
I think it was a credile job for a novice figure painter. .However, painting the soda cans, wrist watch, boots and belts took me more time than the uniforms. In te end, the heads with the helmets and accessories, plus some touch-ups renderece an acceptable result:
The final steps were to scratchbuilt the headphones. The cable was simulated using a bulb filament...

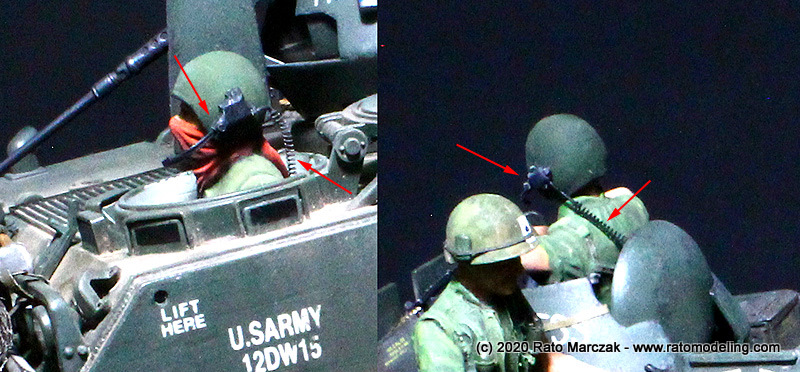
And then I had some good moments of fun deciding the exact position of each troop. Previously, when I was still assembling the crew, I found a natural place for each one and took some photos with my cel phone. That helped me to put everything in place. Small adjustments were necessary, which were obtained by tweaking an foot, an arm or a head.

The installation of all the weapons also fought me for a while, but in the end everything found its place. Needless to say, many items were left out of the scene. I will use them in the next diorama.
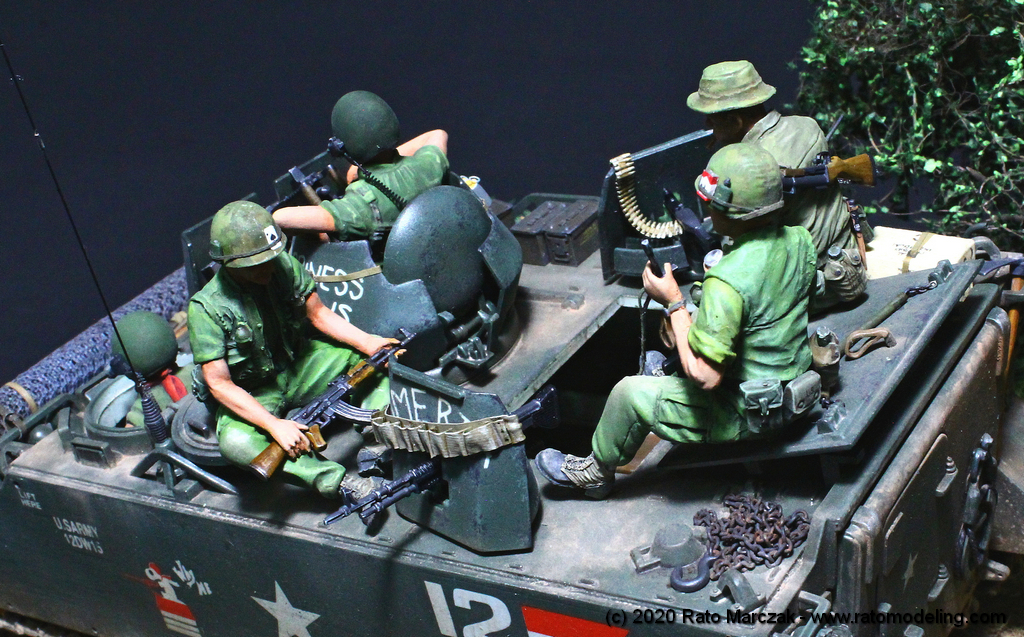
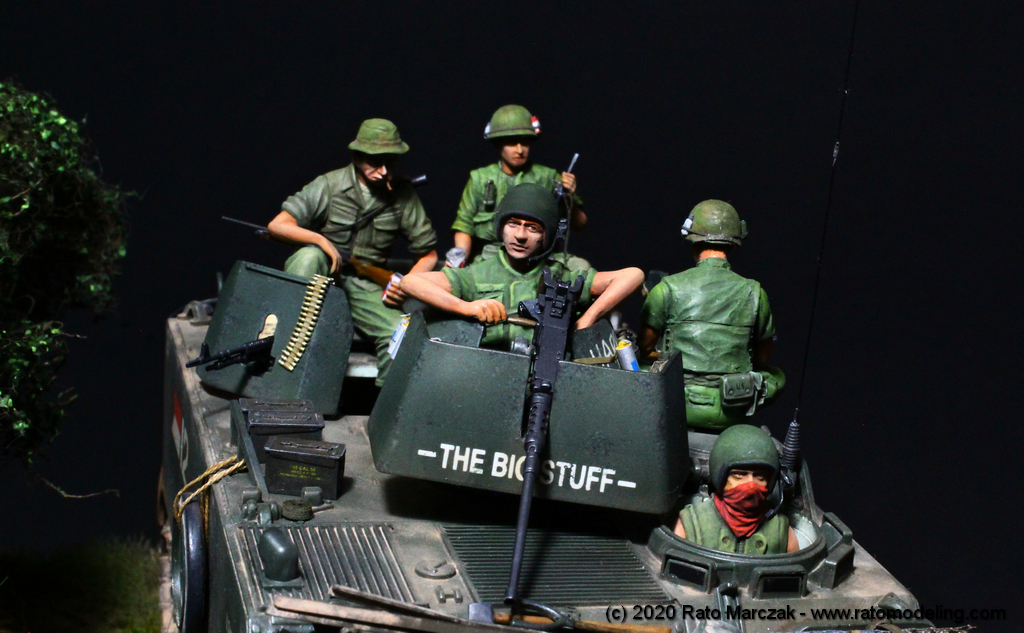
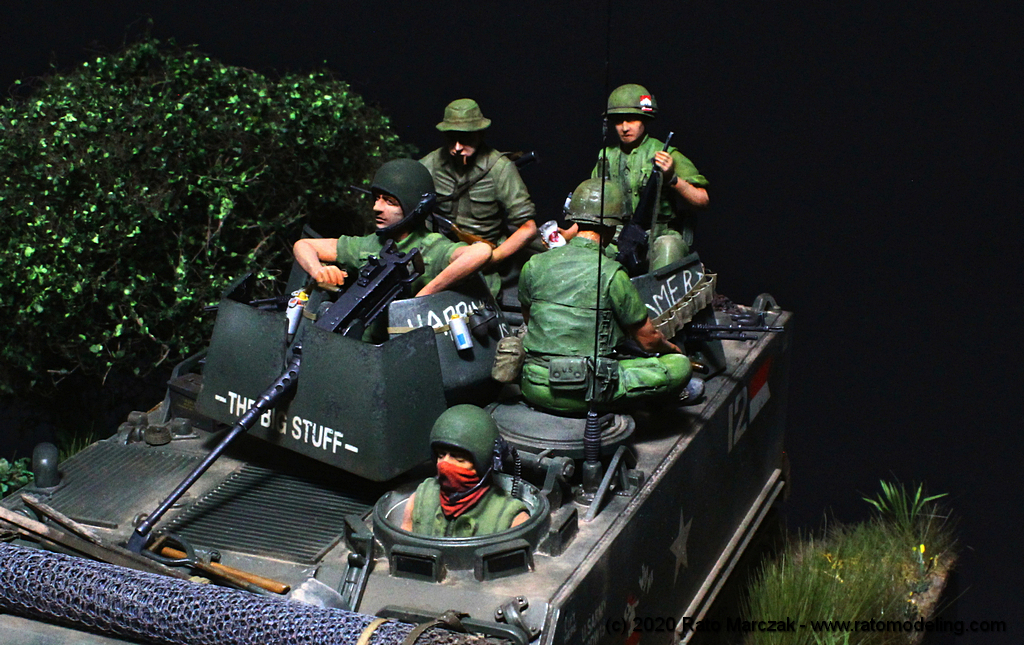
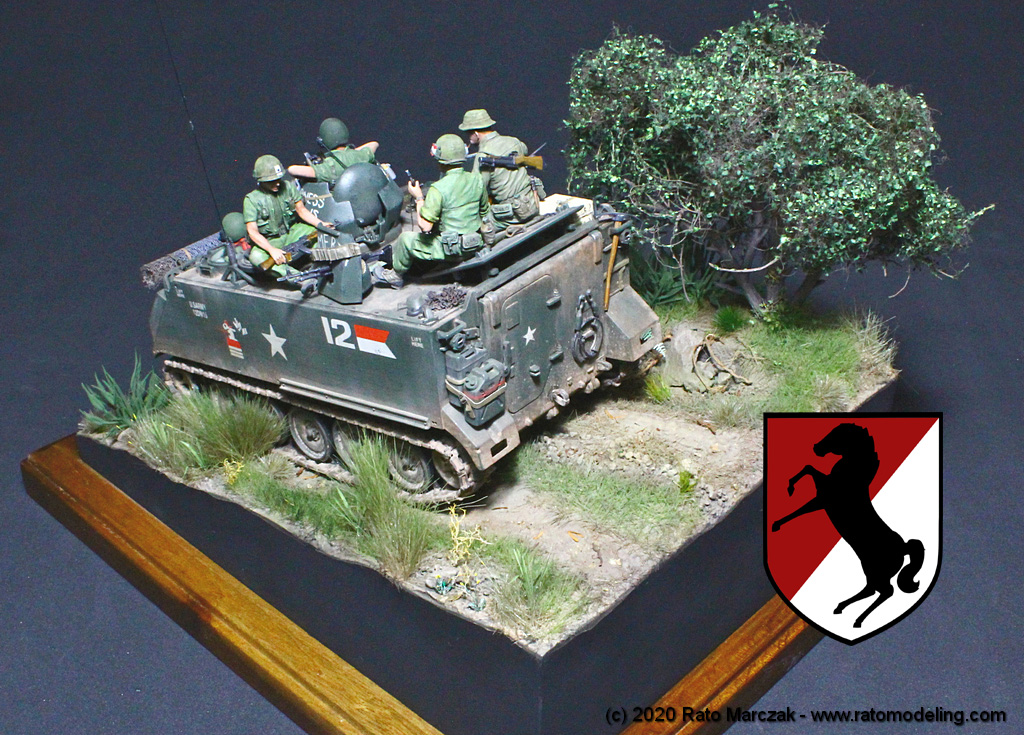
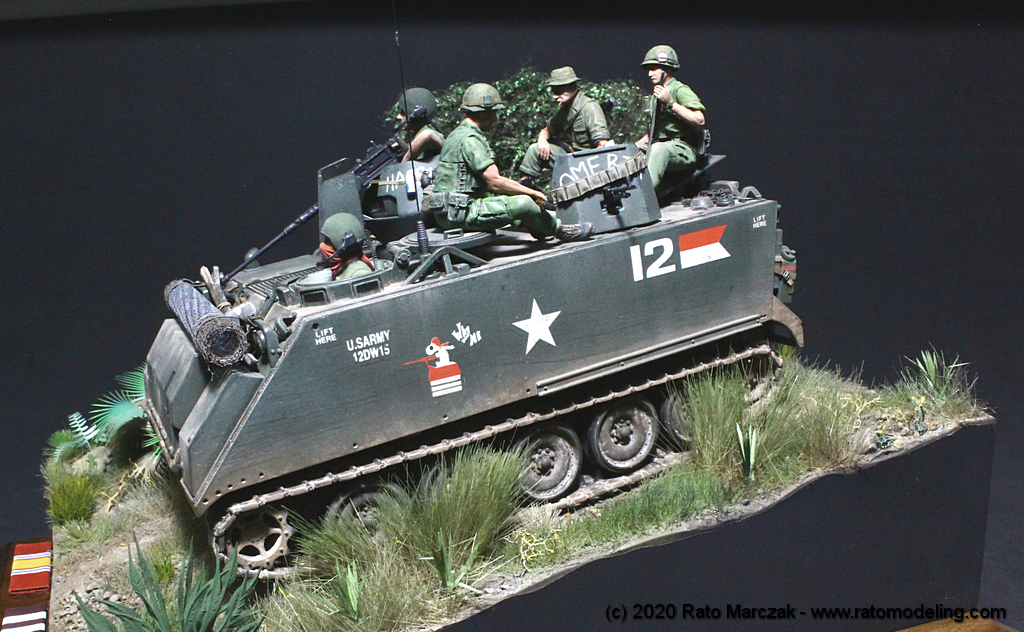
Everything in place, drum roll:
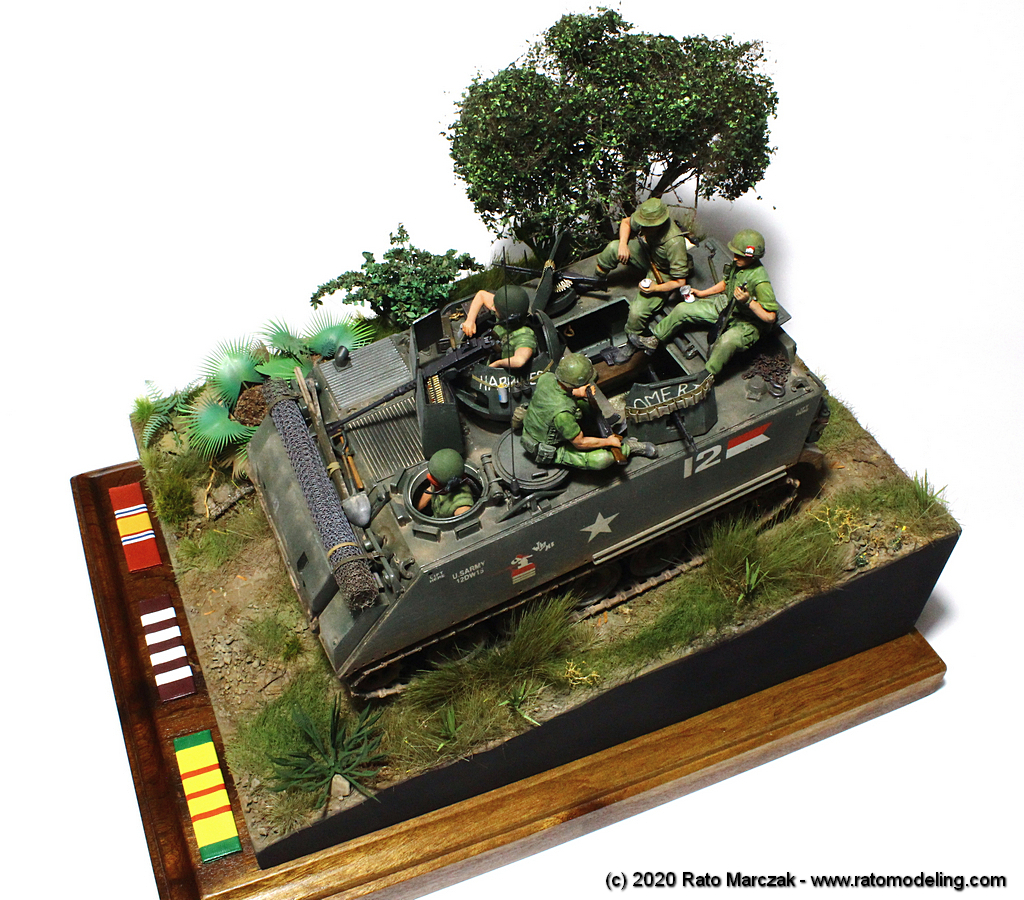
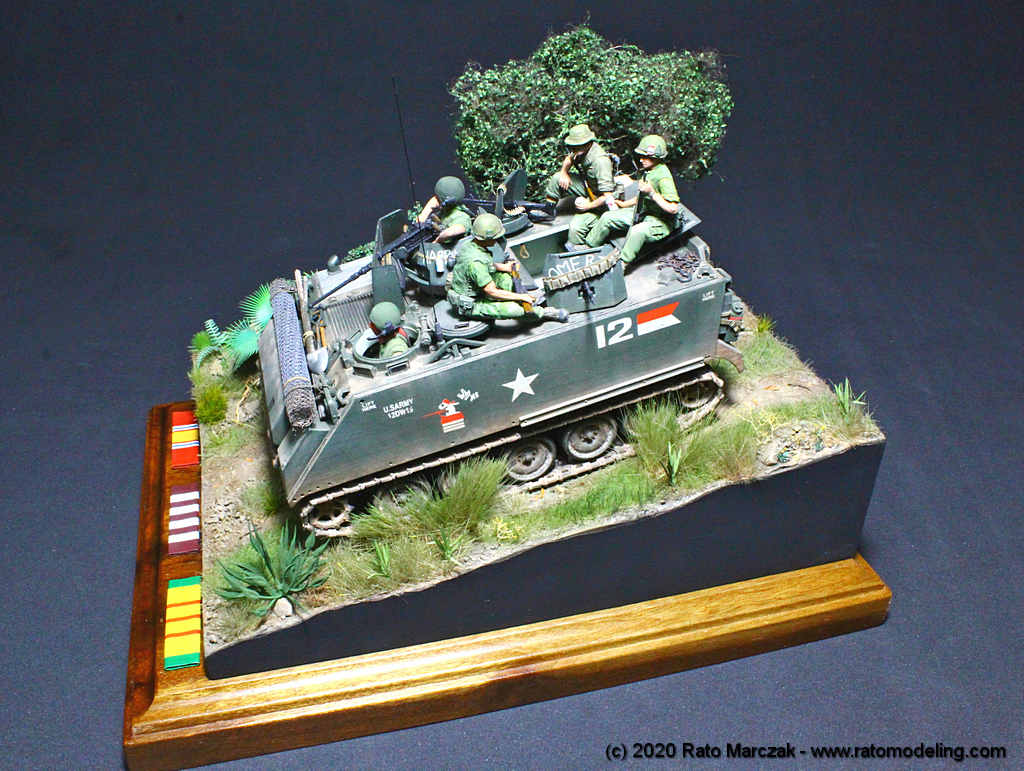
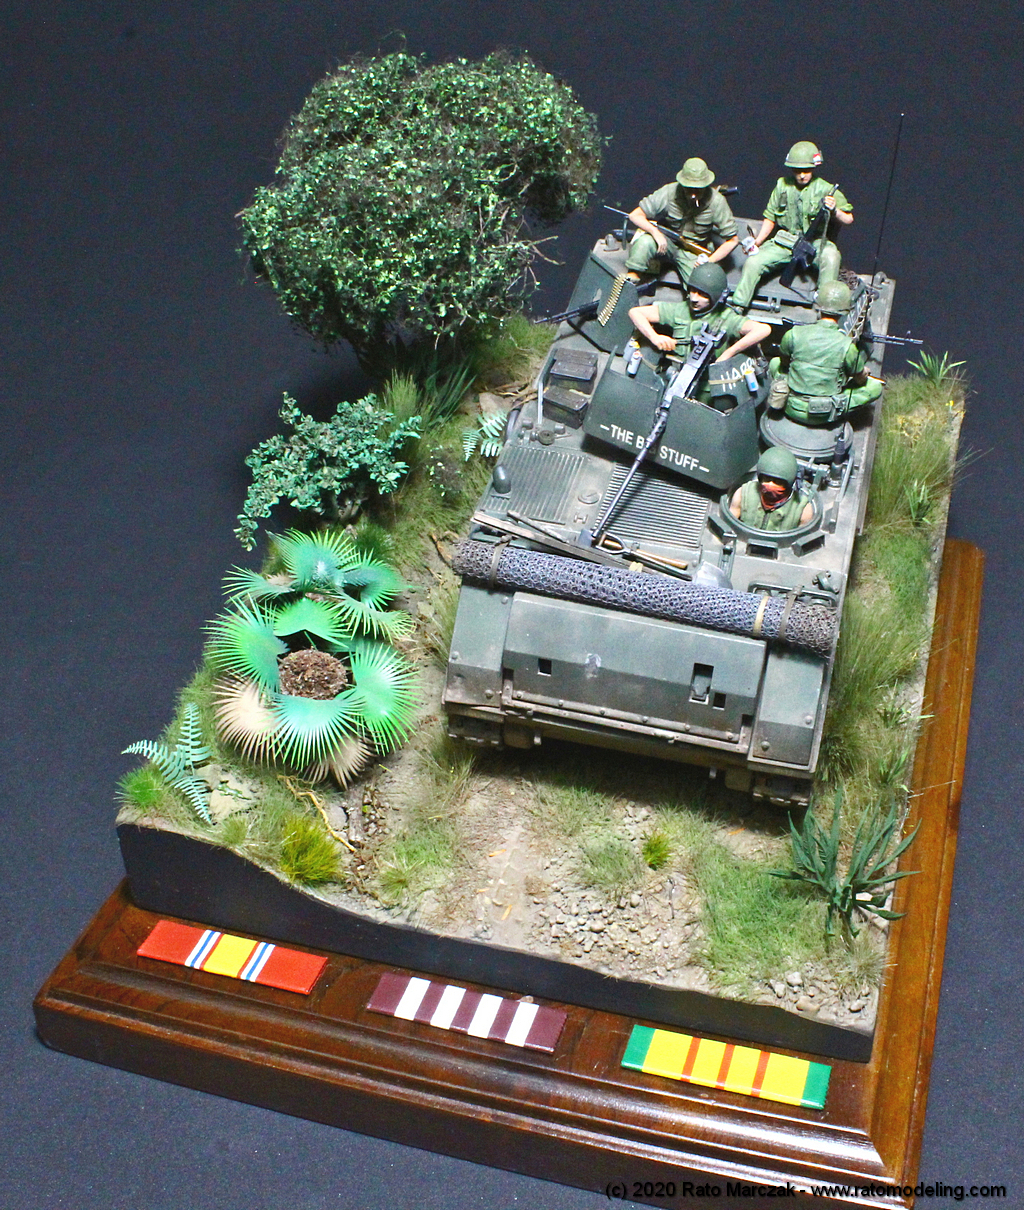

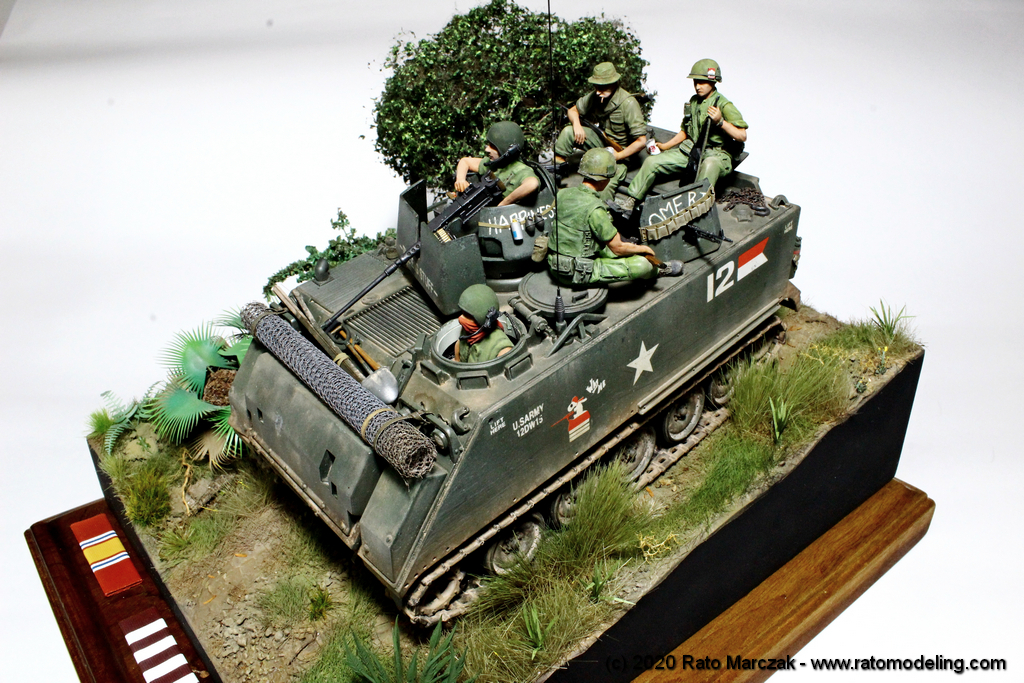
I probably will add a plaque containing the shield of 11th ACR. Technically, this diorama depicts the movements of the 11th ACR in the area of Loc Ninh, during the Battle of Binh Long Province, in1969.
And, of course, I played with photoshop as much as with the model itself:
| Technical file | |
| Kit:
|
- Academy 1389 |
| Additions:
|
- Dragon .50 cal machine gun and ammo belt. - Eduard ammo belt from machine gun set. - Legend Productions US AFV Crew (Vietnam) in 1/35 scale - product #0107 - Hornet Various Bare Heads in 1/35 scale - product #HNT-HH01 |
| Basic
colors: |
-
Primer: GSI Mr.Surfacer 1200 in spray can - Interior green: Vallejo mix - Camouflage green: Tamiya mix based on XF-13 IJA Green |
| Notes: |
-
Several scratchbuilt details (see text). |
Rato Marczak © 2020
