| Airfix WWI Mark I 'Male' tank in 1/72 |
|
Started: January/2015 Finished: May/2015 |
The First Wave of British Heavy Metal
Here is my report on a quick and fun projetc. Very fun, actually. It is the famous Birtish WWI tank - the first worls's operational tank - Mark I male. I received this kit partially assembled from my friend modeler Jackson 'Bradley' awhile ago (thanks mate). It is a classic Airfix kit that you all probably know, as it passed through many reboxings over the decades, including the nostalgic classic blister packages of the 70's. I think the original scale is 1/76, but it has been labaled 1/72 in its last incarnations.

I will not review this kit. It has very few parts but it is still a decent model. As a curious note, modeler Jerônimo Ulrich once told me that AFV modelers used to buy this model for a couple of bucks on swap meetings just to remove the rivets and use them (individually glued!) on better models. MasterBox recently released a new model of it in both - male and female - versions, and they appear to be superior to the Airfix offering, but not all that much in my opinion. Anyway, this is my boxing:
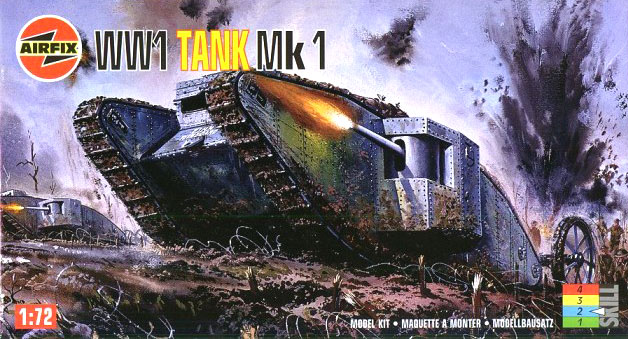
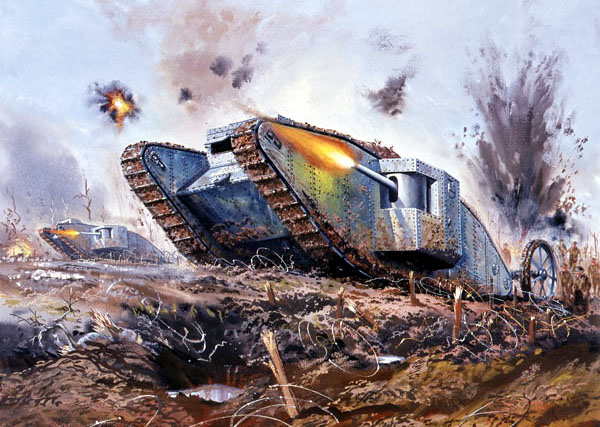
What made me built it? I don't know, but maybe I should confess that the boxart relly hooked me. After the terrible RPM's Renault FT-17, I always wanted to do the Mark I, for it is a milestone in modern warfare. Digging the internet I found what seems to be the original artwork of the box, but decided that such an old kit do not deserve more than an interesting vignette from your editor.
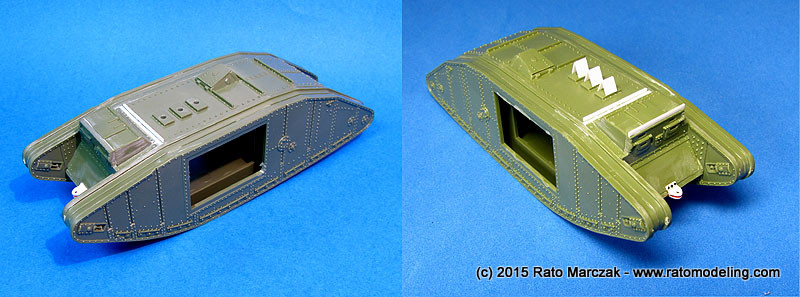
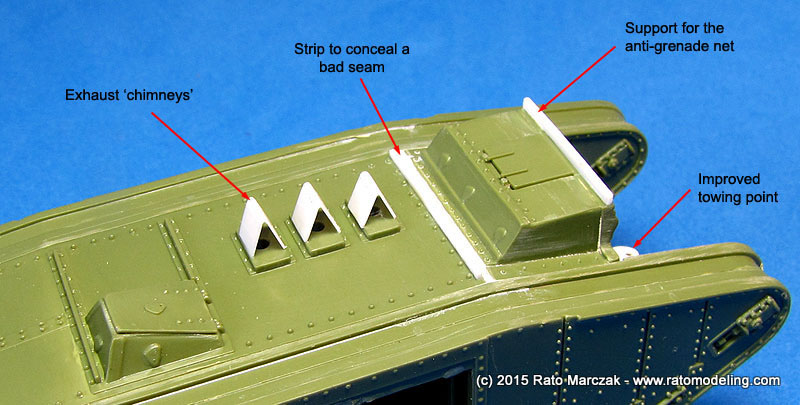
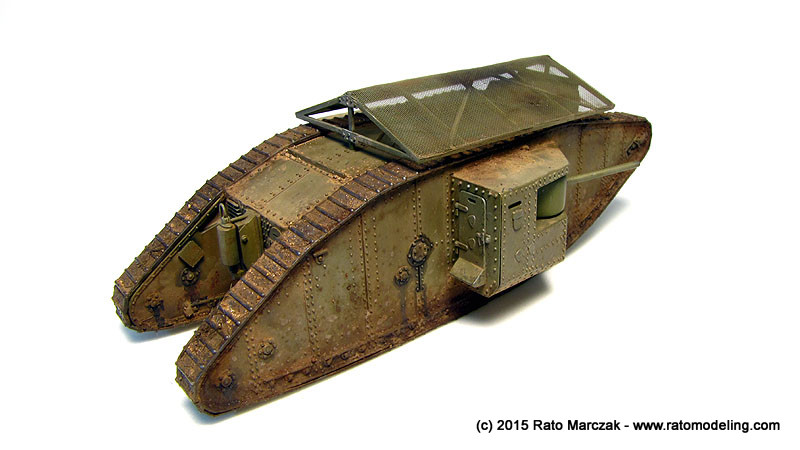
I received the kit with the hull assembled, and spent the first night basically adding a few details. This would be an early Mark I, so I added the triangular roofs on the exhaust openings (there was no siliencer in the first versions), the front towing plate and a couple of things more. Later I discovered that I should have removed the hatch atop the driver's compartment (fortunately it will be eventually hidden):
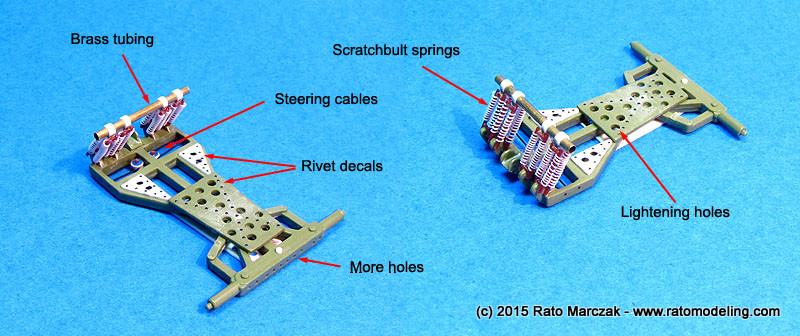
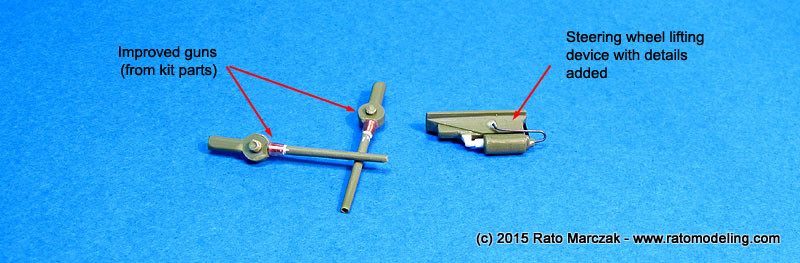
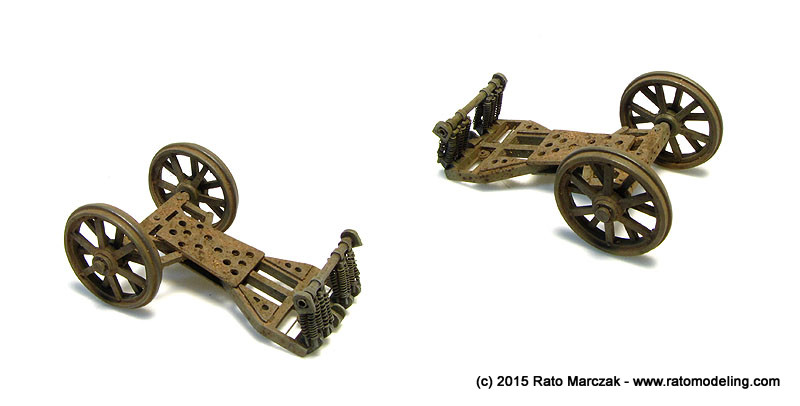
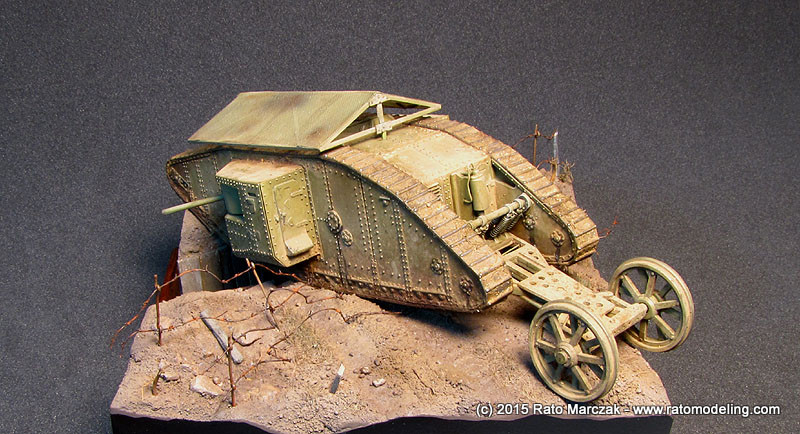
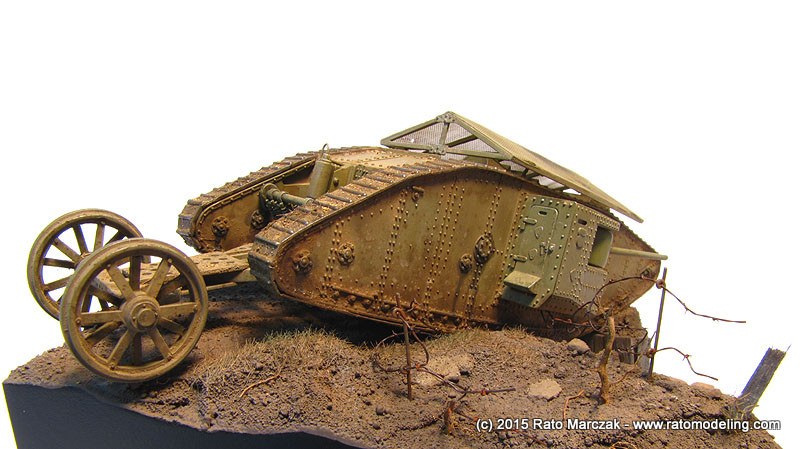
Early Mark Is had a primitive steering wheel mounted on the rear of the hull to help negotiating small curves (some good soul latter (re-)discovered differential brakes or clutches). The kit parts are good enough, but I managed to destroy them with the hair drier trying to speed up paint drying. Doh! I'm getting used to it - I think it is my age. I wanted the steering wheels, so no option was left but to scratchbuilt a new one, which I did using plastic rods, brass tubing and stretched sprue cooked as springs. And since I was at it, more details were added, like the steering cables, pulleys and round rivets simulated with Micro Mark 3D rivet decals. The wheels themselves received bolt heads along their perimeter and hub. The steering wheel lifting device and the cannons were also slightly improved:
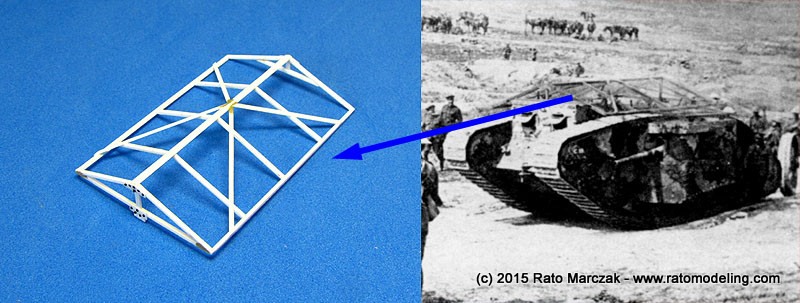
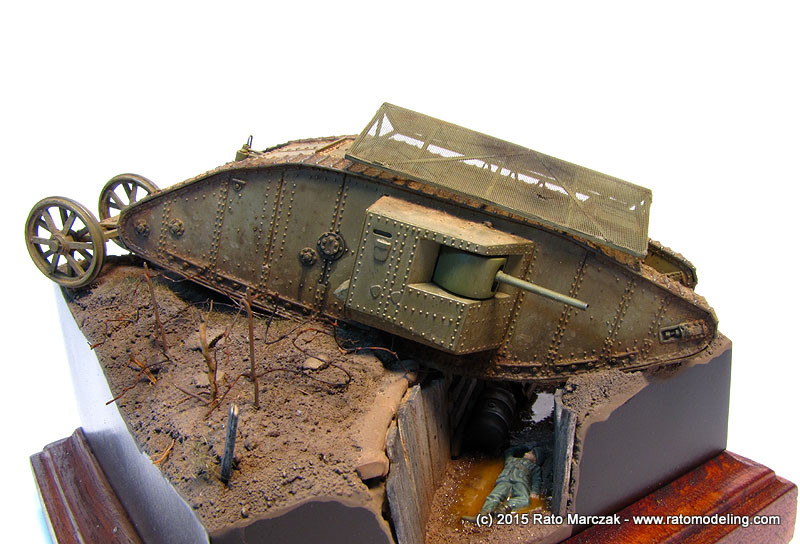
Besides the characteristic steering wheels, early Mark Is also had a primitive grenade screen - or bomb roof - mounted on the top. I guess this was used to avoid hand grenades from landing on the top of the hull. Both the wheels and the bomb roof were shortly used in combat, being installed only on early vehicles. I scratchbuilt the screen armature using plastic strips and drawings as references. The screen itself would later be cemented to the armature. At that point, I didn't had a clue of what to use as screen, but I knew didn't want a photoetched screen due to its flatness. More on that later...
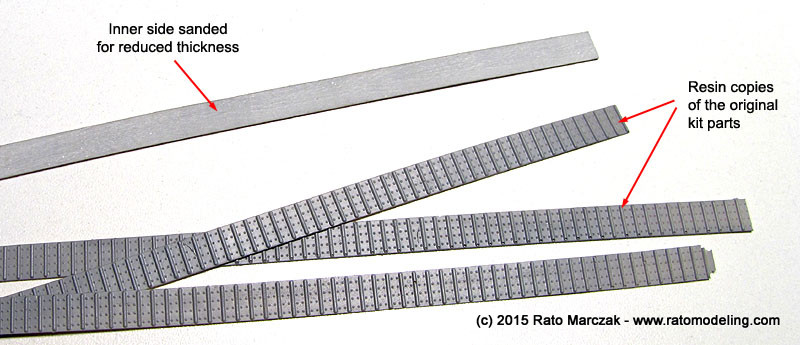
A terrible surprise, and probably one of the reasons why the model was not finished by the original owner, was the fact that the vinyl tracks suffered of severe shrinking over the years. The tracks on my model were about 1 cm(!) short from closing, not to mention that vinyl is a pretty bad material for sanding, gluing and painting.
My only viable choice was to cast several copies of the original tracks in resin and assemble new ones in place around the hull with the necessary length in a link-by-length fashion. The benefit of this approach was twofold: (a) the tracks were sanded on the inner side and brought to a scale thickness that no rubber track would allow. (b) by scribing lines on the inner side (under the hinges) along the positions where they would curve, I managed to produce a realistic hinges without bending the individual track links - an ever present problem with flexible tracks. I called the method controlled cracking, and it worked fine. The remaining lengths of the track would stay flat.
You may argue that if the original tracks had the correct number of links, then mine had a wrong number of them. After sniffing so much resin fumes, I simply don't care...
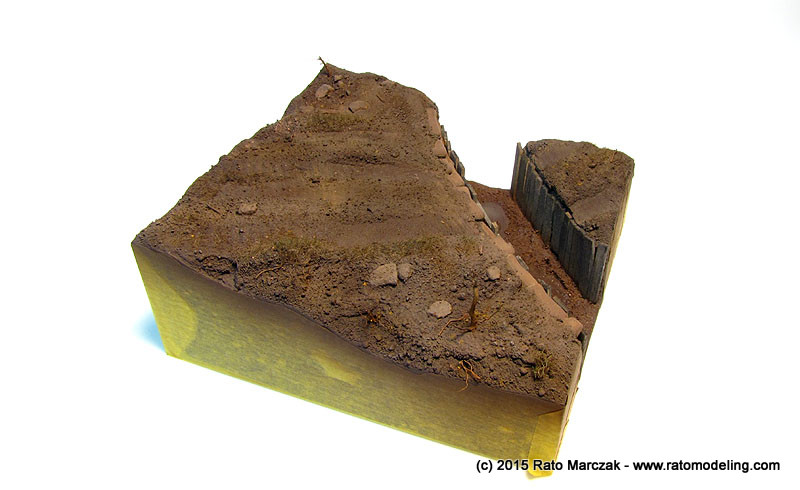
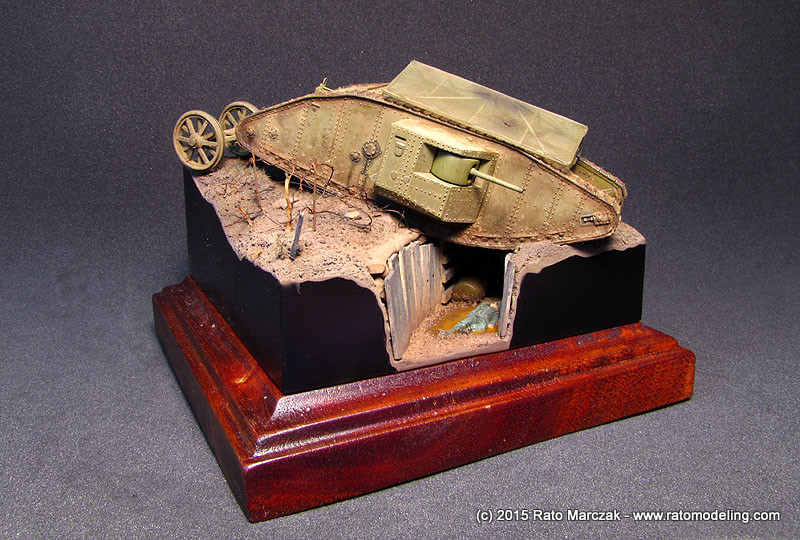
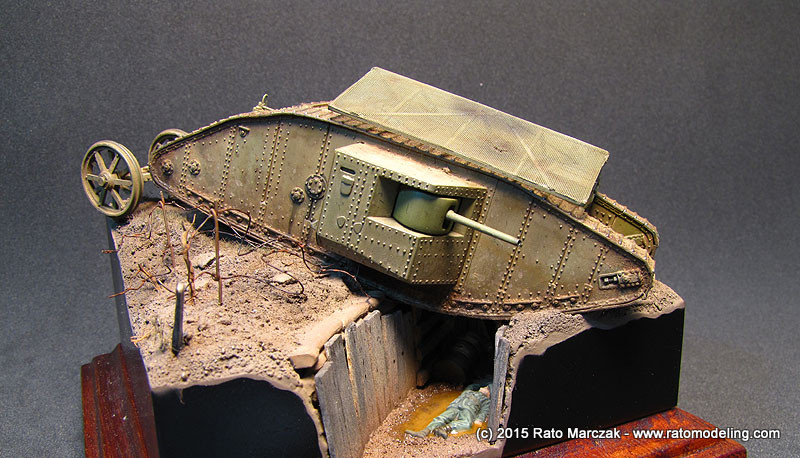
After assembling the tracks and the cannon housings, I left the model aside and started to work on a suitable base. As I mentioned before, the boxart was in my head. After sketching some ideas on a piece of paper, I came up with a general ideal of my Mark I crossing a defeated trench on a weak spot along the enemy lines.
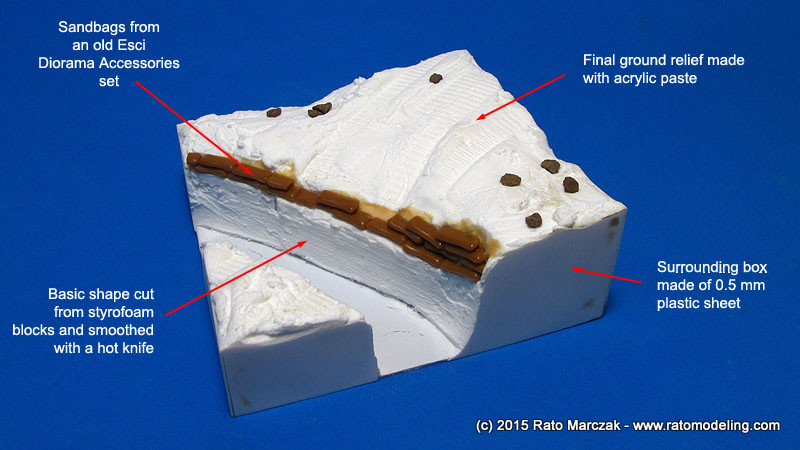
The base started with a squared plastic sheet over which I glued blocks of styrofoam fixed in place with hot glue. The trench was carved off, then I roughly smoothed the relief with a hot knife, and refined the ground shape with acrylic paste. The base was boxed with 0.5 mm plastic cards for a better finish.
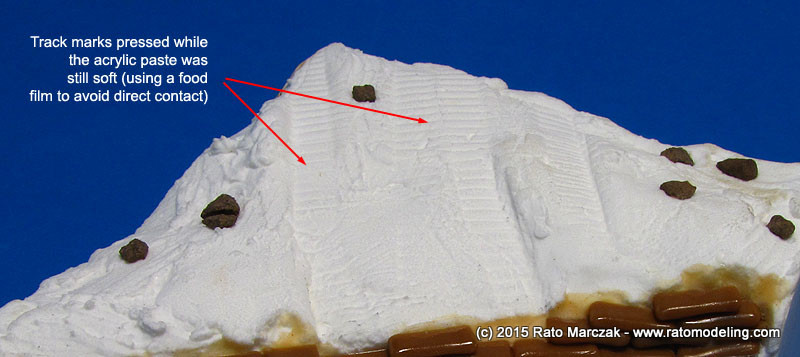
The track marks were pressed while the acrylic paste was still soft using the resin tracks. In such cases, I like to lay a piece of food film over the paste to avoid it from sticking to the tracks:
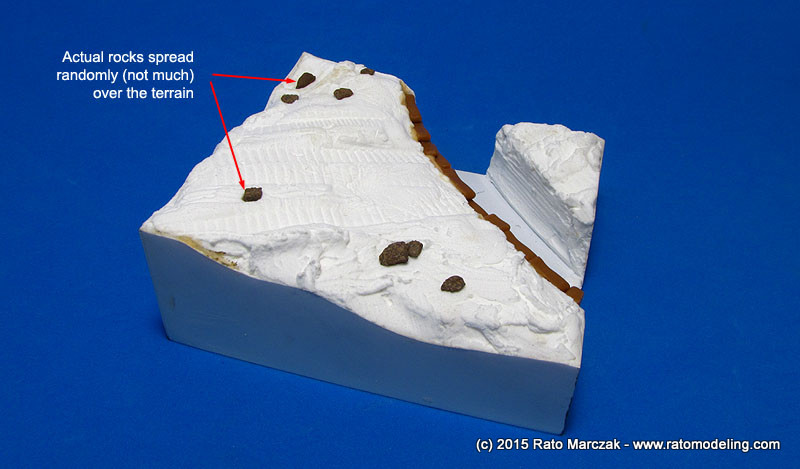
The acrylic paste I used is very porous, and that allowed me to bury partially small rocks here and there with little pressure. I used sandbags from an old Esci's Diorama Accessories. They are a pain to sand, and I used a hot pin to remove mold seams instead. They were sliced in the middle and glued along one border of the trench with carpenter's glue:
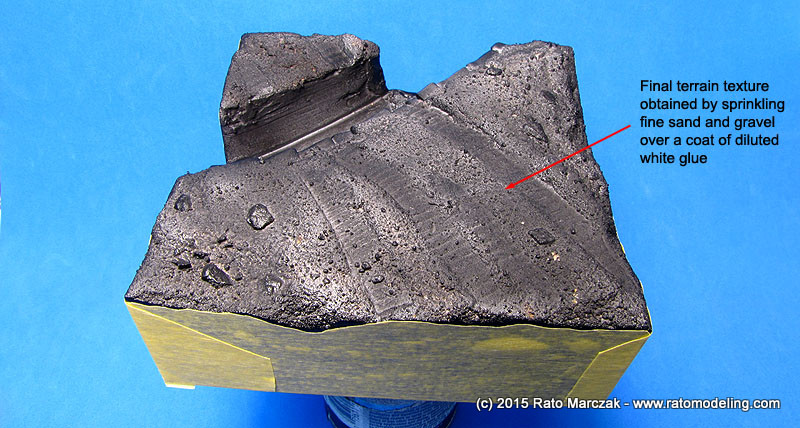
The final texture of the terrain was obtained by sifting a mix of fine and medium sand over the base previously coated with diluted white glue. This is important not only to get a scale relief, but also to fill small holes and stubborn or irrealistic depressions. The glue was purposedly applied over the sliced side of the sandbags as well, so that after adding the sand it gives the impression of dirt fallen over the bags, and conceal the cut edge of them. The method worked very well, looking like the sandbags were partially buried in the soil,
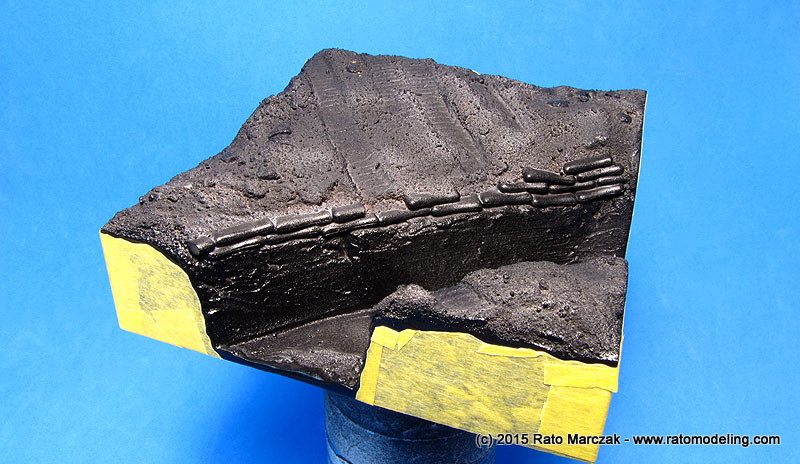
I painted the walls of the base with semi-gloss black, masked them, and sealed the terrain to the next step with a black spray primer. This also helps to produce false shadows on deeper spots later:
Zap, zip, zap... fast forward a couple of nights.
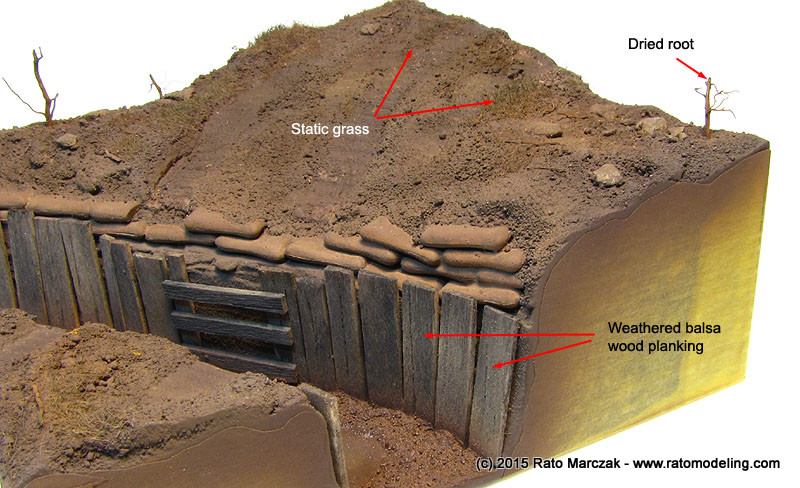
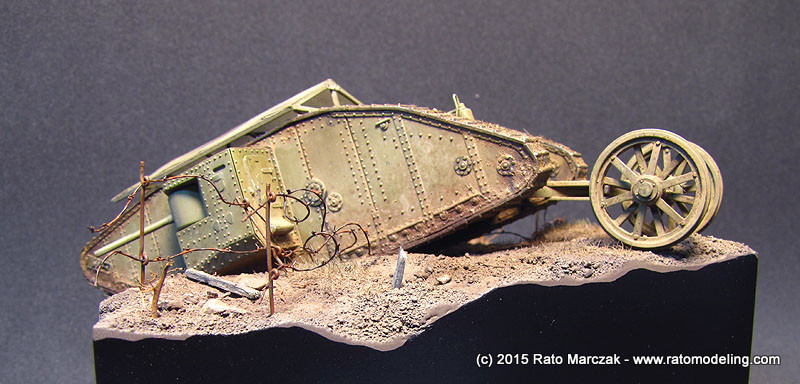
Once the glue was fully dry, I glued some static grass on selected places, planted some dead trees using dried roots, and scattered grinded dried roots over the base. I glued all these things before painting the base. The first things to receive paint were the sandbags, washed afterwards with diluted acrylic paint. Only then I airbrushed the base colors, starting with a dark brown mix and playing with the airbrush using lighter earth tones on higher spots. The rocks and dead vegetation were brush painted with lighter colors. Finally, a gentle dry brushing with green mixes of artist oils gave some color back to the grass. I like this sequence because we eliminate that irrealistic shine of the static grass, and at the same time it leaves a common shade to the whole base.
Actually, I purposedly used darker tones more intensely than in my previous bases, for I wanted to simulate a terrain still wet in places, like if had rained a couple of days before. I even airbrushed a mist of gloss varnish over the track marks and a couple of depressions, but my photos failed to show it. A drybrushing of light earth tones on higher spots finished the terrain.
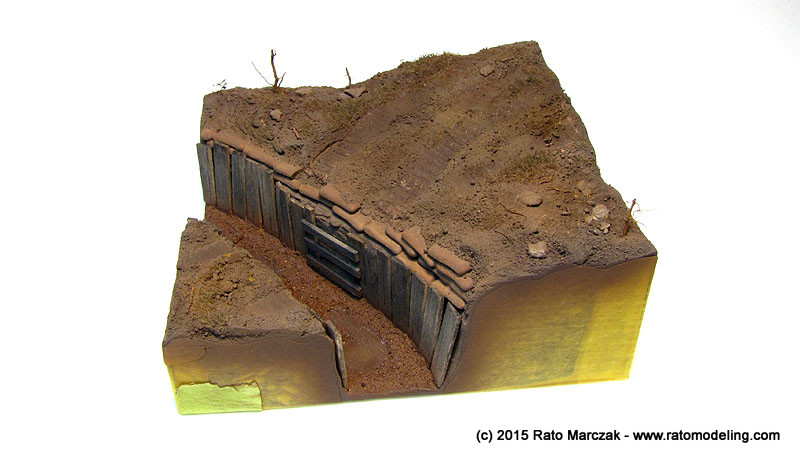
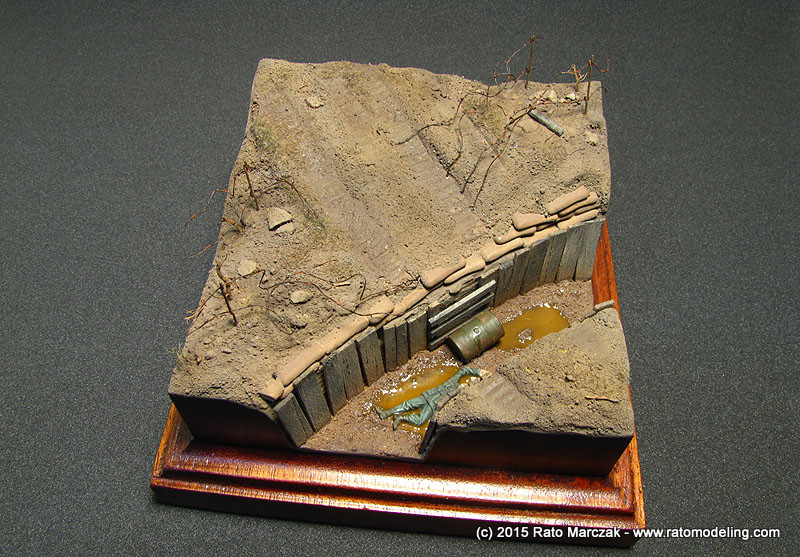
Moving on to the trench, I decided to simulate a crude planking along its walls. For that I used pieces of balsa wood cut without a ruler, as I didn't wanted that perfectly cut look for the planks. They were then treated with black and white pastels, using a method I learned from master modeler Brett Galland. They just look perfectly weathered, old dry wood. No paint here!
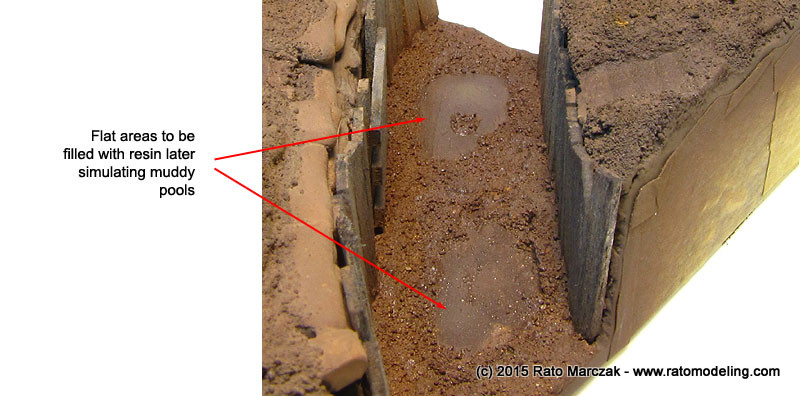
The floor of the trench also received sifted sand, but I left two areas in the bare plastic of the bottom of the base, as these will be filled with resin later to simulate muddy pools. I airbrushed gloss varnish along the base of the planking and over the pools to make the trench look more wet than the higher terrain above it. As I said, it rained a couple of days ago:
And the base was virtually done. I would rework a couple of things later, but I could start painting the tank:
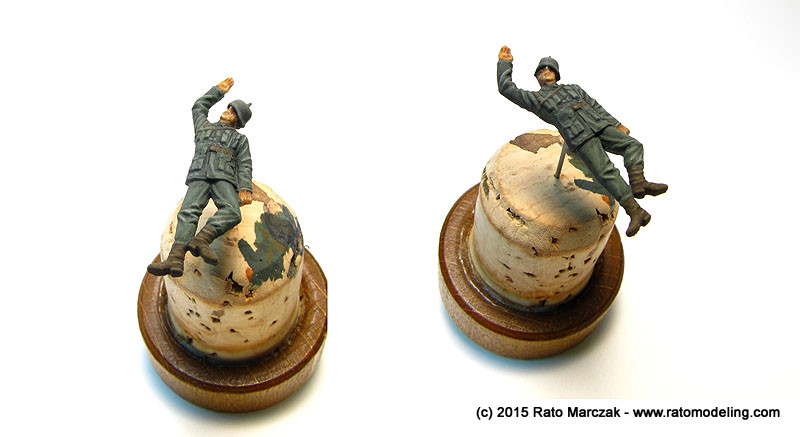
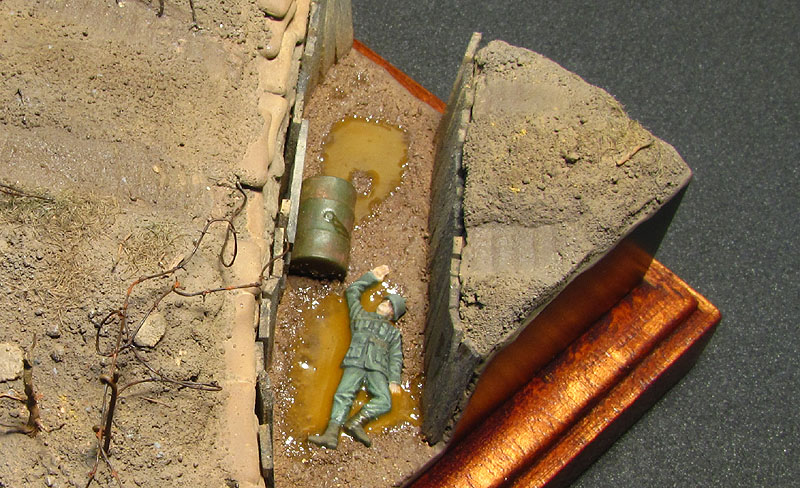
I almost forgot to mention that I opted for adding a morbid element to my base: a dead German soldier. I used a fallen soldier from Pagasus' Germans in Berlin set. The set is almost useless for plastic modeling, because it is molded in a vinyl so soft that it almost drip between your fingers. Being a WWII troop, I backdated the helmet and shaved off unsuited details. Its back was carved flat and before painting the figure it was pressed to the base while the sand was still wet. This formed a bed to cement the figure, which would be partially sank in one of the mud pools.
I'm no figure painter, so I did my best using Vallejo paints, but took the care of not using much vivid colors on the skin areas (thanks Flavio! You see? I retouched it.), afterall, its was an unfortunate fellow. I guess it was a case of being at the wrong place at a wrong time....
Another fast forward. Sorry for that. I was in overdrive and didn't want to stop to take wip pics...
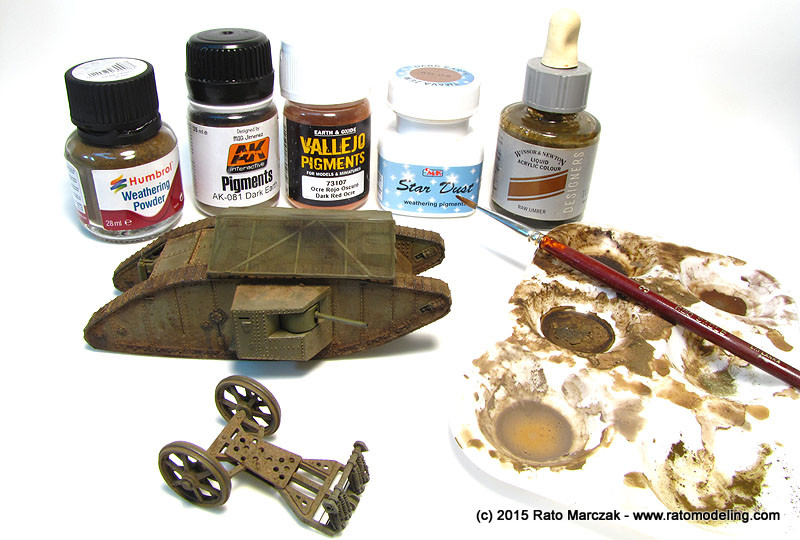
The model was painted with my own mix of Vallejo colors. I keep myself forgetting of setting the white balance of my camera, and the base color looks too green in all the photos here. Up close it is considerably more brown, honestly. The tracks were base coated with Humbrol Polished Steel from their Metal Cote line (I love this stuff), and the model was airbrushed with a satin varnish, also from Vallejo. The next step was the application of oils wash, what was done in a very lousy way. The idea was to depict a very dirty vehicle.
I used several pigment brands from my workbench to weather the model. In a nutshell, here is the basic sequence (each step applied once the previous one was sufficiently dry):
1. An overall pass of light dust pigments heavily diluted in water/Windex.
2. Dark dust applied on corners, upper and lower hull, cannon housing and tracks. This was applied dry and fixed with Windex.
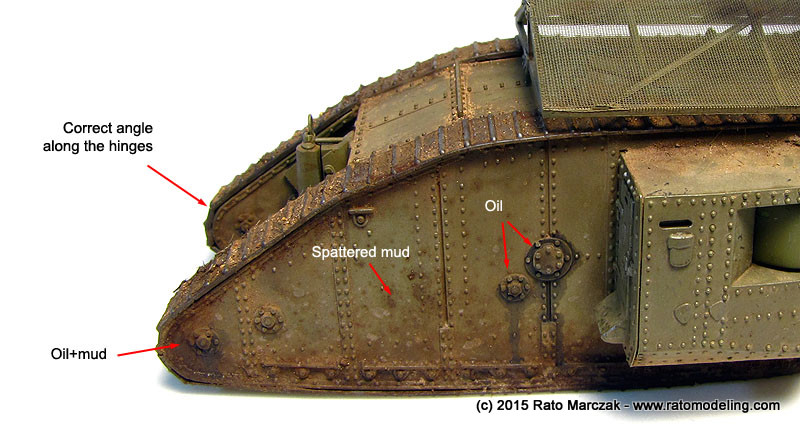
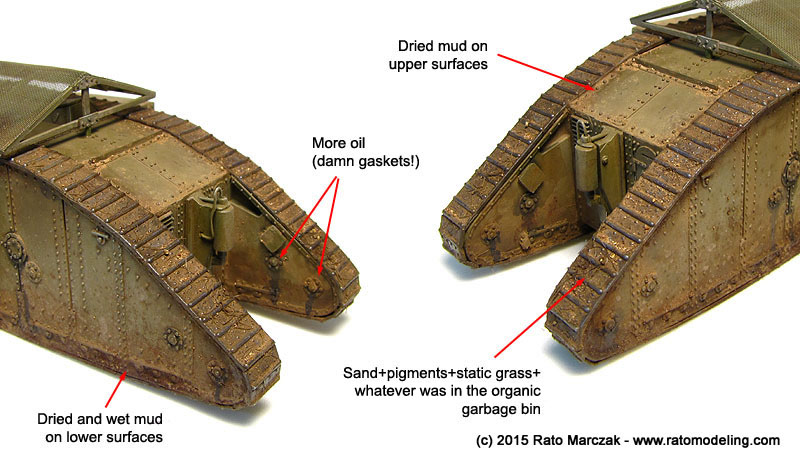
3. Dry mud pigments applied over horizontal surfaces, tracks, and along the hull edges running on the sides of the tracks. Applied diluted in Windex.
4. Fresh mud effets, applied close to the tracks and lower hull.
5. Accumulated rocks simulated with sand+pigments and deposited on the roof of the cannon housings and upper hull, depicting dirt from the tracks fallen over the horizontal surfaces. Applied dry and fixed with Windex.
6. Mud crumps were simulated with a mix of dry and fresh mud pigments and washes, sand and fine static grass, and applied more localized along the lower hull, tracks and hull edges close to the tracks.
7. Spilled mud was produced using diluted dry mud pigment blown from a brush using air from the airbrush. These was applied on the front hull and selected places of the sides.
8. Oil leaks are thinned Lifecolor Tensochrom Oil, applied with a brush along bearing caps, engine hatches, steering wheels and wherever it was possibly lubricated.
9. Paint chipping and scratches applied with artists pencils along edges, doors and handles. Dark brown and black colors.
I made most of the weathering on the fly, not worrying much with perfection (whatever it means). If something didn't look good, I would retouch - simple as that - until I was satisfied. As you know, the secret of a convincing weathering is the build up of layers, even if it is to correct mistakes...
Of course the whole process can be considerably expedited with the aid of a hair dryer, but my advice here is not to try to finish everything in one day. Leave the model overnight and in the next day you will see spots deserving touch ups that you missed yesterday.
Once everything was dry, I rubbed my fingers over the tracks to bring back some shining to the raised edges. These photos help to see the final aspect of all the steps:
The screen of the bomb roof came from a tea bag given by a friend (thanks Alex!). I don't know the brand, but it seems very nice for 1/72 scale, as it is sewed like fabric, not flat as a photoetched part. I cut a piece of suitable size and glued with contact cement on the roof structure. It really looks like a wire screen (in retrospect, the gauge is a tad too small, but it was the only type I had). The screen was teared on a couple of places to simulate some abuse, and only then painted. I used Rustall to simulate rusted areas, and Gunze's Soot immediately above the engine chimneys representing accumulated grime:
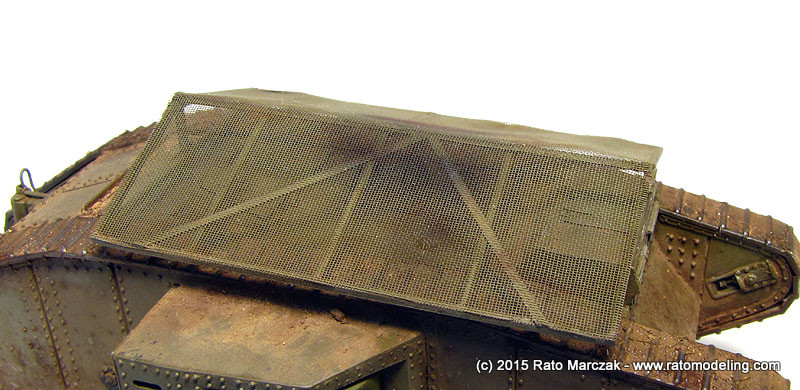
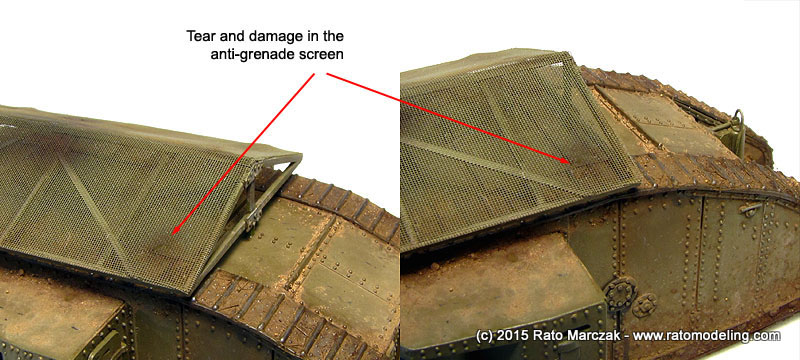
Here is the result:

The steering wheel bogie recieved a treatment similar to the hull, except that I scrubbed graphite powder along the rims of the wheels.
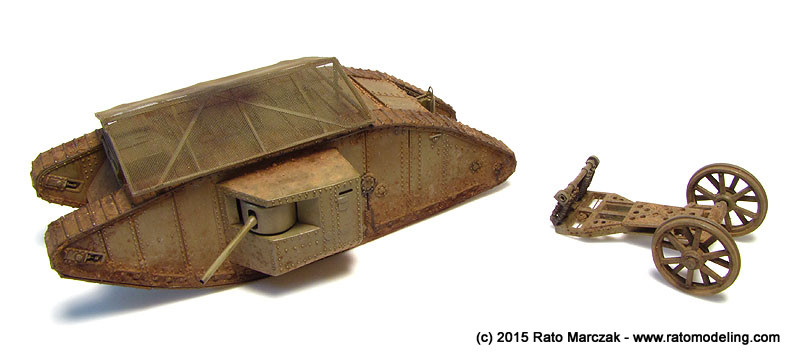
Almost there. I just had to install the steering wheel bogie, but this would be done once the tank was secured in its final position on the base.
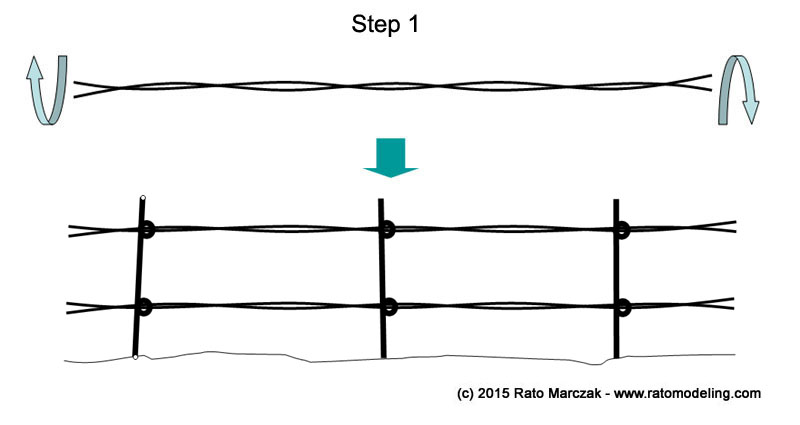
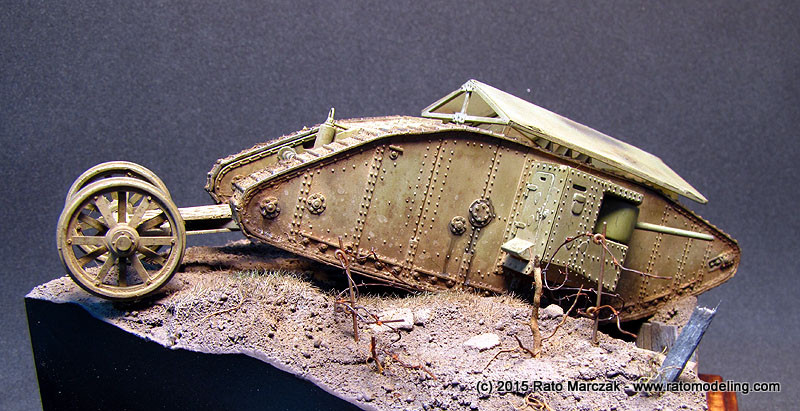
Back to the base, again. I believe there is no genuine WWI diorama without barbed wire fences. I couldn't use the same method of my Renault FT-17 vignette, when I made it from fine wire small knots directly along the length. The problem is that I wanted to depict those poles made of steel, with the barbed wire running through eyes along the poles. It would be impossible to run the wire along the eyes without ripping the knots off the leading wire.
Here is the method which worked for me. I started bending the poles using 0.5 mm wire, making a couple of eyes at a suitable height from the ground. They were painted with dark rust color and inserted in holes previously drilled to the base. I then made the running wires by turning a pair of fine wires (0.15 or 0.2 mm) over each other and painted them. Next, the running wires were inserted in the eyes of the poles:
A considerable time was spent making knots using the same gauge of the running wires. I made quite a few of them, cut to size:
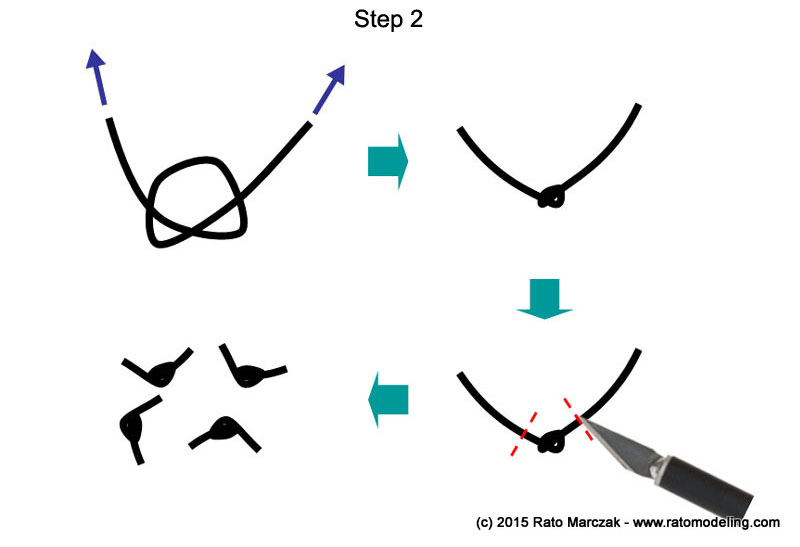
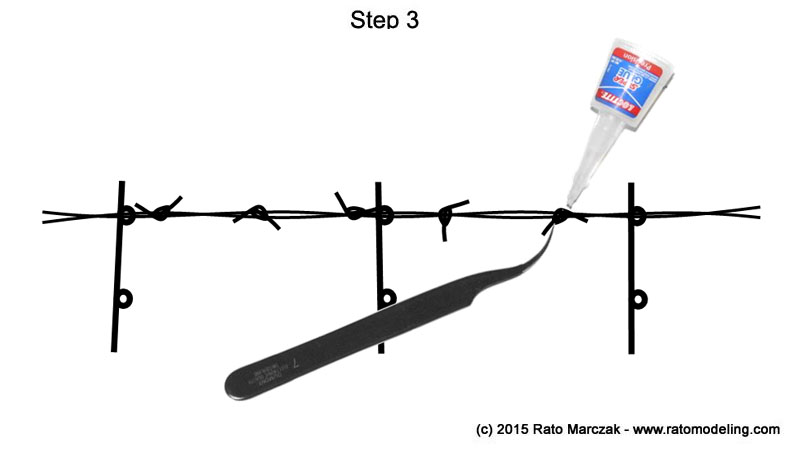
Next, each knot was individually glued to the running wires. It is time consuming, but not more than the time spent with the previous method on the little Ranault. Once the glue was dry, I painted the knots with the same color of the running wires and rusted with Rustall:
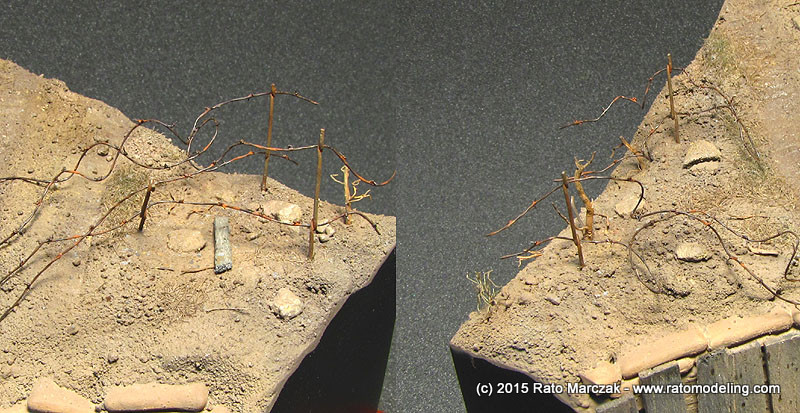
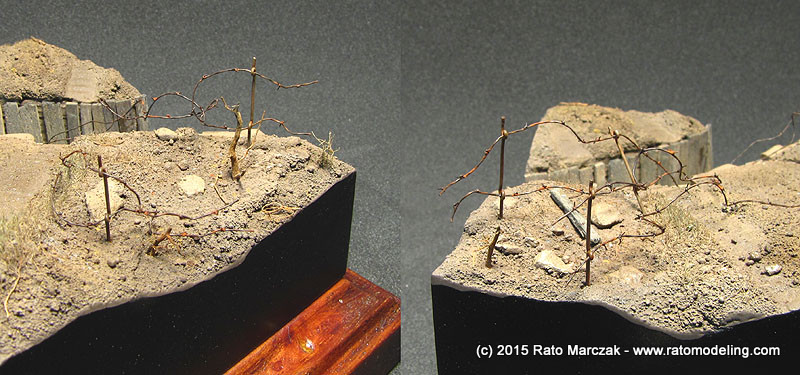
Strictly speaking, the gauges used are probably more suitable for 1/35 scale. But I had to make a compromise between scale appearance and what was achievable with my fat fingers. Besides that, a truly scale barbed wire could fade in the base, and I wanted it very visible:
Finishing off the base, I harmonized the terrain with the tank by applying restrained amounts of the same pigments used on the hull to the terrain, using a make-up brush. The dead troop was glued to its spot and Vallejo Still Water mixed with earth colored acrylic paints was poured on the pools. In order to minimize the characteristic capillarity effect of running up on the raised edges of the troop, the product was applied in three or four layers. The last layer was Sill Water straight, without any dying, what produced an interesting color variation. A drum was laid between the pools:
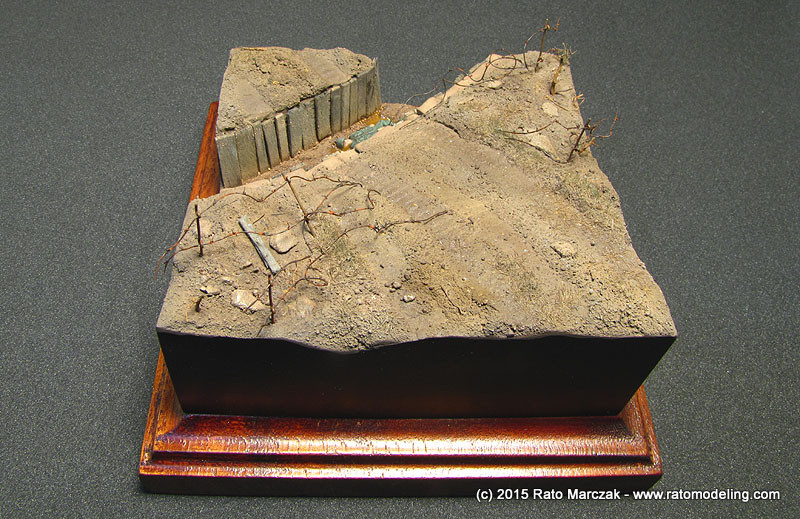
The tank was cemented to its position, and only then I installed the steering wheel bogie. I also added a wood ladder resting on the North wall of the trench (check your GPS). Some dry leaves were added to the terrain, but these photos were taken before that. Anyway, it was done. Here are some general views:
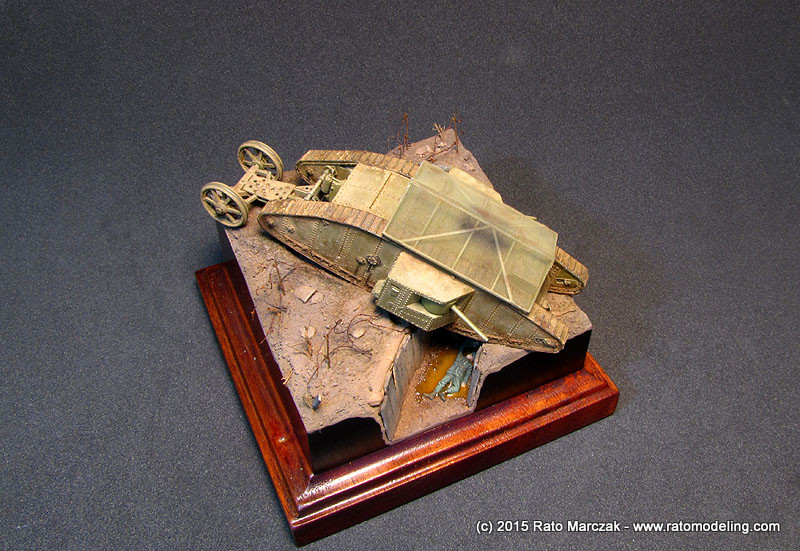
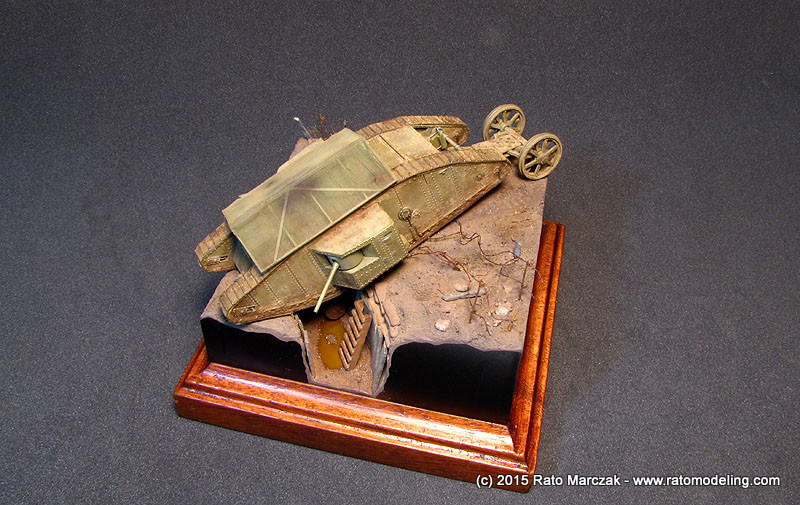
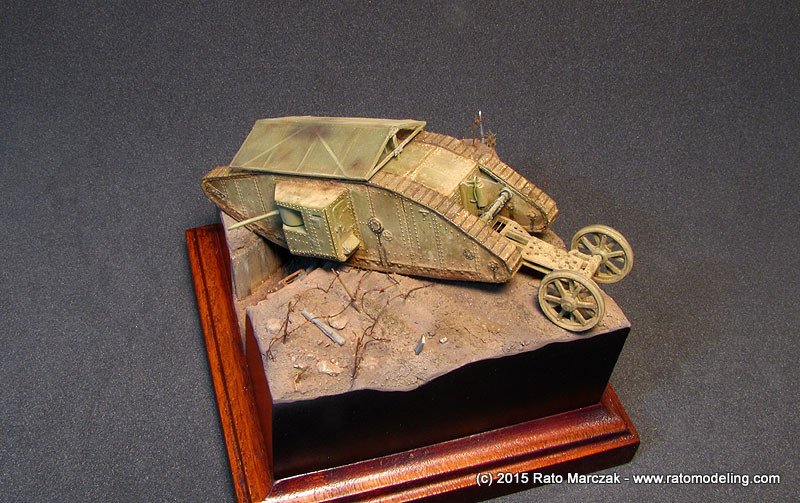
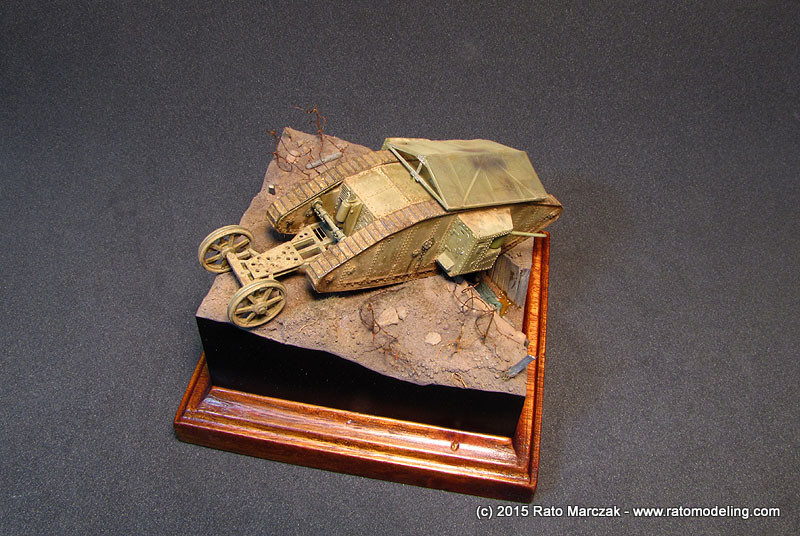
More photos...
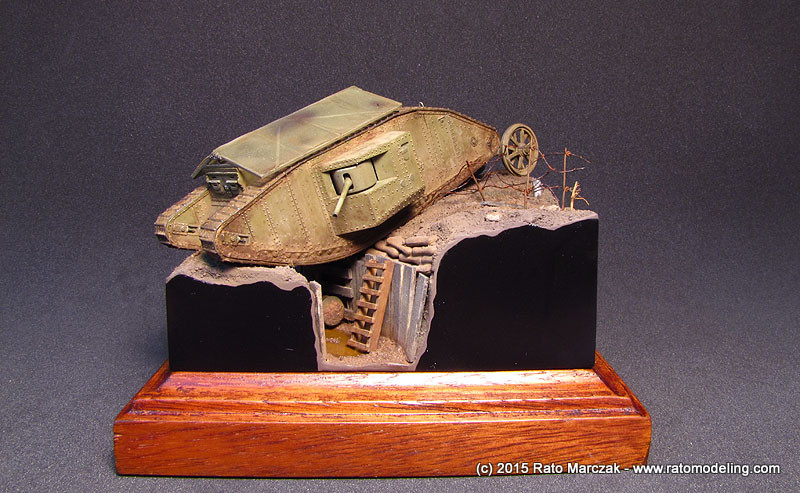
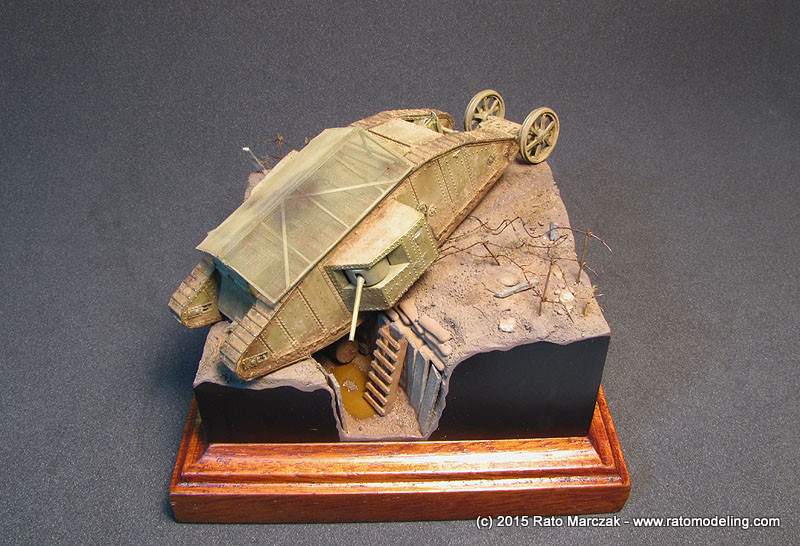
Here my attempts to produce more dramatic views:
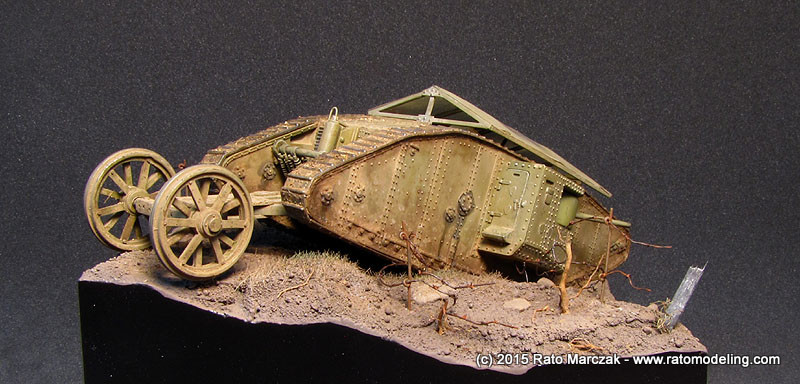
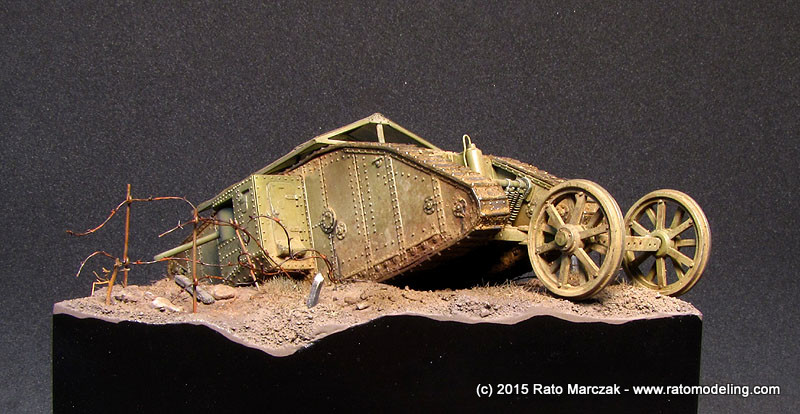
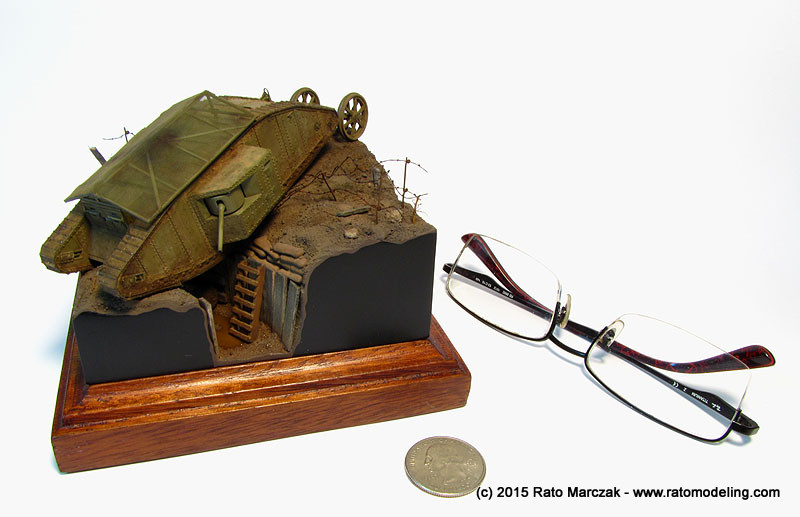
And a couple with a white background:
This was one of the most enjoyable among my recent projects. Dioramas have something that standalone models never deliver. I definitely will keep doing more...
Many thanks to Bradley for handing me over this model, and my friends modelers for many suggestions during this project.
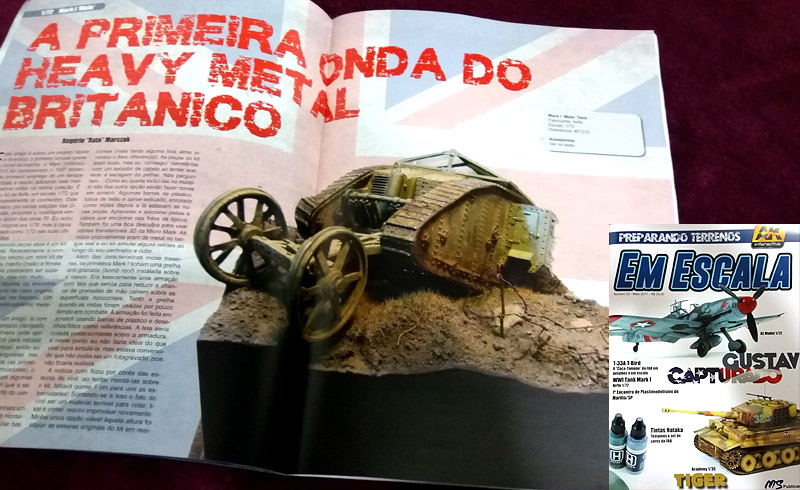
This article was published on Em Escala magazine, #3 / May/2017 issue:
| Technical file | |
| Kit:
|
- Airfix #01315 |
| Additions:
|
|
| Basic
colors: |
-
Primer: None - Camouflage: mix of Vallejo Model Color paints - Tracks: Humbrol Metal Cote Polished Steel - Flat finish: Testors Model Master Acryl flat |
| Notes: |
-
Some scratchbuilt details (see text). |
Rato Marczak © 2015 (revised March/2023)
