| F4 Models NC-1A Aircraft Starter Unit - US Navy in 1/72 |
|
Started: January/2015 Finished: June/2015 |
While
working on a Korean War diorama project, I needed a suitable carrier
deck equipment. It could be a tow tractor or something else, but when I
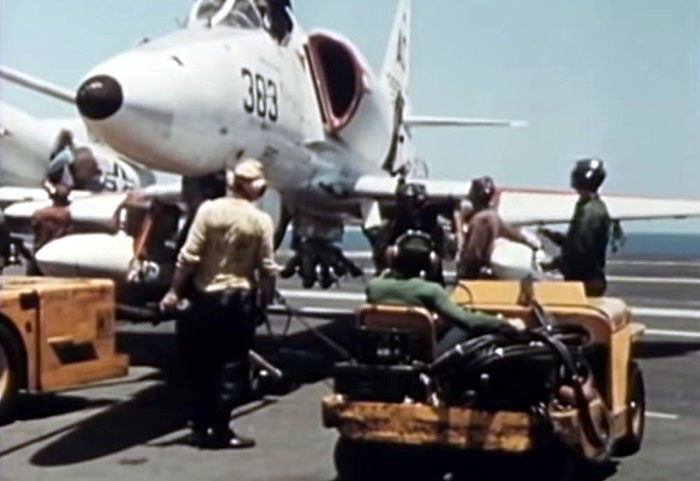
saw Bridges at Toko-Ri movie I came across a scene showing a NC-1 starter unit:
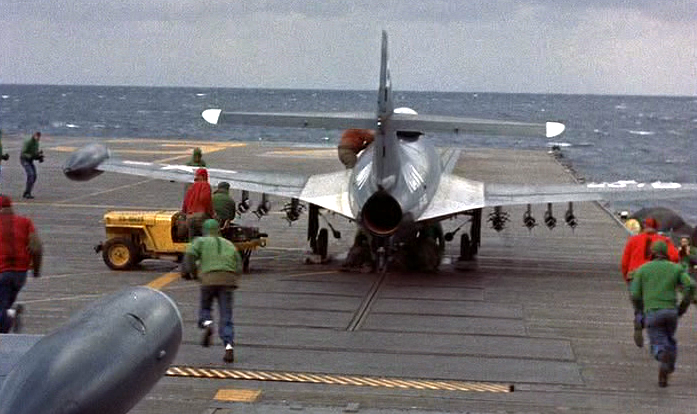
A little research showed that these little vehicles were nothing else than modified MB Jeeps which had the rear axle replaced for a pair of small swivelling wheels. Several other modifications made the vehicle more compact than its Army cousin, as it is supposed to be in any carrier deck equipment. Its purpose was to provide electric power to start jet engines up. The NC-1 served on USN aircraft carriers from early 50's up to late 60's, when it was replaced by more modern types. From the photos, I identified basically two types, one with a large pyramidal cover over the engine hood (I don't have a clue of why is that) and another without it. I have chosen the first one, as it seemed more interesting.
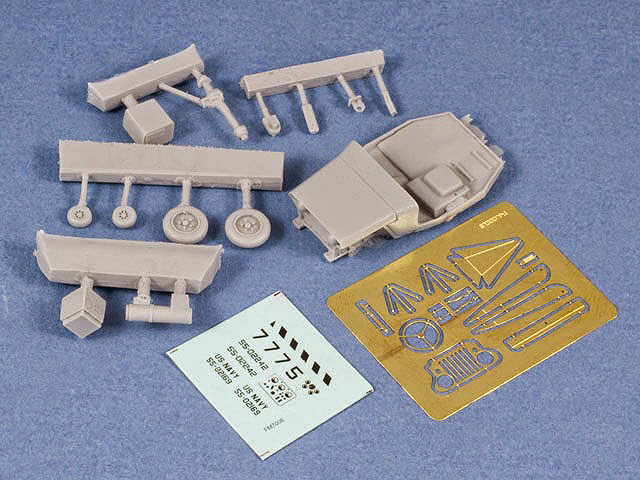
It would be a chore to scratchbuilt or convert a Jeep model to one of these, but fortunately F4 models, from Russia, has a nice line of ground vehicles in 1/72 and 1/48 scales, and the NC-1 is one of them. It is a good resin kit with photo etched parts, decals and instruction sheet. Surely is a wonderful addition to any Panther, Banshee or Cutlass diorama, if you are so interested...
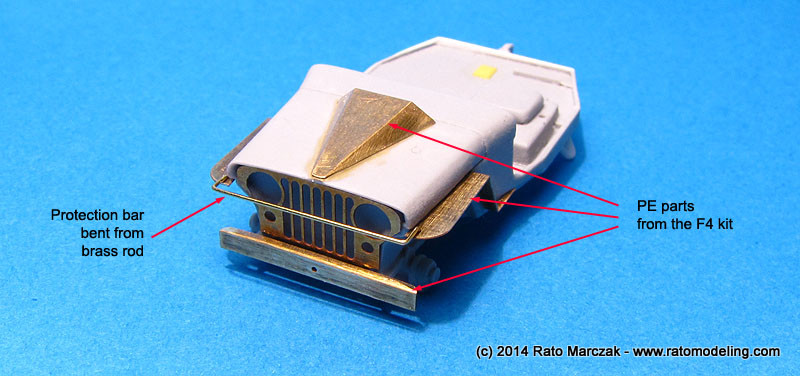
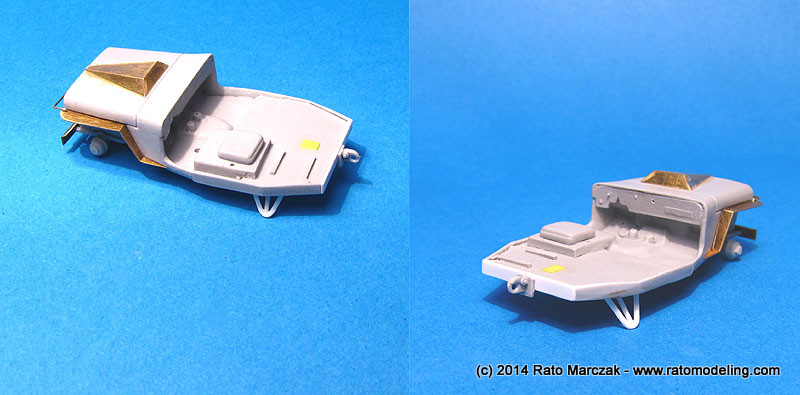
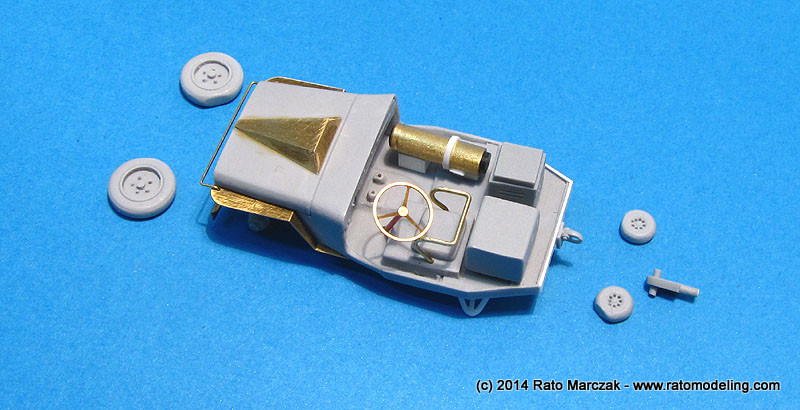
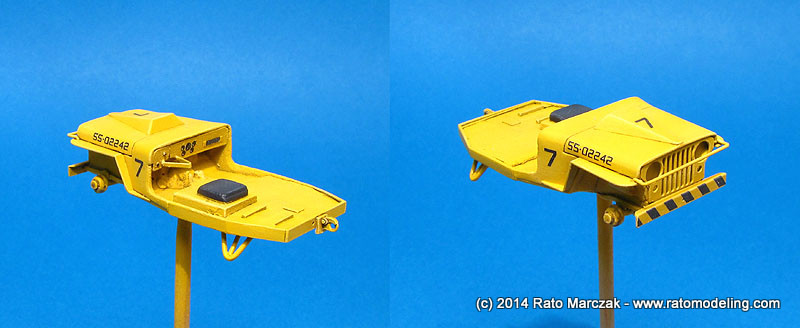
I started by assembling the main body, which consisted of cementing the PE parts in their corresponding places. I had to tweek with the PE fenders' angles to made them follow the sidewall, but other than that, all parts fitted very well. The guard bar in front of the unit is not provided with the kit, but the holes to glue them to the fenders are. It was a matter of bending a brass rod and supergluing it in place. It is a visually important piece, don't leave it out. My friend Felipe (a great Jeep fan) will be happy to see the small hole in the front bumper, used to crank the engine.
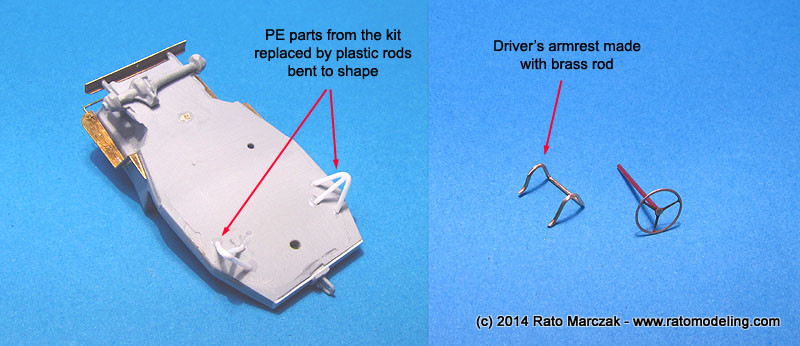
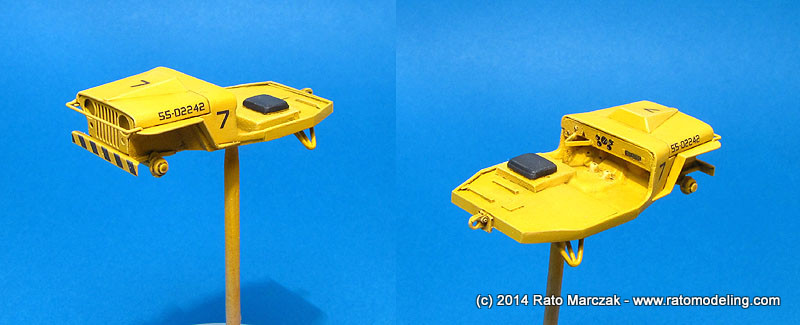
The NC-1 had a pair of side guards under the aft body, and they are provided as PE parts as well, but I replaced them by plastic rods bent to shape. The rods I used are slightly larger than what I wanted, but that's ok. I also made the driver's armrest with brass rod bent to shape following photos. It would be glued to holes drilled on the sides of the driver's cushion. The PE steering wheel was glued to a plastic rod column, made longer than necessary. This will allow me to insert it in a hole drilled on the floor, cement on the underside (not visible), and trim the excess. This woulc allow its intallation after the driver is cemented in place - it would be virtually impossible to fit the driver later with the steering wheel in place.
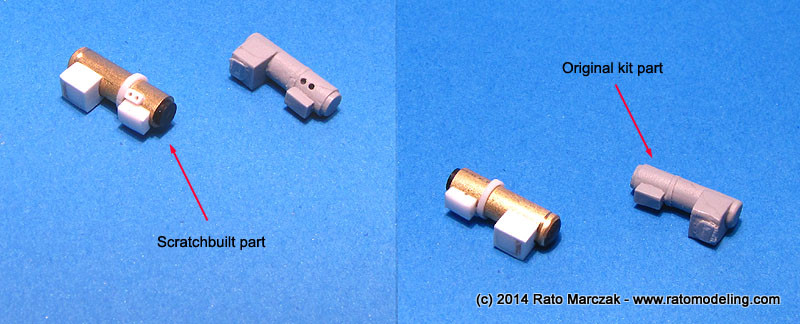
The only item I didn't like in the kit is part #7, which I assumed to be a generator. I turned a new one in brass using a micro-lathe and added the surrounding details with plastic bits. It turned out very good when compared to the kit original:
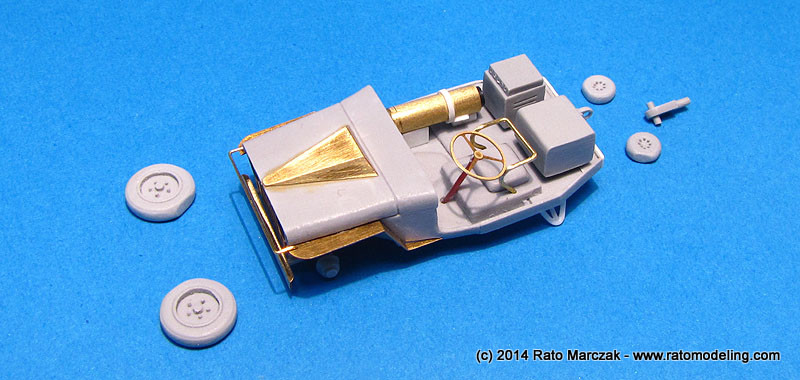
Everything was dry fitted before start the painting phase. A nice touch by F4 are the bulged wheels. On the other hand, their fit to the ends of the front axle are very loose. It would make gluing more difficult later, but at least I would be able to put them in a steered position.
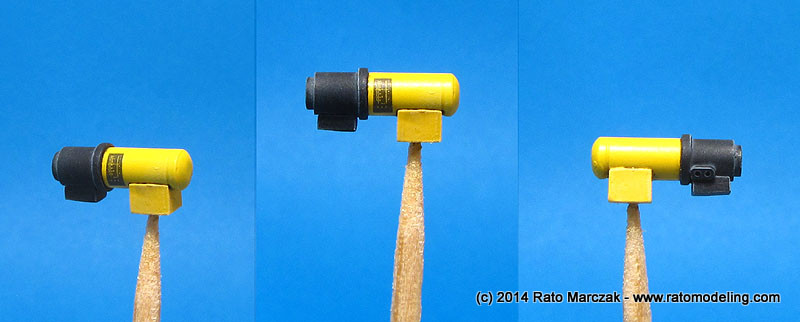
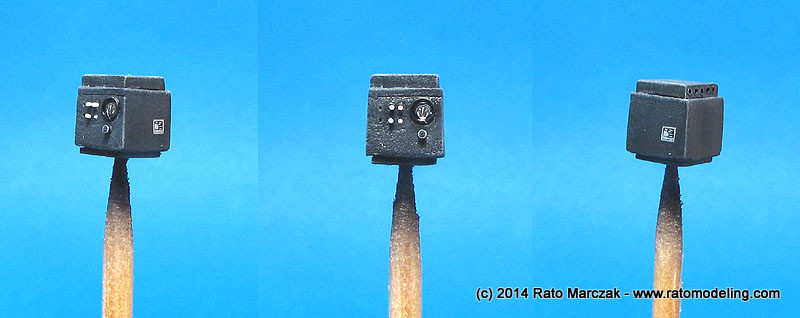
Painting commenced with the starter electrical devices. I painted the control box with Humbrol's Trainer Yellow and the generator with Gunze's Yellow. The body would be painted with the first color, which is considerably darker than Gunze's. I reasoned a small variation in the colors would add interest, like if they were painted by different manufacturing contractors. The output box was painted plain black. These items used the nice dial decals of the kit. In order to make them more three-dimensional, though, I added Reheat brass bezels, as well as buttons and switches from colored platic bits, and also used Grant's placards here and there to act as instruction stencils and manufacturer data plates. The accessories received a light oils wash and a gentle drybrushing with a lighter base color, coated with semi-gloss or flat clear. Of couse the bezels were painted with gloss black and glued afterwards. The final effect is way more convincing than what I would get with plain instrument faces:
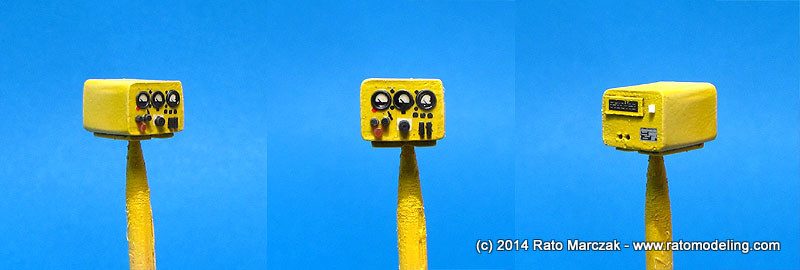
Like I said, the chassi/body was painted with Trainer Yellow from Humbrol range. The kit decals were used for the dials, but again I added data plates from Mike Grant. All other markings are from the kit, and they performed quite well. I gloss coated everything, washed with brown oils, drybrushed with light yellow oils, and, after 24hs, flat coated the model.
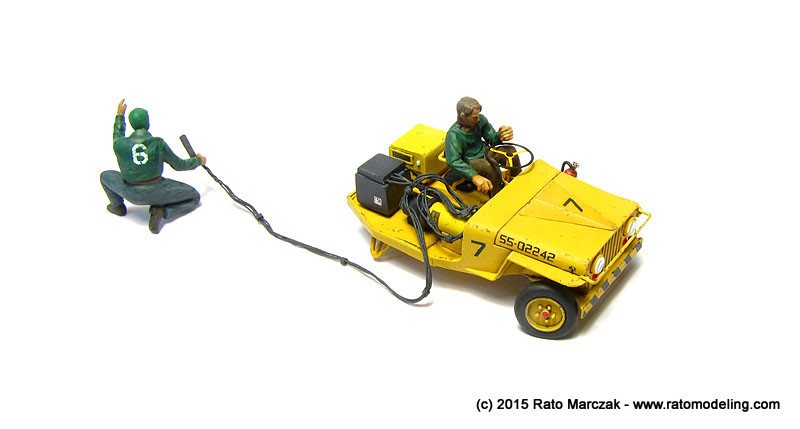
I didn't take photos of the final assembly. What was left to do was to paint and glue the wheels, which I put in a lightly steered position, and the accessories on the rear of the chassis. I also made the engine hood locks from stretched sprue and glued them at their spots on the sides of the hood. The headlights are from the kit, similar to MV lenses - a very nice touch, as all that was needed was to paint the yellow rims and cement them in their holes. The red lights were made with stretched clear red sprue, mushroomed over a candle. A small fire extinguisher was scratchbuilt and glued on the aft face of the port fender. I saw at least one photo of a NC-1 with such item, but failed to find it to register here. Anyway, it looks nice there. Instructions describes how to make the cable, using four 0.3 mm wires with total length of 5 to 6 cm. I found 0.3 mm too thick and used three 0.25 mm solder wires instead (had I used four, which is the correct number, it would result too wide, but I didn't have a smaller gauge). They were tied with Tamiya tape at each 1.5 cm or so, but 6 cm is too short when compared to photos. I used 8 cm, and still resulted too short. That will do for my needs, though.
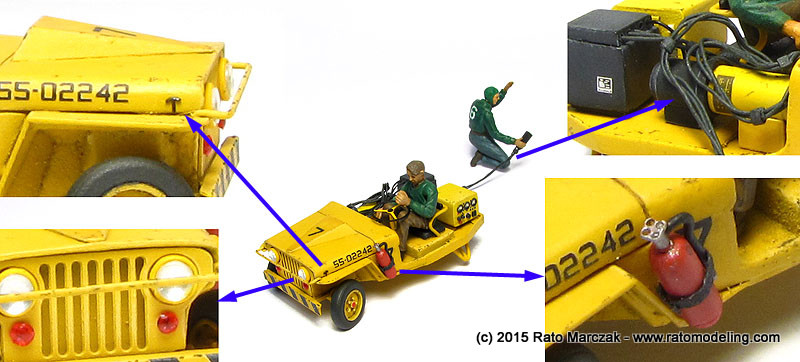
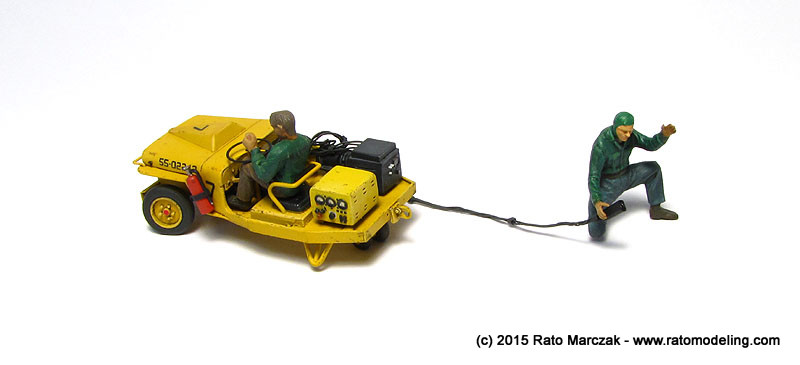
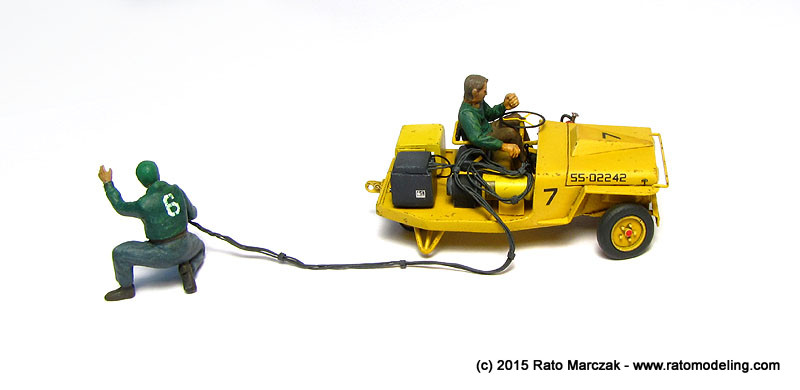
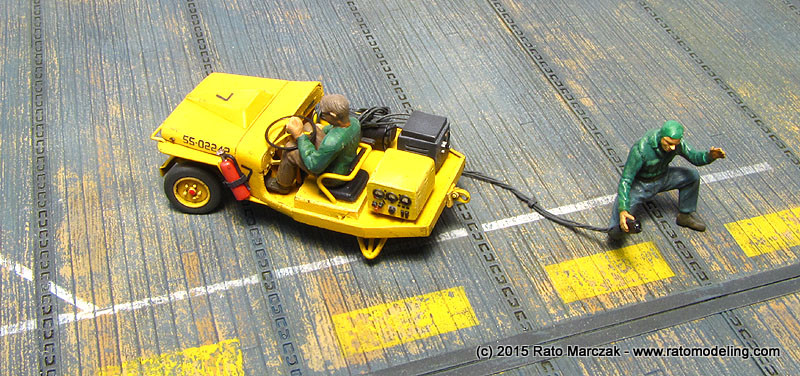
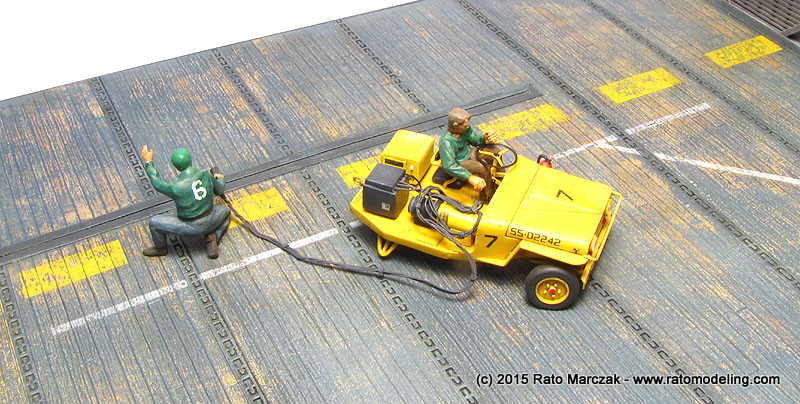
Already thinking on the diorama, I added a driver and an additional 'green shirt' who will be plugging the connector to the aircraft. Another F4 Models item was used for the driver: Flight Deck Tractor Drivers - US Navy, while a Preiser figure made the other deck crew. I used the legs, arms and head from the F4 drivers set, but the thorax was strange, looking like an inflatable dummy, so I replaced it by a spare item. After painting it I added a home made decal with the man's name on the back of his green jersey. I used a white number on the back of the Preiser figure.
The steering wheel was glued after the driver was cemented in place. This is a small vehicle, and don't think it was very easy to make the driver fit there - there was a lot of tweaking not described here.
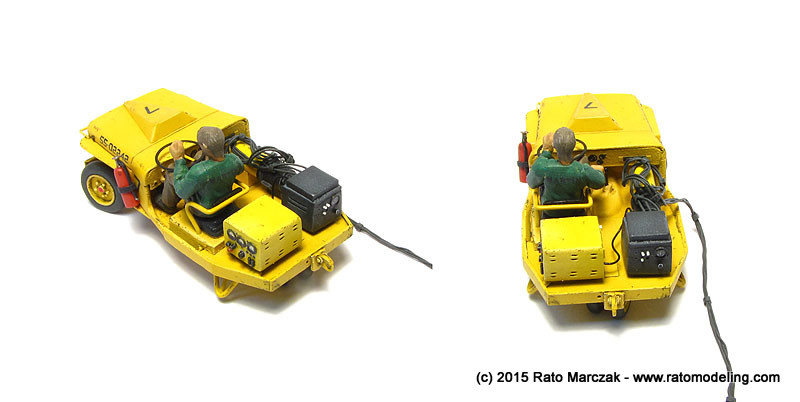
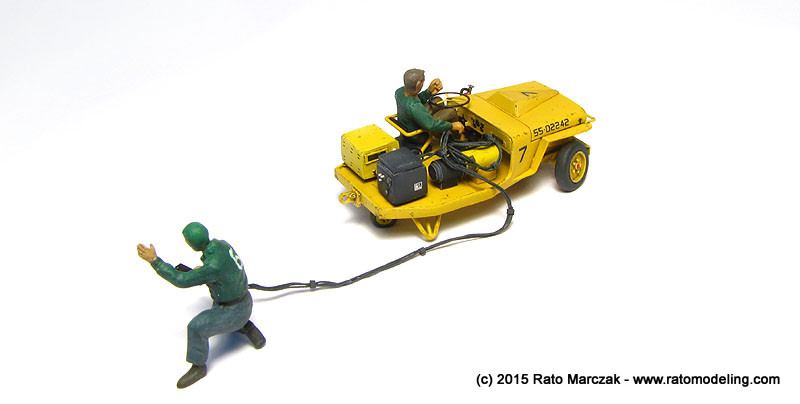
Since the cable was made of solder wire, I was able to roll part of it and make it conform to the accessory where it is was thrown by the crew, while the remaining length will be adjusted to the diorama scene later on. No parts was left in the box, so I guess this is it:
And of course, I couldn't resist the temptation of checking out the starter on the carrier deck:
This kit is a nice addtion to any scene, and I throughly recommend it.

A little research showed that these little vehicles were nothing else than modified MB Jeeps which had the rear axle replaced for a pair of small swivelling wheels. Several other modifications made the vehicle more compact than its Army cousin, as it is supposed to be in any carrier deck equipment. Its purpose was to provide electric power to start jet engines up. The NC-1 served on USN aircraft carriers from early 50's up to late 60's, when it was replaced by more modern types. From the photos, I identified basically two types, one with a large pyramidal cover over the engine hood (I don't have a clue of why is that) and another without it. I have chosen the first one, as it seemed more interesting.
It would be a chore to scratchbuilt or convert a Jeep model to one of these, but fortunately F4 models, from Russia, has a nice line of ground vehicles in 1/72 and 1/48 scales, and the NC-1 is one of them. It is a good resin kit with photo etched parts, decals and instruction sheet. Surely is a wonderful addition to any Panther, Banshee or Cutlass diorama, if you are so interested...
I started by assembling the main body, which consisted of cementing the PE parts in their corresponding places. I had to tweek with the PE fenders' angles to made them follow the sidewall, but other than that, all parts fitted very well. The guard bar in front of the unit is not provided with the kit, but the holes to glue them to the fenders are. It was a matter of bending a brass rod and supergluing it in place. It is a visually important piece, don't leave it out. My friend Felipe (a great Jeep fan) will be happy to see the small hole in the front bumper, used to crank the engine.
The NC-1 had a pair of side guards under the aft body, and they are provided as PE parts as well, but I replaced them by plastic rods bent to shape. The rods I used are slightly larger than what I wanted, but that's ok. I also made the driver's armrest with brass rod bent to shape following photos. It would be glued to holes drilled on the sides of the driver's cushion. The PE steering wheel was glued to a plastic rod column, made longer than necessary. This will allow me to insert it in a hole drilled on the floor, cement on the underside (not visible), and trim the excess. This woulc allow its intallation after the driver is cemented in place - it would be virtually impossible to fit the driver later with the steering wheel in place.
The only item I didn't like in the kit is part #7, which I assumed to be a generator. I turned a new one in brass using a micro-lathe and added the surrounding details with plastic bits. It turned out very good when compared to the kit original:
Everything was dry fitted before start the painting phase. A nice touch by F4 are the bulged wheels. On the other hand, their fit to the ends of the front axle are very loose. It would make gluing more difficult later, but at least I would be able to put them in a steered position.
Painting commenced with the starter electrical devices. I painted the control box with Humbrol's Trainer Yellow and the generator with Gunze's Yellow. The body would be painted with the first color, which is considerably darker than Gunze's. I reasoned a small variation in the colors would add interest, like if they were painted by different manufacturing contractors. The output box was painted plain black. These items used the nice dial decals of the kit. In order to make them more three-dimensional, though, I added Reheat brass bezels, as well as buttons and switches from colored platic bits, and also used Grant's placards here and there to act as instruction stencils and manufacturer data plates. The accessories received a light oils wash and a gentle drybrushing with a lighter base color, coated with semi-gloss or flat clear. Of couse the bezels were painted with gloss black and glued afterwards. The final effect is way more convincing than what I would get with plain instrument faces:
Like I said, the chassi/body was painted with Trainer Yellow from Humbrol range. The kit decals were used for the dials, but again I added data plates from Mike Grant. All other markings are from the kit, and they performed quite well. I gloss coated everything, washed with brown oils, drybrushed with light yellow oils, and, after 24hs, flat coated the model.
I didn't take photos of the final assembly. What was left to do was to paint and glue the wheels, which I put in a lightly steered position, and the accessories on the rear of the chassis. I also made the engine hood locks from stretched sprue and glued them at their spots on the sides of the hood. The headlights are from the kit, similar to MV lenses - a very nice touch, as all that was needed was to paint the yellow rims and cement them in their holes. The red lights were made with stretched clear red sprue, mushroomed over a candle. A small fire extinguisher was scratchbuilt and glued on the aft face of the port fender. I saw at least one photo of a NC-1 with such item, but failed to find it to register here. Anyway, it looks nice there. Instructions describes how to make the cable, using four 0.3 mm wires with total length of 5 to 6 cm. I found 0.3 mm too thick and used three 0.25 mm solder wires instead (had I used four, which is the correct number, it would result too wide, but I didn't have a smaller gauge). They were tied with Tamiya tape at each 1.5 cm or so, but 6 cm is too short when compared to photos. I used 8 cm, and still resulted too short. That will do for my needs, though.
Already thinking on the diorama, I added a driver and an additional 'green shirt' who will be plugging the connector to the aircraft. Another F4 Models item was used for the driver: Flight Deck Tractor Drivers - US Navy, while a Preiser figure made the other deck crew. I used the legs, arms and head from the F4 drivers set, but the thorax was strange, looking like an inflatable dummy, so I replaced it by a spare item. After painting it I added a home made decal with the man's name on the back of his green jersey. I used a white number on the back of the Preiser figure.
The steering wheel was glued after the driver was cemented in place. This is a small vehicle, and don't think it was very easy to make the driver fit there - there was a lot of tweaking not described here.
Since the cable was made of solder wire, I was able to roll part of it and make it conform to the accessory where it is was thrown by the crew, while the remaining length will be adjusted to the diorama scene later on. No parts was left in the box, so I guess this is it:
And of course, I couldn't resist the temptation of checking out the starter on the carrier deck:
This kit is a nice addtion to any scene, and I throughly recommend it.
| Technical file | |
| Kit:
|
- F4 Models #7006 |
| Additions:
|
- F4 Models #7016 - Flight Deck Tractor Drivers - US Navy |
| Basic
colors: |
-
Primer: Mr.Surfacer 1200 in spray can - Yellow: GSI Creos H4 Yellow and Humbro #24 Trainer Yellow. - Gloss clear: automotive clear gloss lacquer - Flat finish: Testors Model Master Acryl flat |
| Notes: |
-
A few scratchbuilt details (see text). |
Rato Marczak © 2015
