| Hobby Boss Republic
XP-84 Thunderjet prototype conversion in 1/72 |
| Start:
August / 2010 Finished: November / 2010 |
Here
is a simple project which, although spanning almost four months (mostly
because of my other projects), actually consumed very low workbench
time. I got this kit as "change" after returning some modeling goodies
to a hobby shop. The price? $3.00 USD! Ok, ok, my Tamiya's F-84 has
been halted for a long time, but after I melted my V-1 bomb, I thought
I could install its engine under the wing of a F-84, something Republic
Aviation could have done sometime after WWII, during their JB-2 Loon
tests (or so I've read).
This is a very simple kit, with solid wings and fuselage. But it is a decent kit for its price. After failing to find evidences of the installation of a buzz engine under the wing of a Thunderjet by Republic, I found a nice conversion of the old Heller F-84 to the prototype configuration by Bill Dye, I decided to do the same.
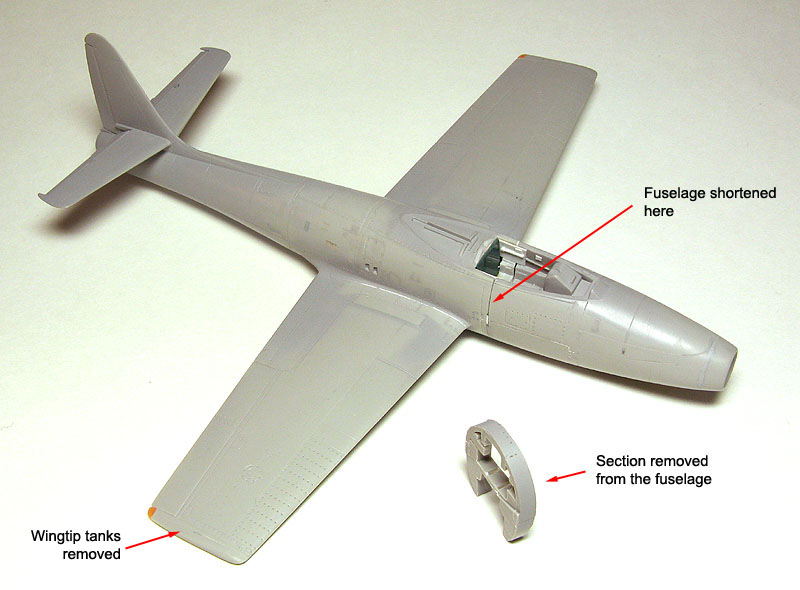
I stated by removing the molded-on wingtip fuel tanks and reshaping the wingtips. Next, I removed 6 mm from the fuselage to match the prototype dimensions. This portion was sawed off from the area slightly ahead the wings leading edge, and the remaining parts reattached.
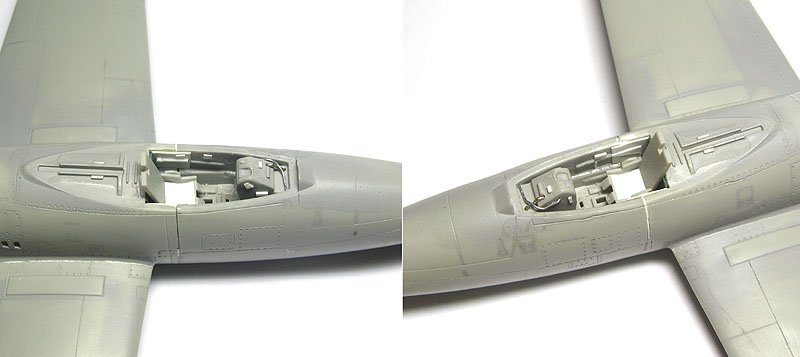
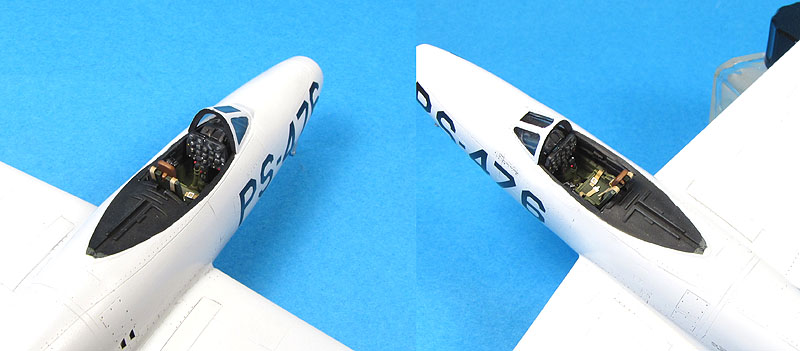
The cockpit received some details and a bit of gizmology. I couldn't find any photo of the prototypes' cockpits, so I just make it look more crowded. I was not planning to lead the canopy completely open, anayway:
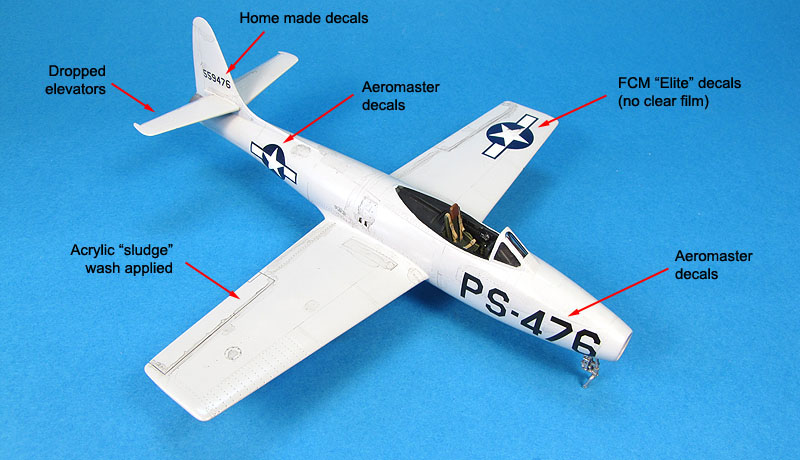
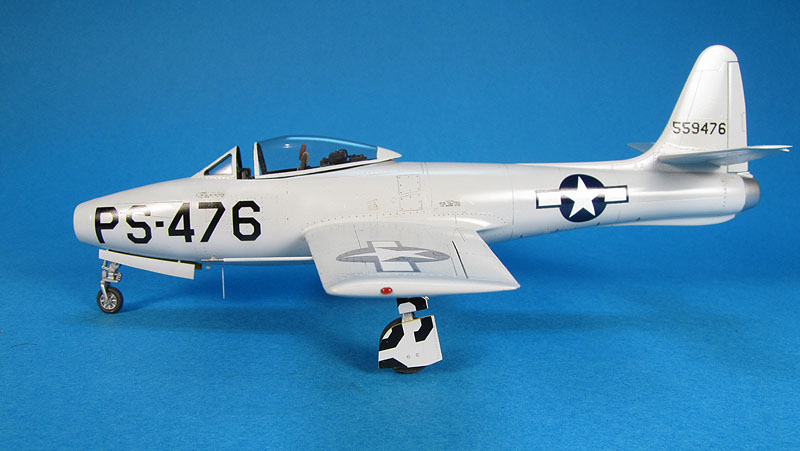
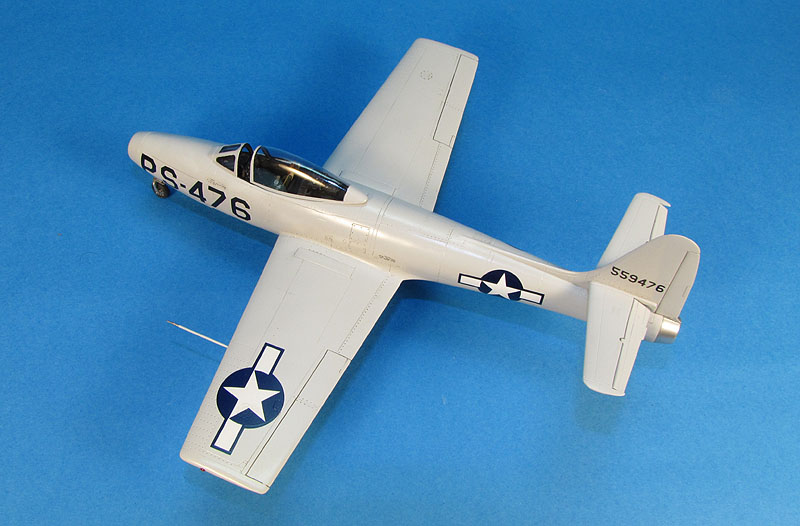
I made a few corrections regarding the second prototype: the Boeing refueling boom receptacle on the port wing was filled and sanded, and I also dropped the elevators to give some life to the model.
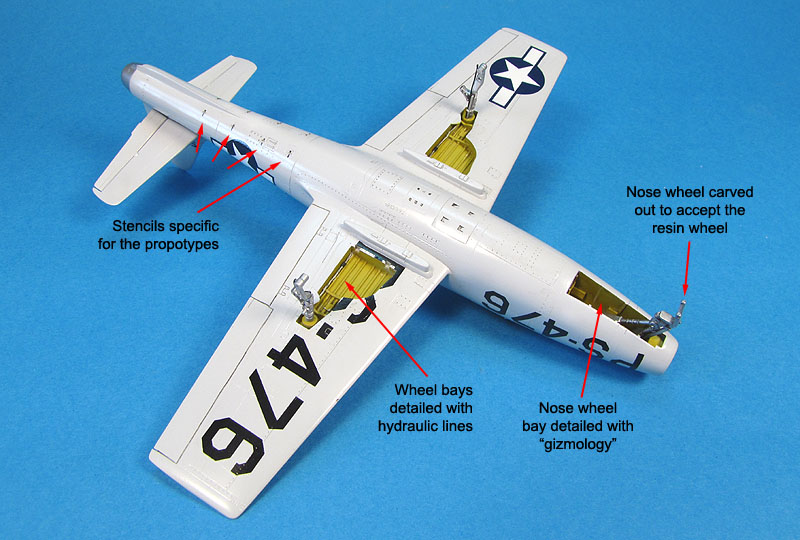
I detailed the landing gear struts as much as I could using the kit parts. The nose landing gear doors were molded with the fuselage, very irrealistic. I promptly removed them and made new ones from plastic card.
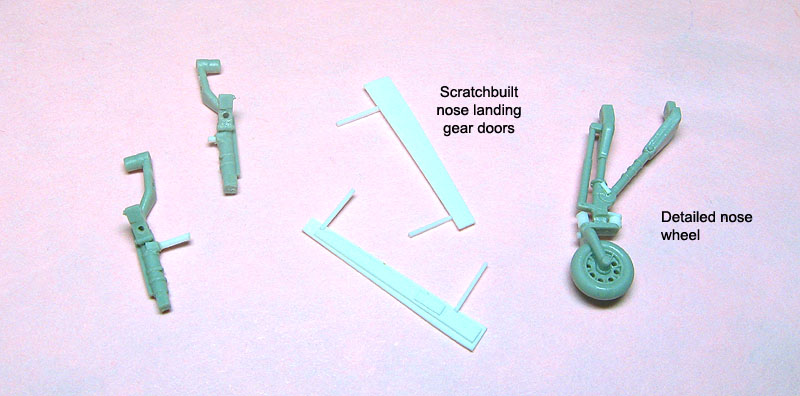
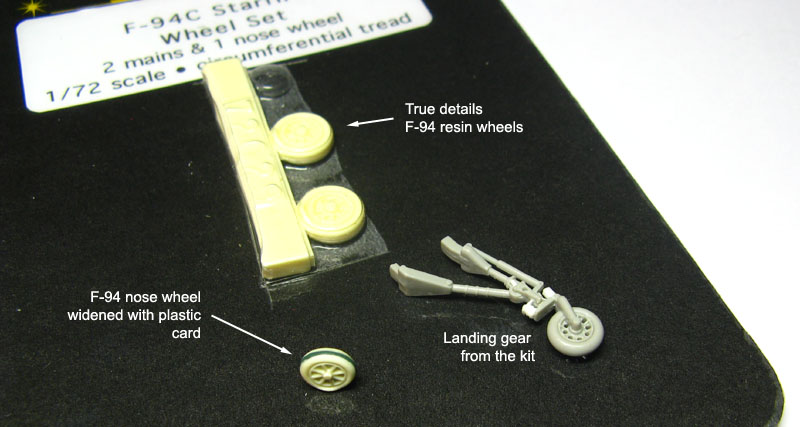
On a second thought, I realized I would not sleep well with the nose wheel integrally molded with the yoke. I then carved it off and shaped the yoke to a more acceptable aspect. The nose wheel was replaced by a resin item from True Details, intended for the F-89. However, that wheel had to be fattened with a piece of plastic to look ok:
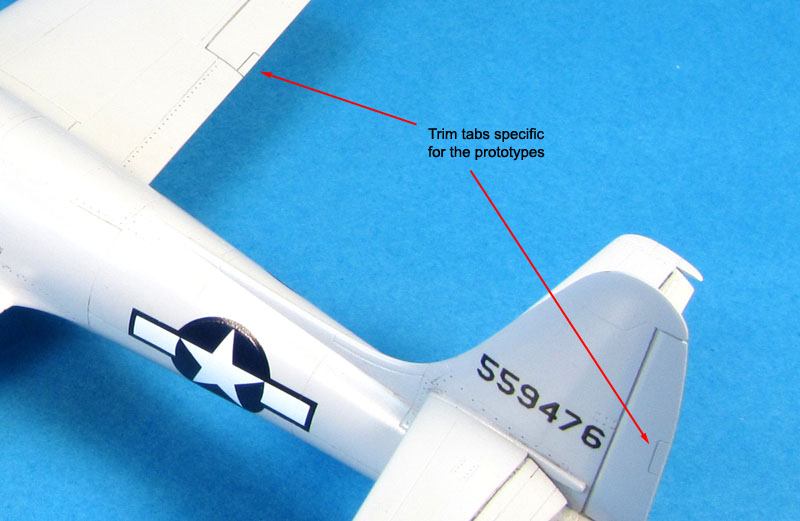
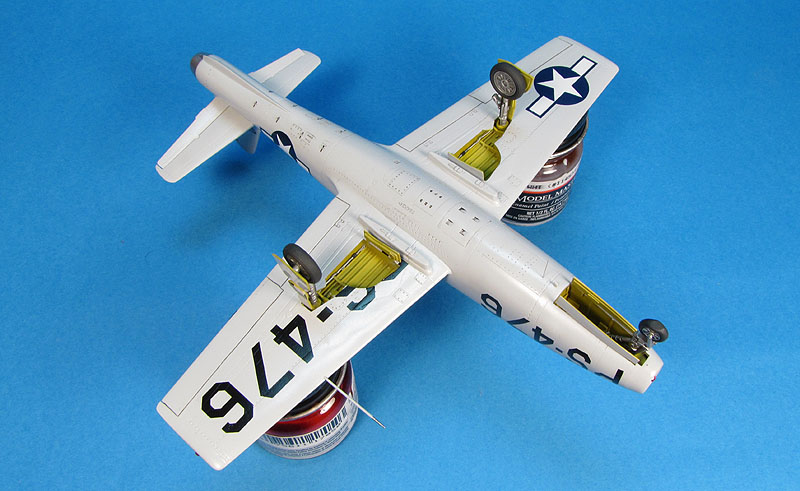
New trim tabs were scribed, another particular characteristic of the prototypes. The shape of the main landing gear doors and main wheel bays on the first two prototypes were different than the prodution versions. I reshaped the kit doors and modified the wheel bays accordingly. My only concession was the underwing pylons. I doubt the prototypes carried them, but there is always a chance... Anyway, it would give me a lot of work to remove them (molded solid with the wing) and rescribe the area. Oh, well...
Meanwhile, work on the rest of the model was going prettly fast. So fast that I don't have many photos to show you. Suffices to mention that I rescribed some panel lines, eliminated others not present in the prototypes (as per photos), and primed the model with Mr. Surfacer 500. Another sanding section was needed after eliminating the inevitable flaws here and there. The cockpit was painted with a darker shade of interior green to emulate the bronze green used by Republic, while the rear and front decks were painted with flat black. The jet exhaust tube was painted with Alclad Chrome. These areas were masked in preparation for the main color.
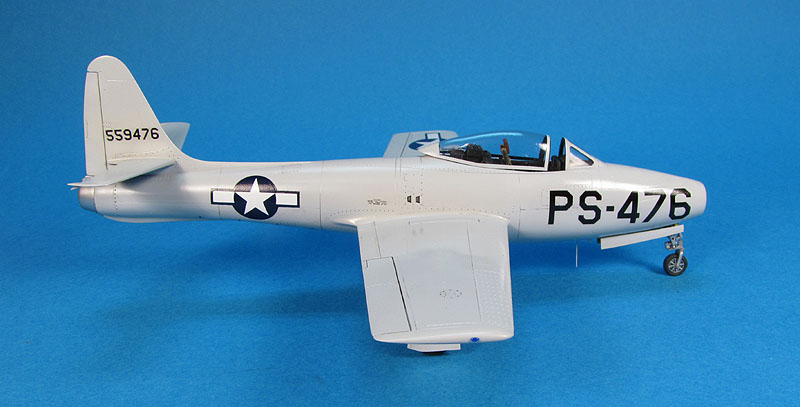
The first (45-59475) and second (45-59476, my choice) prototypes were painted in Pearl Grey. The USAF was studying the use of high gloss paints by then to increase the speed a tad, but these paints flaked off so easily that the idea was abandoned. I reproduced the color by mixing roughly 40% RLM 21 Semi-Gloss White with 60% RLM 63 Lichtgrau enamels from Model Master range. After masking the wheel wells, I airbrushed the mix with my trusty Badger 100. I allowed the paint to dry for several days and applied a good coat of Model Master Metalizer Sealer. Being a lacquer, it would resist the wash later.
The decals were applied next, using a mixed bag from FCM and Aeromaster decals, with the tail serial numbers and stencils home made in a laser printer. After sealing the decals with another coat of Metalizer Sealer, I applied the wash. However, I switched plans and used a acrylic sludge wash for the first time, instead of my usual artists oil wash. For that I used artists acrylic paint mixed with water and some drops of dish detergent:
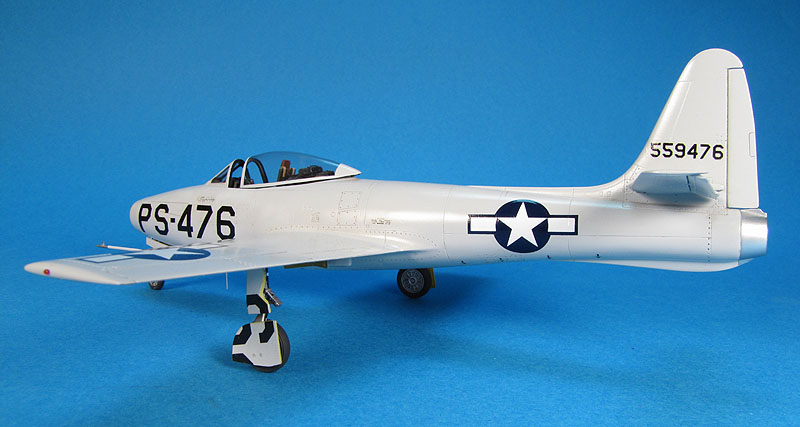
I liked the effect of the sludge wash because it does not stick well to the model (well, I guess that's the idea), and even a dry piece of cloth could clean up the excess. I had to keep in mind that this was a prototype, and a dirty airframe would not reflect what I saw in the photos. The masks were removed and the landing gear struts installed:
The remaing parts of the cockpit were installed next. I used the kit's seat, control panel and control column - these parts are very nicely molded, by the way. I enhanced the seat with some old photoetched belts and painted the instrument faces on the control panel. A drybrushing with grey color highlighted the details, and much of my gizmology efforts paid off.
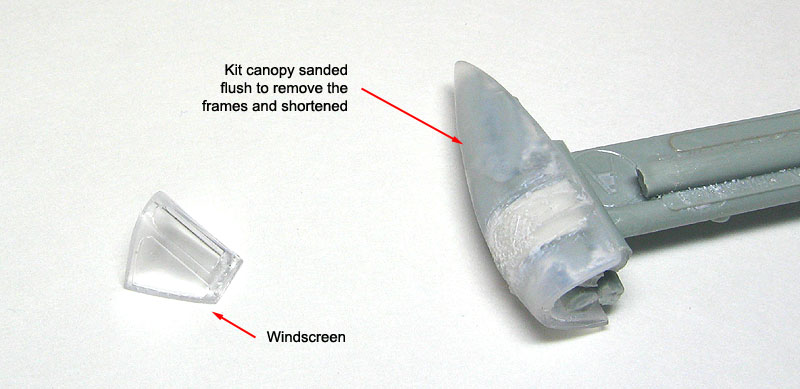
At this point the model was virtually done, but I had to face a step I had postponed as much as I could: to make a new sliding canopy. I started with the kit part, sawed to match the shortened fuselage.
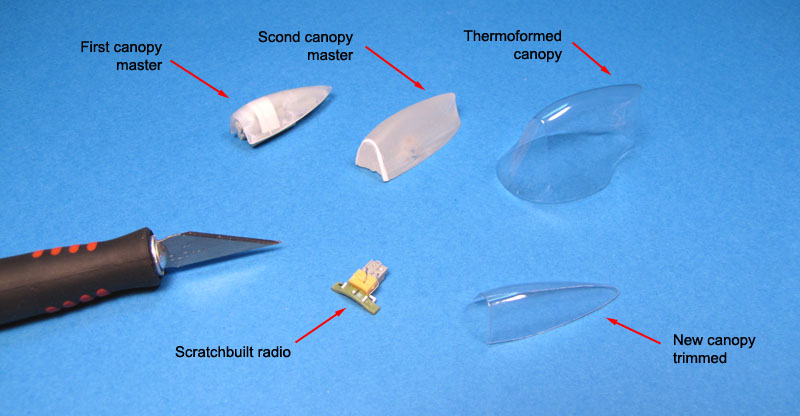
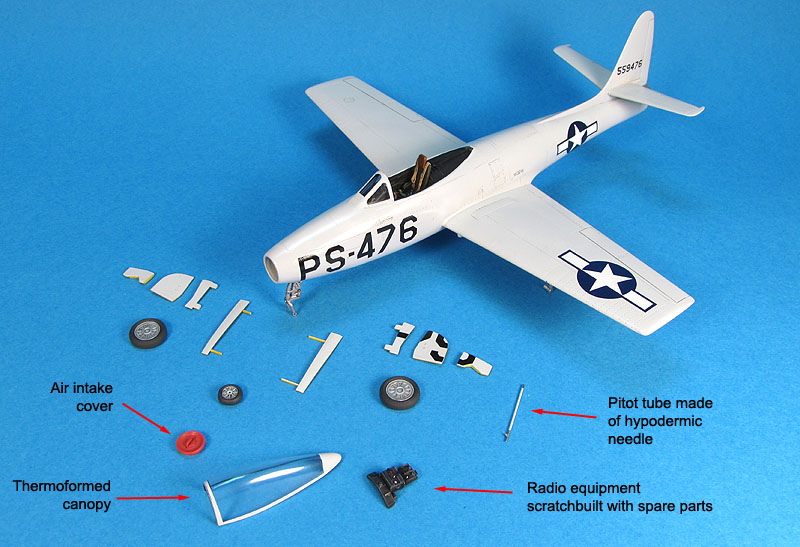
I sanded the raised details and used it as a master to thermoform a new canopy in acetate. This canopy was used as a mold to pour dental resin in and provide a new, definitive master. I like to use this trick because the second mold always smooth possible imperfections in the first master.
Another missing item is the characteristic radio and stuff on the rear deck. In the real aircraft, these were fixed to the canopy frame. I scratchbuilt one trying to be as close as possible to the photos I had in hand.
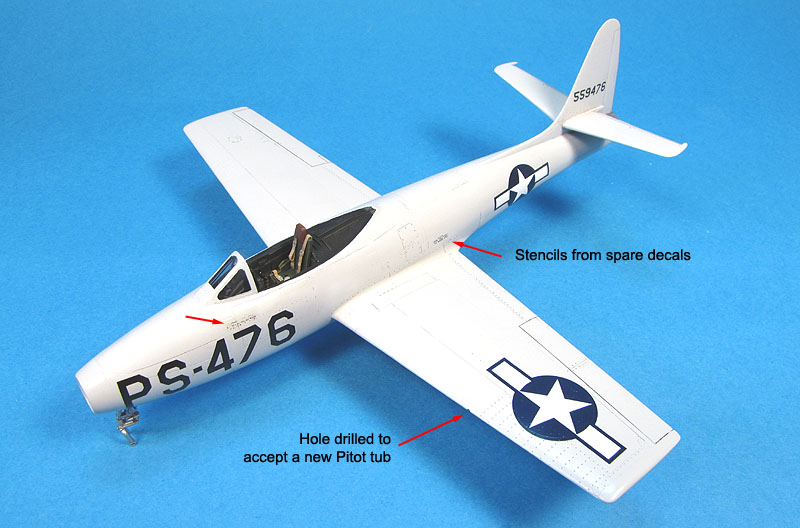
One of the worst areas of the Hobby Boss kit is the air intake. I solved the problem by choosing to close it with a FOD cover made from an old Revell Fw-200 wheel cover. The new Pitot tube was made from an hypodermic needle and a plastic rod. After painting the remaining parts, my XF-84 was on its final approach:
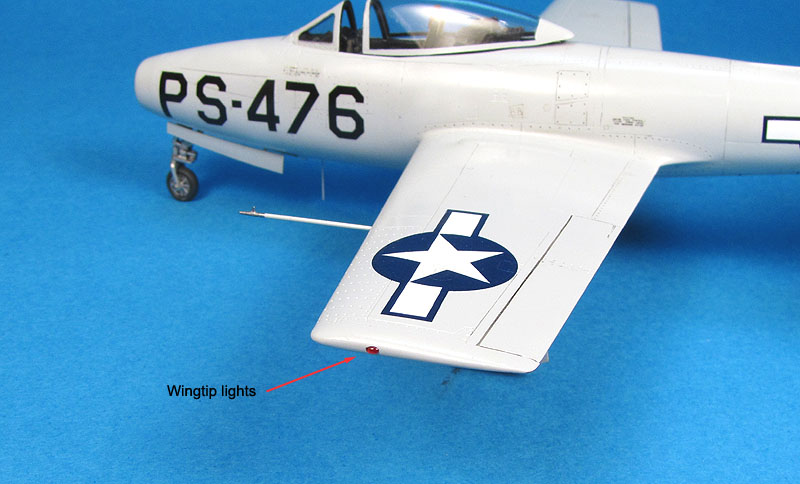
The smaller parts were glued in place, but I still had two details to add: the wingtip lights, made using a tip reported here, and two small antenaes to go under the belly, right behind the nose wheel bay.
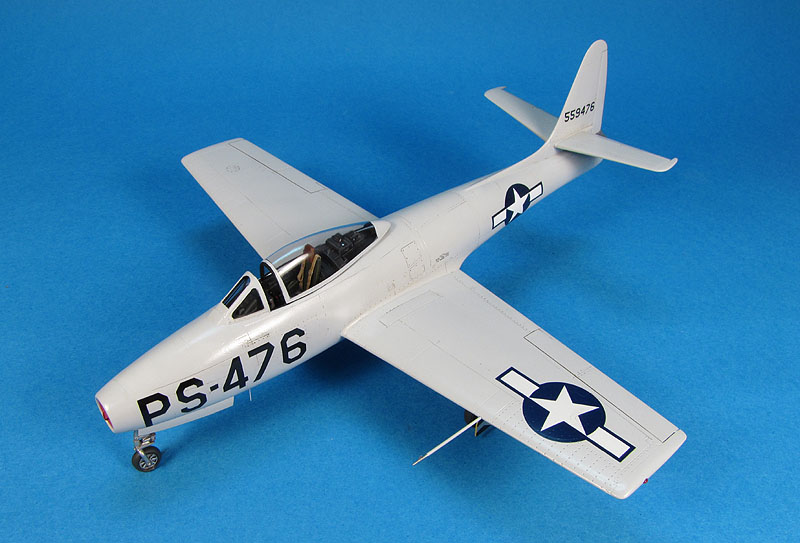
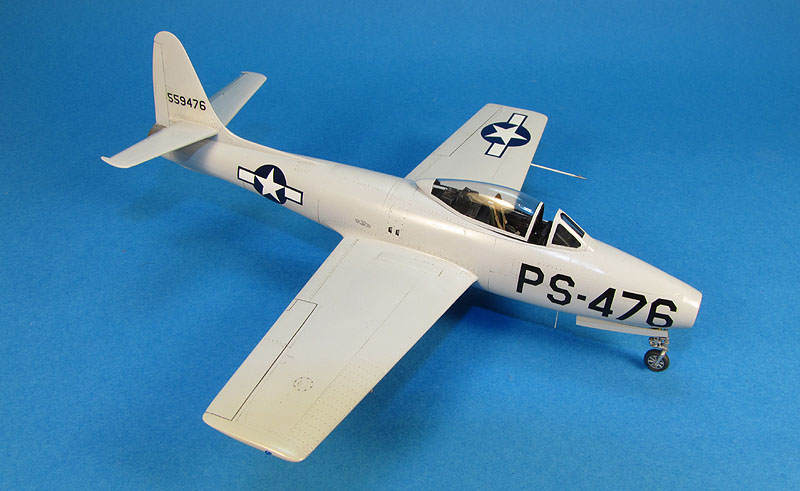
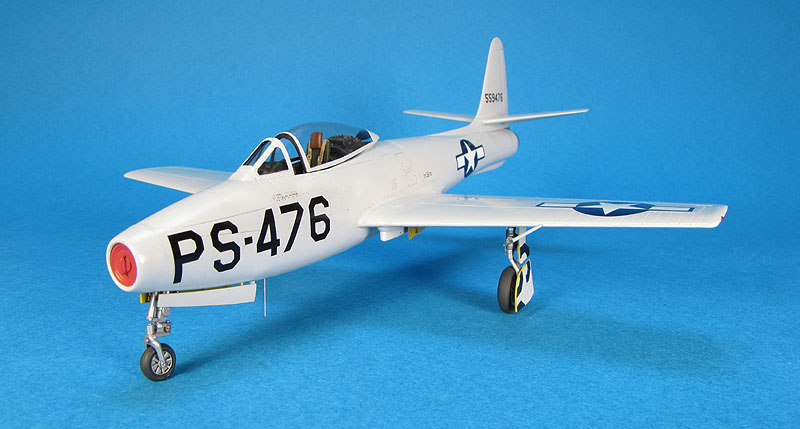
And so I finally could declare it done. By the way, this bird set the US National Speed Record of 611 mph on September 7th, 1946. It was 5 mph short of the World Speed Record then held by the Gloster Meteor F.4. I guess my model captures reasonably the PS-476 during the occasion. There was a third prototype, but it was much closer to the production models (the XP-84A, with another engine and longer fuselage).
This is a very simple kit, with solid wings and fuselage. But it is a decent kit for its price. After failing to find evidences of the installation of a buzz engine under the wing of a Thunderjet by Republic, I found a nice conversion of the old Heller F-84 to the prototype configuration by Bill Dye, I decided to do the same.
I stated by removing the molded-on wingtip fuel tanks and reshaping the wingtips. Next, I removed 6 mm from the fuselage to match the prototype dimensions. This portion was sawed off from the area slightly ahead the wings leading edge, and the remaining parts reattached.
The cockpit received some details and a bit of gizmology. I couldn't find any photo of the prototypes' cockpits, so I just make it look more crowded. I was not planning to lead the canopy completely open, anayway:
I made a few corrections regarding the second prototype: the Boeing refueling boom receptacle on the port wing was filled and sanded, and I also dropped the elevators to give some life to the model.
I detailed the landing gear struts as much as I could using the kit parts. The nose landing gear doors were molded with the fuselage, very irrealistic. I promptly removed them and made new ones from plastic card.
On a second thought, I realized I would not sleep well with the nose wheel integrally molded with the yoke. I then carved it off and shaped the yoke to a more acceptable aspect. The nose wheel was replaced by a resin item from True Details, intended for the F-89. However, that wheel had to be fattened with a piece of plastic to look ok:
New trim tabs were scribed, another particular characteristic of the prototypes. The shape of the main landing gear doors and main wheel bays on the first two prototypes were different than the prodution versions. I reshaped the kit doors and modified the wheel bays accordingly. My only concession was the underwing pylons. I doubt the prototypes carried them, but there is always a chance... Anyway, it would give me a lot of work to remove them (molded solid with the wing) and rescribe the area. Oh, well...
Meanwhile, work on the rest of the model was going prettly fast. So fast that I don't have many photos to show you. Suffices to mention that I rescribed some panel lines, eliminated others not present in the prototypes (as per photos), and primed the model with Mr. Surfacer 500. Another sanding section was needed after eliminating the inevitable flaws here and there. The cockpit was painted with a darker shade of interior green to emulate the bronze green used by Republic, while the rear and front decks were painted with flat black. The jet exhaust tube was painted with Alclad Chrome. These areas were masked in preparation for the main color.
The first (45-59475) and second (45-59476, my choice) prototypes were painted in Pearl Grey. The USAF was studying the use of high gloss paints by then to increase the speed a tad, but these paints flaked off so easily that the idea was abandoned. I reproduced the color by mixing roughly 40% RLM 21 Semi-Gloss White with 60% RLM 63 Lichtgrau enamels from Model Master range. After masking the wheel wells, I airbrushed the mix with my trusty Badger 100. I allowed the paint to dry for several days and applied a good coat of Model Master Metalizer Sealer. Being a lacquer, it would resist the wash later.
The decals were applied next, using a mixed bag from FCM and Aeromaster decals, with the tail serial numbers and stencils home made in a laser printer. After sealing the decals with another coat of Metalizer Sealer, I applied the wash. However, I switched plans and used a acrylic sludge wash for the first time, instead of my usual artists oil wash. For that I used artists acrylic paint mixed with water and some drops of dish detergent:
I liked the effect of the sludge wash because it does not stick well to the model (well, I guess that's the idea), and even a dry piece of cloth could clean up the excess. I had to keep in mind that this was a prototype, and a dirty airframe would not reflect what I saw in the photos. The masks were removed and the landing gear struts installed:
The remaing parts of the cockpit were installed next. I used the kit's seat, control panel and control column - these parts are very nicely molded, by the way. I enhanced the seat with some old photoetched belts and painted the instrument faces on the control panel. A drybrushing with grey color highlighted the details, and much of my gizmology efforts paid off.
At this point the model was virtually done, but I had to face a step I had postponed as much as I could: to make a new sliding canopy. I started with the kit part, sawed to match the shortened fuselage.
I sanded the raised details and used it as a master to thermoform a new canopy in acetate. This canopy was used as a mold to pour dental resin in and provide a new, definitive master. I like to use this trick because the second mold always smooth possible imperfections in the first master.
Another missing item is the characteristic radio and stuff on the rear deck. In the real aircraft, these were fixed to the canopy frame. I scratchbuilt one trying to be as close as possible to the photos I had in hand.
One of the worst areas of the Hobby Boss kit is the air intake. I solved the problem by choosing to close it with a FOD cover made from an old Revell Fw-200 wheel cover. The new Pitot tube was made from an hypodermic needle and a plastic rod. After painting the remaining parts, my XF-84 was on its final approach:
The smaller parts were glued in place, but I still had two details to add: the wingtip lights, made using a tip reported here, and two small antenaes to go under the belly, right behind the nose wheel bay.
And so I finally could declare it done. By the way, this bird set the US National Speed Record of 611 mph on September 7th, 1946. It was 5 mph short of the World Speed Record then held by the Gloster Meteor F.4. I guess my model captures reasonably the PS-476 during the occasion. There was a third prototype, but it was much closer to the production models (the XP-84A, with another engine and longer fuselage).
| Technical
file |
|
| Kit:
|
-
Hobby Boss 80246 |
| Additions:
|
-
Eduard seat belts from an old fret. |
| Basic
colors:
|
-
Primer:
Gunze Mr. Surfacer 500 - Main color: 60% Model Master RLM 61 Lichtgrau (#2077) + 40% Model Master RLM 21 Semi-Gloss White (#2143) - Aluminum (wheels and oleos): GSI Gunze Silver (H8) - Natural metal (jet exhaust): Alclad II Chrome - Flat Black: Tamiya Black (XF-1) and Model Master FS37038 Flat Black (#1749) - Clear coat: Testors Metalizer Sealer (#1409) |
| Notes: |
-
Cockpit
sidewalls,
radio, sliding canopy and Pitot tube are scratchbuilt. |
Rato Marczak © 2010
