| Italeri Sd.Kfz.253 conversion in 1/72 |
|
Start: I'm not telling... Current state: October/2014 |
This
is my
first 1/72 AFV since I was a kid. I grabbed this kit a
while ago and cleaned most of the parts during a few vacation days. My
plan is to use it in a vignette with a Fieseler Storch, which I have
already started. This is the Italeri incarnation of the the
ancient Esci kit.
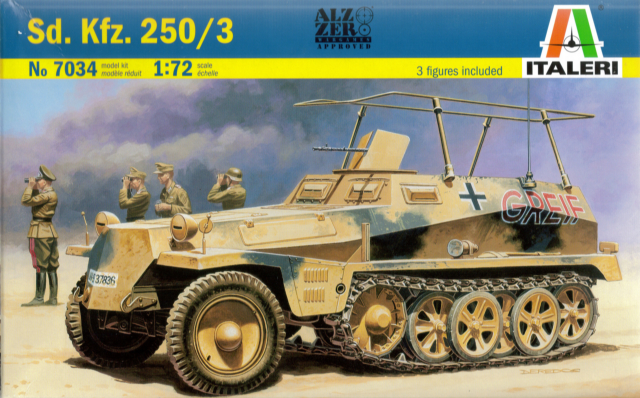
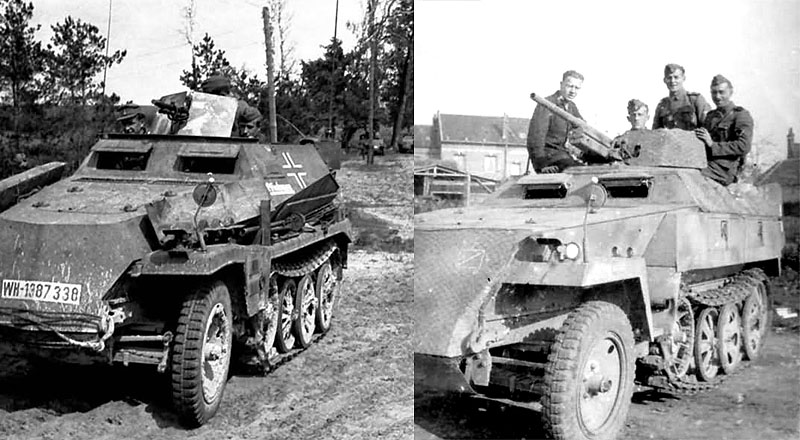
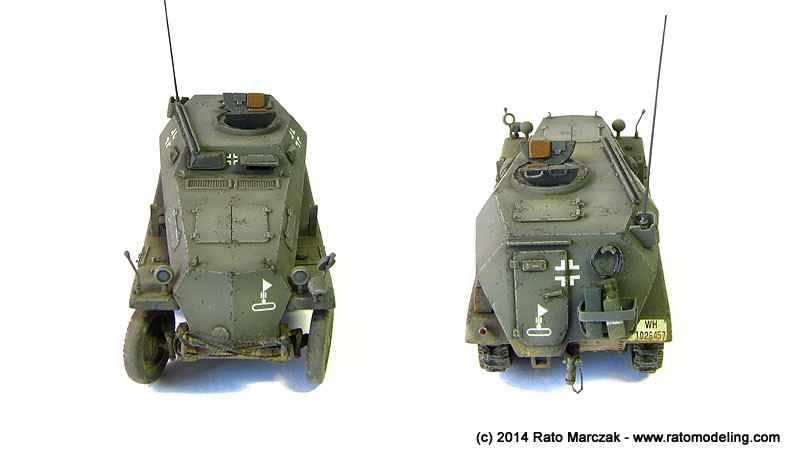
Although the molds have stood well under the time, with my sample being particularly well molded, showing almost no flash, the interior of these little half-tracks used to be cramped with details. Radios, guns, driver's pit, ammunition, you name it, are quite visible from above. And the kit brings nothing more than a primitive radio and a funny looking seat. I then decided to convert it to a Sd.Kfz.253. The 253 was basically a 250 with heavier armour and a fully-enclosed crew compartment to be used as armoured observation vehicle.Observation was from a large circular hatch in the roof. The radio aerial on the right-hand side folded forward into a protective channel when not in use.The Sd.Kfz. 253 served with Sturmgeschütz Batterien 640 , 659 , 660 and 665 in France in 1940 and later with other assault artillery batteries in Russia. The advantage (for me) of the conversion is the enclosed crew compartment, which would save me a lot of work since I didn't have to add the interior details.
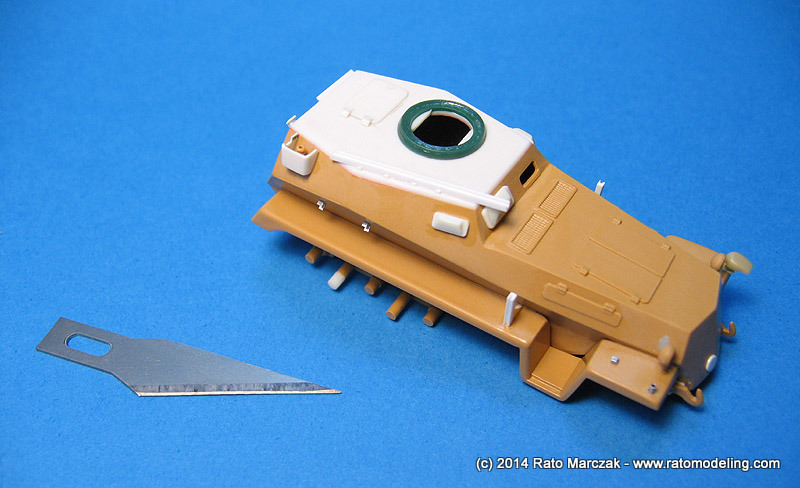
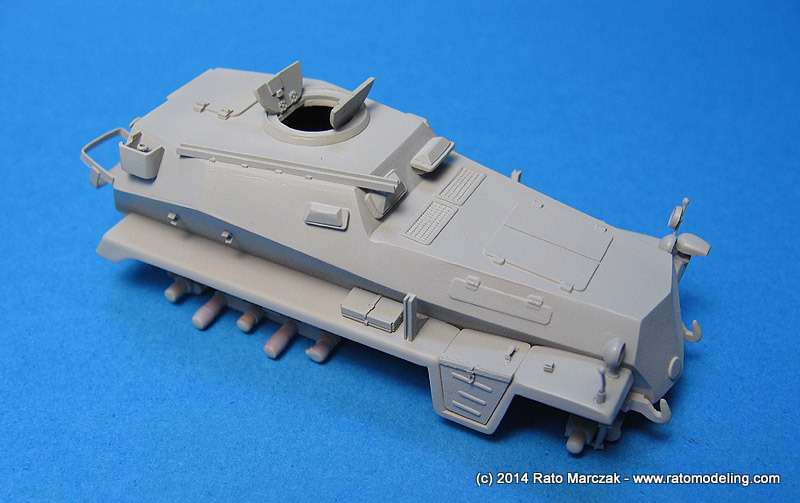
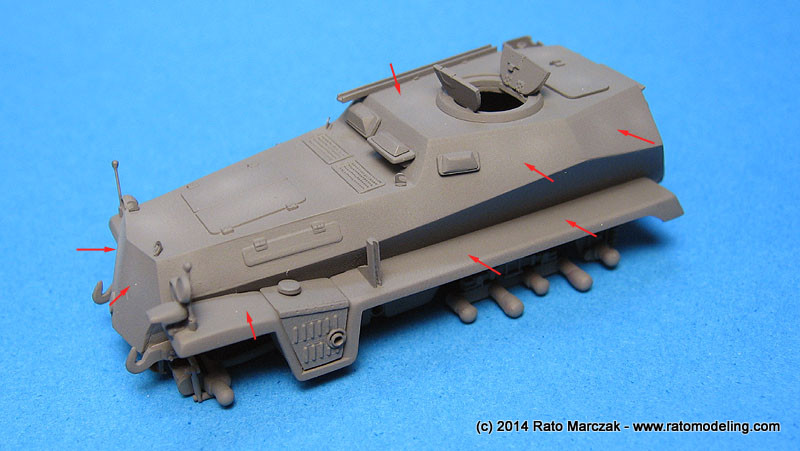
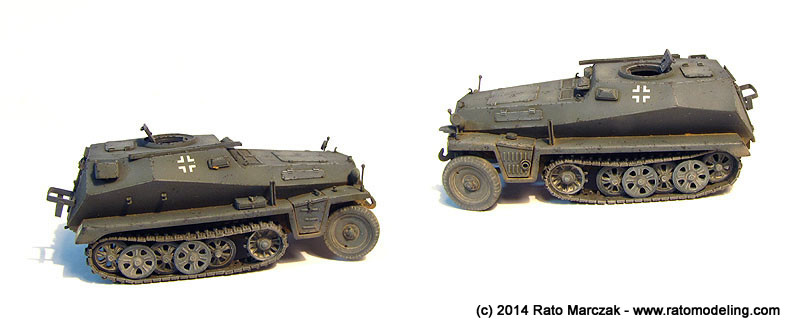
Well, this stuff is so small that I haven't bothered to take many in-progress photos. Basically, I assembled the main body and closed the crew compartment with a piece of 0.5mm styrene. The seams were puttied and sanded, and from that point on I worked on the external details. The suspension ans wheels were left off for easy painting. Here's the model before cementing the smaller details:
This particular version
(Italeri kit #7034) has appeared before under Revell label, too. Other
versions of the vehicle were released under several labels in the past,
as well. Being a Esci item, it is truly 1/72 scale, what will make life
easier when the time to include figures comes, particularly in dioramas
and vignettes.
Although the molds have stood well under the time, with my sample being particularly well molded, showing almost no flash, the interior of these little half-tracks used to be cramped with details. Radios, guns, driver's pit, ammunition, you name it, are quite visible from above. And the kit brings nothing more than a primitive radio and a funny looking seat. I then decided to convert it to a Sd.Kfz.253. The 253 was basically a 250 with heavier armour and a fully-enclosed crew compartment to be used as armoured observation vehicle.Observation was from a large circular hatch in the roof. The radio aerial on the right-hand side folded forward into a protective channel when not in use.The Sd.Kfz. 253 served with Sturmgeschütz Batterien 640 , 659 , 660 and 665 in France in 1940 and later with other assault artillery batteries in Russia. The advantage (for me) of the conversion is the enclosed crew compartment, which would save me a lot of work since I didn't have to add the interior details.
Well, this stuff is so small that I haven't bothered to take many in-progress photos. Basically, I assembled the main body and closed the crew compartment with a piece of 0.5mm styrene. The seams were puttied and sanded, and from that point on I worked on the external details. The suspension ans wheels were left off for easy painting. Here's the model before cementing the smaller details:
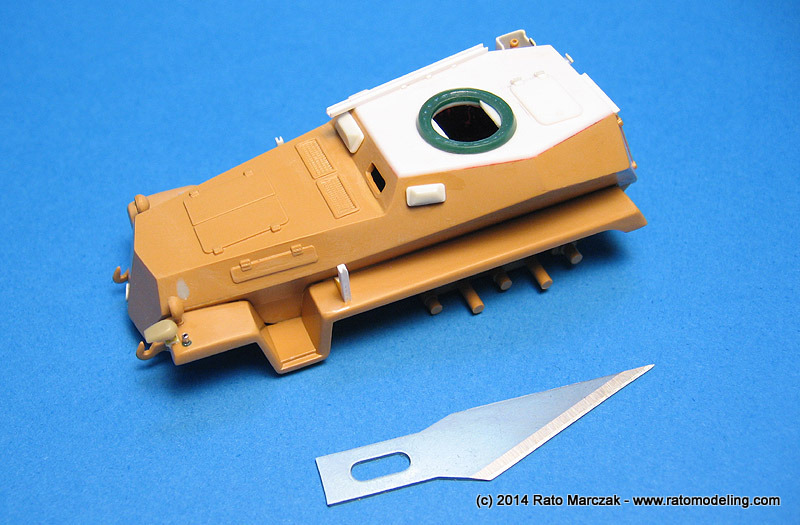
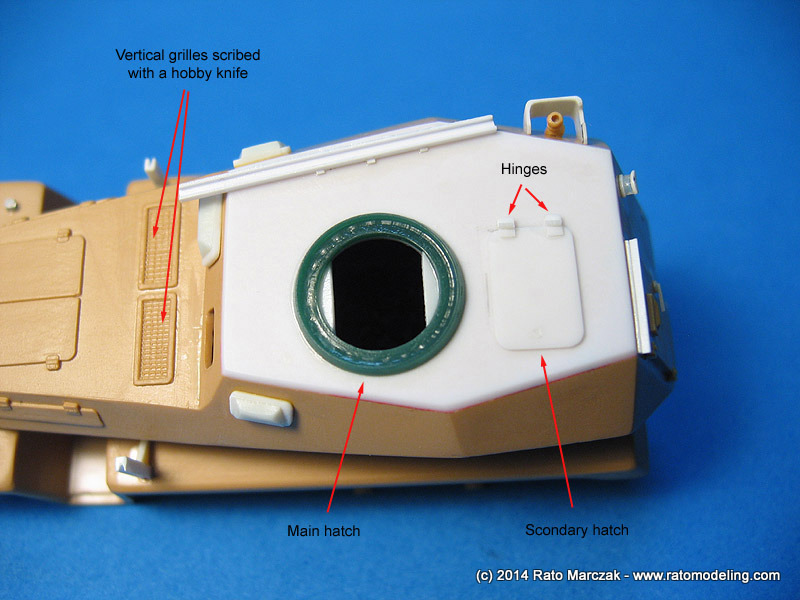
After topping-off the crew pit, I turned a ring to serve as the main (round) hatch aperture. It is not absolutely faithful, but you know these crews... A secondary (rectangular) hatch was made from plastic and glued over the roof. The hinges were made from pieces of styrene strip and rod. The engine grilles come molded with wires represented in one direction only, so I scribed the perpendicular ones with a hobby knife:
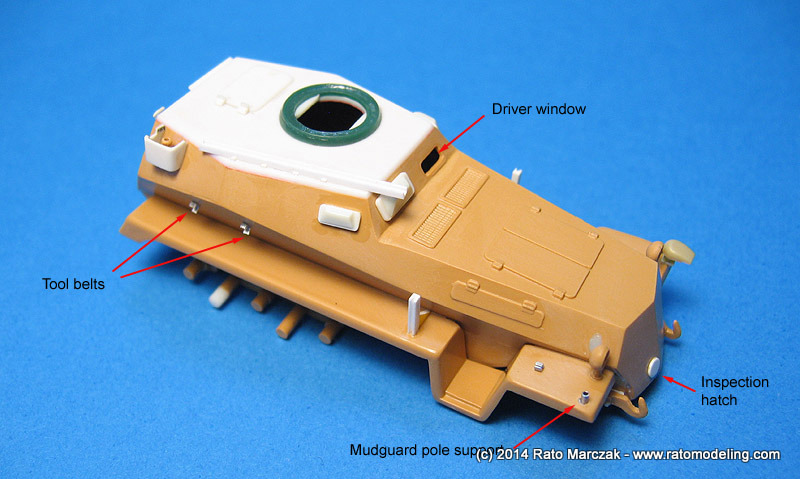
The 253 was a very polyhedrical thing, with lots of corners and edges. I was planning to simulate the weld seams but dropped the idea very fast (recovering from AMS, remember?). I then shoved off all the window hatches and opened the driver's window to pose that hatch open later. I also added a number of external details like tool holding belts and inspection panels. The kit holes for the mudguard poles were too wide. I filled them with styrene, sanded flush and drilled new holes to accept syringe needle lengths that will receive the scratchbuilt poles later.
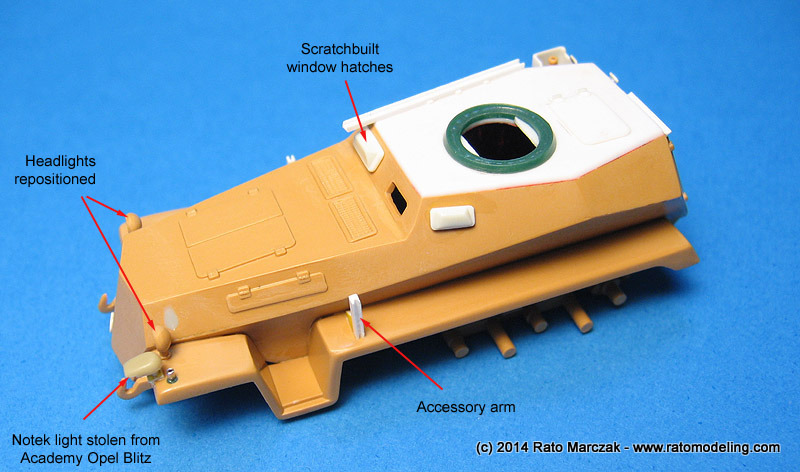
New window hatches were made from plastic. I repositioned the main lights while a Notek light was sourced from the Academy Opel Blitz.
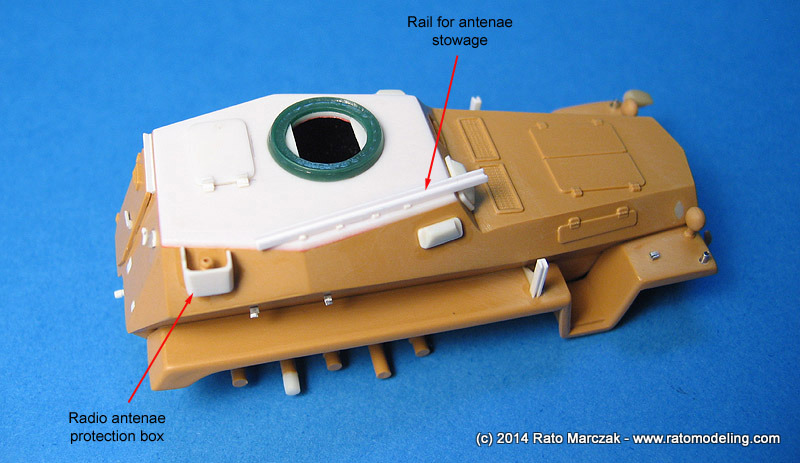
I then turned my attention to the radio stuffs. After all, this is a radio car. The antennae support is a modified part from the kit (part 22A). A protection shield was vacuum formed and sanded to match the slanted surfaces of the vehicle. This was a difficult task since the angles of the edges in contact to the vehicle surface must be such that the walls of the shield remain vertical to the ground. The antennae was designed to fold on a protective rail. I built the rail from strips of styrene and glued it in the proper position.
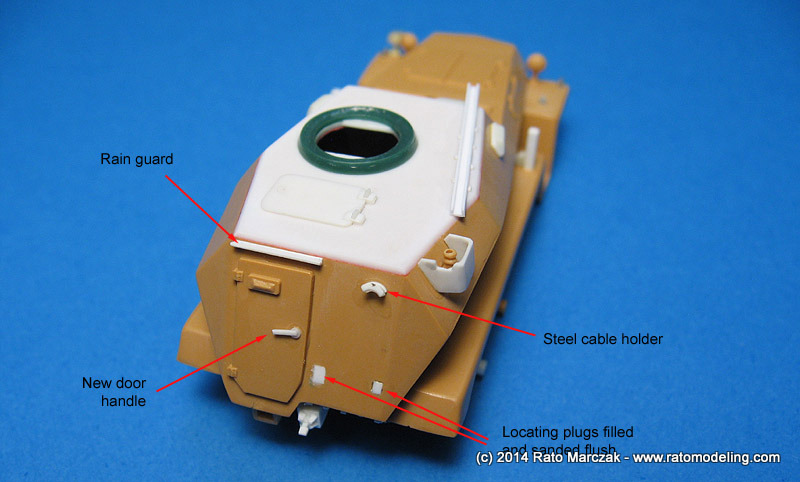
The work on the aft area included a new crew entrance door handle, a rain guard, and the elimination of locating holes. At his point, I hadn't decided yet what kind of stowage the vehicle would carry. Factory Sd.Kfz.253 had a couple of holders to roll a cable around. I built and installed only one (the upper one), since I was thinking on installing one of those field-made fuel can racks on the lower side. More on that later.
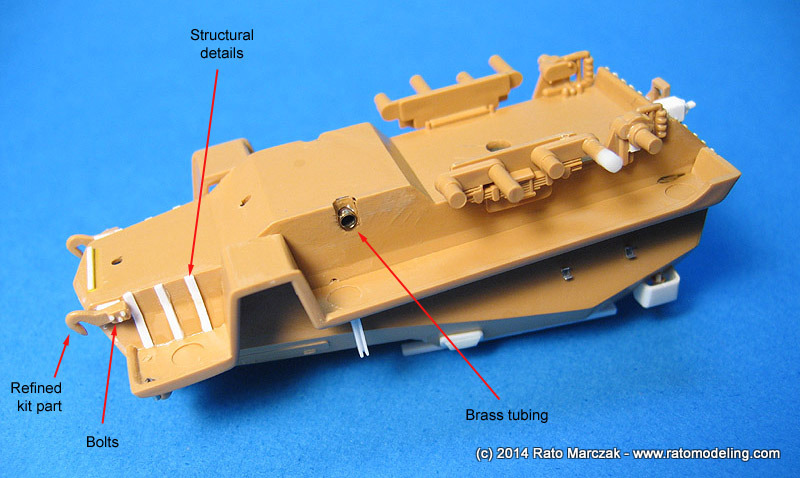
On the lower part, I added just a few details, around areas that would be more visible, basically under the front mudguards. Since the traction wheels had a very loose fit, I inserted a length of brass tubing all the way through the chassis, and press fitted the kit wheels to the tube ends to provide a tight fitting to these parts. Worked like a charm...
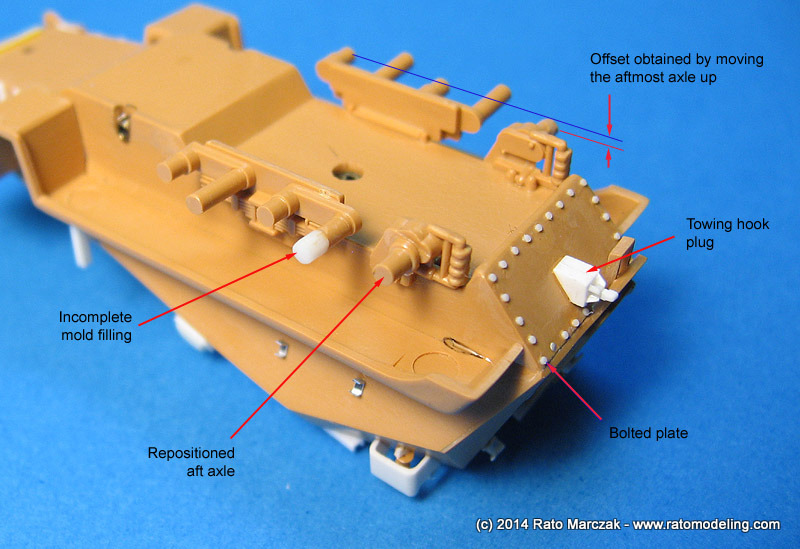
Still on the lower area, while gluing of the rear suspension, I noted a number of problems. First, one of the axles of the traveling wheels was incomplete, like if the plastic hasn't filled completely the mold cavity. I added a small length of plastic rod and trimmed it to the proper size. The other problem is related to the alignment of the aft most wheel axle - the one of the follower wheel. When glued in place, it rests aligned to the traveling wheels. That would result in all the wheels (except the traction ones) aligned to the ground. Looking at the photos, it is clear that the follower wheel used to stay slightly above the traveling wheels, not touching the ground (not as much as the traction wheels, but still quite visible). I decided to reproduce that by simply cutting off the aft most axles and re-gluing them about 1mm higher.
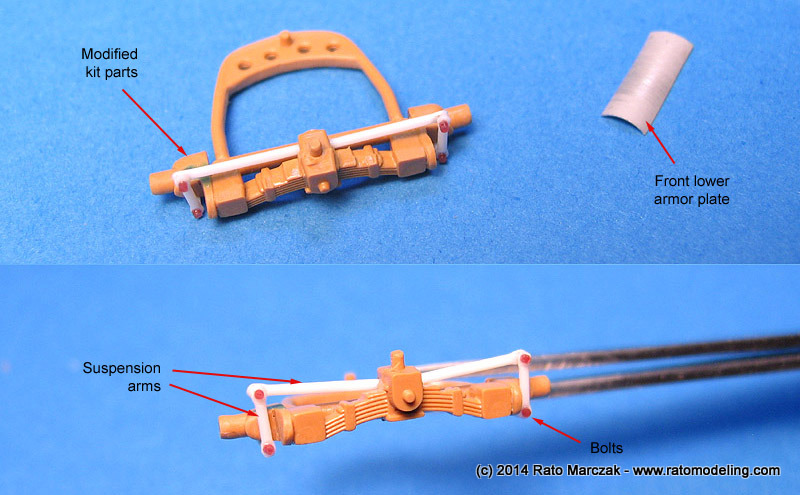
The steering suspension system was very simple in the kit, although the leaf spring is very well molded. During one the countless dry-fitting runs, I noted that there is a problem with the instructions of the kit. During step 3, if you glue the front axle ends (parts 2A) as indicated, you will have the steering wheels assembled way ahead of their correct position. The solution is simply to flip these parts 180 degrees, so that the wheel attachment points remain aligned to the axle of the suspension arc (part 3A). That will produce a much better positioned steering wheels, but the fictitious, chunky shape of the part 2A will be visible. To remedy this, I sawed a good portion of parts 2A and added the prominent suspension arms. The final aspect is quite improved, specially if you are going to show the wheels in a steered attitude. The prominent semi-circular lower armor plate was made with a simple piece of aluminum shaped around a brush handle.
The 253 (and 250 and 252 as well) had two lateral removable guards. The right one was used as stowage compartment while the left one gave access to the exhaust system. I reworked both kit parts with reinforcement strips. An exhaust pipe end was included in the left guard, while the right one received some photoetched details. The main upper hatch was scratchbuilt from plastic discs and decorated according to the photos, including photoetched hinges from spare frets. The drivers window hatch received the arms of the retracting mechanism. The kit wheels are very poor. I tried to improve them, but all I got was a pair of 'American style' wheels. I will try to replace them soon...

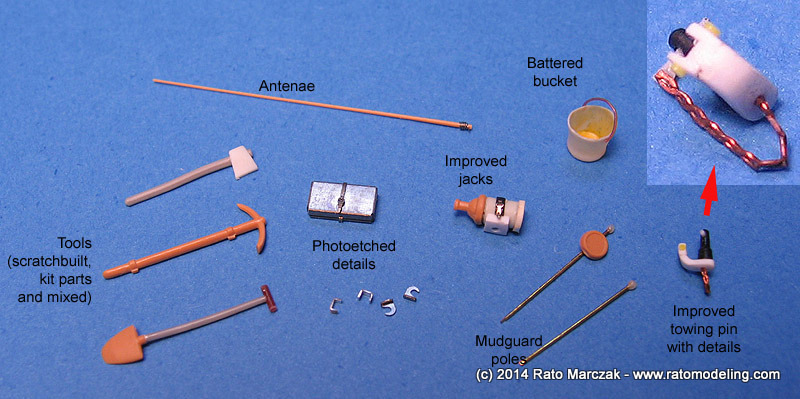
Continuing with the smaller details, I made an antennae with stretched sprue and a small length of bulb filament at the base. The standard tools include a scratchbuilt ax, and the kit's pickax and shovel, the later with a new handle. The jacks was improved with plastic bits and photoetched details. The new mudguard poles were made of 0.3mm brass rods with small blobs of carpenter's glue at the end (they still have to be bent to their final shape). I inserted one of the kit's rear mirror in one of the poles. I also made a small bucket to be placed somewhere (still figuring where...). The towing pin, which will be glued to the plug at the rear of the vehicle, was carved from a solid block of styrene, with minor details added later. A chain made with the cooper wire trick adds a lot of interest to this part.
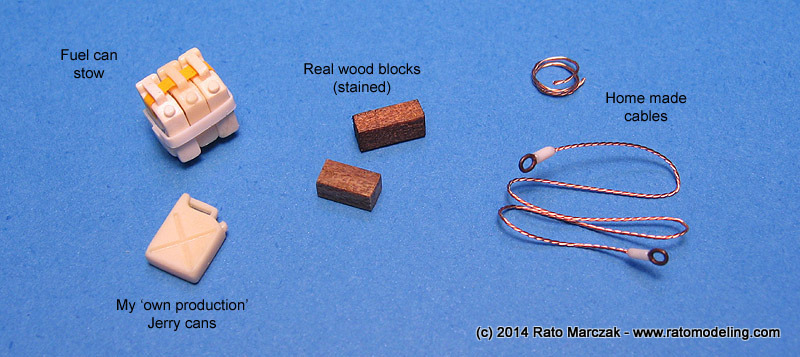
Finally, some more details were prepared before painting. I made a jerry can rack holding my own resin fuel cans, as well as wood block made out of real wood cut to shape and stained with commercial wood stains. A towing cable will find its place hanging between the front hooks. I made it from fine cooper wires, while the cable ends are stretched plastic tubing glued to 1/35 scale chain links.
I resumed the work on this little tractor, as my youngest daughter called it, priming everything with automotive acrylic primer and checked for major faults. I left some small photoetched parts to be added just before the base camouflage.
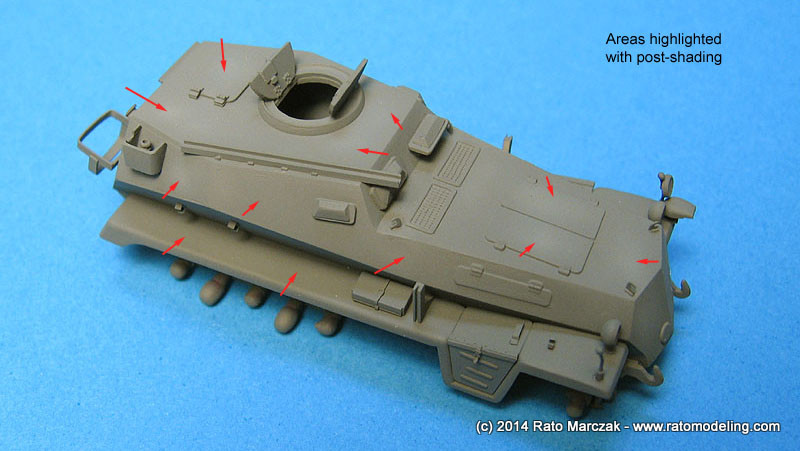
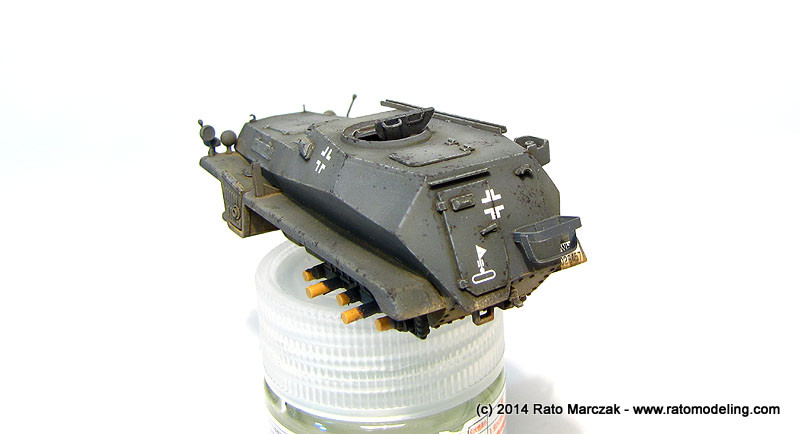
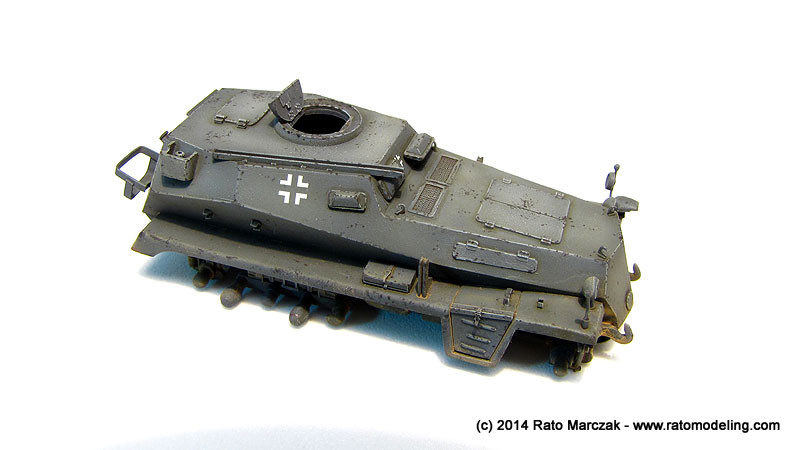
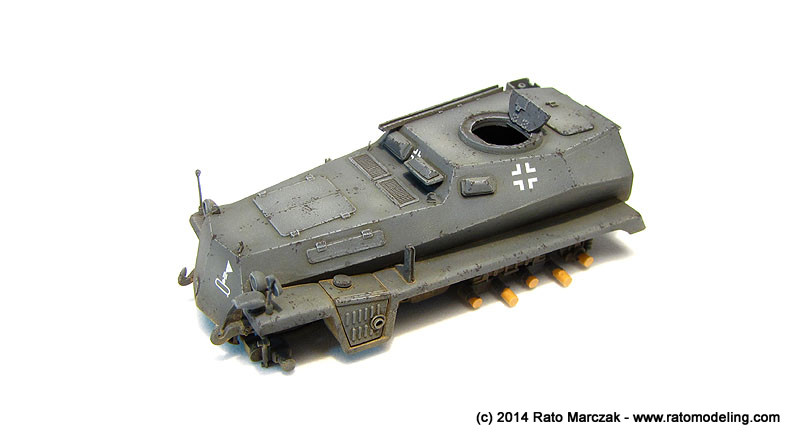
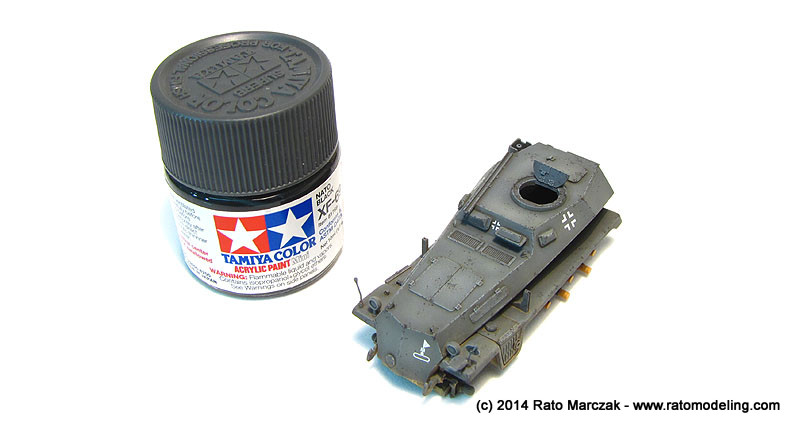
Some remaining photoetched parts were finally attached, right before the base camo. Due to my lack of experience on the subject, I had a hard time trying to find a suitable Panzer Grey color. My first attempt with a mix of Tamiya acrylics looked like Patrick Depallier's six wheeled Tyrrell. The model was bathed in caustic soda to remove the paint, and I tried again, this time using Revell #78 lightened with Revell #5 for scale effect. It looks like a pre war Panzer Grey but I liked it. Once dry, I added even more white (#5) to the mix and applied some fading to the center of the flat areas.
After setting this model aside for years (literally), I resumed the work on it, as it would be part of a diorama along with the Famo and the Kanone. After so long time without working on this project, I forgot most of my research and had to spend a good time catching up with what I was doing then...
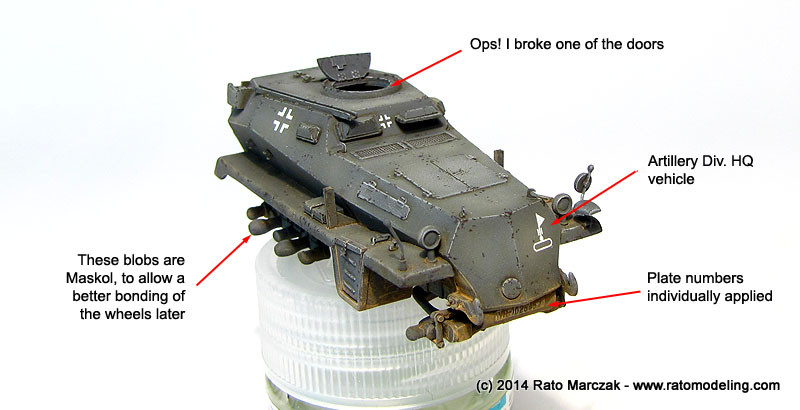
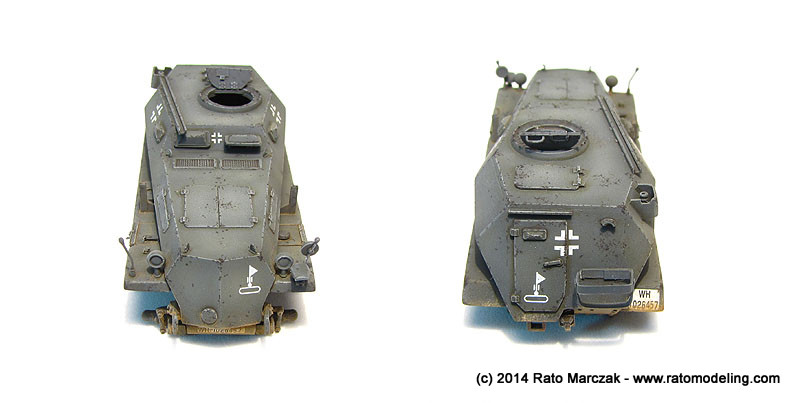
The model was coated with automotive clear lacquer and the mandatory wash with oils was applied. I used dark brown on most areas, and an even darker, almost black wash on a few places, like suspension mechanisms and grilles. I still don't understand why, but once dry I promptly coated the model with flat clear and drybrushed the whole model with medium gray oils... But I forgot the decals... Duh! So Future was brush painted on the areas that would receive the decals. Once applied, the decals were sealed with flat coat - again. As for the decals, the crosses came from Italeri's sheet, while the tactical markings and the plate numbers came from a Dragon's Sd.Kfz. 251. The plate numbers were applied one by one, something that would test your nerves, believe me.
As I said, I made the mistake of applying the flat coat before the right time, but I feared that another gloss/weathering/flat coat sequence would be too much for such a small model. I proceeded with the weathering this way, knowing in advance that pigments could be a problem, as they stick strongly to flat finishes.
Anyway, the next stop was the paint chipping. I used my usual recipe of a very dark brown mix of Vallejo paints with a bit of retarder and a 000 brush to produce the larger paint chipping. Afterwards, I would use the sponge method to enhance the effect on corners and heavy traffic areas. The problem with applying paint chipping effects directly on flat paints is that you must follow combat rules: you get one shot. It is virtually impossible to clean it if you overdo it.
In my case, this Sd.Kfz.253 was probably a veteran from Kursk, still serving with an Artillery Battalion HQ in mid/late 1943, so I abused a bit of the effect. An eagle eye will note that I haven't applied any divisional markings, something not so rare, particularly after those messy years in the eastern front, when equipment and vehicles were constantly changing units...
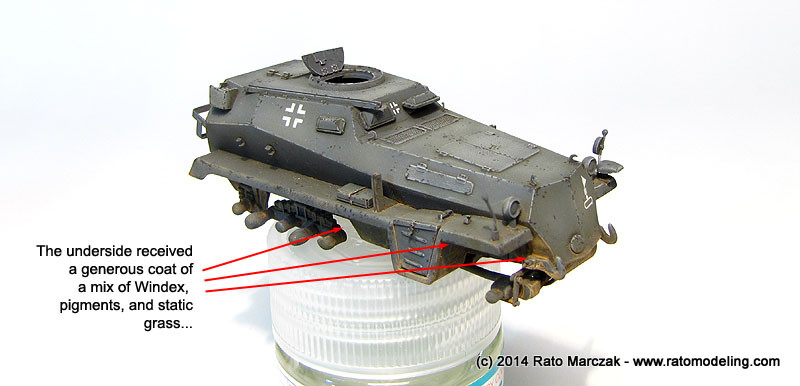
Continuing with the weathering, I prepared a very thin mix of Windex, earth colored pigments and a bit of static grass which was generously applied to the undersides: lower and side hull, and fenders. I like this method because it can be attenuated after drying by scrubbing a stiff brush. Surprisingly, it worked very well on the flat surface, but I don't recommend to use it as a thick mix unless you have a gloss finish...
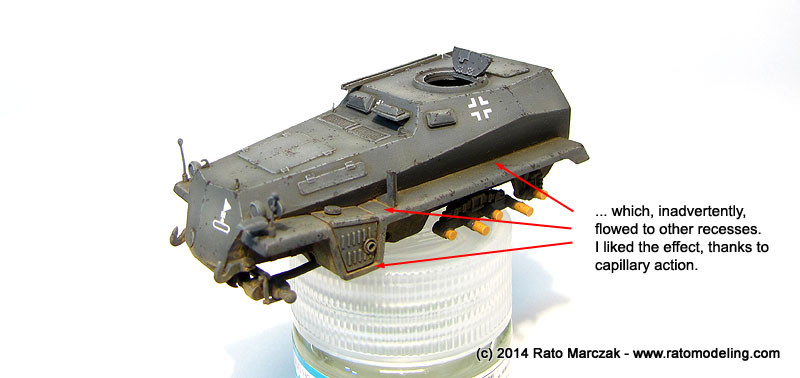
Incidentally, the capillary action dragged the mix along recesses and corners, simulating dust collected in these areas. That would save me from another pigment application later. Luck was on my side...
Anyway, I still have to refine the chipping with graphite around corners and retouch the dusting on lower areas. Now my eyes need a rest:
At this point I decided to install the tracks. The kit's tracks... and that's the reason why I stayed away from this model for months. Let me explain.
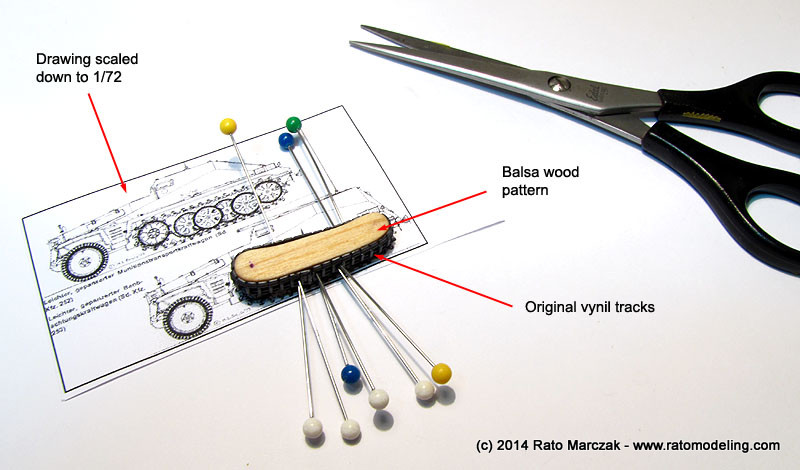
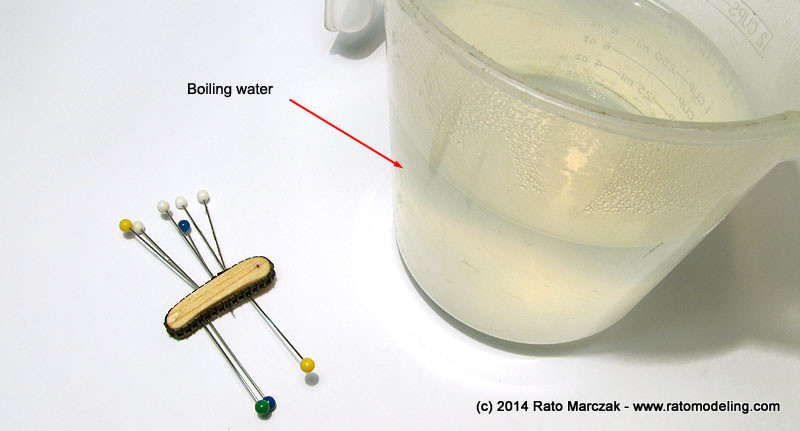
Although the kit's running gear parts are generally acceptable, the track themselves are of vinyl type. That old vinyl which used to crack with time. I was not completely confident they would work, but decided to try. Convinced that the tracks should be assembled without stressing them, I carved a pattern in balsa wood to conform the vinyl parts. I used a scaled down drawing, respecting the distance between the driving and the idle wheels, and trying to reproduce the sag. I then pinned the track parts around the pattern...
...and dipped it in boiling water:
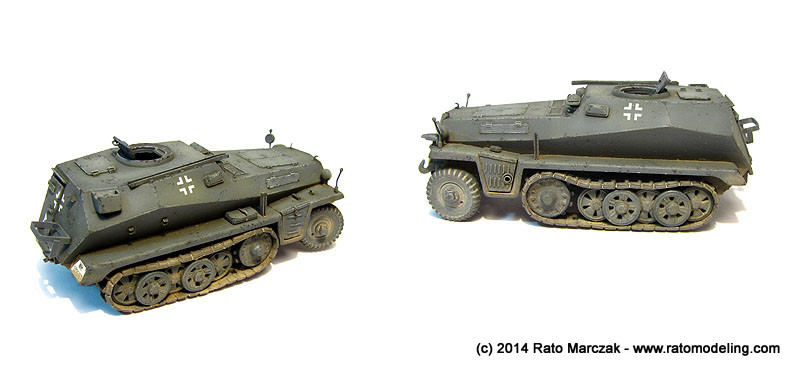
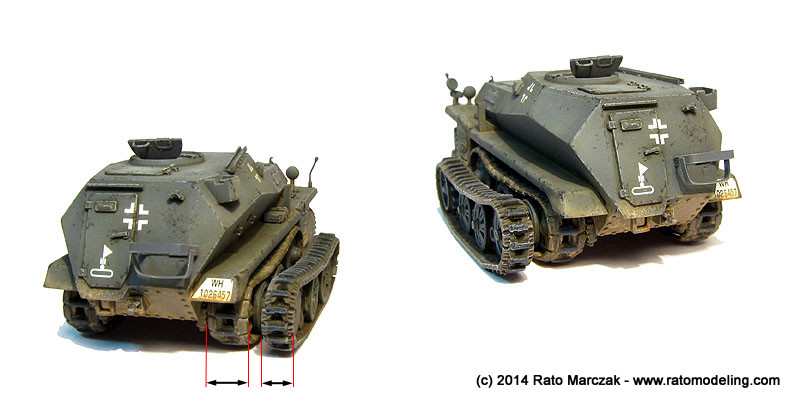
After waiting them cool down, I assembled the tracks, painted everything and proceeded with the weathering. It was ok, but something was not right. The sag was less than perfect, however, the driving wheel seemed overscaled, and something else that I couldn't figure.
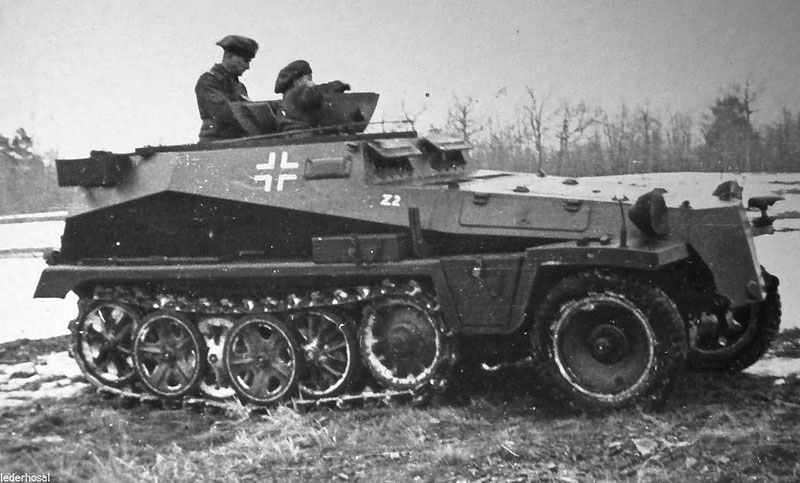
After checking photos from books, the bell finally rang: the track width was way out. They were laterally spanning out from the fenders.
I will not bother you with drawings and dimensions, but I made my homework, and things should look like this:
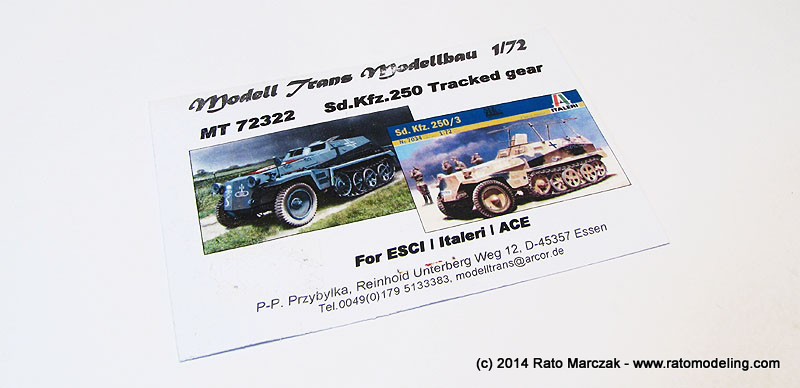
After all the work put on this model, I could not live with those tracks. I quick trip through the internet revealed my savior: Modell Trans product #72722. Having a positive previous experience with their tracks with my Renault FT-17, I knew they would be better than what I had installed on my little 253.
As usual, they are not perfect, and you have to spend some time cleaning and correcting molding problems. All in all, after painting and drybrushing, the result is way better than the vinyl tracks:
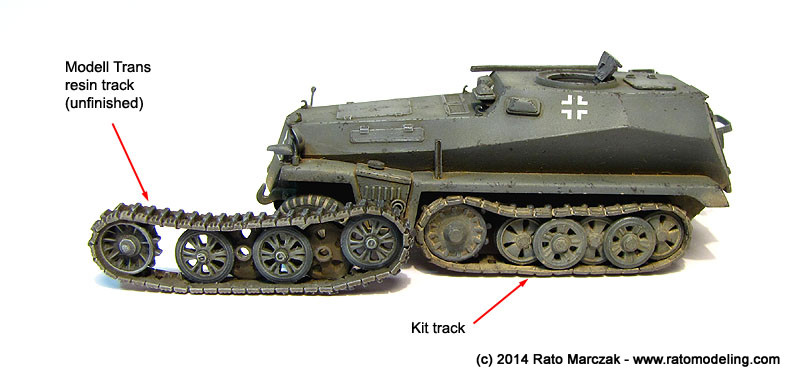
More importantly, they had the right width and the rubber shoes correctly represented. The difference is quite visible:
Finally convinced, I let the carnage began... I ripped off the old wheels and removed the old vinyl tracks. I had to grind off most of the original suspension details of the kit to make the resin tracks sit correctly under the mudguards.
In retrospect, I simply don't understand why I insisted in such stupid idea. Thanks to the suggestion of a couple of friends (thanks Mikolaj and Flavio), I also replaced the front wheels for the Modell Trans ones. The difference is huge:
And certainly it looks more the real thing:
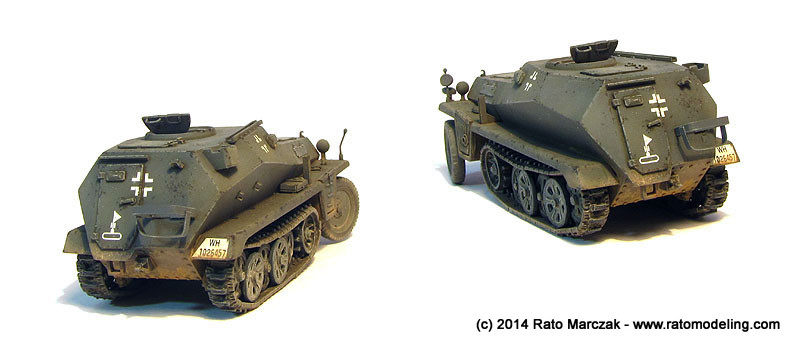
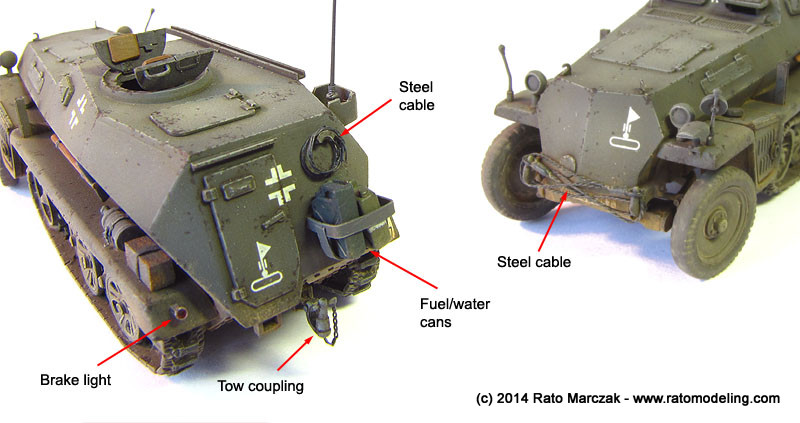
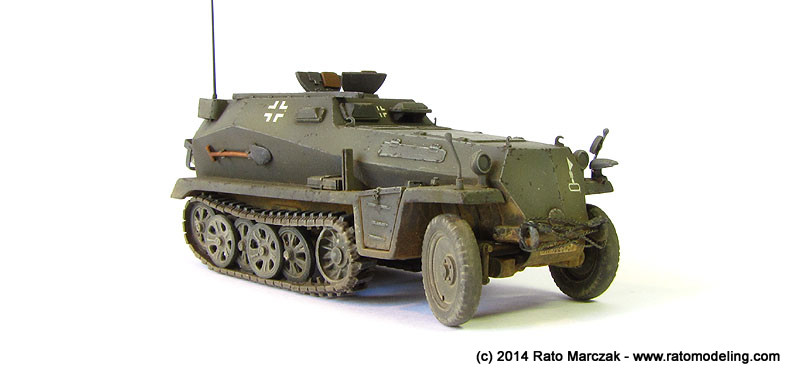
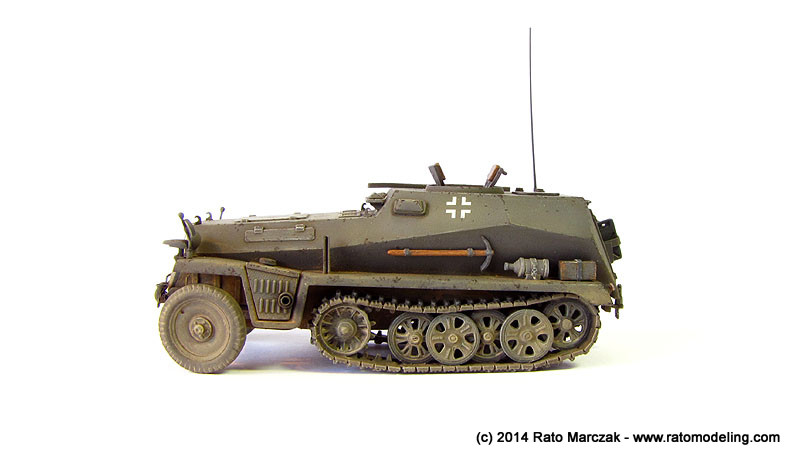
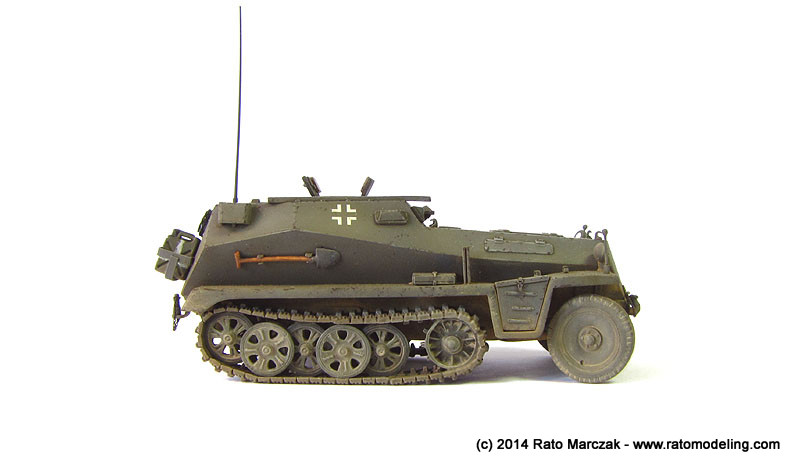
With everything ready, I proceeded to the final assembly by cementing the smaller details in place. In the front of the little half-track, I installed the steel cable previously made, painted and weathered accordingly. It was tied over the hooks as commonly found in wartime pictures. On the rear, A small brake light was made of clear red plastic and glued on a small support made of soda can. The set was cemented on the back of the left fender. The makeshift fuel drum support received a fuel and a water can, and a small roll of steel cable was put atop of it:
On the sides of the hull I installed the jack, wood block, a shovel and a pickaxe. These things are not exactly as factory installed, but I assume a improvisation was in order during combat. These items were painted in a slightly different shade of panzer gray and, along with the wooden handles of the tools helped to break the monotone finish:

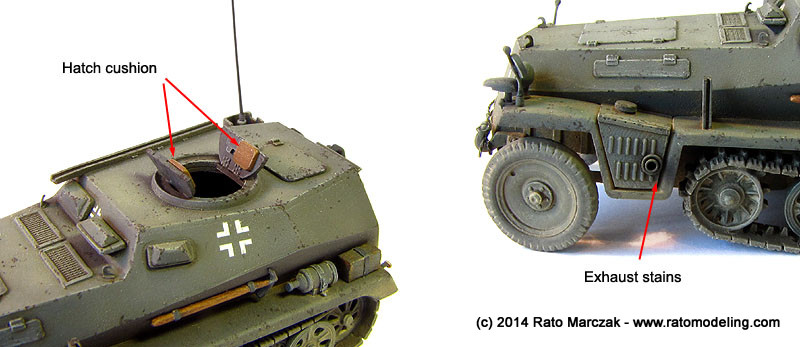
The final things done were the installation of the commander hatch's cushions and to airbrush the soot stains from the exhaust:
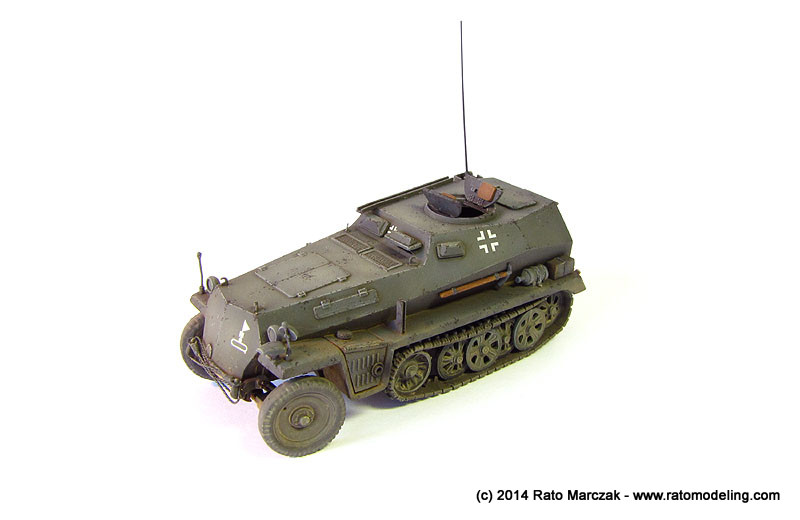
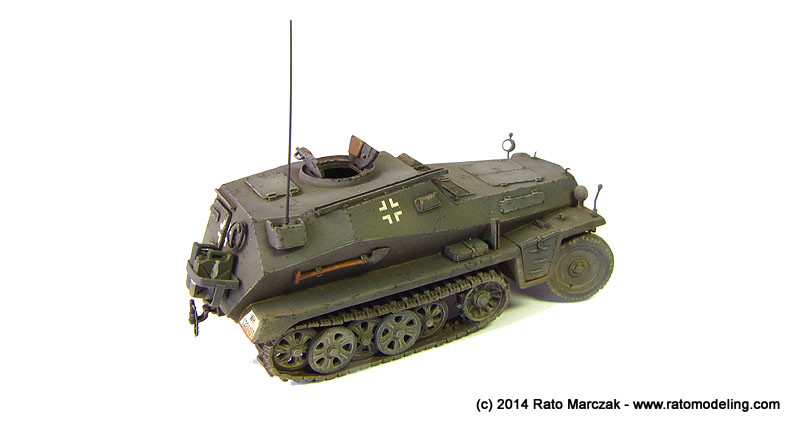
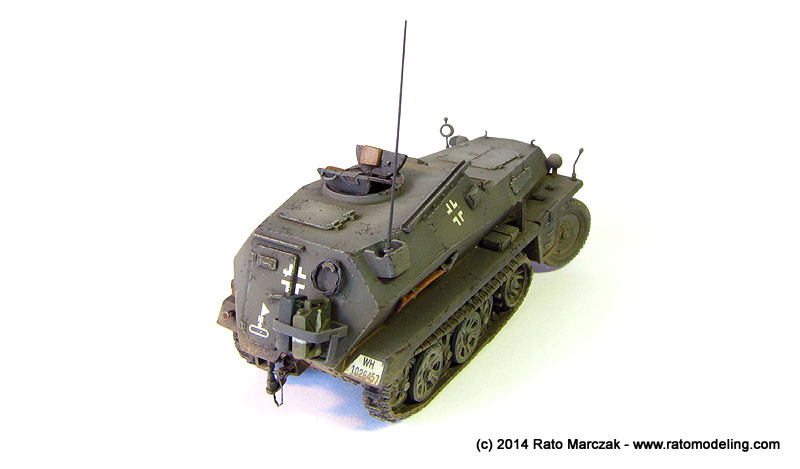
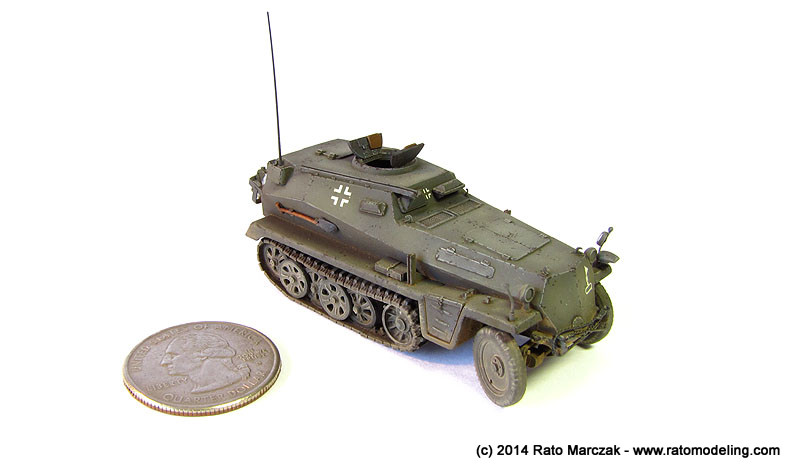
And I declared this long overdue project done:
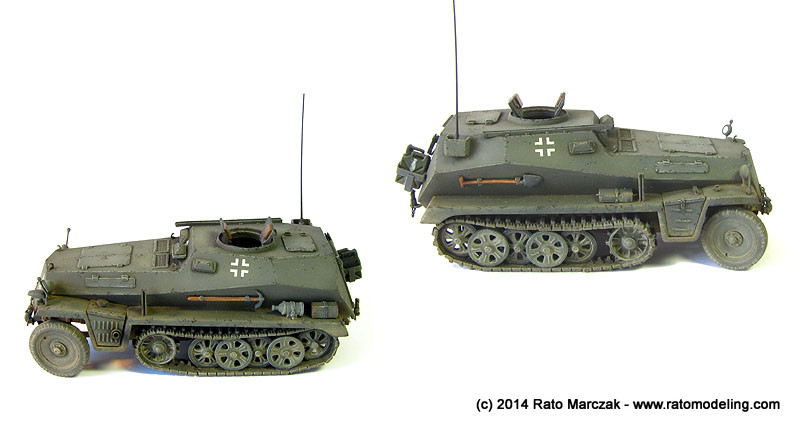
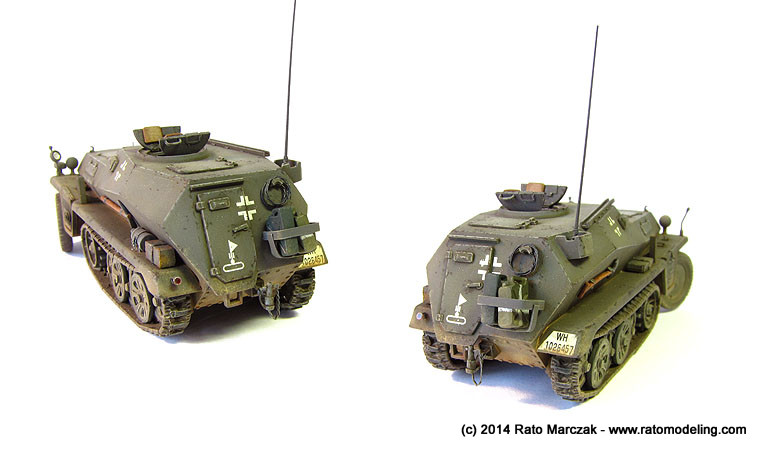

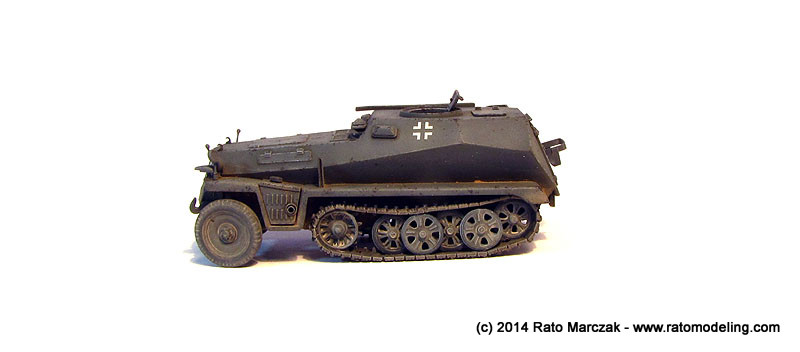
Now my Sd.Kfz.253, along with the Kanone 18 and the Famo can find their way in the Retreat diorama. I enjoyed this project from the outset, but if you accept an advice, never let a good project take so long. Besides loosing interest, you also loose the memory of the research on the subject.
Anyway, here are the final photos before you see it again in the diorama:
| Technical file | |
| Kit:
|
- Italeri #7034 |
| Additions:
|
-
A few photoeteched parts from left-over frets - Modell Trans Modellbau product #72722 - Sd.Kfz.250 Tracked gear resin set |
| Basic
colors: |
-
Primer: Acrylic automotive primer. - Panzer grey: mix of Revell #78 & #5 - Gloss coat: Automotive clear lacquer - Flat coat: Humbrol Flat Cote |
| Notes: |
-
The original kit is a Sd.Kfz.250/3. The conversion to a Sd.Kfz.253 was
scratchbuilt. |
Rato Marczak © 2014
