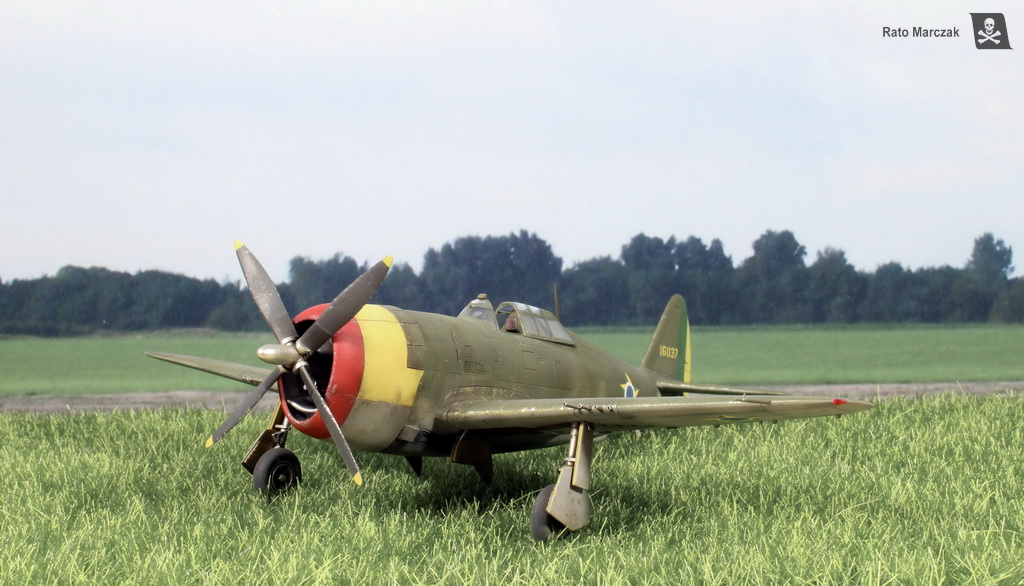
| Academy RP-47B Thunderbolt conversion in 1/72 scale |
| Finished: October/2022 |
Although
it never saw combat, the P-47B was
relatively well used in the USA as a training airplane, and was the
forerunner
of the more famous C and D razorback versions. In October 1944, the
Brazilian
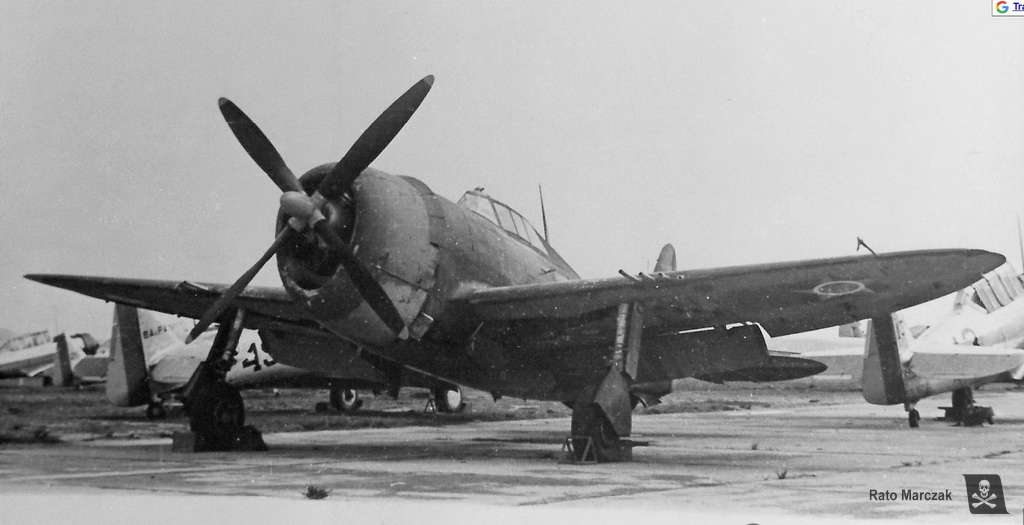
Air Force received one single RP-47B-RE. As a war-weary aircraft, it
should not
be used operationally. After a few flights, it was incorporated into
the
Technical Aviation School to serve as instructional equipment to ground
crews. It was so used until 1964 and ended up being sold as scrap in
1966. It was the only razorback among all BAF P-47s.
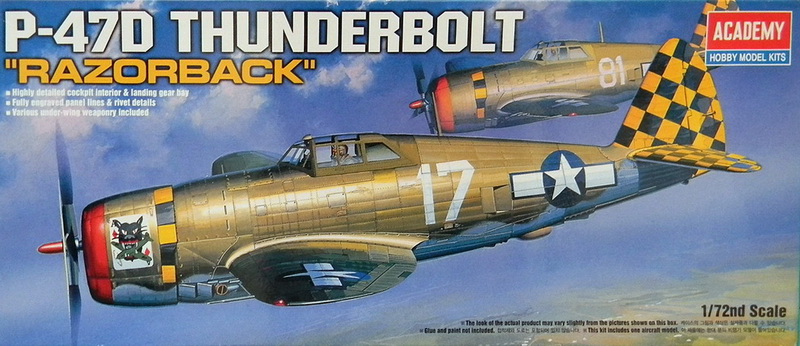
Not surprisingly, the P-47B was never translated into an inject kit form by a major manufacturer (until I finished this one...), for it has big differences from the other versions. I decided to have one in my 1/72 scale collection, but I knew in advance that it would require a lot of work. Knowing that a lot of sanding was ahead of me, I chose to put the Academy kit in my stash in this mission.
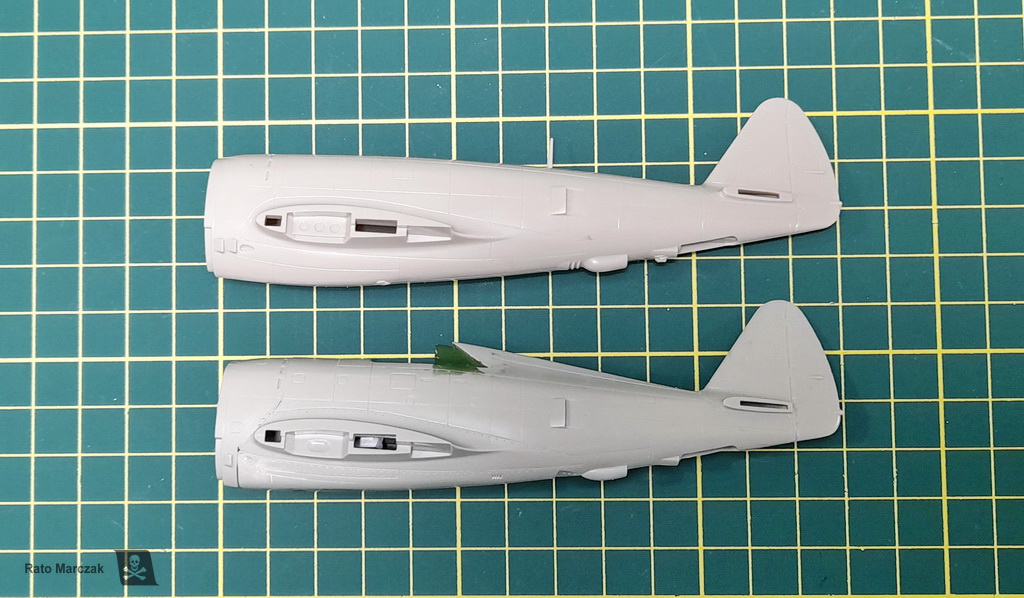
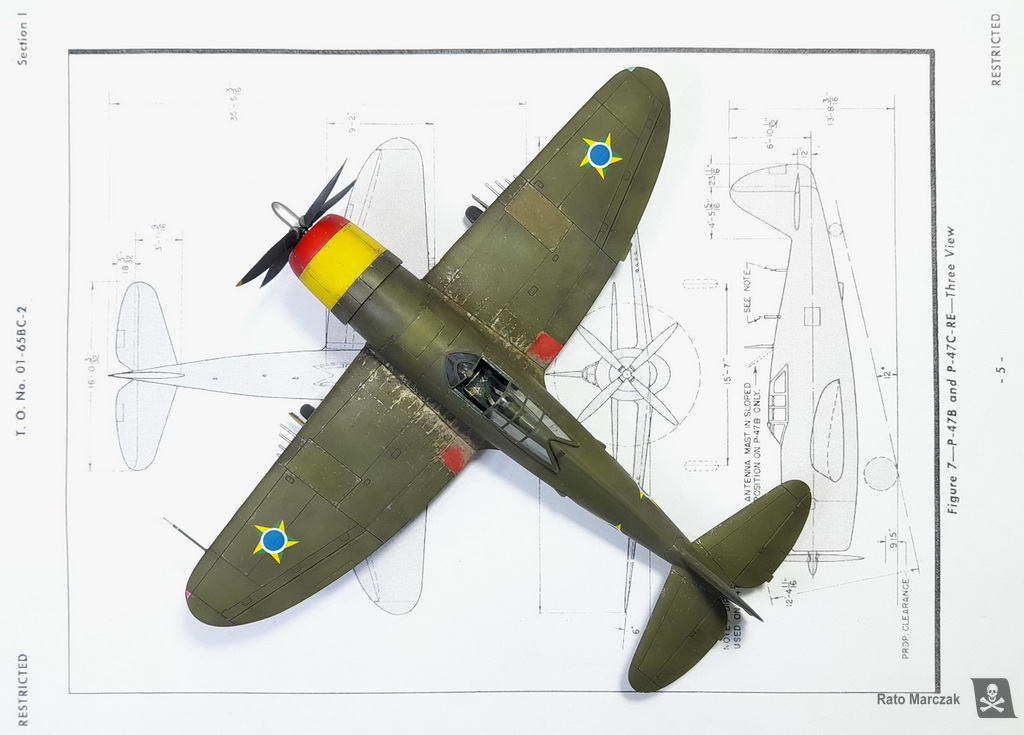
Building a scale model of the P-47B is not just a matter of painting different markings on any Razorback kit. The B had a fuselage eight inches (203 mm) shorter than its more famous cousins as it did not have the quick engine change kit. Other major identification features are the single deflector plate ahead of the exhaust waste door and the antenna mast mounted at an angle. So my first step was to remove approximately 3 mm of the fuselage. I tried to use panel lines as a guide to make a zig-zag cut, and then I shaved the 3 mm off.
 .
.
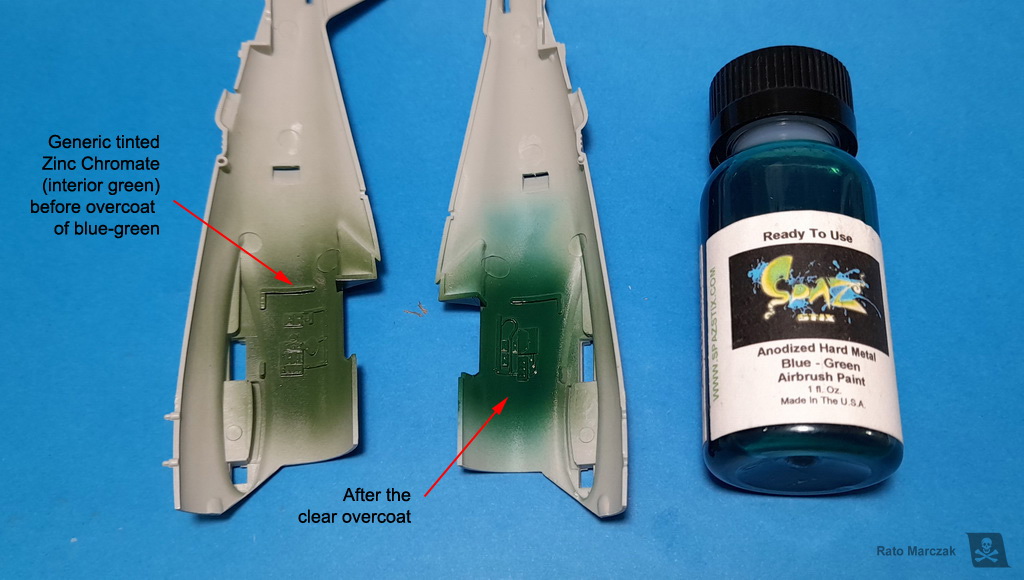
Before closing the fuselage, a new cockpit was detailed and assembled to replace the kit’s one. I tried a different recipe to simulate Republic’s characteristic Dull Dark Green used in the cockpits: I airbrushed Interior Green first, and on top of it I applied a coat of translucent blue-green color (the type used in Japanese aircraft interiors). It worked like a charm.
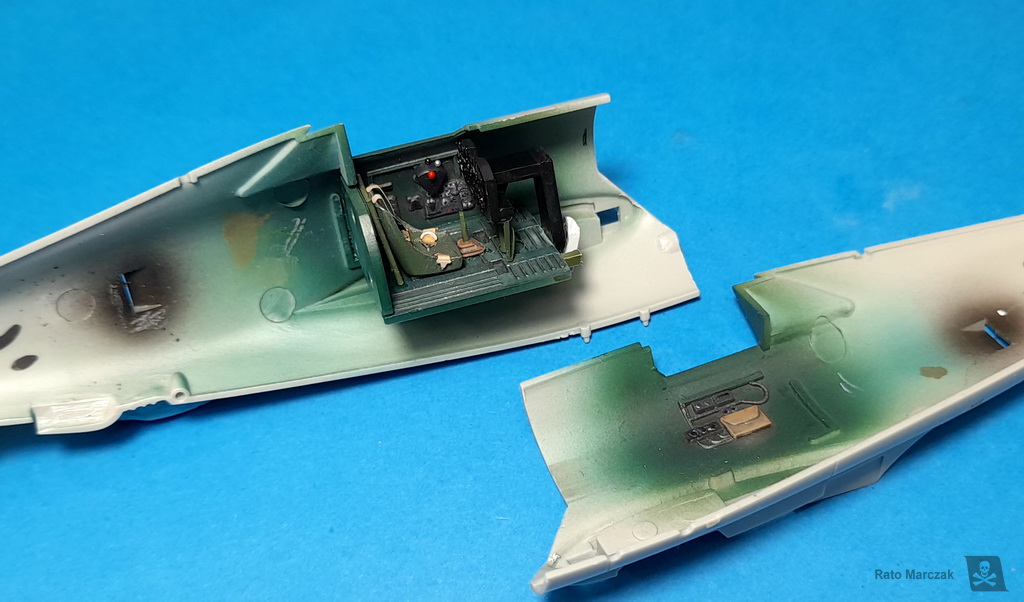
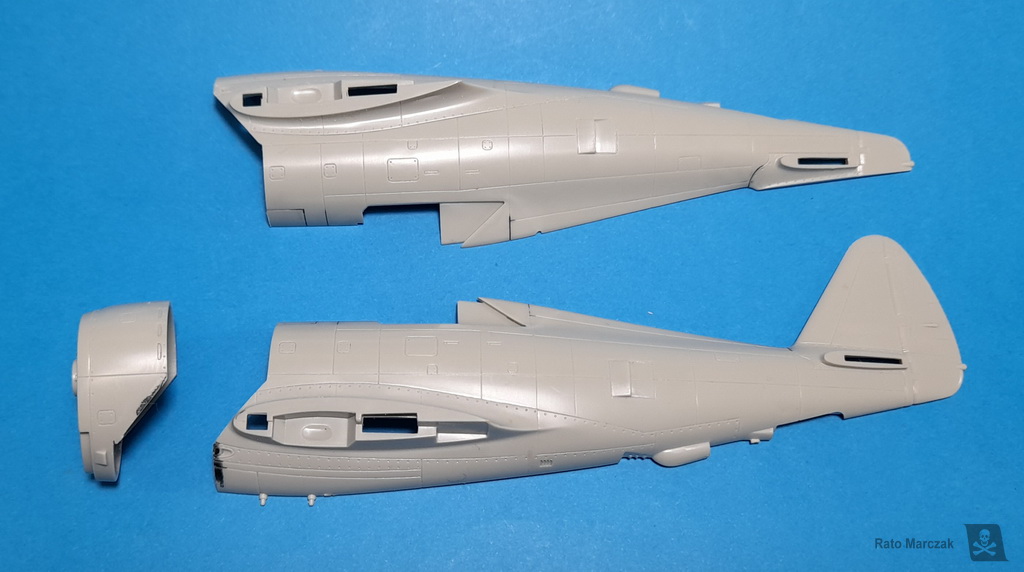
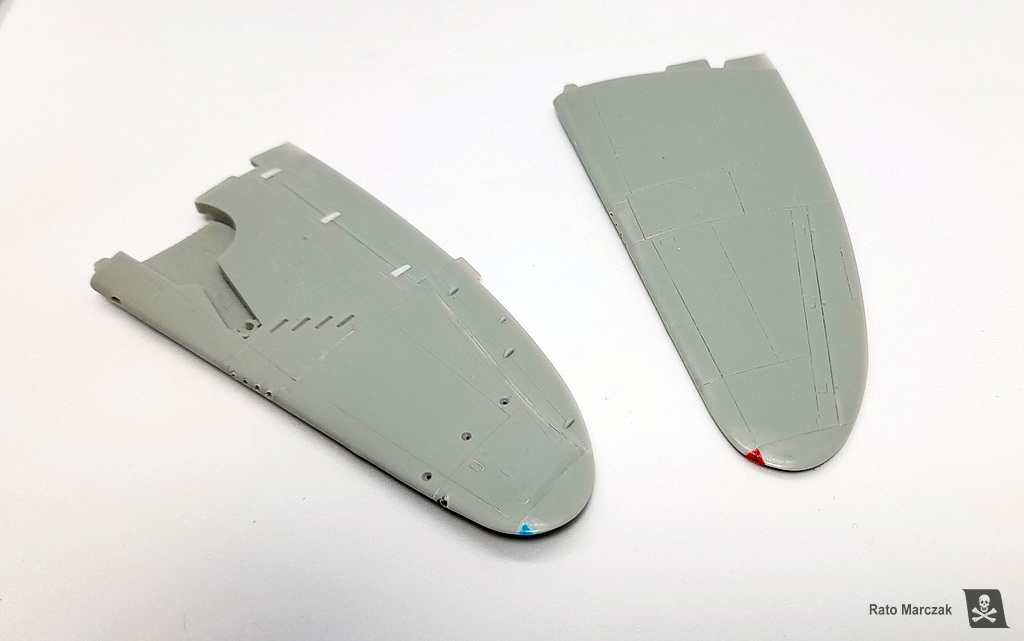
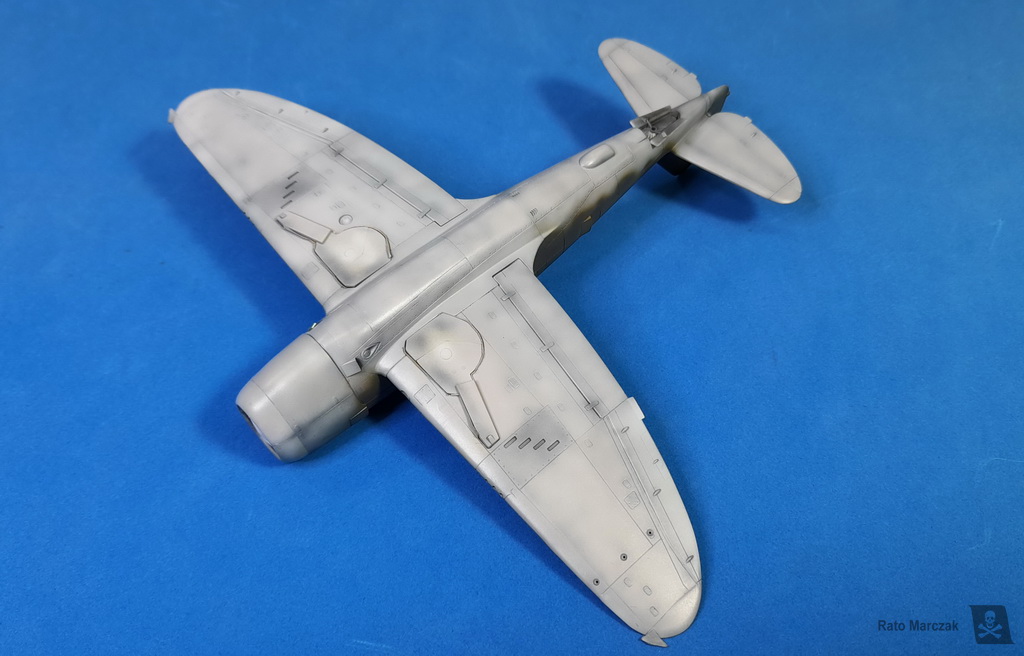
The fuselage was closed, and I flooded the interior of the belly area with gel super-glue. It was a necessary measure in view of another identification feature of the P-47B: the characteristic belly of the Thunderbolt is absent in the B version, so I had to sand the fuselage to the correct shape. The super-glue shell inside avoided the occurrence of holes or waffle-thin areas. The comparison to the P-47D fuselage exposes these differences :
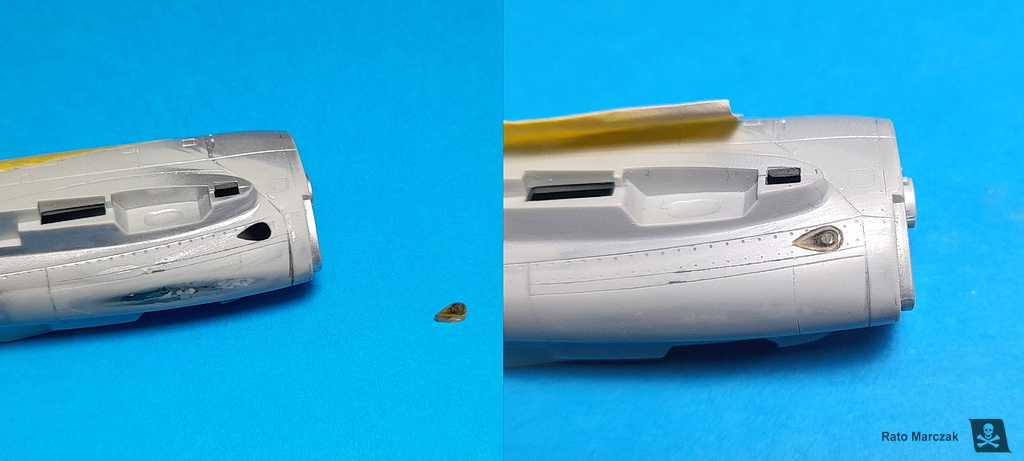
I started this project aware that although the Academy kit is a good starting point for the conversion, it is too simple in many details. I opted to sacrifice a Revell P-47D kit and use its landing gear struts, wheel bay doors, engine, and other smaller details. I would graft them into the Academy kit. The first was the tail wheel, inserted in a hole opened in the fuselage. I also copied the exhaust wastegate in resin and carved an eye-shaped hole to insert it, because the original was removed during the fuselage surgery. Another common error in many kits is the machine gun barrels aligned to the wing leading edge, instead of the ground line. I removed the kit barrels and drilled new holes along the correct line:
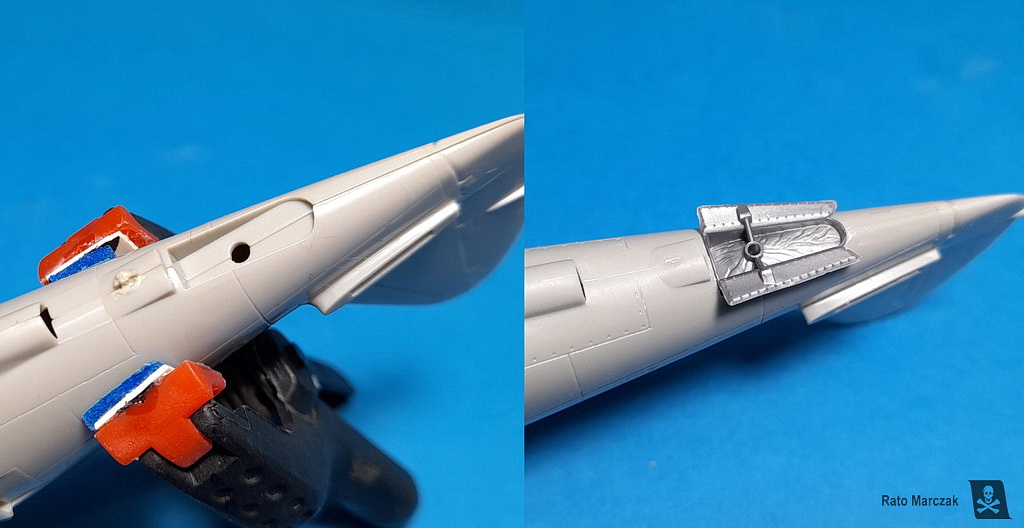
And since I was at it, I addet the wingtip lights using the standard method and colored plastic. Formation lights are absent in the kit, so I drilled their holes in the corresponding position. They would be filled with UV resin later on.:
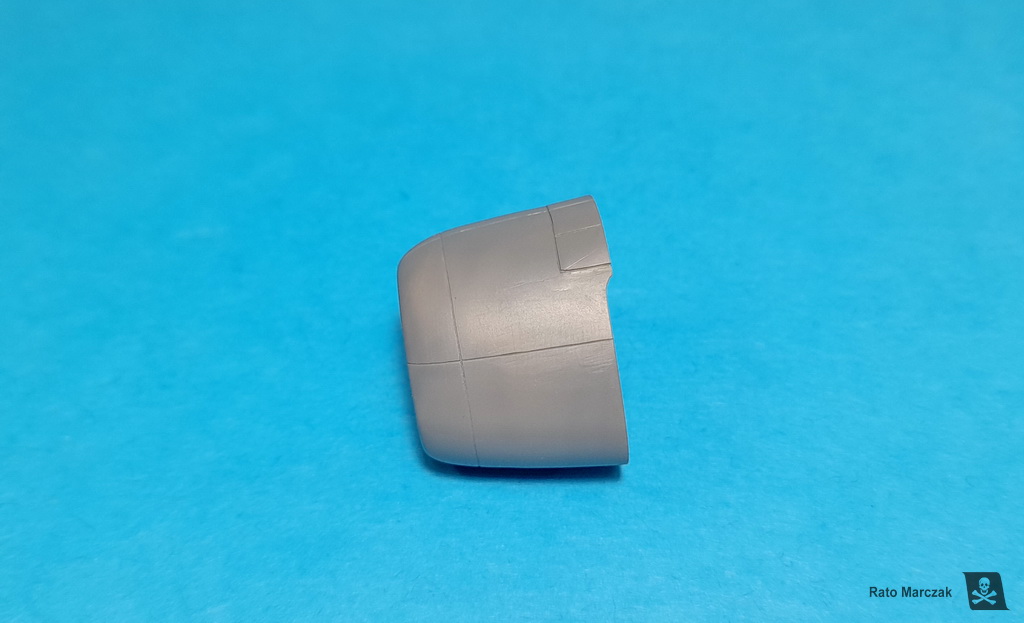
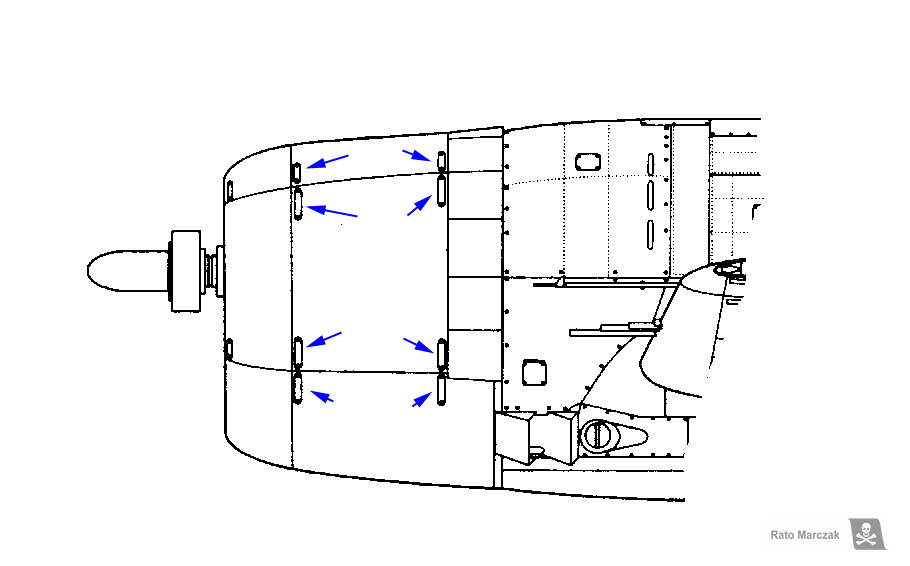
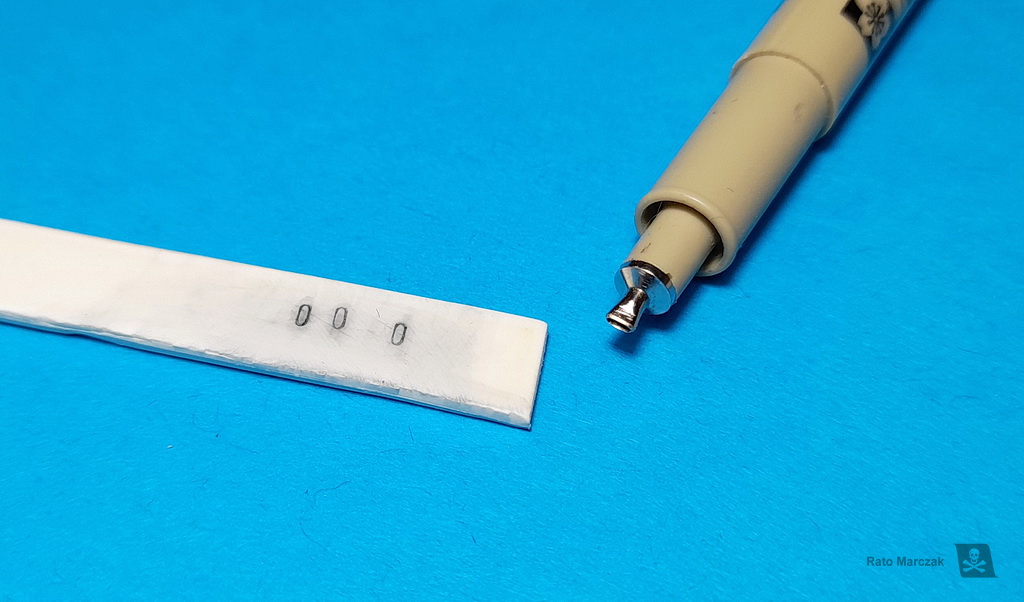
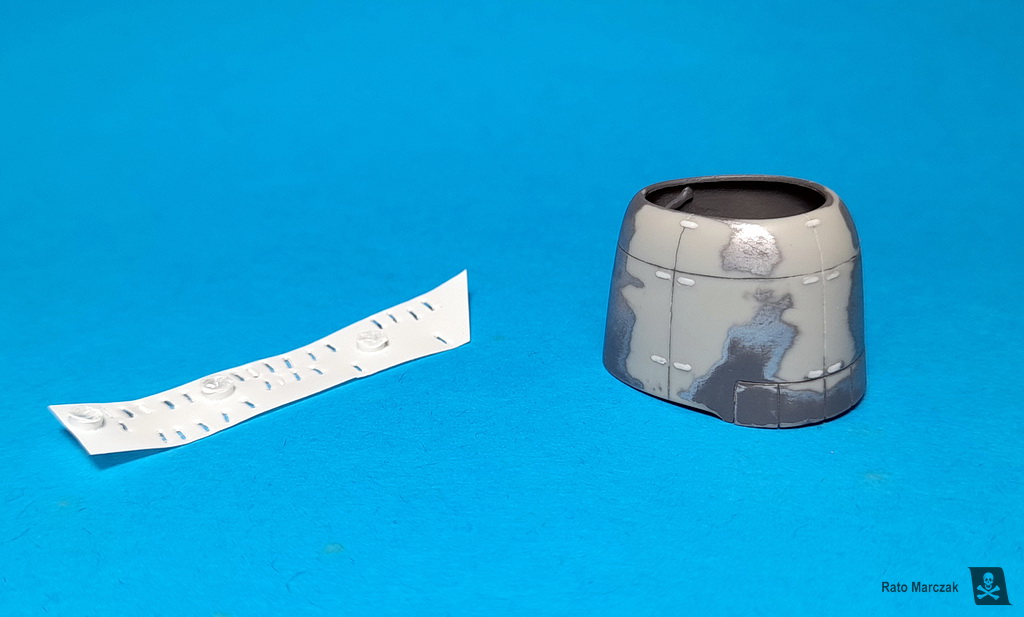
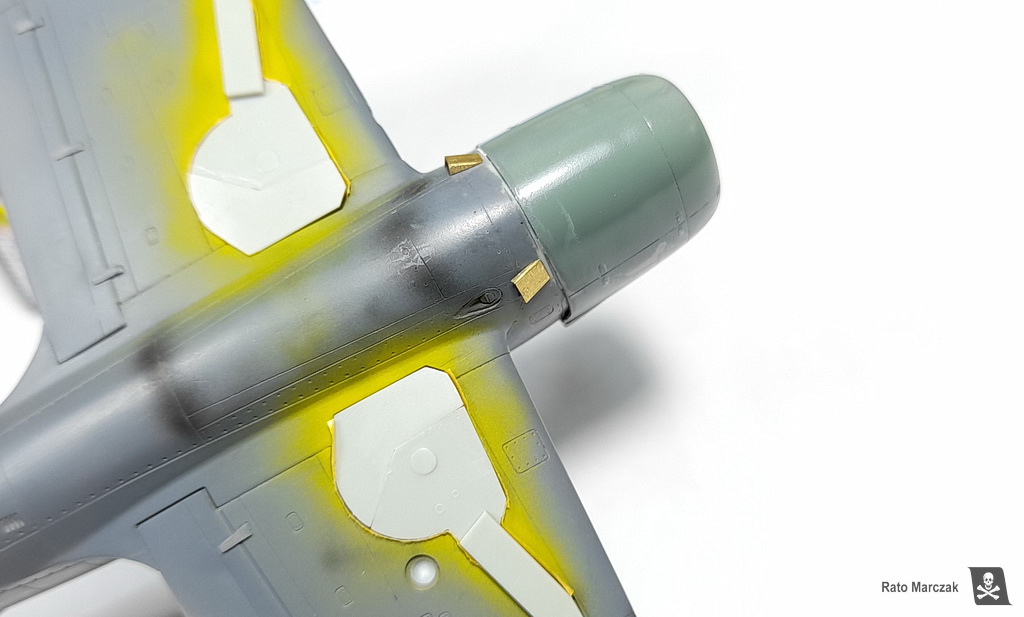
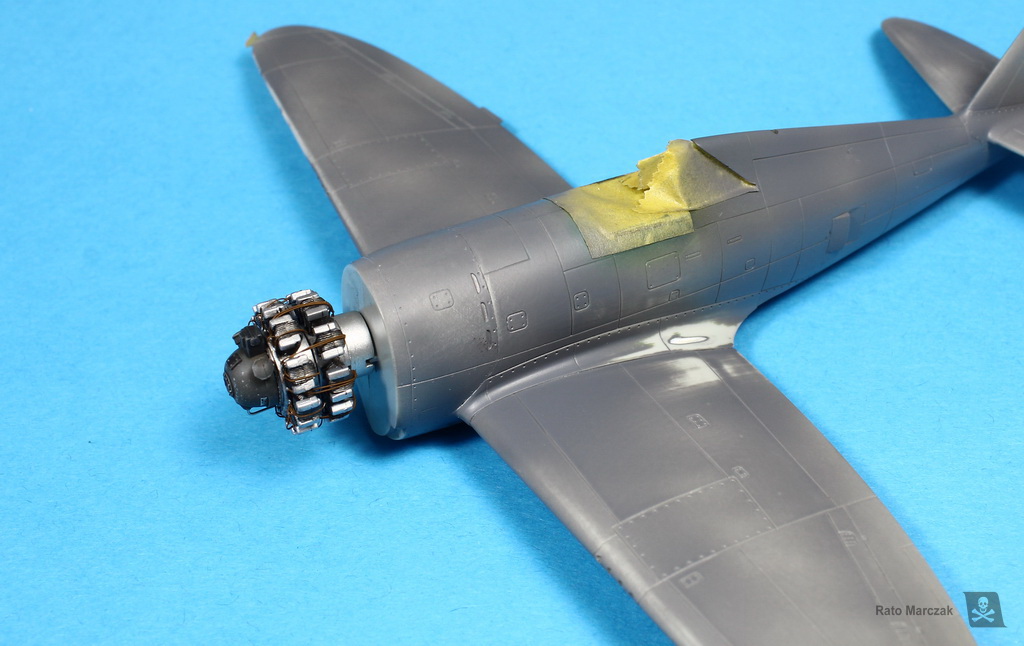
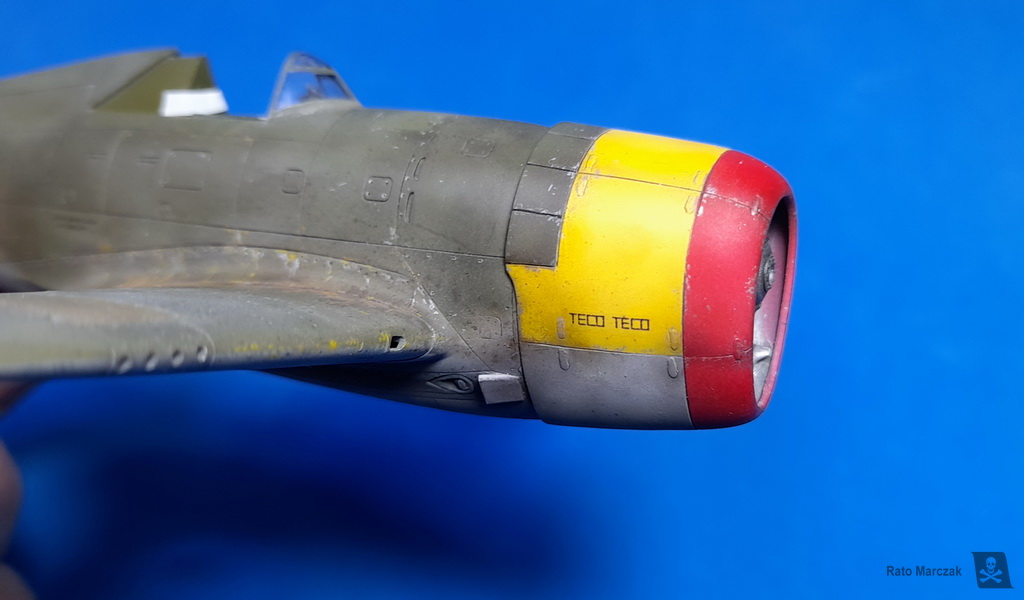
The Academy cowling is for a late C or D model, so the two lowest cowl flaps must be removed, and the panel lines rescribed. Another detail omitted in the kit part are the dzus fasteners which hold the engine panels. I modified an empty drafting pen to punch plastic oblongs that were glued over the cowling. After the glue was set, they were lightly sanded, resulting in a barely raised fastener. This method is much easier than scribing the fasteners, and alternates raised details with the recessed panel lines of the kit, adding realism to the model. The oil cooler exhausts were scratchbuilt from brass sheets and secured in place with super-glue:
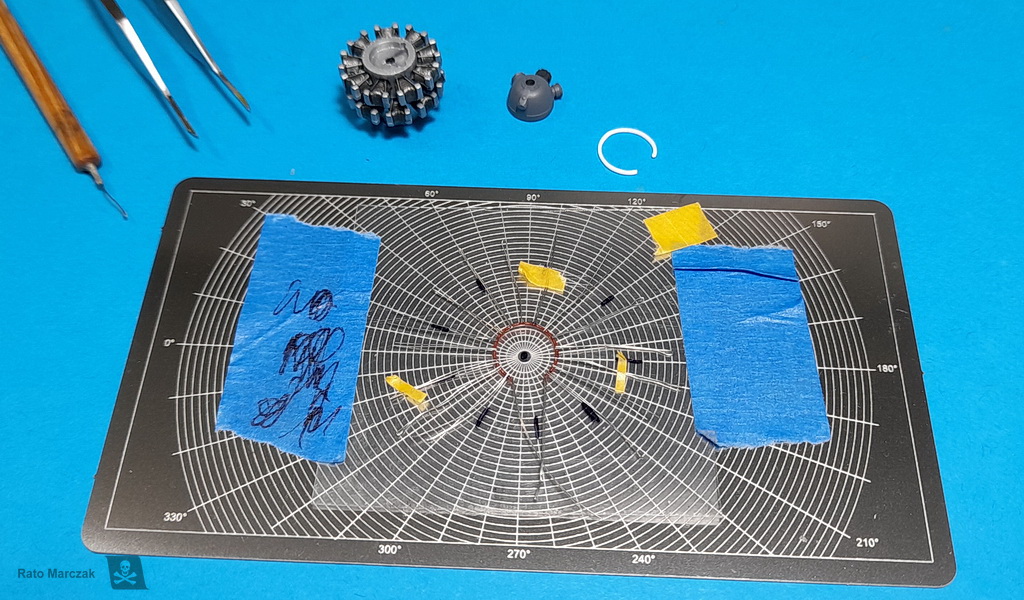
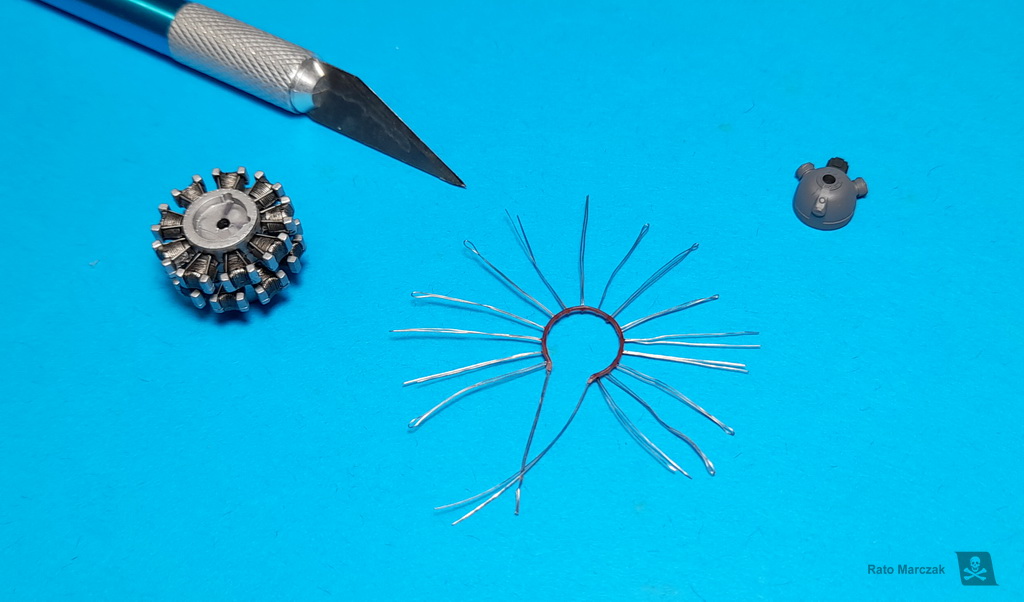
The next major subassembly to tackle was the engine. As a fan of the P&W R-2800 engine, I wanted a better representation than the kit one, but I wasn't in the mood to work with resin. The solution came from the Revell kit, which is very good and has the correct magnetos for this version of the Thunderbolt. All I did was to scratchbuilt a new harness and add plug wires.
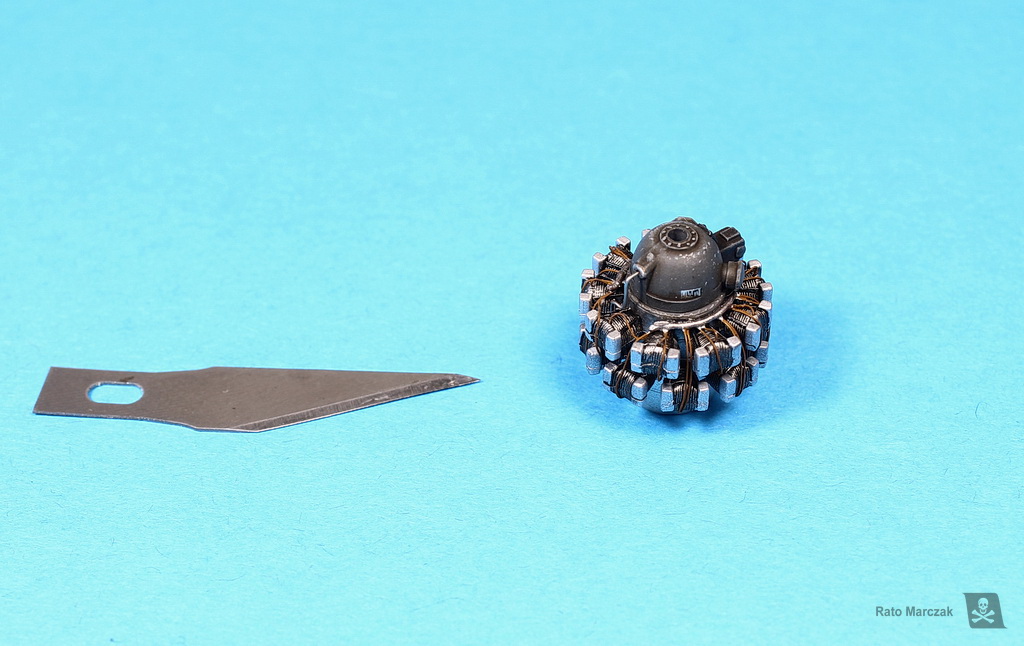
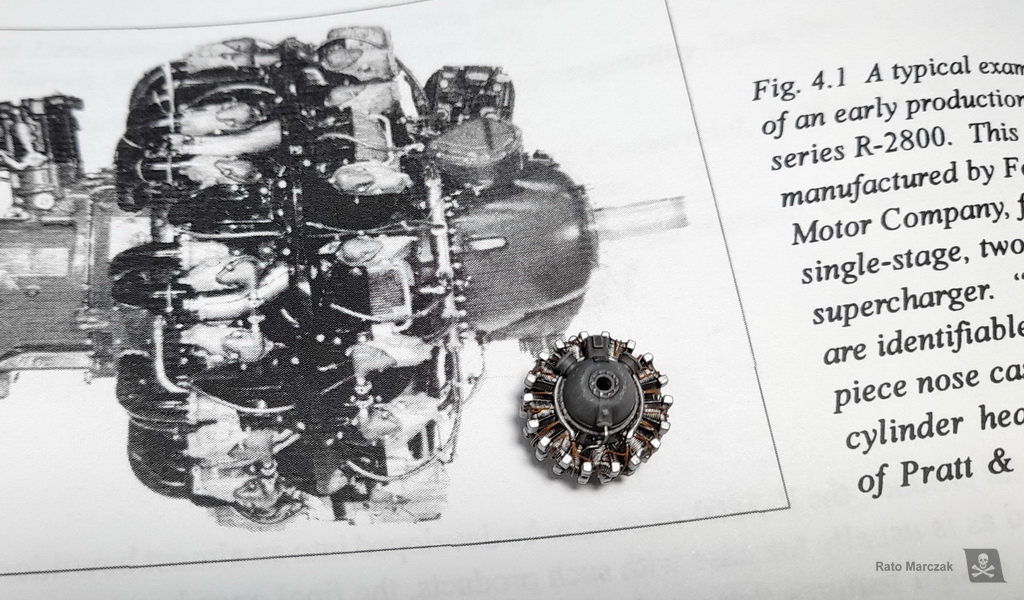
After a careful painting, some weathering, and a dry transfer placard I had a beautiful engine. Finally, I had to modify the fuselage mount to graft the new engine in the correct position.
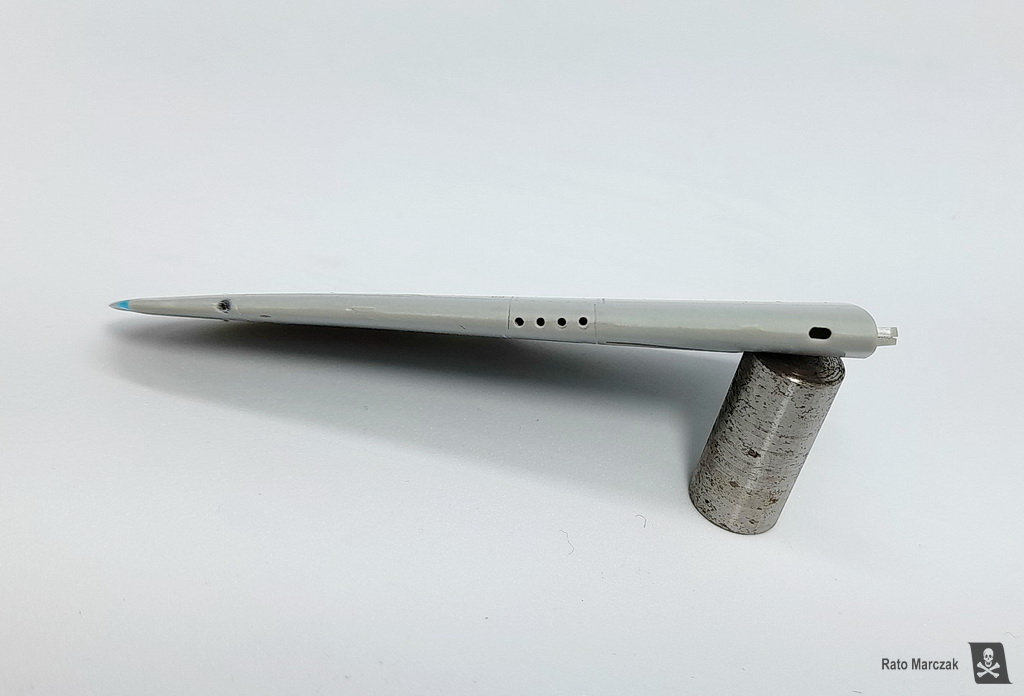
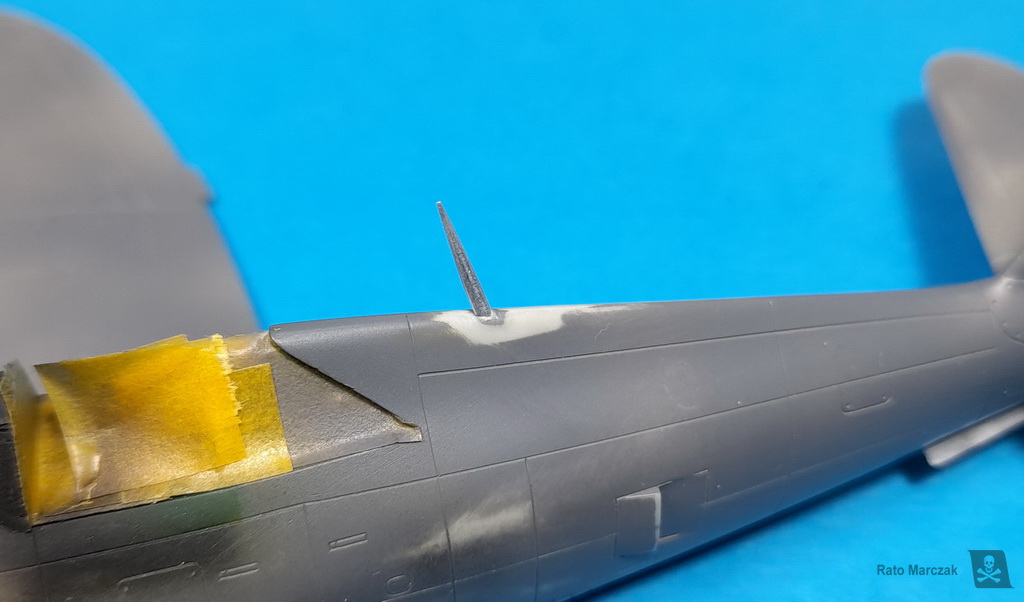
I also carved a slanted antenna mast, another particular feature of the P-47B, from an aluminum rod. It would be installed later on during the project. A stronger pitot tube was built from metal, and the gun barrels made from brass piping to be inserted in the wing openings later on:

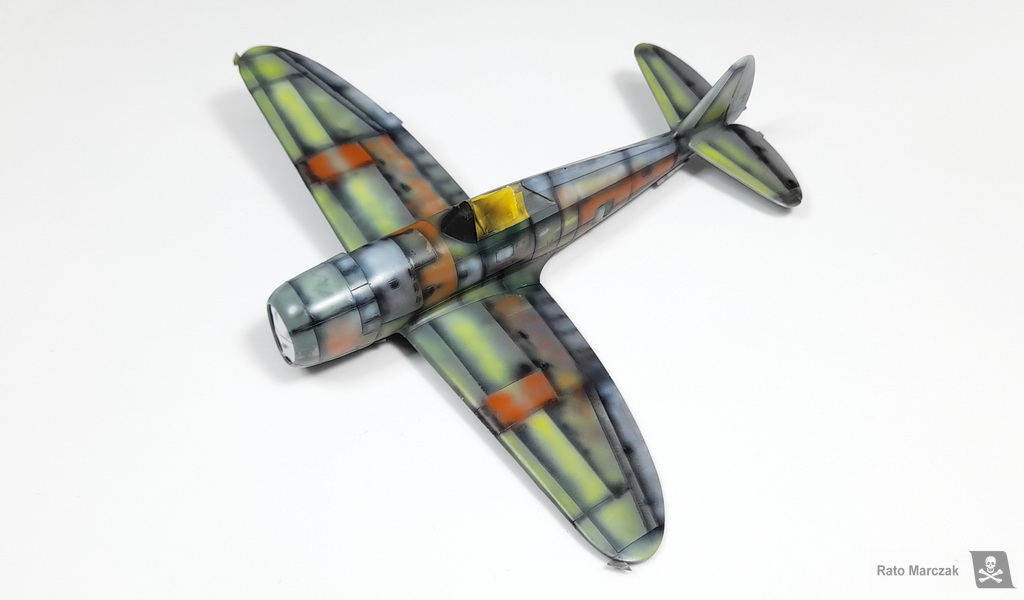
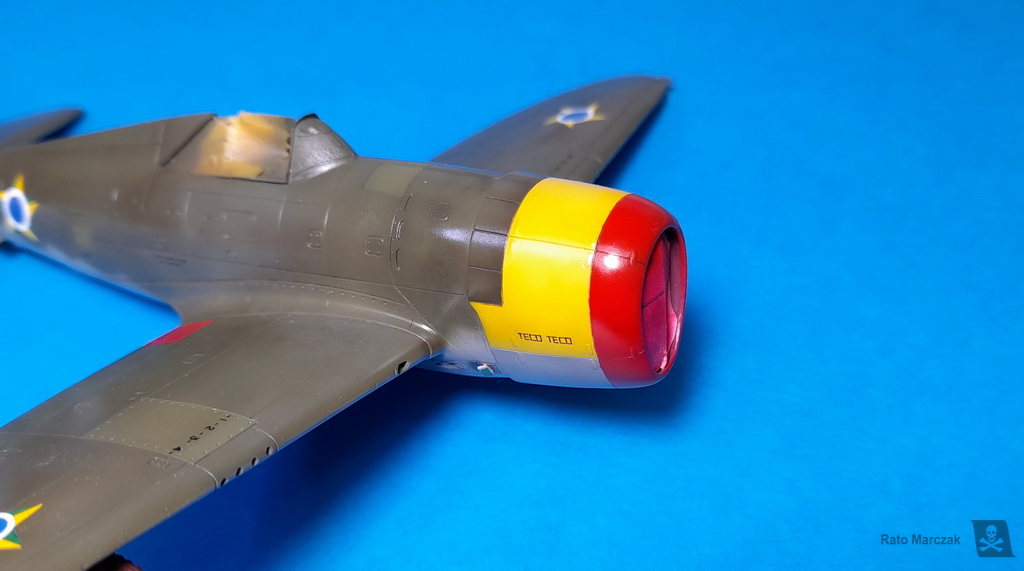
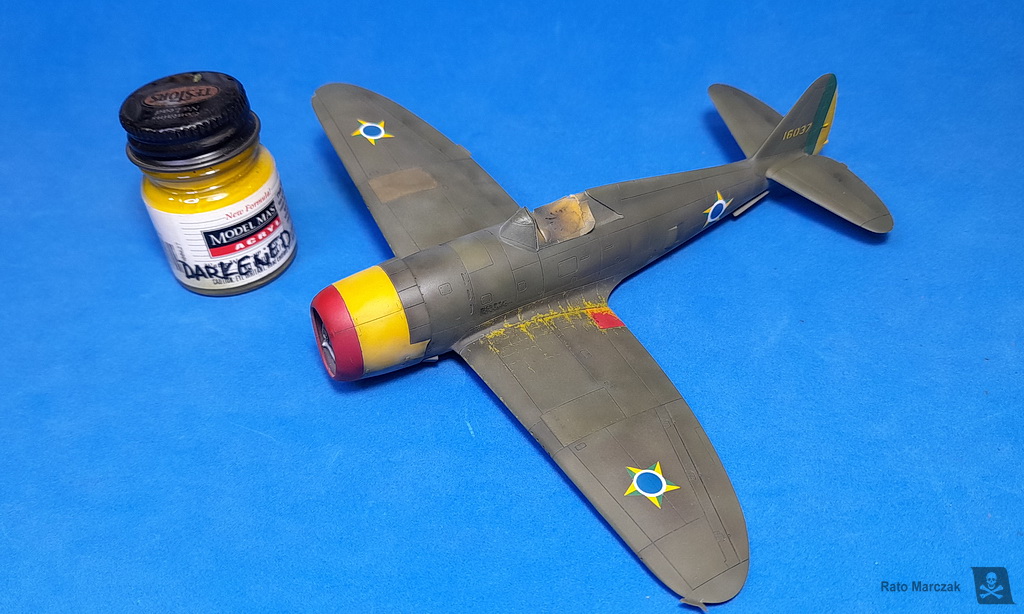
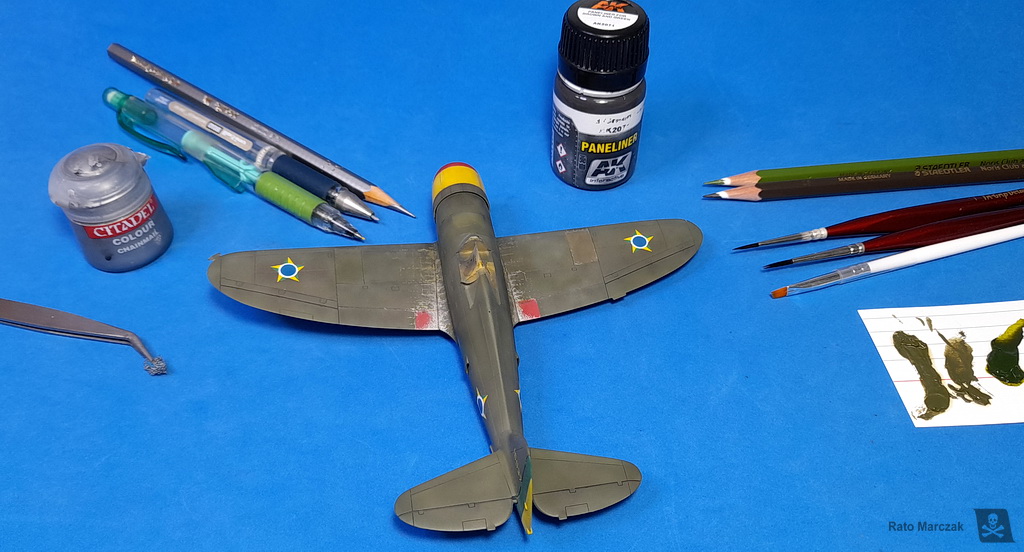
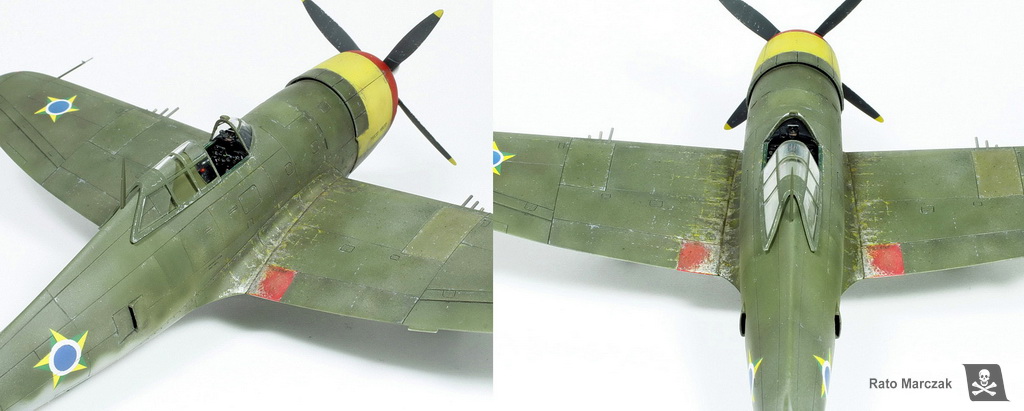
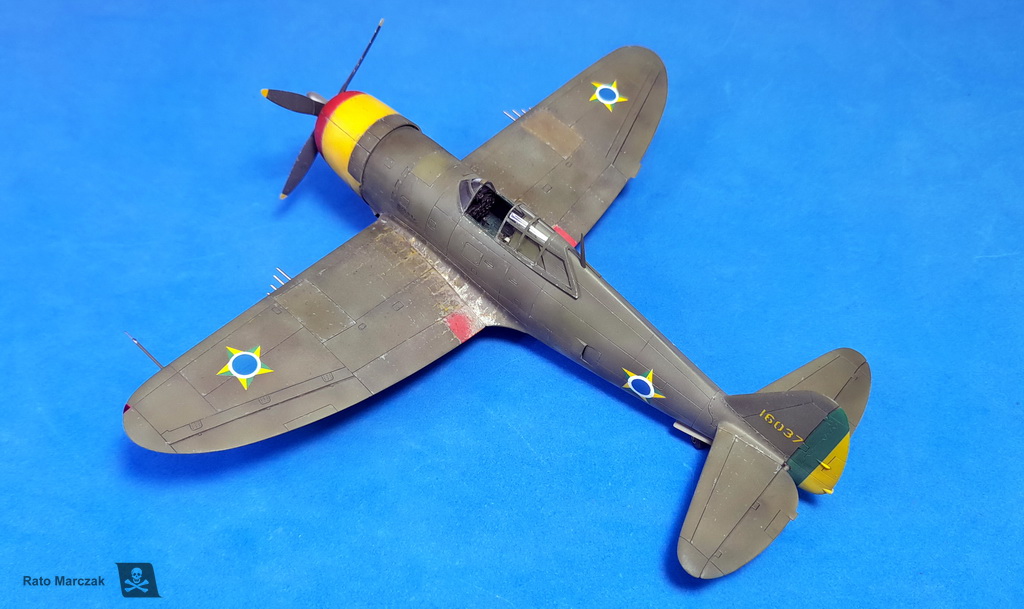
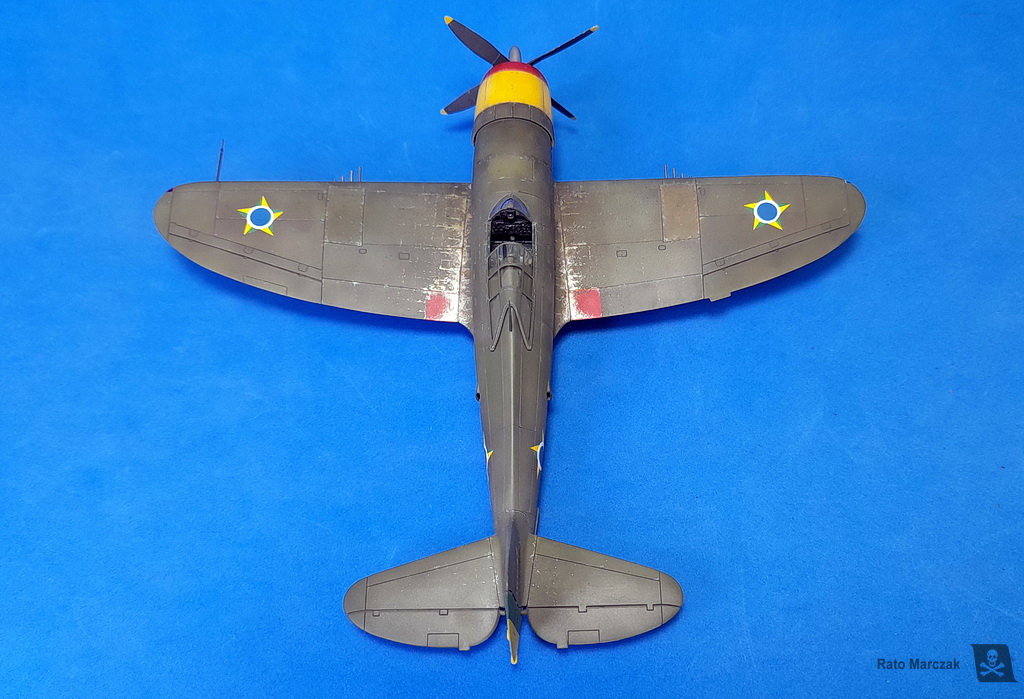
After studying photos of P-47s, I came to the conclusion that Republic used a different paint for their Dark Olive Drab 41 than other manufacturers. It seems more green, and darkened considerably with time, as opposed to other aircraft painted with the same color. Aiming for a very weary painting finish, I played with pre-shading on both, upper and undersurfaces. Thinner and water-based GSI paints were used for the camouflage (H for Hobby Color and C for Mr. Color). I applied H330 as a base OD color. Dark spots and retouches were airbrushed with C12. Everything was smoothed out with a thin coat with C23, and highlighted with C23+C21. On the underside, as my interpretation of an old Neutral Grey 43, I started with GSI H-53, then applied dark spots with H-22, followed by H-32, and white. As a final touch, I airbrushed a darkened tone of OD with the aid of stencil masks in order to simulate oil stains, fuel spills, and alike. After painting the yellow/red cowling colors, I faded them heavily by adding white to the colors and misting them over the center of the panels.
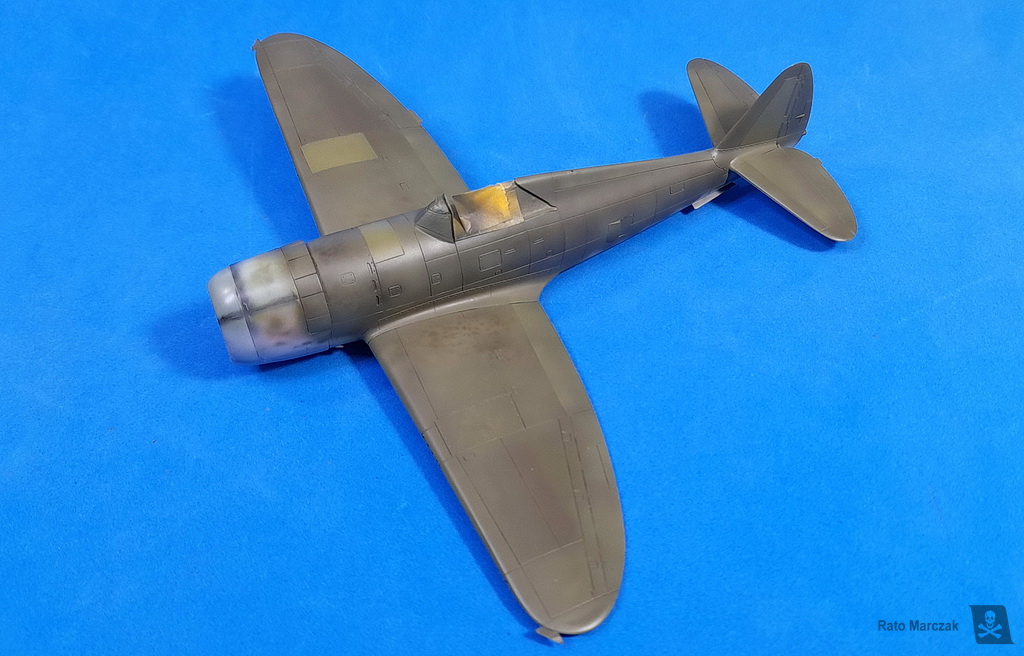
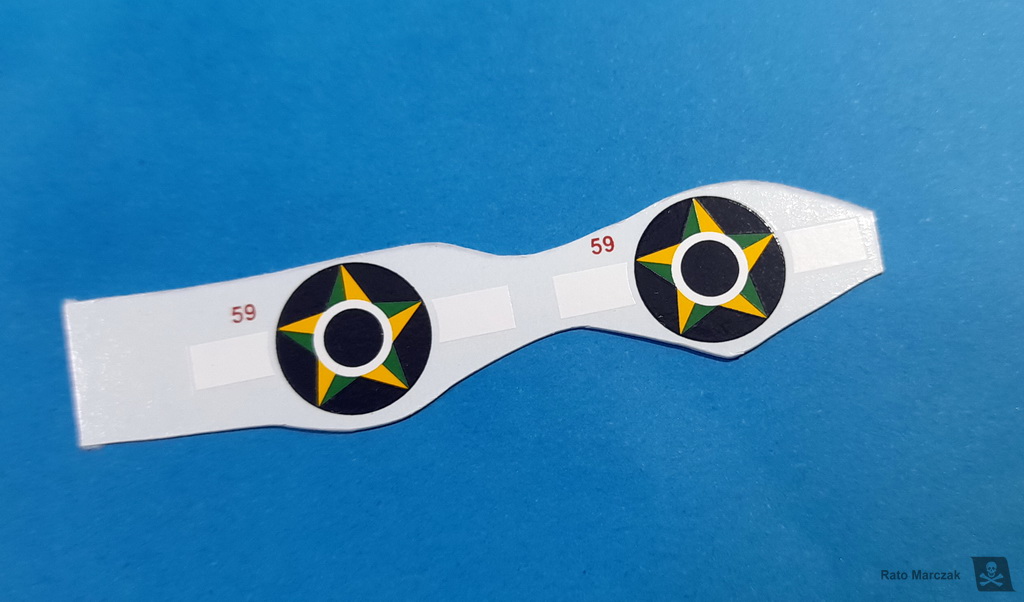
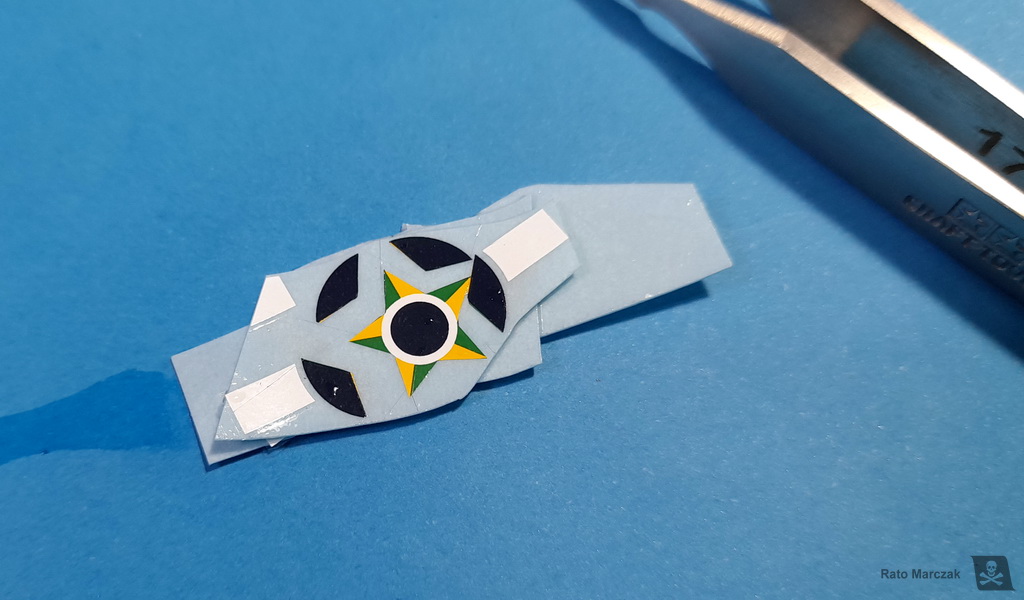
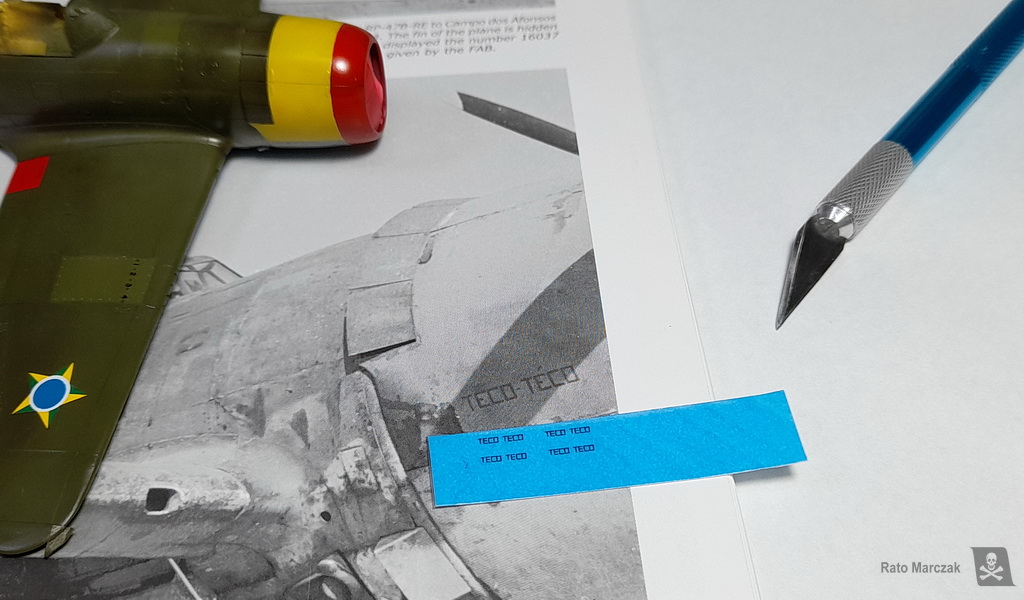
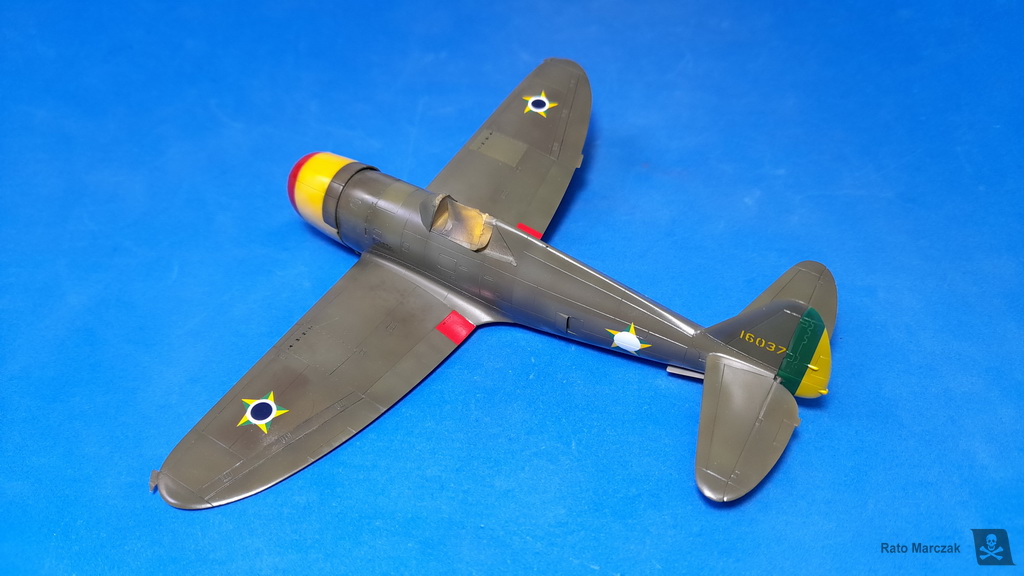
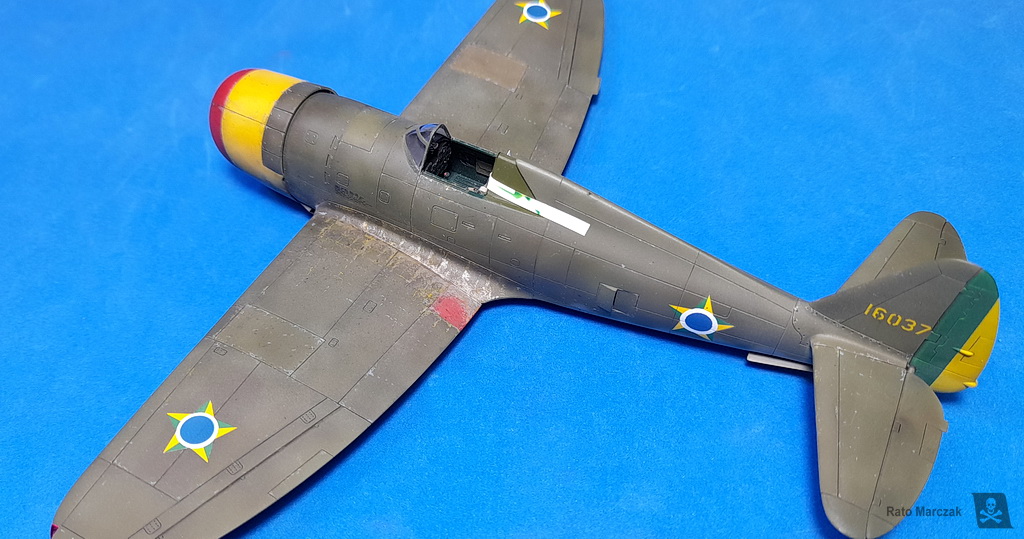
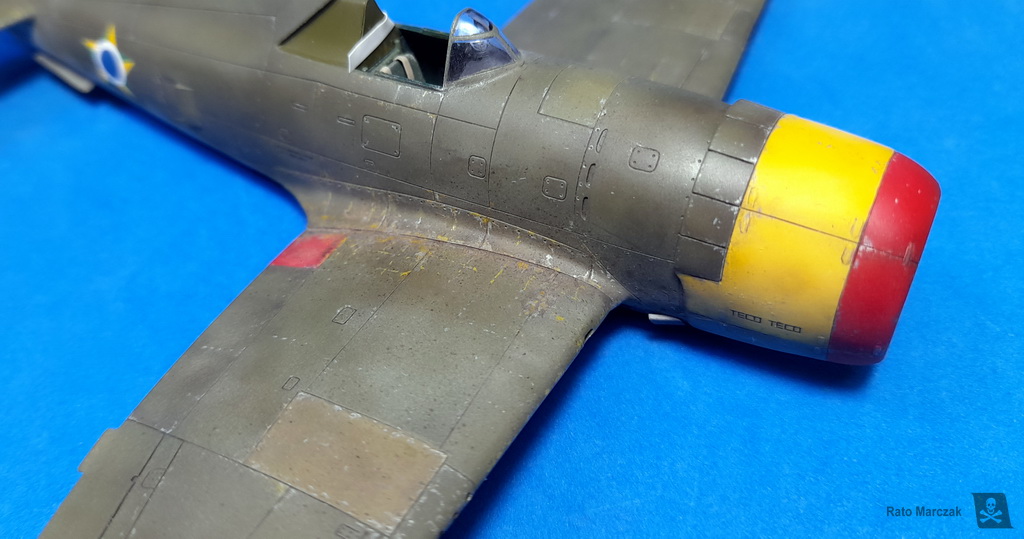
This time I avoided covering the whole model with a protective gloss varnish. Instead, I applied it only to the decal areas. Talking about decals, this particular Thunderbolt had the 'fat' Brazilian AF star, without the bars. I could not find a suitable decal sheet, so I had to resource to decals of the 1st Brazilian FG, whose markings were applied directly over the American insignia, and cut off the unwanted parts. I had to repaint the center circles of the insignias with a lighter blue, though. Interestingly, the Brazilian AF markings of s/n 416037 were painted on in USA, over the very beaten camouflage, days before its transfer. That is why the markings on my model are not weathered as the rest of the model. Upon arrival in Brazil, someone painted the words ‘teco-teco’ (Portuguese slang for small propeller aircraft) on the right side of the cowling. I made it with a laser printer.
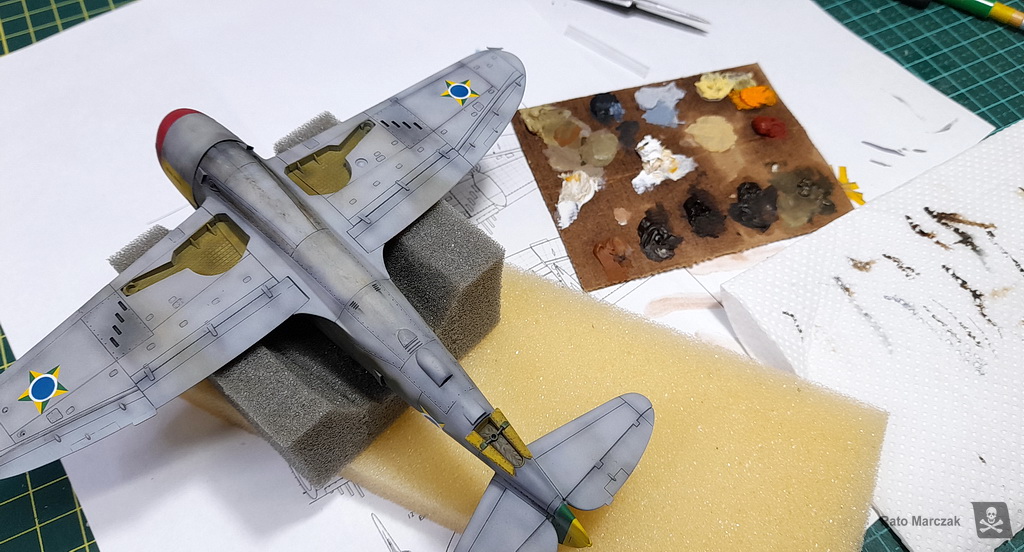
And finally the model was ready for the weathering:
Since GSI paints are impervious to oils and enamels, I applied the wash directly over the camouflage, skipping the clear coat. That also made the finish an excellent canvas to play with oils. Being a battered airframe, I abused the weathering effects. Based on photos of other aircraft from this batch, I assumed 416037 had serious paint chipping problems, particularly along the wing root, given its relentless usage in training.
I wanted the chipping to show both, the zinc chromate underneath the OD paint, and more severe scuffing exposing the aluminum. Therefore I started the process by applying zinc chromate along the panel lines crossings running through the wing root, where mechanics and pilots would walk. This was done using a fine brush and acrylic paint, so I could clean any mistake with a moistened cotton bud. Next, I spent some time simulating the exposed aluminum. The basic chipping was done again by brush, using the now extinct Citadel Chainmail acrylic paint. I then refined the effect and applied small scratches using silver pencils. Once I was satisfied with the result, I re-defined the panel lines with a dark brown paneliner. In some places, green and brown pencils were used to further enhance the weathering. Some areas also received smudges of various green oils.
I used the same process to a smaller extent to simulate scratches and paint chipping on the fuselage, around the cockpit, inspection hatches, and engine cowling. The nice thing about mixing silver paint and pencils is that depending on the light incidence, the chipping becomes more visible, while from other angles it is not so glaring, Exactly what I see in period photos.
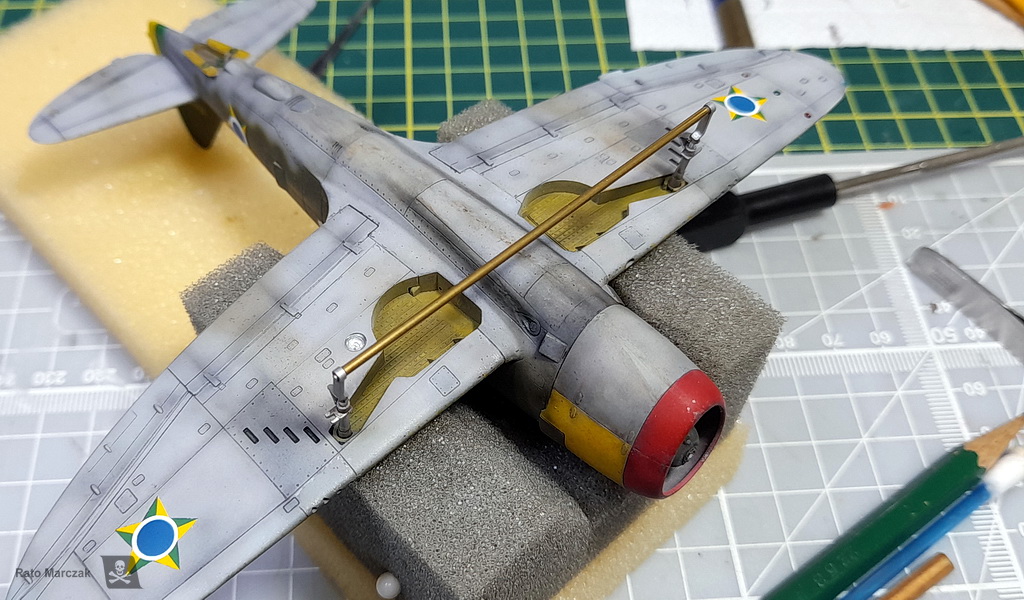
The final touches included streaking effects on the underside and what I call ‘airwash’ – the application of dark brown along selected panel lines with a fine-tipped airbrush to simulate dirt and grime accumulation. A splattering of very dark brown oils enhanced the well-used aspect of the model.
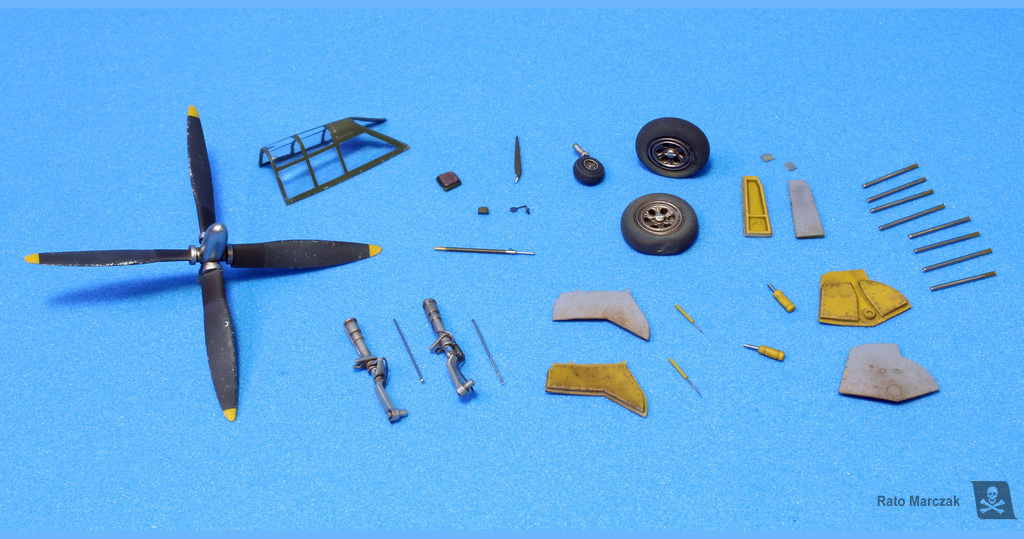
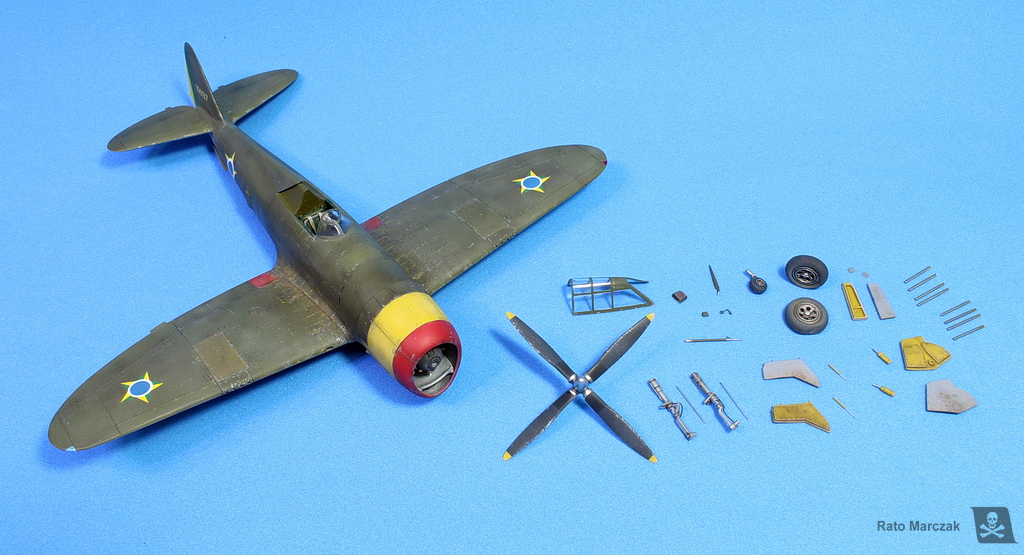
A couple of evenings were necessary to finish other details, like the propeller, wheels, and smaller parts. The tail wheel and landing wheel struts were stolen from the Revell kit, as well as the wheel bay doors, as these parts are better detailed than the ones in the Academy kit. The wheels are resin items from CMK. I had to scratchbuilt the retraction arms of the landing gear legs and doors, using telescoping metal tubing, and several smaller details missing in all 1/72 scale that I know. And by the way, metal tubing is a great aid to align the wheel struts – a tip I learned from master modeler Paul Budzik.
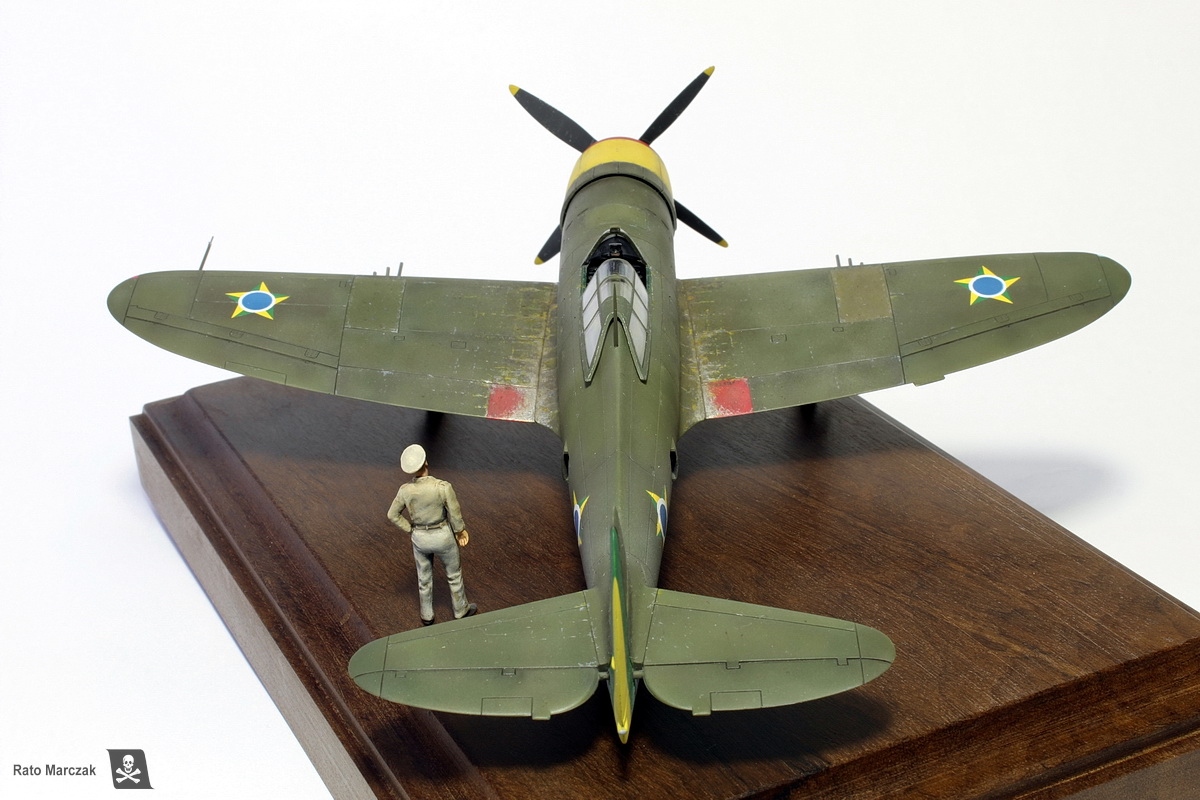
With the last items fixed in place, I could appreciate the result of the techniques used to simulate a well-used airplane. Besides the techniques themselves, it is important to keep in mind that weathering must always be in scale, too, like any other part of the model. In 1/72 scale this may be a challenge.
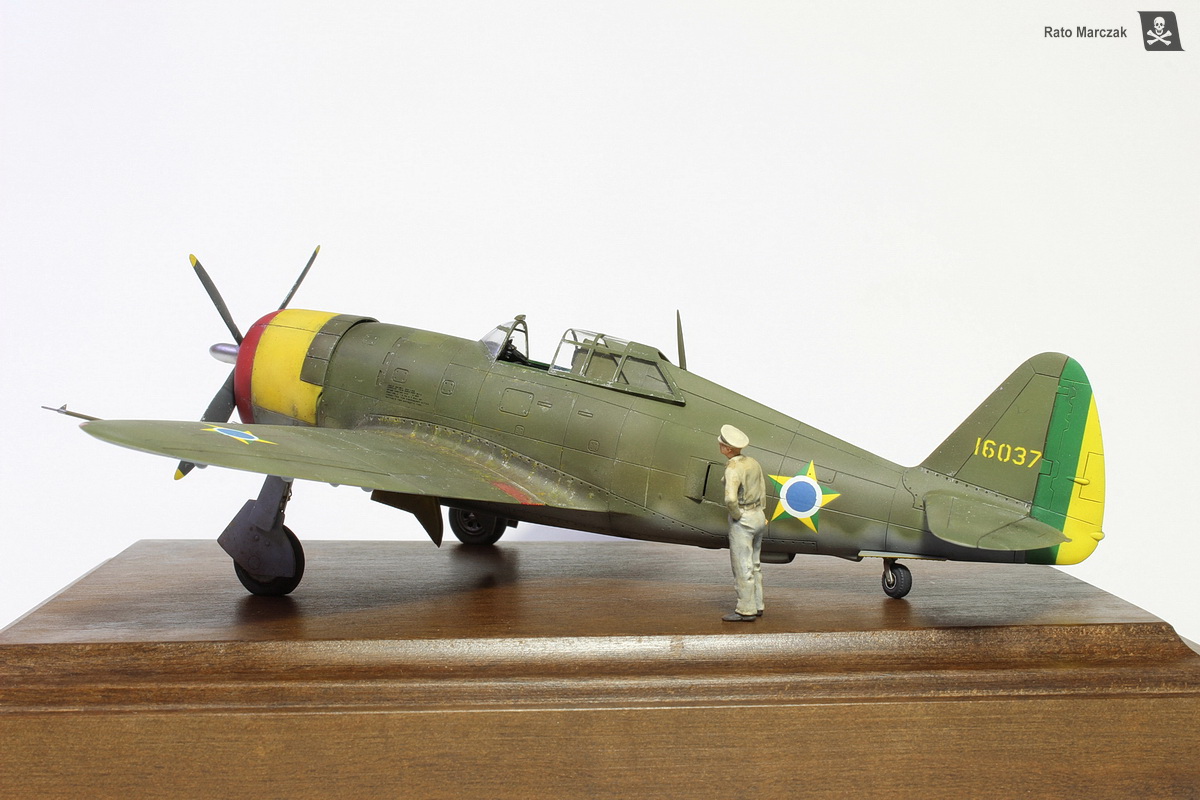
I tooke a while until I modified a Prieser figure and painted it to go with the model. Just a simple wooden base to highlight the weathing and voilá:
I am pleased to have a genuine P-47B in my collection. More than that, I tried some new techniques during this project and it truly represents a departure from my usual methods. Of course, by the time I was applying the decals, Dora Wings announced their new P-47B in the scale for later this year. Oh, well...
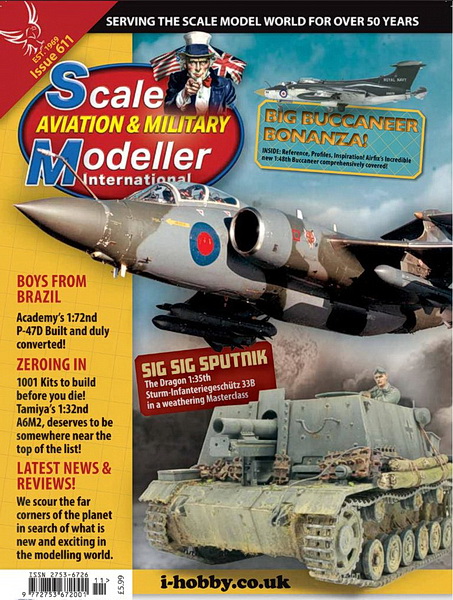
A shorter article of this model was published in the Scale Aviation and Military Modeller Int. magazine, issue 611, Dec/2022.

I hope you liked this model. See you in the next one.
Not surprisingly, the P-47B was never translated into an inject kit form by a major manufacturer (until I finished this one...), for it has big differences from the other versions. I decided to have one in my 1/72 scale collection, but I knew in advance that it would require a lot of work. Knowing that a lot of sanding was ahead of me, I chose to put the Academy kit in my stash in this mission.
Building a scale model of the P-47B is not just a matter of painting different markings on any Razorback kit. The B had a fuselage eight inches (203 mm) shorter than its more famous cousins as it did not have the quick engine change kit. Other major identification features are the single deflector plate ahead of the exhaust waste door and the antenna mast mounted at an angle. So my first step was to remove approximately 3 mm of the fuselage. I tried to use panel lines as a guide to make a zig-zag cut, and then I shaved the 3 mm off.
.Before closing the fuselage, a new cockpit was detailed and assembled to replace the kit’s one. I tried a different recipe to simulate Republic’s characteristic Dull Dark Green used in the cockpits: I airbrushed Interior Green first, and on top of it I applied a coat of translucent blue-green color (the type used in Japanese aircraft interiors). It worked like a charm.
The fuselage was closed, and I flooded the interior of the belly area with gel super-glue. It was a necessary measure in view of another identification feature of the P-47B: the characteristic belly of the Thunderbolt is absent in the B version, so I had to sand the fuselage to the correct shape. The super-glue shell inside avoided the occurrence of holes or waffle-thin areas. The comparison to the P-47D fuselage exposes these differences :
I started this project aware that although the Academy kit is a good starting point for the conversion, it is too simple in many details. I opted to sacrifice a Revell P-47D kit and use its landing gear struts, wheel bay doors, engine, and other smaller details. I would graft them into the Academy kit. The first was the tail wheel, inserted in a hole opened in the fuselage. I also copied the exhaust wastegate in resin and carved an eye-shaped hole to insert it, because the original was removed during the fuselage surgery. Another common error in many kits is the machine gun barrels aligned to the wing leading edge, instead of the ground line. I removed the kit barrels and drilled new holes along the correct line:
And since I was at it, I addet the wingtip lights using the standard method and colored plastic. Formation lights are absent in the kit, so I drilled their holes in the corresponding position. They would be filled with UV resin later on.:
The Academy cowling is for a late C or D model, so the two lowest cowl flaps must be removed, and the panel lines rescribed. Another detail omitted in the kit part are the dzus fasteners which hold the engine panels. I modified an empty drafting pen to punch plastic oblongs that were glued over the cowling. After the glue was set, they were lightly sanded, resulting in a barely raised fastener. This method is much easier than scribing the fasteners, and alternates raised details with the recessed panel lines of the kit, adding realism to the model. The oil cooler exhausts were scratchbuilt from brass sheets and secured in place with super-glue:
The next major subassembly to tackle was the engine. As a fan of the P&W R-2800 engine, I wanted a better representation than the kit one, but I wasn't in the mood to work with resin. The solution came from the Revell kit, which is very good and has the correct magnetos for this version of the Thunderbolt. All I did was to scratchbuilt a new harness and add plug wires.
After a careful painting, some weathering, and a dry transfer placard I had a beautiful engine. Finally, I had to modify the fuselage mount to graft the new engine in the correct position.
I also carved a slanted antenna mast, another particular feature of the P-47B, from an aluminum rod. It would be installed later on during the project. A stronger pitot tube was built from metal, and the gun barrels made from brass piping to be inserted in the wing openings later on:
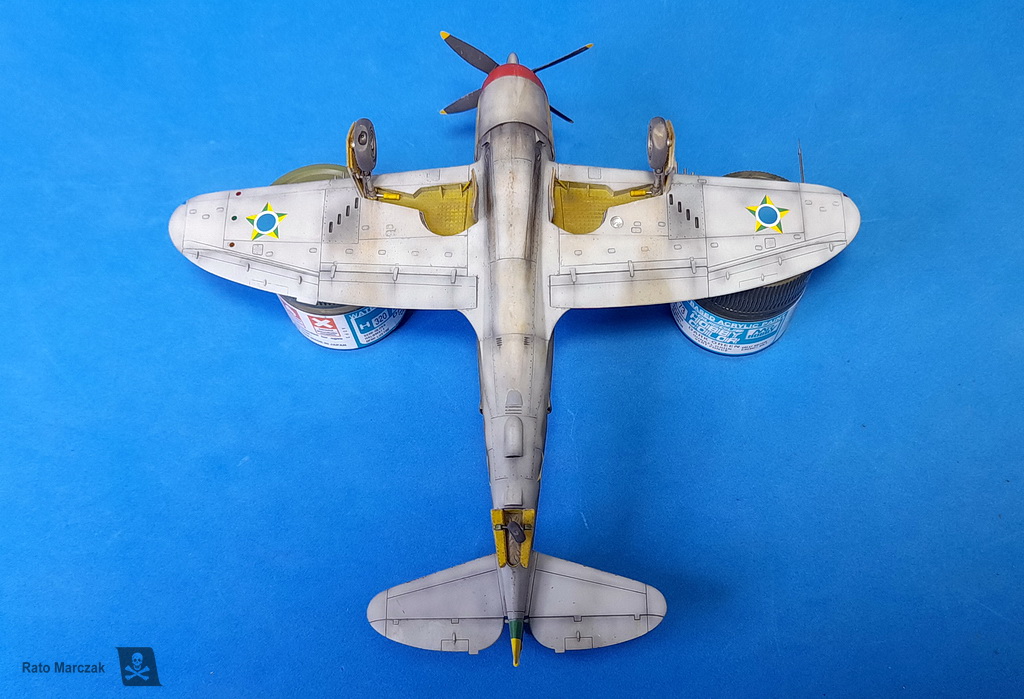
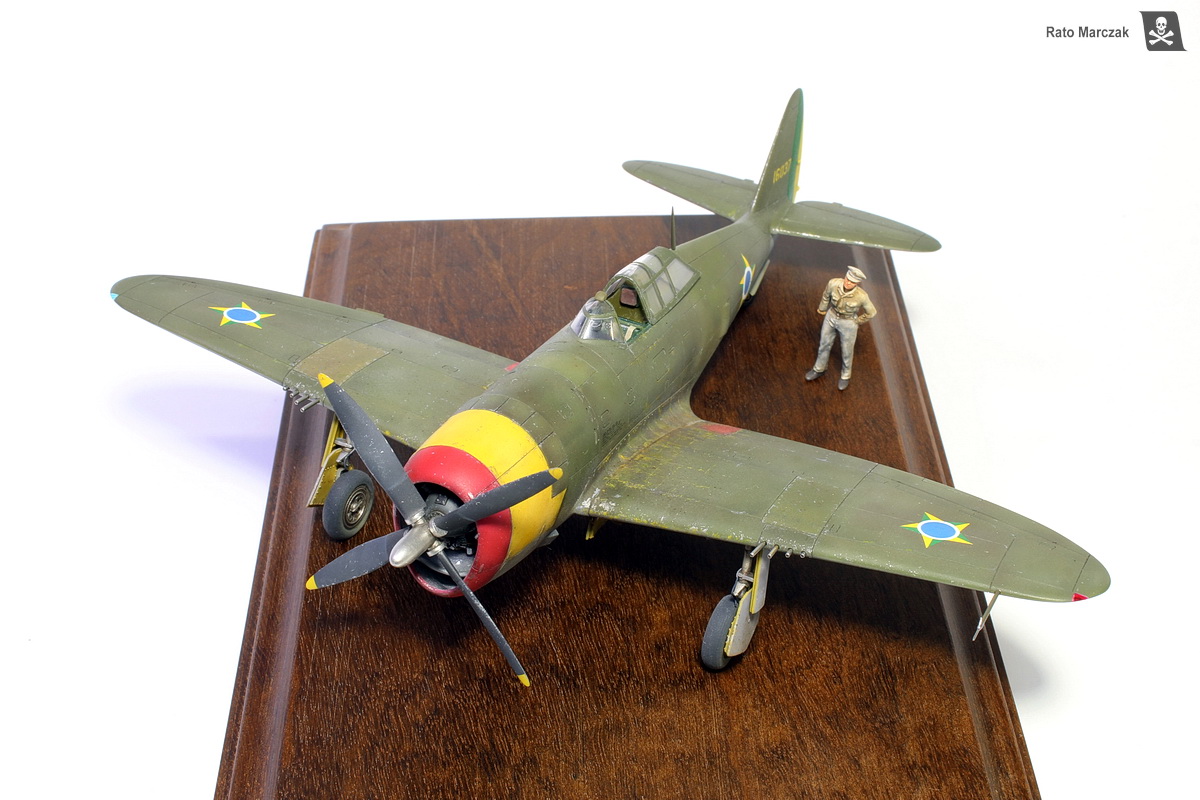
After studying photos of P-47s, I came to the conclusion that Republic used a different paint for their Dark Olive Drab 41 than other manufacturers. It seems more green, and darkened considerably with time, as opposed to other aircraft painted with the same color. Aiming for a very weary painting finish, I played with pre-shading on both, upper and undersurfaces. Thinner and water-based GSI paints were used for the camouflage (H for Hobby Color and C for Mr. Color). I applied H330 as a base OD color. Dark spots and retouches were airbrushed with C12. Everything was smoothed out with a thin coat with C23, and highlighted with C23+C21. On the underside, as my interpretation of an old Neutral Grey 43, I started with GSI H-53, then applied dark spots with H-22, followed by H-32, and white. As a final touch, I airbrushed a darkened tone of OD with the aid of stencil masks in order to simulate oil stains, fuel spills, and alike. After painting the yellow/red cowling colors, I faded them heavily by adding white to the colors and misting them over the center of the panels.
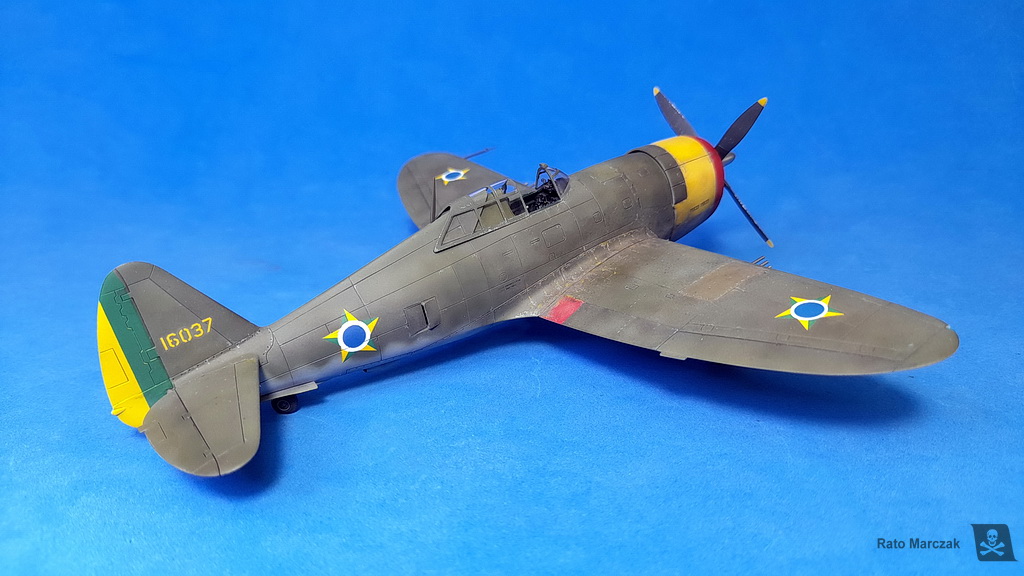
This time I avoided covering the whole model with a protective gloss varnish. Instead, I applied it only to the decal areas. Talking about decals, this particular Thunderbolt had the 'fat' Brazilian AF star, without the bars. I could not find a suitable decal sheet, so I had to resource to decals of the 1st Brazilian FG, whose markings were applied directly over the American insignia, and cut off the unwanted parts. I had to repaint the center circles of the insignias with a lighter blue, though. Interestingly, the Brazilian AF markings of s/n 416037 were painted on in USA, over the very beaten camouflage, days before its transfer. That is why the markings on my model are not weathered as the rest of the model. Upon arrival in Brazil, someone painted the words ‘teco-teco’ (Portuguese slang for small propeller aircraft) on the right side of the cowling. I made it with a laser printer.
And finally the model was ready for the weathering:
Since GSI paints are impervious to oils and enamels, I applied the wash directly over the camouflage, skipping the clear coat. That also made the finish an excellent canvas to play with oils. Being a battered airframe, I abused the weathering effects. Based on photos of other aircraft from this batch, I assumed 416037 had serious paint chipping problems, particularly along the wing root, given its relentless usage in training.
I wanted the chipping to show both, the zinc chromate underneath the OD paint, and more severe scuffing exposing the aluminum. Therefore I started the process by applying zinc chromate along the panel lines crossings running through the wing root, where mechanics and pilots would walk. This was done using a fine brush and acrylic paint, so I could clean any mistake with a moistened cotton bud. Next, I spent some time simulating the exposed aluminum. The basic chipping was done again by brush, using the now extinct Citadel Chainmail acrylic paint. I then refined the effect and applied small scratches using silver pencils. Once I was satisfied with the result, I re-defined the panel lines with a dark brown paneliner. In some places, green and brown pencils were used to further enhance the weathering. Some areas also received smudges of various green oils.
I used the same process to a smaller extent to simulate scratches and paint chipping on the fuselage, around the cockpit, inspection hatches, and engine cowling. The nice thing about mixing silver paint and pencils is that depending on the light incidence, the chipping becomes more visible, while from other angles it is not so glaring, Exactly what I see in period photos.
The final touches included streaking effects on the underside and what I call ‘airwash’ – the application of dark brown along selected panel lines with a fine-tipped airbrush to simulate dirt and grime accumulation. A splattering of very dark brown oils enhanced the well-used aspect of the model.
A couple of evenings were necessary to finish other details, like the propeller, wheels, and smaller parts. The tail wheel and landing wheel struts were stolen from the Revell kit, as well as the wheel bay doors, as these parts are better detailed than the ones in the Academy kit. The wheels are resin items from CMK. I had to scratchbuilt the retraction arms of the landing gear legs and doors, using telescoping metal tubing, and several smaller details missing in all 1/72 scale that I know. And by the way, metal tubing is a great aid to align the wheel struts – a tip I learned from master modeler Paul Budzik.
With the last items fixed in place, I could appreciate the result of the techniques used to simulate a well-used airplane. Besides the techniques themselves, it is important to keep in mind that weathering must always be in scale, too, like any other part of the model. In 1/72 scale this may be a challenge.
I tooke a while until I modified a Prieser figure and painted it to go with the model. Just a simple wooden base to highlight the weathing and voilá:
I am pleased to have a genuine P-47B in my collection. More than that, I tried some new techniques during this project and it truly represents a departure from my usual methods. Of course, by the time I was applying the decals, Dora Wings announced their new P-47B in the scale for later this year. Oh, well...
A shorter article of this model was published in the Scale Aviation and Military Modeller Int. magazine, issue 611, Dec/2022.
I hope you liked this model. See you in the next one.
| Technical file | |
| Kit:
|
- Academy 12492 |
| Additions:
|
- Pavla Models No.U72-50 - P-47 Thunderbolt wheels set - Eduard No. B 72-011 - Republic P-47D Basic Detail Set For Hasegawa - Several parts from the Revell P-47D-30, kit No. 04155 (see text) |
| Basic
colors: |
- Primer: GSI Mr. Surfacer. - Aluminum: GSI Creos H-8 silver and Dry Colors White Aluminum - Camouflage:GSI H330, C12, C23, and C21 for OD. H-53, for the neutral grey (see text) - Clear coat: Testors Model Master Acryl flat. |
| Notes: |
- Several scratchtuilt items (see text). |
Rato Marczak © 2023
