| RPM TKS tankette in 1/35 scale |
| Started: May / 2019 Finished: October / 2019 |
Here
is a quick and fun project... Actually, this was another trick played
with me by a friend from my modeling club (not sure if I thank you or
hate you Bradley!), handing me over this RPM TKS tankette in 1/35th
scale. Knowing the questionable quality of RPM kits from my own
experience with their Renault FT-17 in 1/72 scale,
I was more relieved finding out that this is actually a Mirage Hobby
reboxing by RPM... The interesting thing is that I worked on this kit
only in spare moments between projects. Even painting was done before
cleaning my airbrush after an airbrushing session on another kit.
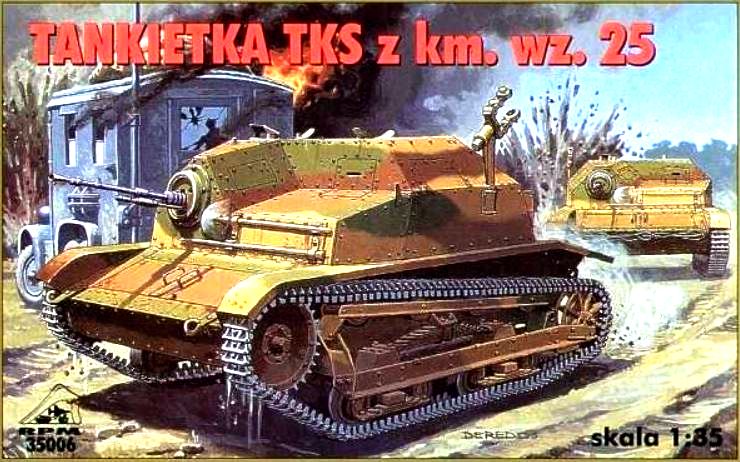
This is the box art of this kit:
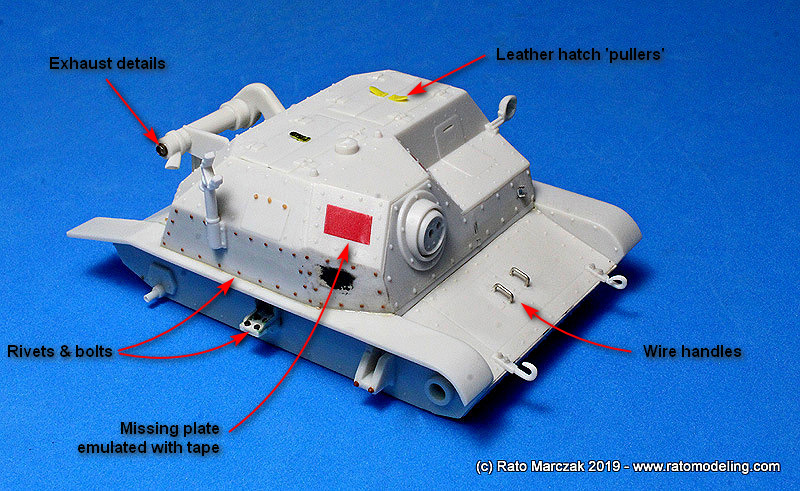
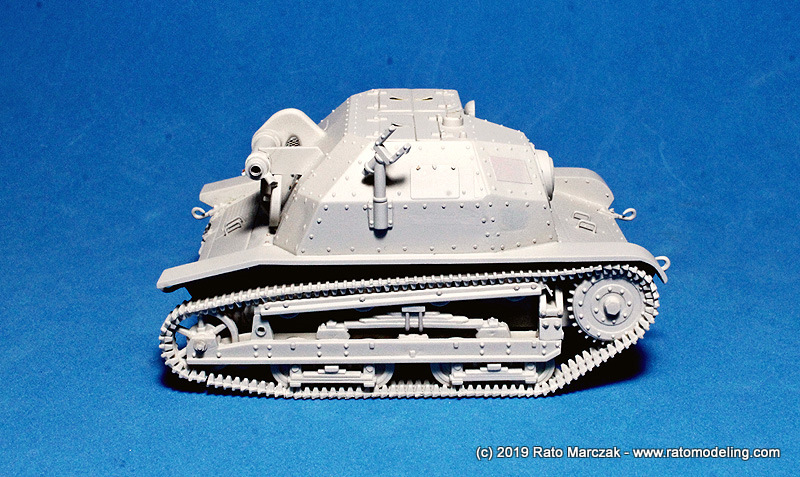
After assembling the hull, my first task with the kit was to add round head rivets to the model. Studying photos, it was evident that RPM (Mirage) omitted several rivet lines and even some hatches. The TKS had very little weld used, if any, along the joints of its hull. The kit door handles were terrible as well, so I discarded them in favor of new ones made from wire.
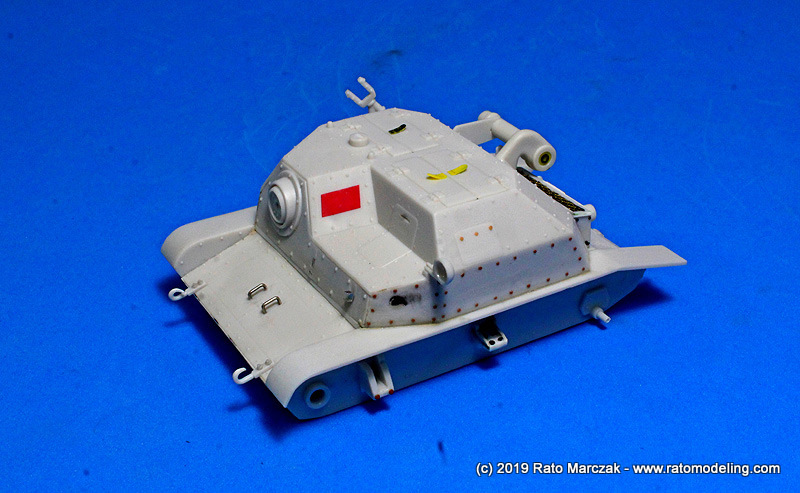
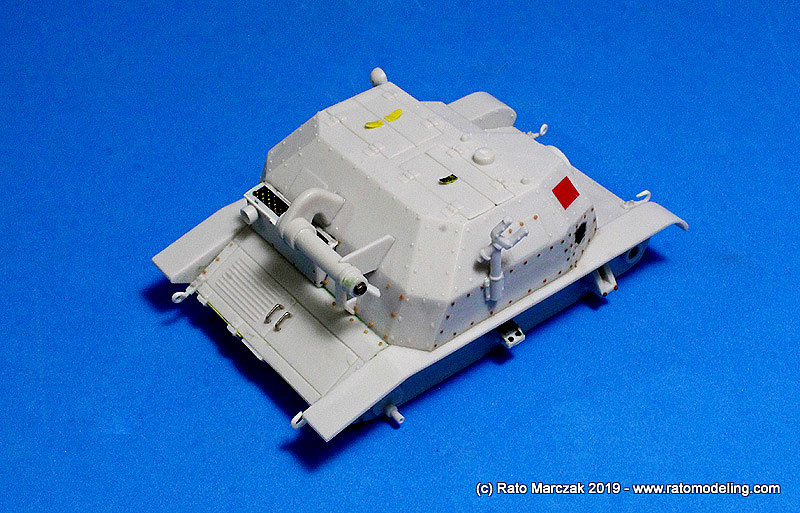


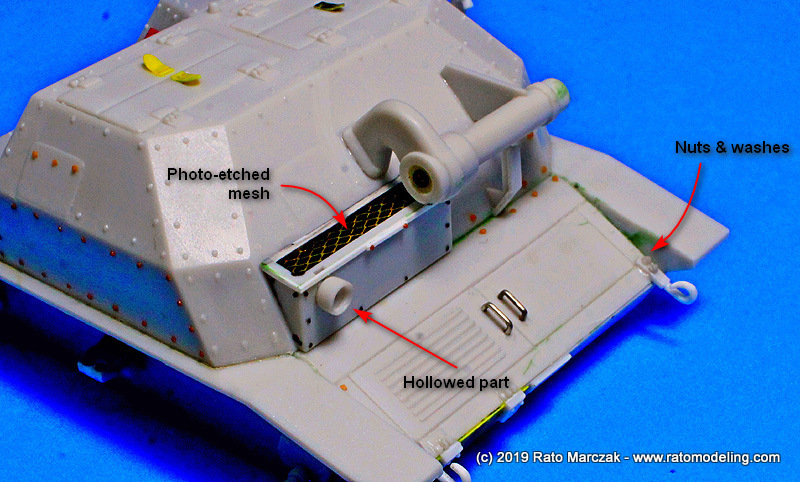
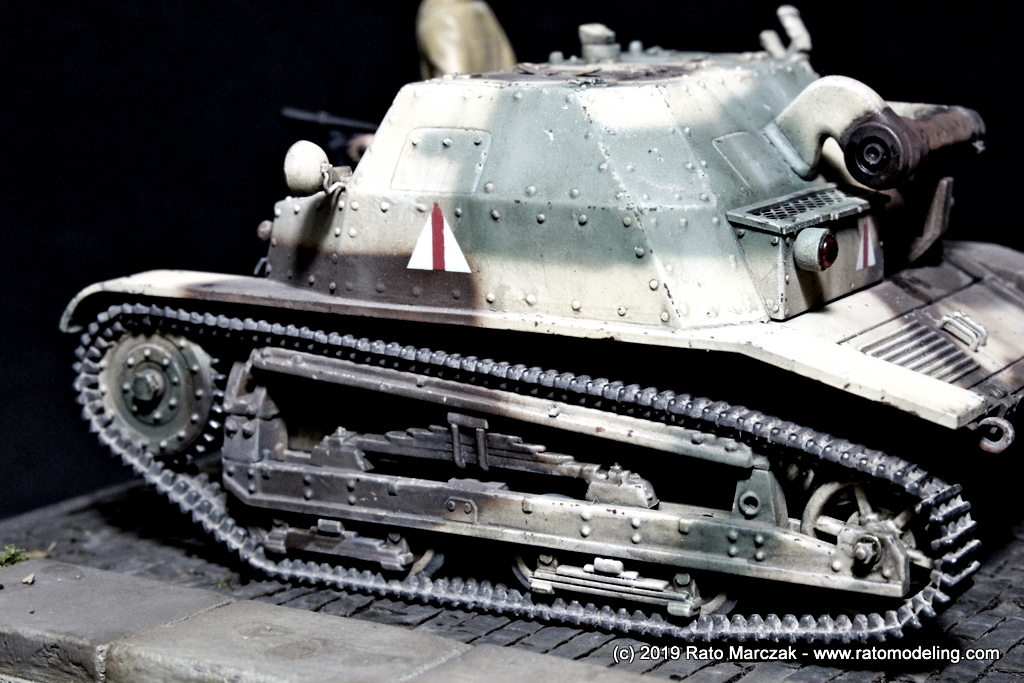
The kit representation of the suspension structure has several errors. I tried to correct some but there are a couple of places where the details remained overscaled. Nuts and bolts are accessories from which this kit can definitely benefit. I have several brands stocked for such situations, and I used plenty of them, always guided by photos. The characteristic TKS engine exhaust system is oversimplified, so I added some details there, too. There is a small box on the back of the hull which was detailed with plastic strips and rivets. Its cover was opened and a photoetched mesh installed to replace the ugly molded on one. The interior of the box was previously painted black.
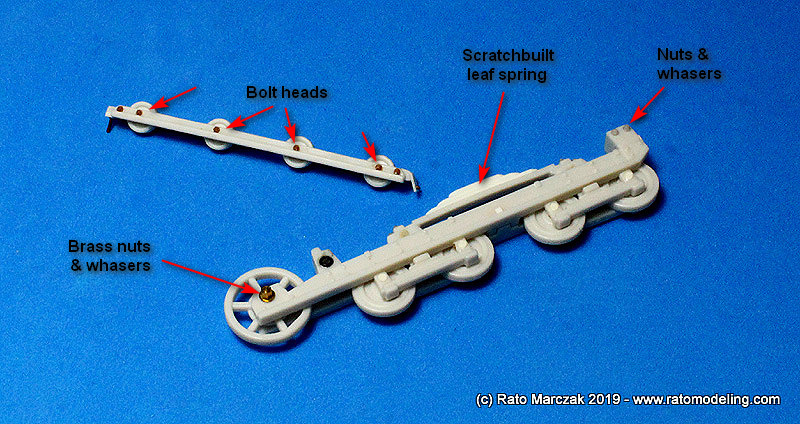
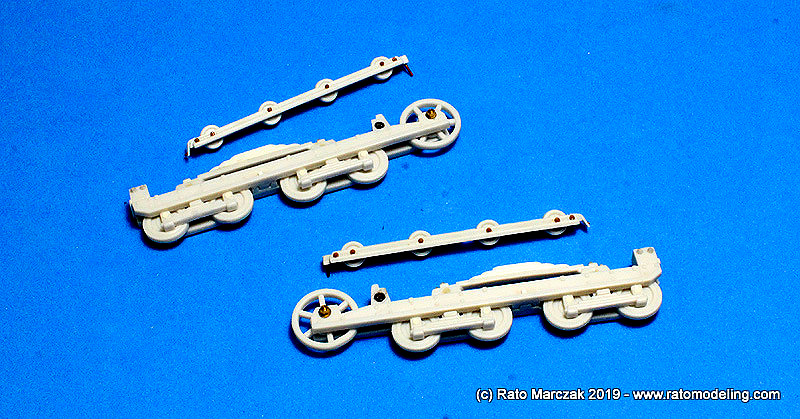
The running gear of the model is nothing better than the rest. I ended up adding several nuts & bolts of various sizes, and a major nut fixing the idler wheel. By the way, the idler should be double, like in panzers, but the kit offers just one single for each side... oh well. The leaf spring of the suspension was ridiculously ugly, so I made a new one from plastic strips:
This is the box art of this kit:
After assembling the hull, my first task with the kit was to add round head rivets to the model. Studying photos, it was evident that RPM (Mirage) omitted several rivet lines and even some hatches. The TKS had very little weld used, if any, along the joints of its hull. The kit door handles were terrible as well, so I discarded them in favor of new ones made from wire.
The kit representation of the suspension structure has several errors. I tried to correct some but there are a couple of places where the details remained overscaled. Nuts and bolts are accessories from which this kit can definitely benefit. I have several brands stocked for such situations, and I used plenty of them, always guided by photos. The characteristic TKS engine exhaust system is oversimplified, so I added some details there, too. There is a small box on the back of the hull which was detailed with plastic strips and rivets. Its cover was opened and a photoetched mesh installed to replace the ugly molded on one. The interior of the box was previously painted black.
The running gear of the model is nothing better than the rest. I ended up adding several nuts & bolts of various sizes, and a major nut fixing the idler wheel. By the way, the idler should be double, like in panzers, but the kit offers just one single for each side... oh well. The leaf spring of the suspension was ridiculously ugly, so I made a new one from plastic strips:
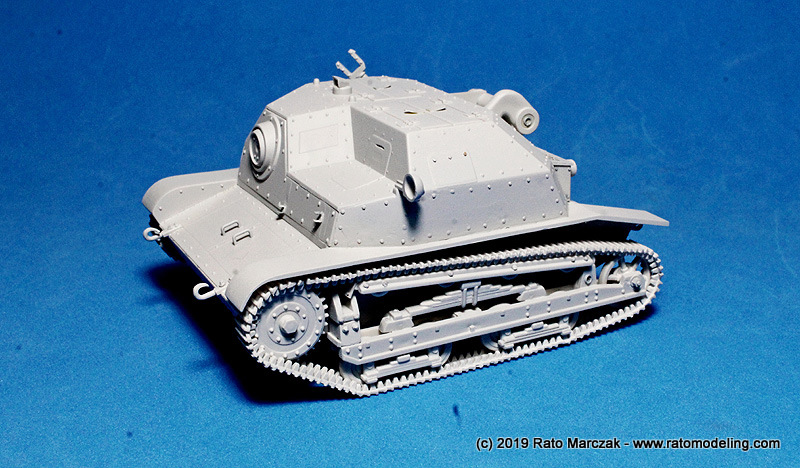
The tracks are of link-by-length type, thankfully. They assembled very well, I just added a small amount of sag between the traction wheel and the return skid. This was the very first time in my modeling career that, having the option, I elected to glue the tracks to the model before painting. I've been listening to fellow modelers about the advantages of this and blah blah... but I always knew that they hire some sort of elf to paint glued on tracks. More on that later.
I primed the model at this point:
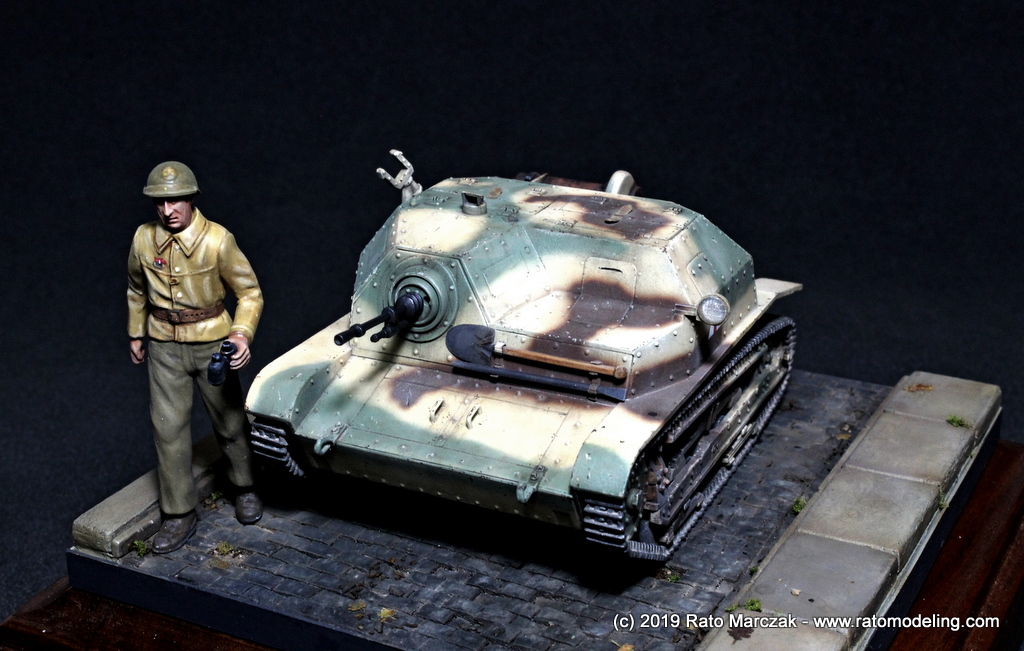
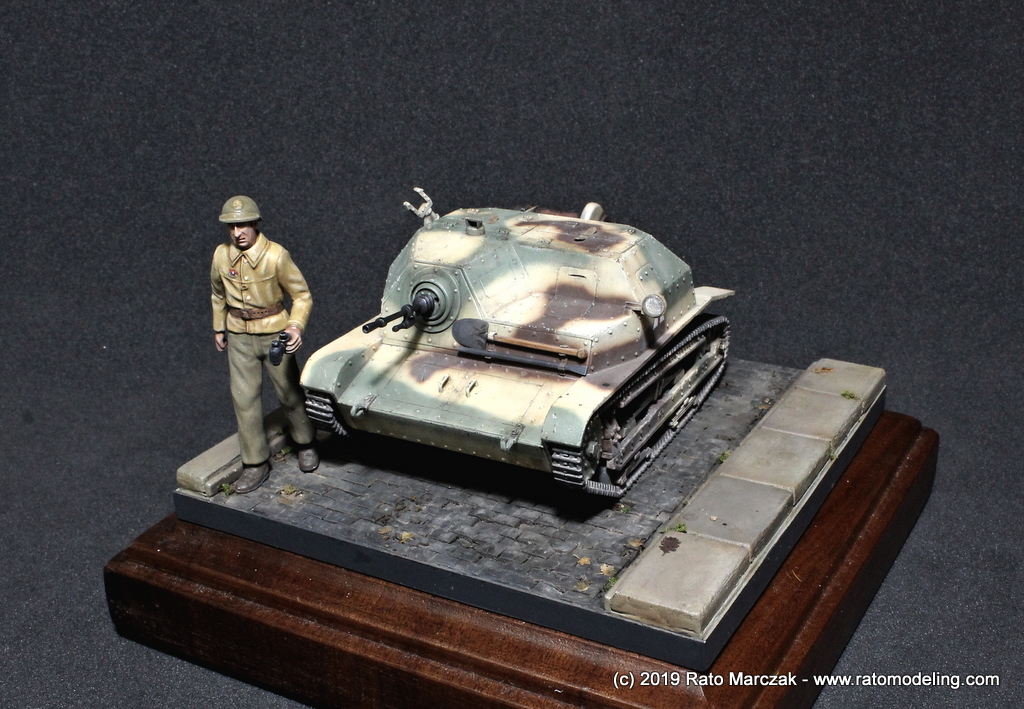
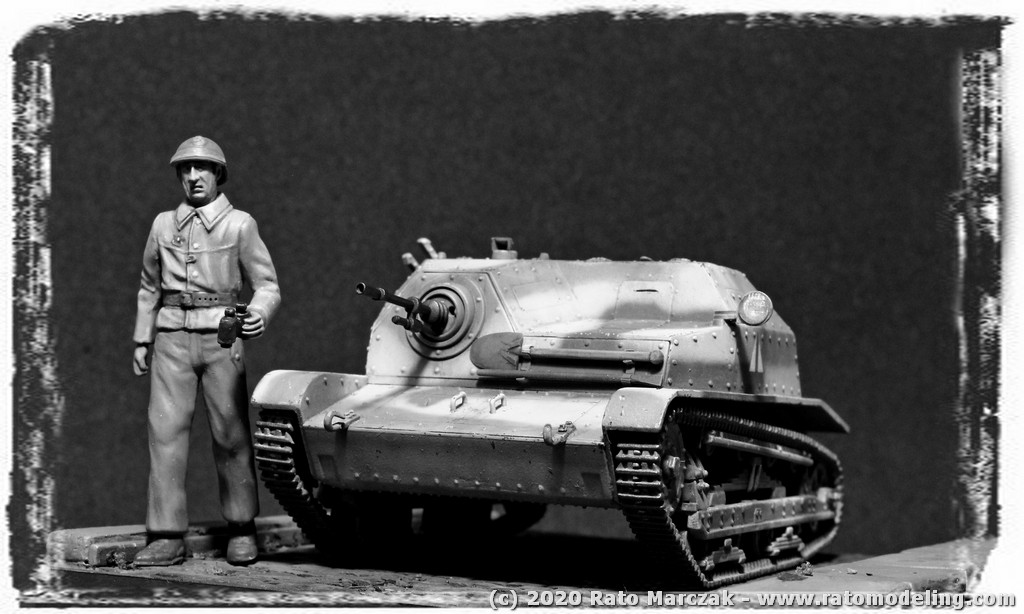
The TKS makes justice to the tankette word. Once assembled, it is difficult to not take it as a 1/72 scale tank. At this point, I was planning to use an old Italeri figure to accompany the little TKS. Later on, I replaced the torso and head by another from the Tamiya Char B. I have not taken photos of the conversion, but the original Italeri figure gives an idea of the small size of the TKS:

In case you are not convinced how small the TKS was, check it out side by side with three other AFVs - it is small even when compared to the already diminutive Panzer I and II:

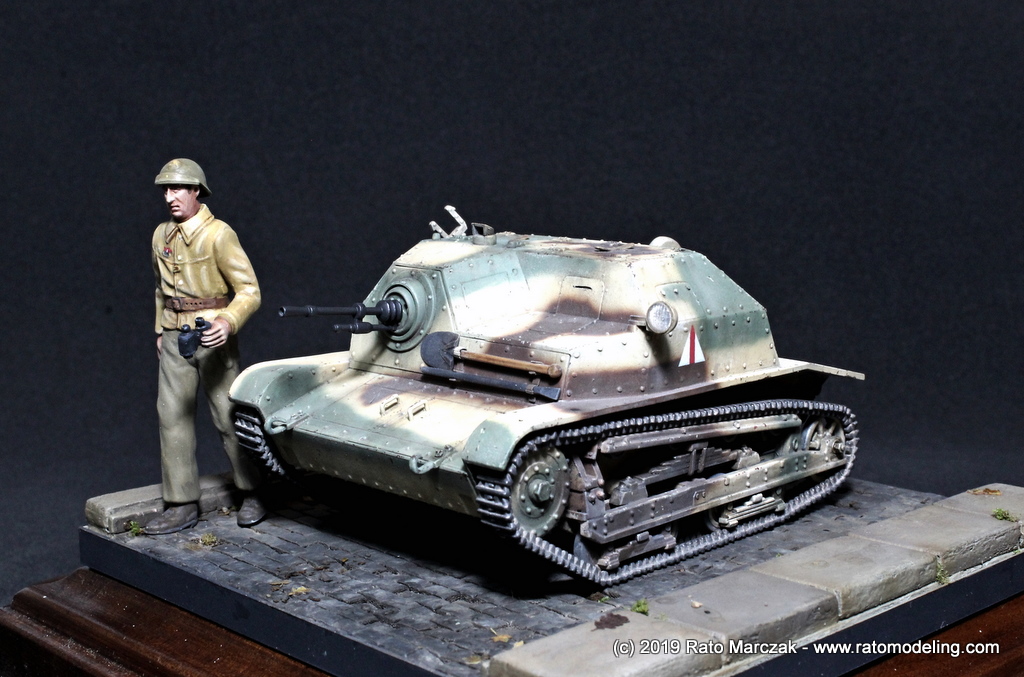
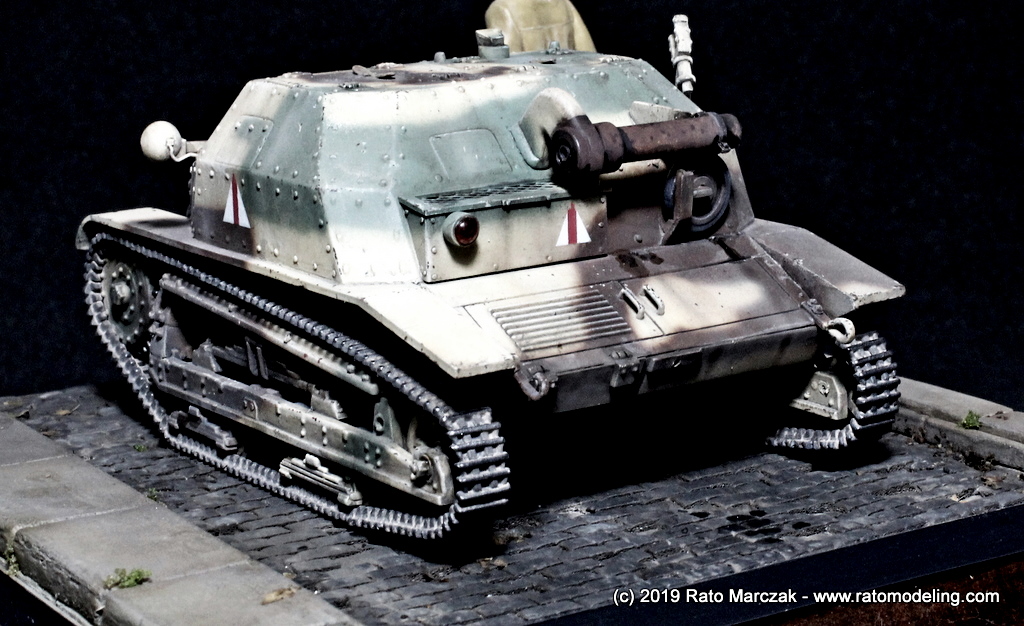
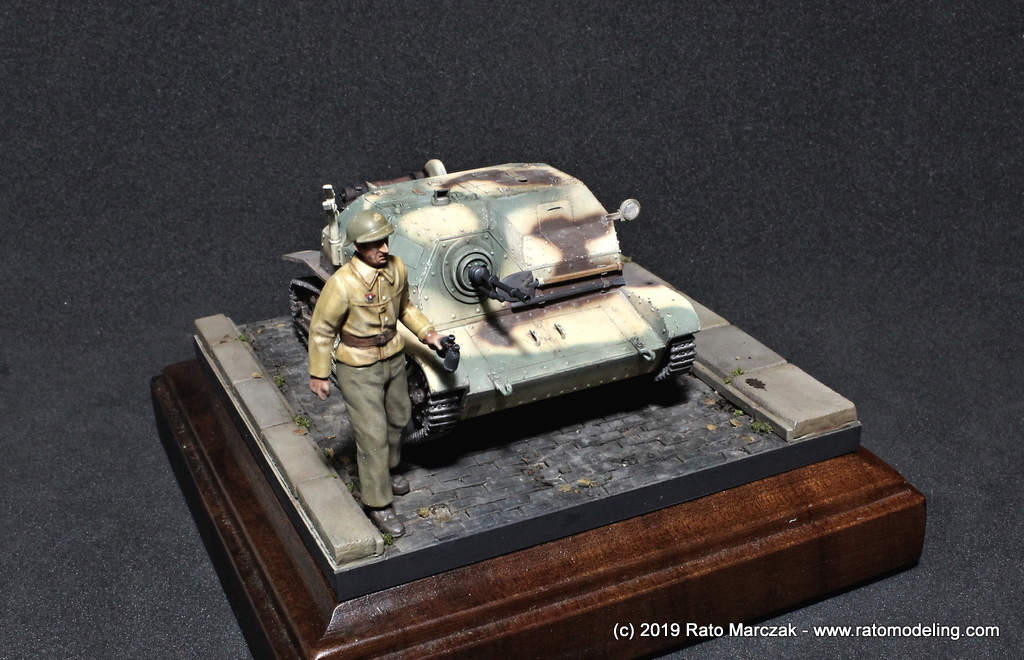
Fast forward a few weeks. In a nutshell, what I did to finish off the assembly was to add a new turret visor, the leather pullers for the upper hatches, and replaced the tools attached to the glacis. I also scratchbuilt new lights and lenses. The Hotchkiss 7.92mm machine gun is from the kit, I just refined it a bit based on some photos I took from the weapons museum inside the 8th Motorized Infantry Battalion of the Brazilian Army at Osório city:
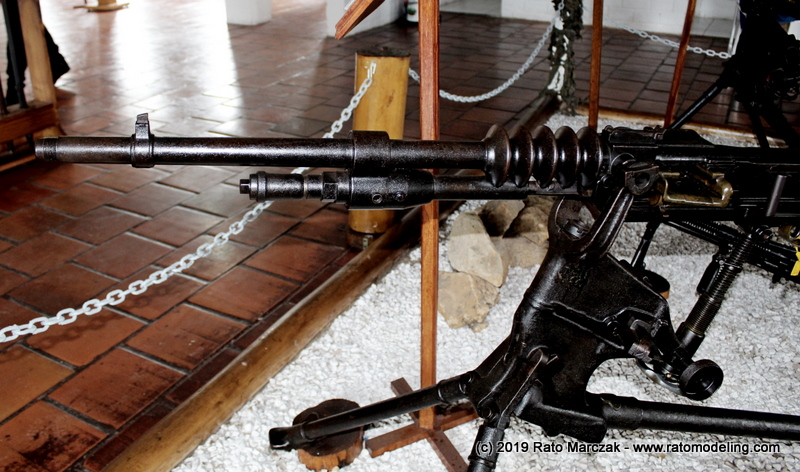
The Hotchkiss 7.92mm machine gun is from the kit, I just refined it a bit based on some photos I took from the weapons museum inside the 8th Motorized Infantry Battalion of the Brazilian Army at Osório city:
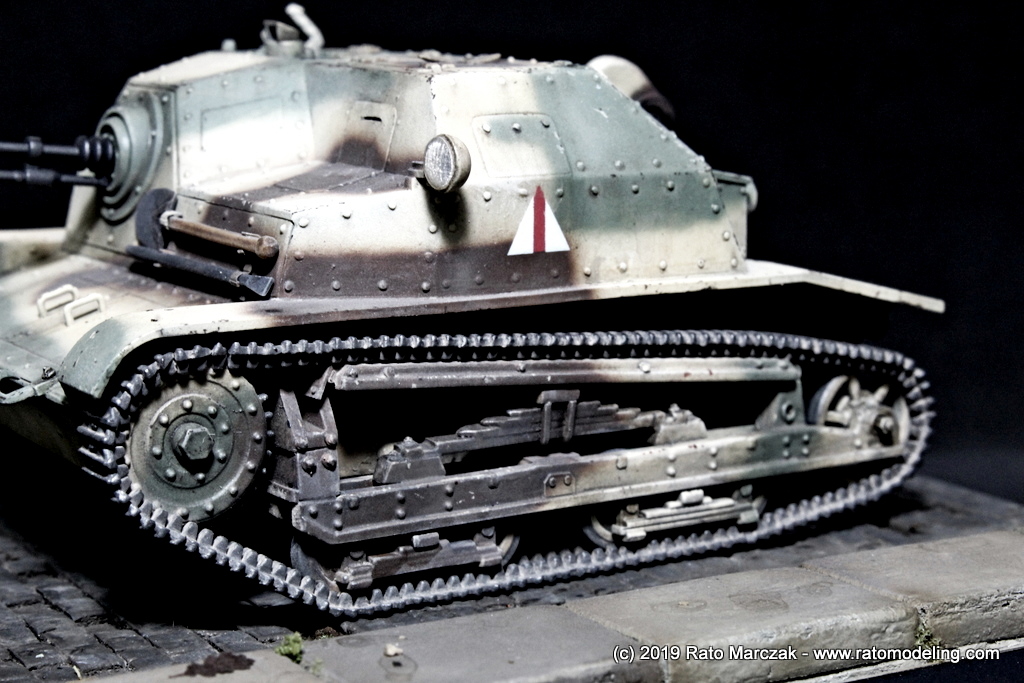
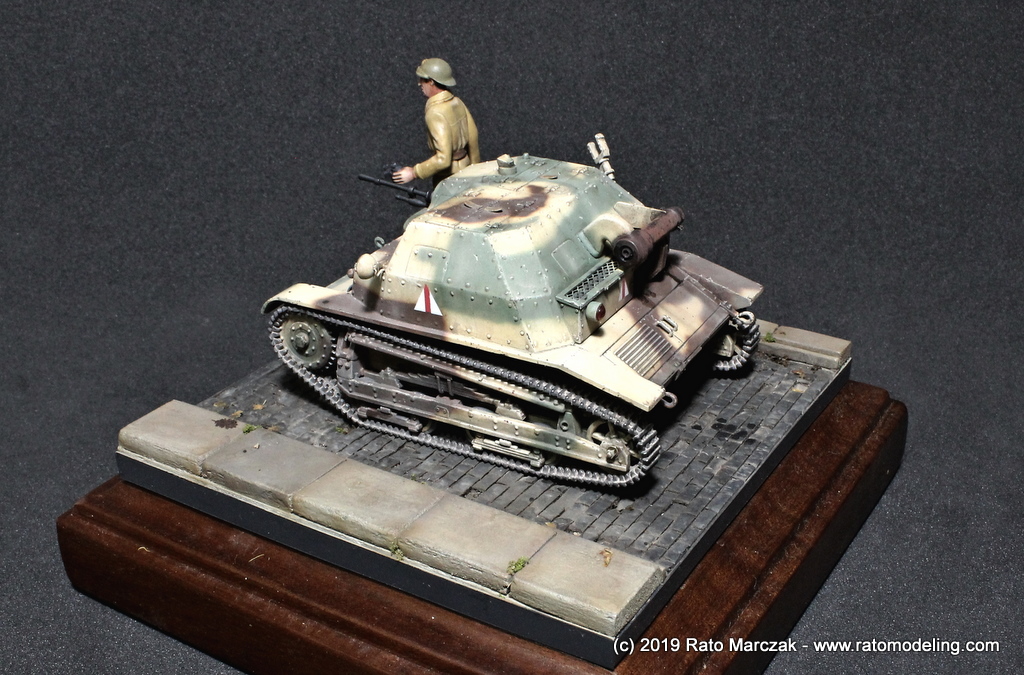
As for the camouflage colors, I have chosen a very typical scheme of the first weeks of WWII, in brown, green and sand. The illustration below shows the color scheme, but the markings refer to a Russian unit which captured several TKS in February 1940:
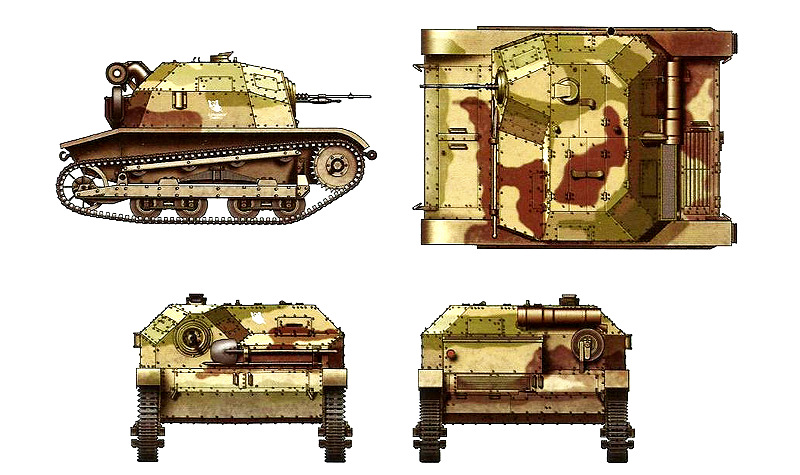
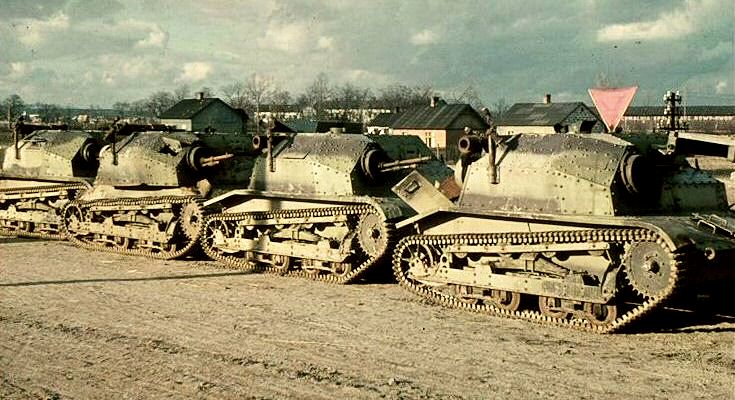
As far as I was able to find out, this pattern was described in the Warunki Techniczne No.4155: Biura Badarí Technicznych Broni Pancernych (Bureau of Technical Armored Weapons), of June 1937, and the colors listed as Olive Green #5338, Sand Grey #5339, and Dark Brown #5340. There is at least one TKS impeccably restored by a Polish preservation society, and I pretty much based my color choices on photos of that particular vehicle. The scarce wartime color photos of TKS that I found on the internet showed a severe color shift and I failed to bring them back digitally. An example:
I have chosen three different brands for the camouflage colors: Testors Model Master RLM 63 for the green, Gunze Aqueous H-84 Mahogany for the brown and Humbrol 81 Pale Yellow for the sand. I used them out of the bottle to achieve an almost perfect match to the restored example in Poland...
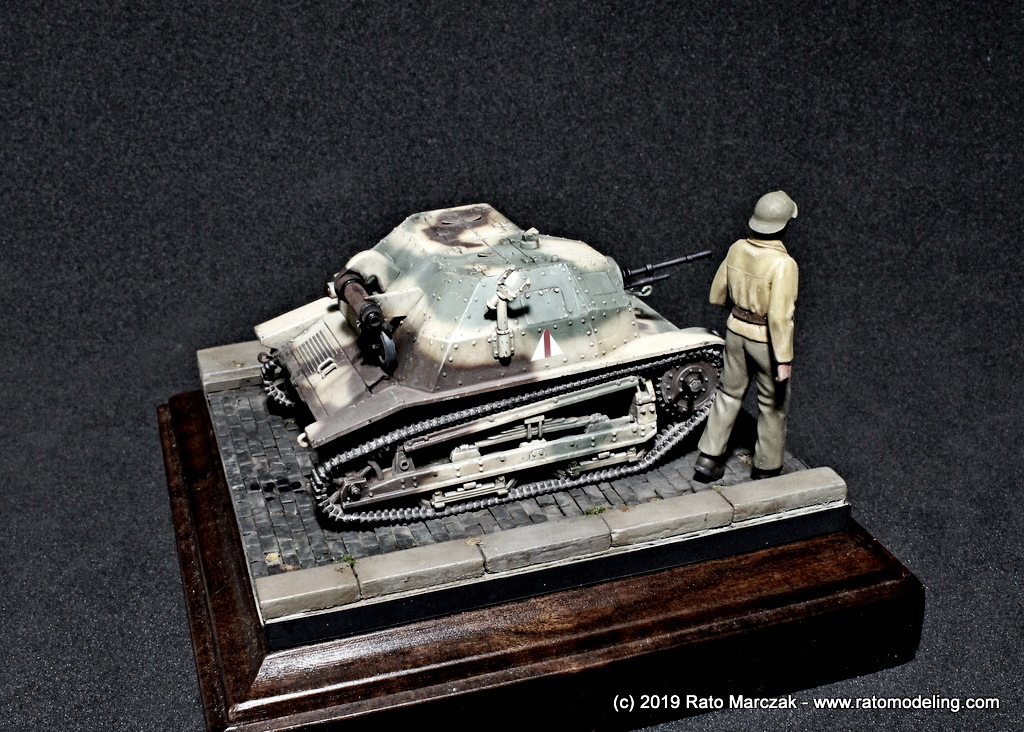
Like mentioned before, the torso of the figure was changed aiming not only a better definition but also to represent loosely a Polish officer. Technically, he is wearing a mix of uniforms (no pun), but it was more a figure painting exercise for me than anything else. And besides, I've never planned to make a vignette, but I thought a figure would give a sense of size to the viewer...
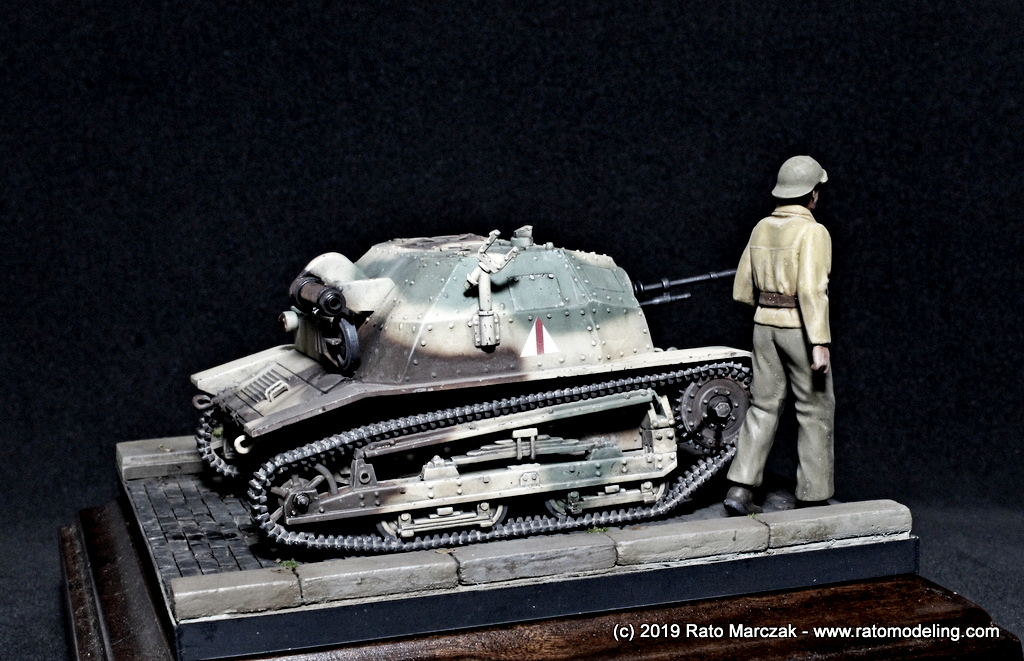
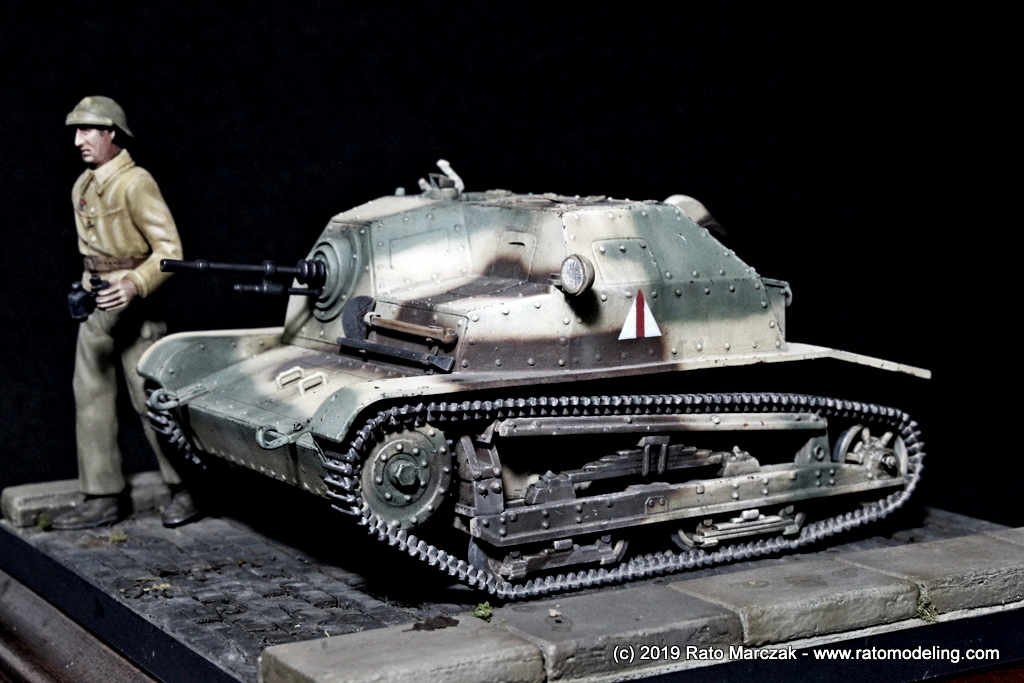
The weathering consisted of filters, washes and paint chipping. Since the hull is essentially faceted, it is possible to have fun simulation scratches along many of the edges of the structure. The engine exhaust was treated with rust-colored pigments and accumulated oil simulated with engine oil from MiG and Life Color. Flat clear was applied before the final effects.
The tracks and running gear received a well diluted coat of earth/dust pigments that, once dry, was partially removed with a dry brush. The same approach was used on the lower hull, corners, flat plates and wherever dust could settle in the real thing. Lubricated spots of the suspension were simulated with engine oil from MiG and Life Color again. The tracks were rubbed with graphite powder. I figured a vehicle being used for a while in urban areas...
The cobblestone covered street was carved on a supermarket food tray by my club fellow Bruno Kuckartz (thanks dude!). I just painted it and spread some dry leaves here and there. I had no real intention of taking this model seriously, but I enjoyed the final result.
And - for my standards - it was definitely a fun and quick project... Take this Gruta Estirênica Modeling Club!
Thanks to Jackson Bradley for the kit.
PS: After taking these photos I realized that I forgot to paint the helmet strap on the officer face. It is now painted.
| Technical file | |
| Kit:
|
- RPM 35006 (rebox of Mirage Hossy 354013) |
| Additions:
|
- None |
| Basic
colors: |
-
Primer: Mr. Surfacer rattle can - Green: Testors Model Master RLM 63 Lichtgrau (#4777) - Brown: GSI Aqueous H-84 Mahogany - Sand: Humbrol 81 Pale Yellow - Flat varnish: Testors Dullcote (#1160X) |
| Notes: |
-
A few scratchbuilt details (see text). |
Rato Marczak © 2019
