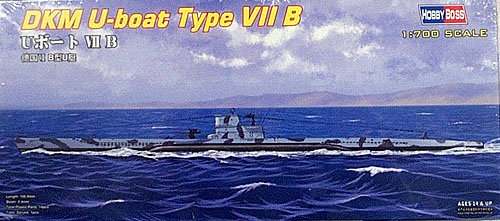
| Hobby Boss DKM U-boat Type VII B in 1/700 |
|
Start:
December / 2012 Finished: February/2013 |
Continuing
with my trend to complete a collection of famous submarines in 1/700
scale, of course I had to have a U-boat... Having tackled the USS Gato and the SSN Greenville
from Hobby Boss, I decided to stick with the same manufacturer.
Unfortunately, I think this one is the worst of the trio, with some
heavy details for the scale, and an engineering of the parts which
leaves a lot to be desired. In common with its cousins, these kits are
extremely simple, comprising a half dozen parts of so, and no decals.
I started by cleaning the parts. I deliberately removed the deck rails, as they were way out of scale. I would improvise something later. Other detail which is too heavy is the rail around the anti-aircraft gun aft the bridge. I made new rails from stretched sprue conformed around a brush handle and glued it in place with Tenax-7R. I then installed the vertical bars with straight pieces of stretched sprue.
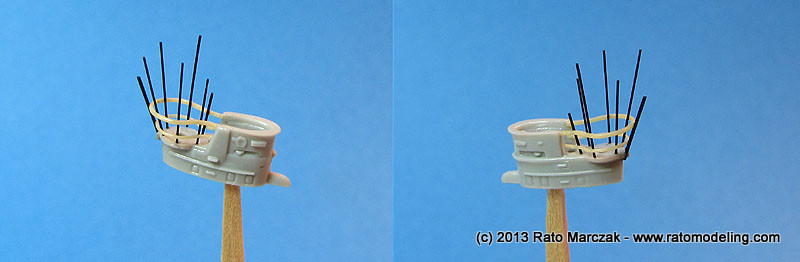
The excess plastic was trimmed with a nail clipper:
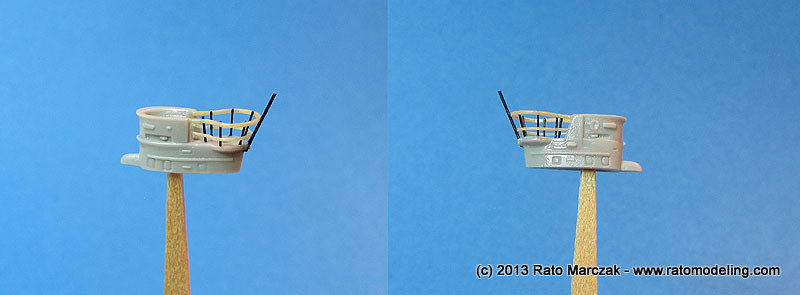
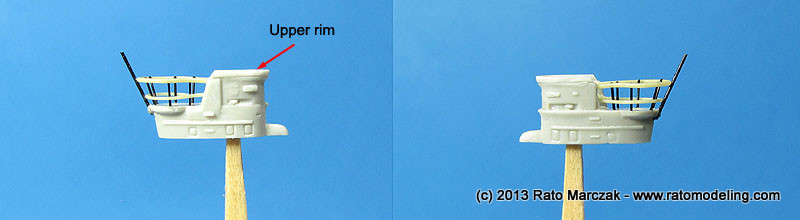
To correct the height of the bridge (my mistake), a rim of stretched sprue was added along the upper wall edge. I also removed the life rings from both sides:

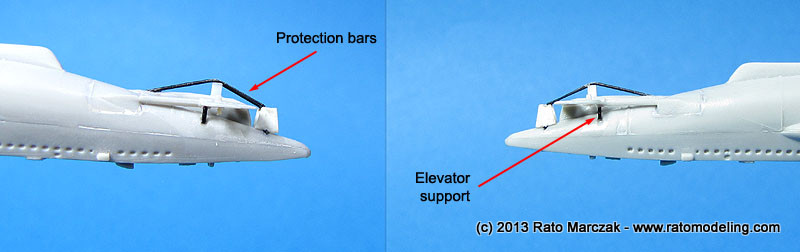
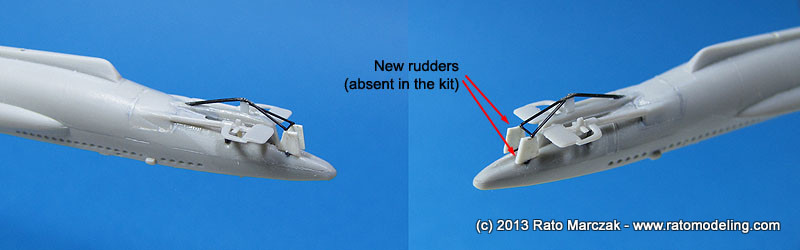
At this stage I noted that Hobby Boss oversimplified the rear area of the U-boat. The rudders were simply forgotten, the propellers were ugly, and Hobby Boss included a sort of continuous fin between the propeller rods that has no resemblance with the real thing. On the other hand, both bow and stern elevons were very delicate. Unfortunately, the fitting of these parts in the corresponding hull slots makes almost impossible to eliminate the seams without removing much of the delicate detail. I removed part of the fin, added the missing structural details and scratchbuilt a pair of rudders using the drawings from both AJ Press volumes on the U-boat.
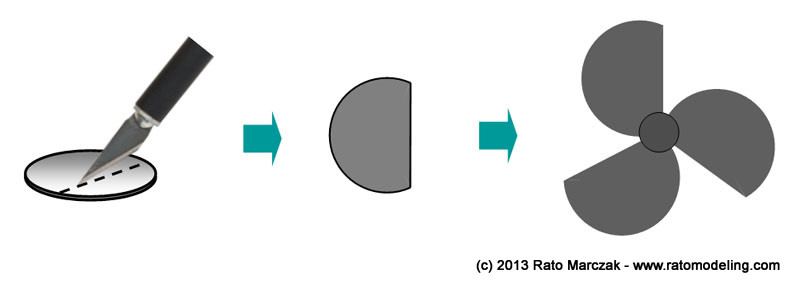
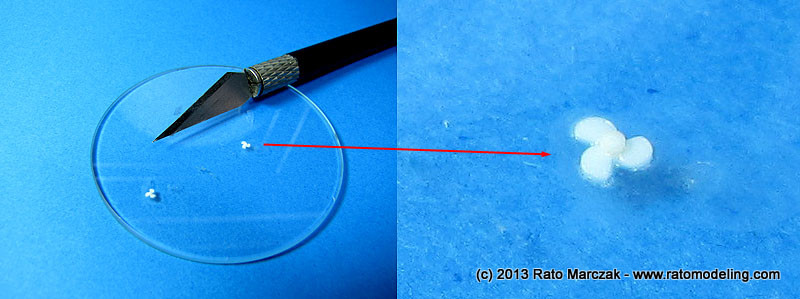
The kit's propeller was ugly, and didn't have the correct number of blades. Instead of making new PE ones like I did with the USS Gato (see the article on photoetching propellers here), I took a shortcut and used small disks of plastic punched with a Waldron set. The idea is simple: I remove part of the disks to look like a propeller blade, and glue them roughly spaced by 120 degrees, using a small slice of rod in the center. The result is quite convincing:
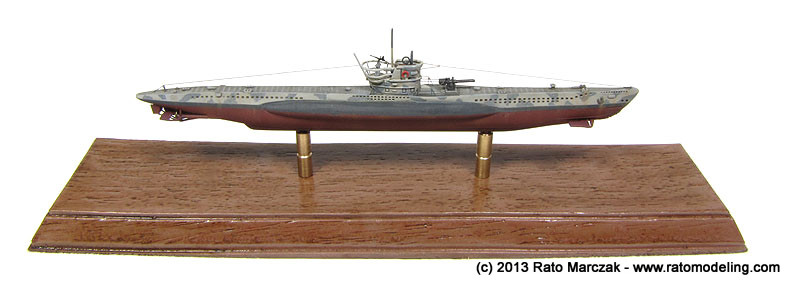
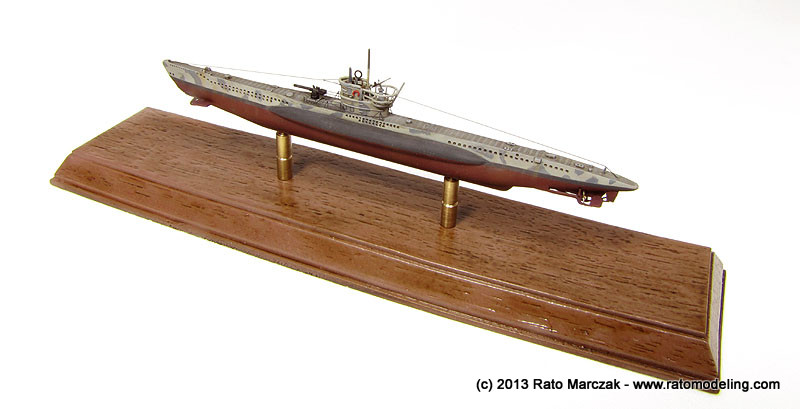
After that the model was virtually done. I pre-drilled holes to hold the radio cable later and started painting. The first color was the black stripe about the waterline. It was masked with Tamiya tape and then I airbrushed hull red on the lower hull. I read a couple of books about U-boats to reduce my ignorance on the subject, but it didn't work. So I mixed the upper hull colors by eye using Tamiya paints. The wood deck was washed with artists oil to make it look darker, as well the hull openings. Once everything was dry, I painted the camouflage patches using Vallejo colors and a fine brush.
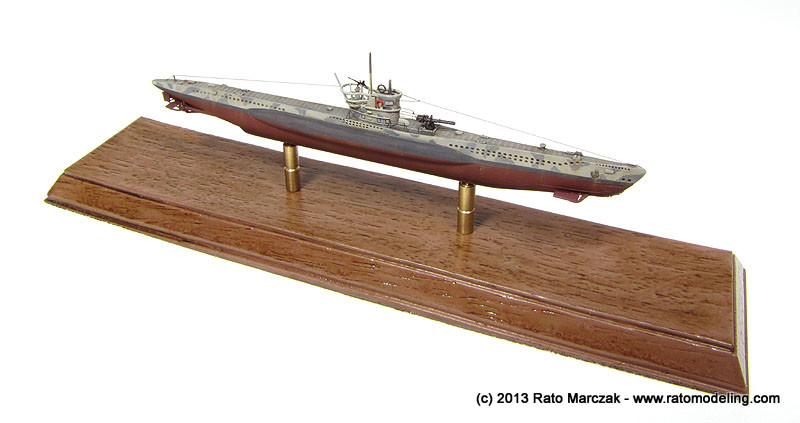
I reworked the periscope and other items to make them look better, and scratchbuilt a few items. The anti-aircraft gun is from a generic PE fret. Life rings were made from tiny rings of stretched sprue, painted red and glued in place. The propellers received a coat of Vallejo Model Air Brass.
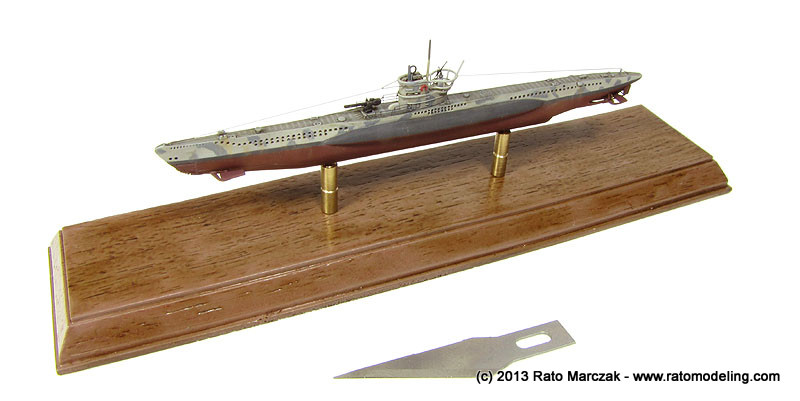
Once satisfied with everything, the model was coated with Testors Dullcote. Light grey was then drybrushed over the deck since the details there are crisp. I even applied a wood colored decal strip inside the bridge to simulate the wood planking there.
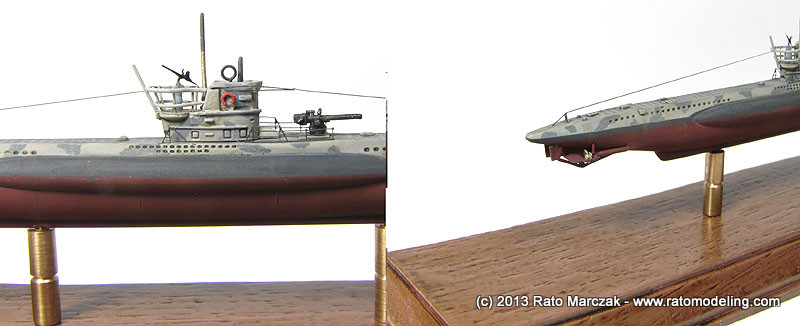
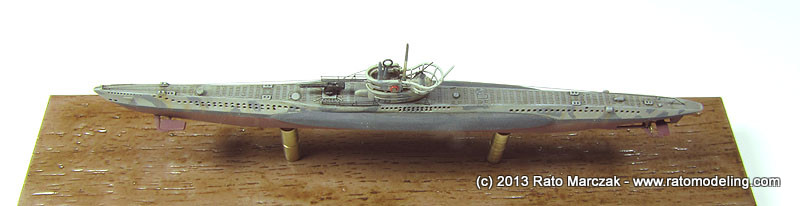
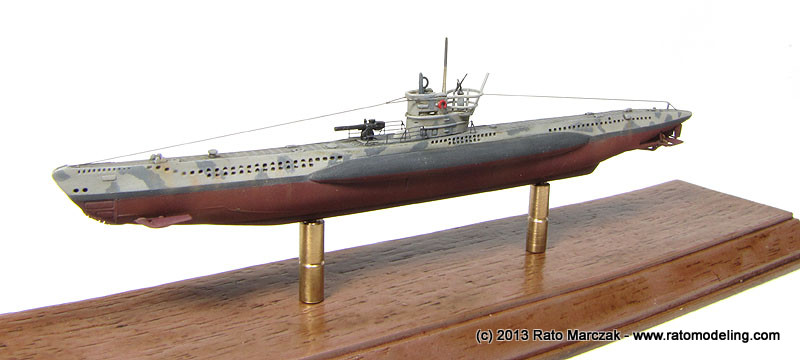
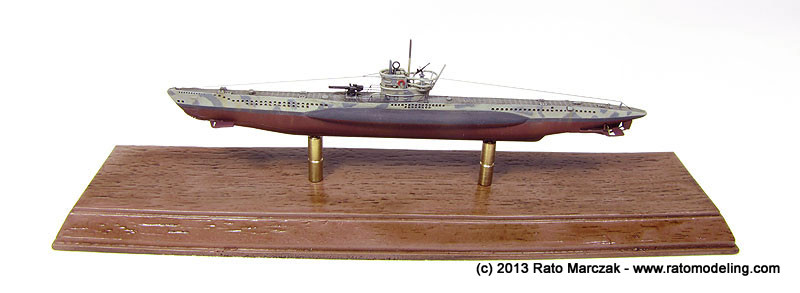
The last item was the aerial cable, made from stretched sprue. I used some rust colored pastels here and there, and installed new rails from left over PE items. None of these things are too accurate, but at least they are much better than what comes in the box. Finally, the Type VII was glued to one of my standard bases.
I'm still very ignorant on the U-boat subjects, and this model has several shortcomings that an expert on the subject could improve. Only after finishing it I discovered a nice PE set by Flyhawk that would save me a lot of work. If you are planning to built this kit, go for it. Although not as satisfied as I was with the Gato and the Greenville, I think it is ok. Now I need a Japanese Navy sub, and one of those big modern Russian monsters to complete my collection...
I started by cleaning the parts. I deliberately removed the deck rails, as they were way out of scale. I would improvise something later. Other detail which is too heavy is the rail around the anti-aircraft gun aft the bridge. I made new rails from stretched sprue conformed around a brush handle and glued it in place with Tenax-7R. I then installed the vertical bars with straight pieces of stretched sprue.
The excess plastic was trimmed with a nail clipper:
To correct the height of the bridge (my mistake), a rim of stretched sprue was added along the upper wall edge. I also removed the life rings from both sides:
At this stage I noted that Hobby Boss oversimplified the rear area of the U-boat. The rudders were simply forgotten, the propellers were ugly, and Hobby Boss included a sort of continuous fin between the propeller rods that has no resemblance with the real thing. On the other hand, both bow and stern elevons were very delicate. Unfortunately, the fitting of these parts in the corresponding hull slots makes almost impossible to eliminate the seams without removing much of the delicate detail. I removed part of the fin, added the missing structural details and scratchbuilt a pair of rudders using the drawings from both AJ Press volumes on the U-boat.
The kit's propeller was ugly, and didn't have the correct number of blades. Instead of making new PE ones like I did with the USS Gato (see the article on photoetching propellers here), I took a shortcut and used small disks of plastic punched with a Waldron set. The idea is simple: I remove part of the disks to look like a propeller blade, and glue them roughly spaced by 120 degrees, using a small slice of rod in the center. The result is quite convincing:
After that the model was virtually done. I pre-drilled holes to hold the radio cable later and started painting. The first color was the black stripe about the waterline. It was masked with Tamiya tape and then I airbrushed hull red on the lower hull. I read a couple of books about U-boats to reduce my ignorance on the subject, but it didn't work. So I mixed the upper hull colors by eye using Tamiya paints. The wood deck was washed with artists oil to make it look darker, as well the hull openings. Once everything was dry, I painted the camouflage patches using Vallejo colors and a fine brush.
I reworked the periscope and other items to make them look better, and scratchbuilt a few items. The anti-aircraft gun is from a generic PE fret. Life rings were made from tiny rings of stretched sprue, painted red and glued in place. The propellers received a coat of Vallejo Model Air Brass.
Once satisfied with everything, the model was coated with Testors Dullcote. Light grey was then drybrushed over the deck since the details there are crisp. I even applied a wood colored decal strip inside the bridge to simulate the wood planking there.
The last item was the aerial cable, made from stretched sprue. I used some rust colored pastels here and there, and installed new rails from left over PE items. None of these things are too accurate, but at least they are much better than what comes in the box. Finally, the Type VII was glued to one of my standard bases.
I'm still very ignorant on the U-boat subjects, and this model has several shortcomings that an expert on the subject could improve. Only after finishing it I discovered a nice PE set by Flyhawk that would save me a lot of work. If you are planning to built this kit, go for it. Although not as satisfied as I was with the Gato and the Greenville, I think it is ok. Now I need a Japanese Navy sub, and one of those big modern Russian monsters to complete my collection...
| Technical
file |
|
| Kit:
|
-
Hobby
Boss
87008 |
| Additions:
|
-
PE rails from generic sets. - Scratchbuilt new propeller, ruder and bridge details. |
| Basic
colors:
|
-
Primer:
Gunze Mr. Surfacer 500 - Light gray: Tamiya colors mixed by eye. - Dark gray mottling: Vallejo colors mixed by eye. - Hull red: Aerotech's Hull Red automotive lacquer - Flat clear coat: Testors Dullcote (#1160) |
| Notes: |
|
Rato Marczak © 2013
