| Hobby Decal Me-262 stencils in 1/32 scale |
| Summary | |
| Description:
|
-
Dry transfer (rubbing) type stencils to replace decals |
| Scale:
|
- 1/32 |
| Price:
|
- 14.98 USD |
| Contents
& Media: |
-
Two printed sheets and placement instructions. |
| Advantages: |
- No silvering / no clear film. - Can be applied over gloss or flat finishes - Unbeatable system when applied over natural metal finishes |
| Disadvantages | -
Cannot be moved during application. - May be difficult to appy over tight corners and protusions. |
| Recommendation: |
-
Recommended, particularly if you hate decals. |
Here´s another set of dry transfers by Hobby Decal. Product ST32007 comes in two sheets, one colored and the other in black. Again, the quality of the printing is outstanding, and the register is virtually perfect in my sample. Most Luftwaffe aircraft used to reflect German appraisal for engineering and documentation. The Me-262 is no exception, in spite of being chaotically rushed into service during the last year of the war. The set is directed to Me-262A´s, but if you are going to build a B version you will surely use most of it. Interestingly, Hobby Decal product numbers indicate the current version of the set, showing that they care about possible future corrections.
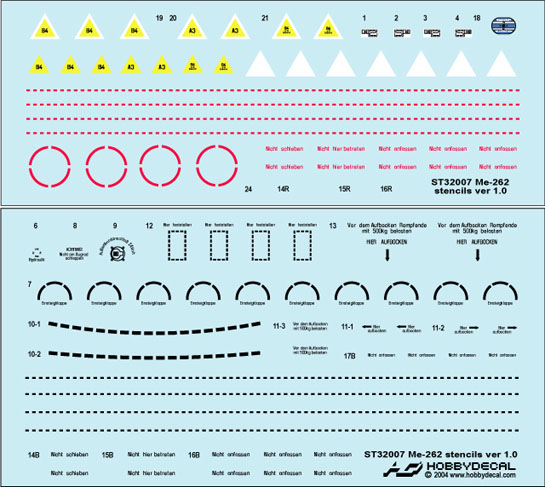
As typical from Hobby Decal, every single item is readable using a magnifying glass, and like the other sets previously reviewed, some of them are provided in more than one version (depending on the aircraft finish), but most are not, so take your time during the application. Except for the warning circles on both sides of the engines (#24) and the walk-on red lines, all items are relatively small, and won´t pose problems during the application.
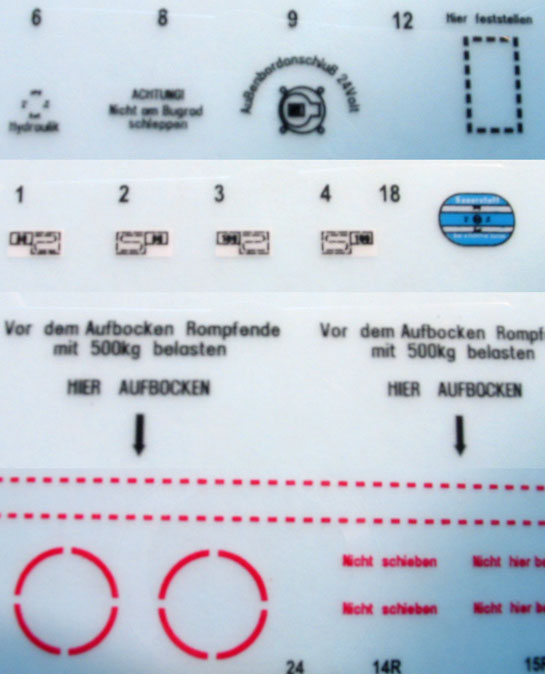
I included a reduced version of the manuals below to allow a better appreciation the amount of work put on this set.
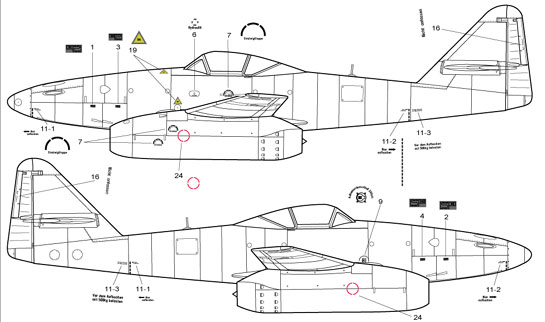
Placement instructions. (image courtesy: Hobby Decal).
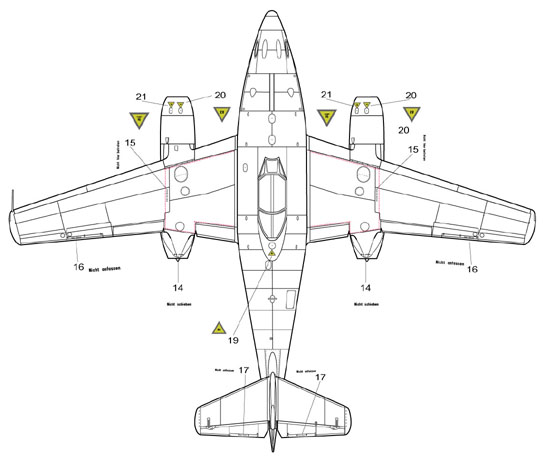
Placement instructions. (image courtesy: Hobby Decal).
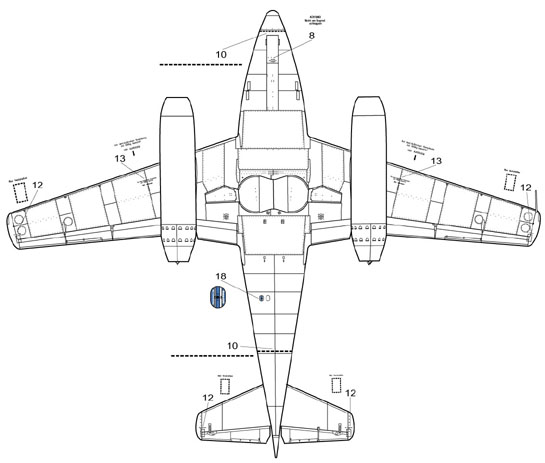
Placement instructions. (image courtesy: Hobby Decal).
The picture below shows a zoom of some items belonging to this sheet. Pay attention to items 1-4, the ammunition loading instructions for the nose cannons.They are different for each one of the cannons, and Hobby Decal didn´t missed it, so read the instructions.
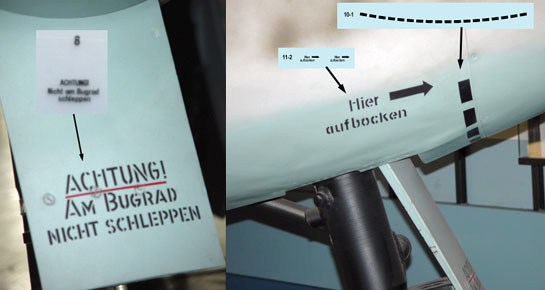
The figures below show a comparison of some items from this sheet against a restored aircraft. Since you have two options in some cases, check the references about your specific warbird.
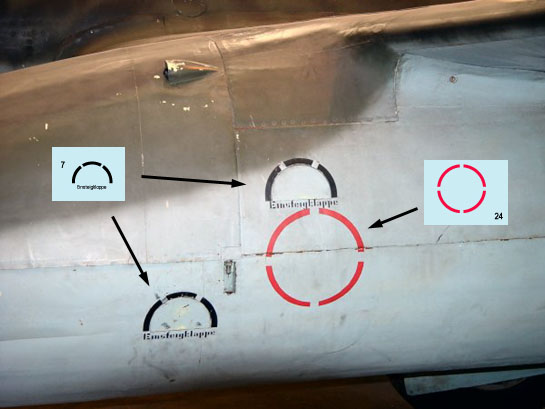
Compared the sheet with some pictures
of Me-262 in museums around the world, it seems that main fuel the yellow
triangle in general contain the number 87, instead of A3. However, the A3 code means 80 octane fuel (light
blue colour). This fuel's triangle label is found near the intake and refers
to the marking for the Reidel starter motor. This marking has been observed
in some cases to read "B4 mit 5% Schmierstoff" (B4 with 5% lubricant), obviously
reflecting the substitution of one fuel for another due to shortages. One
marking per engine, left filler point. Since the B4 fuel was the 87 octane
fuel (dark blue colour), and this was the main engine jet fuel, it may explain
the confusion, but I´m not convinced yet, as they should go only on
fuselage tanks. I think Hobby Decal should check this for version 1.1.
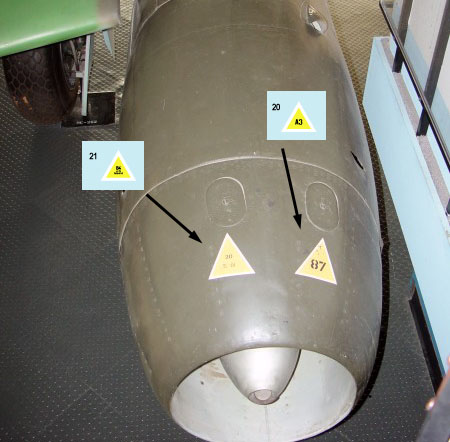
A bit of
confusion here...
Anyway, the fuel/oil triangles are again offered with the option of applying them complete or the white background triangle first, and then the yellow one on top of it. The last option should be used in case you don´t agree with eventual out of register problems. I didn´t find photos showing them without the white outline.
Some other interesting items are those dotted lines applied at the end of all horizontal control surfaces. I don´t read German to say what it means (I guess is a spot to ground crews install locking devices), but dry-transfers are a much better idea here, as decals will always struggle with the corresponding recesses and cut-offs.
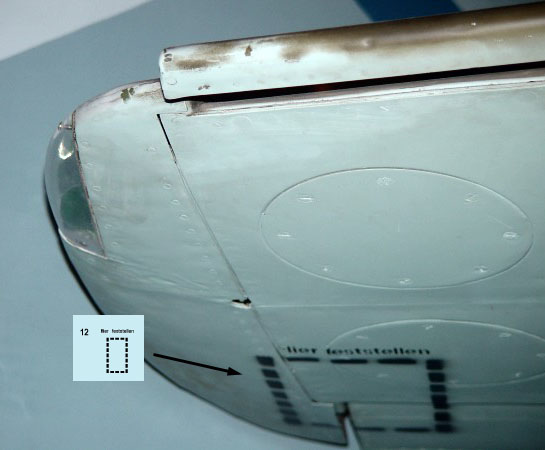
Another nice touch are the dotted lines around the nose (just ahead the landing gear door) and the other on the bottom of the rear fuselage area. The former is printed slightly curved, to make it conform with the bottom nose curvature. The later is straight, as the bottom of the rear fuselage was almost flat in the Me-262. Well done.
This is an
example of potential areas for using Dry transfers.
More comparisons.
Remember, you can apply
dry transfers directly over flat paints/clear coats, and they won´t
detract from the final appearance of the model, as they are flat too. They
also conform to the surface details without need of setting solutions. Avoid
hot thinners applied over them, however, because they may melt the transfers.
As a last resource, you can apply them over a clear decal sheet and use them
are an ordinary decal. Another thing: take care when cutting each transfer
off the sheet, to avoid scratching of the printed side against knife/scissors
edge.
Hobby Decal line of dry transfers are not cheap products when compared to water slide decals: you pay about the price of a large decal sheet for something that will cover much less area, one may wonder. But these sets are taking care of those tiny stencils in an unbeatable way. For the records, this set is also produced in 1/48 scale.
Highly recommended.
Review sample compliments
of Hobby Decal.
Thank you for your support.
Rato Marczak © 2011
