| CMK Me-262A-1a/U4 (V083) & Me-262A (V056) conversion in 1/72 scale (product #7007) |
| Summary | |
| Description:
|
- Resin/PE conversion for Revell kit 04166. |
| Scale:
|
- 1/72 |
| Price:
|
- 14.30 EUR |
| Contents
& Media: |
-
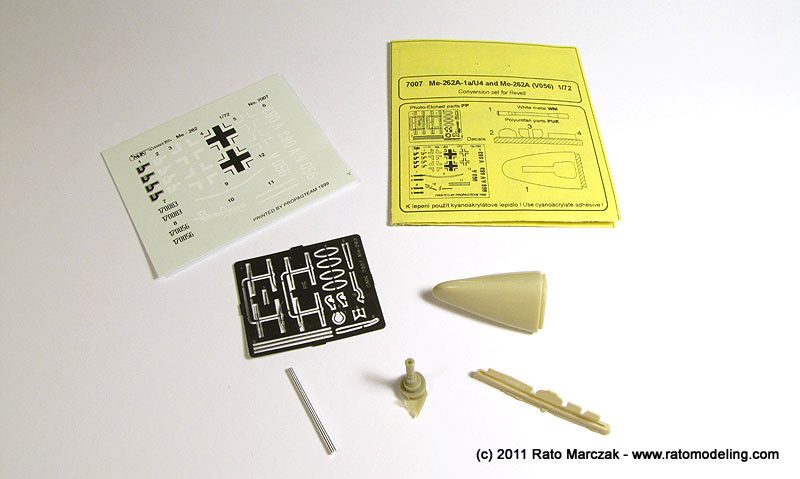
6 resin parts, photo-etched set, Aluminun barrel, decals and instructions |
| Advantages: |
- Nice detail. - Unique subject. |
| Disadvantages | - Reportedly not the best fit to the donor kit |
| Recommendation: |
-
Recommended with reservations. |
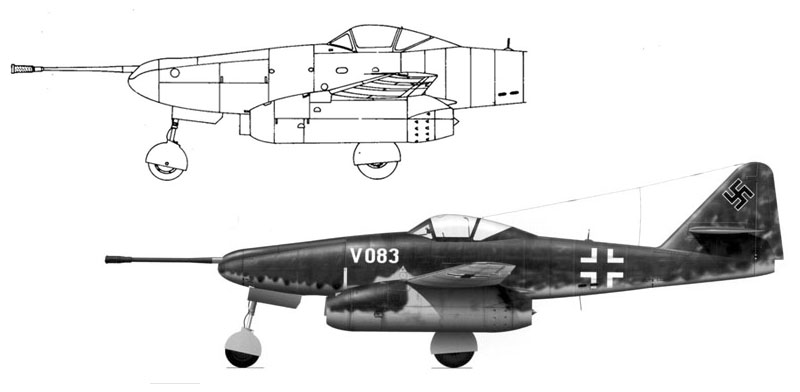
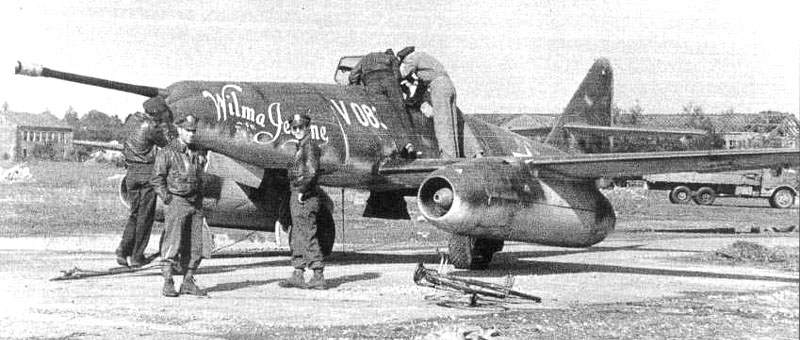
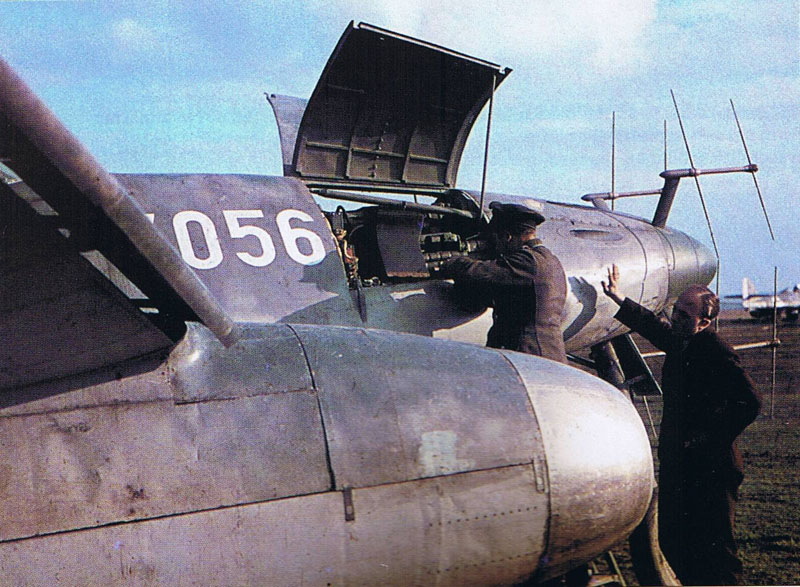
A unique variant of the Messerschmitt Me-262 was A-1a/U4 Pulkzerstörer, designed to carry a 50mm Mauser Mk 214 cannon. This was intended to be the ultimate bomber-killer because of the power of that accurate weapon and the pilot's ability of firing outsite the defensive gun range of the American bombers. Of the two airframes converted to this configuration, w/n 170083 (prototype V083) would be evaluated by Watson's Whizzers (54th Air Disarmament Squadron) in US but crashed before that. This particular aircraft, however, became famous by a series of photos in US markings wearing the Willie Jeanne nose art. Another interesting variant is the V056 prototype, designed to be a jet night fighter equipped with FuG218 radar (interestingly, this bird was test flown by Oblt. Kurt Welter during November of 1944, and reported to shot down 2 Lancaster and 3 Mosquistos).
Well,
enough history. None of these 262's is currently marketed in injection
form (that I know of, at least), so if you want to make one of them,
this CMK set comes to your rescue.
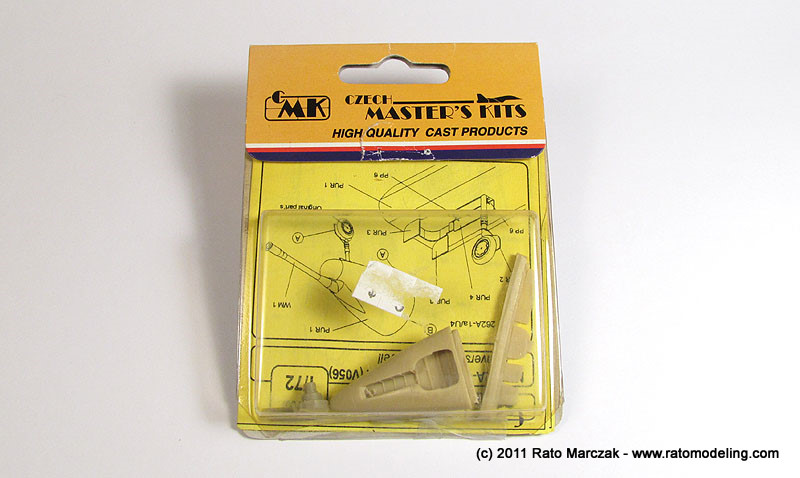
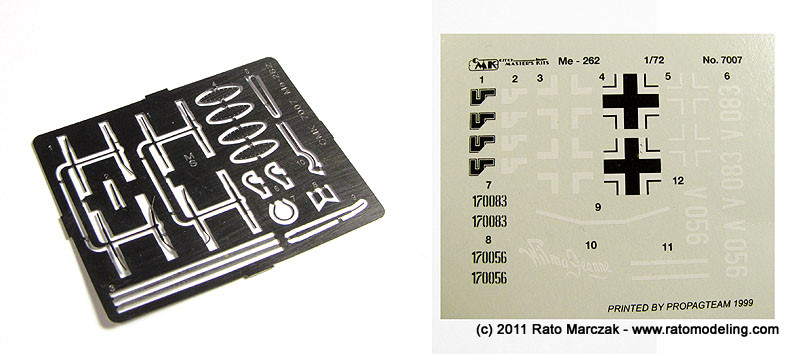
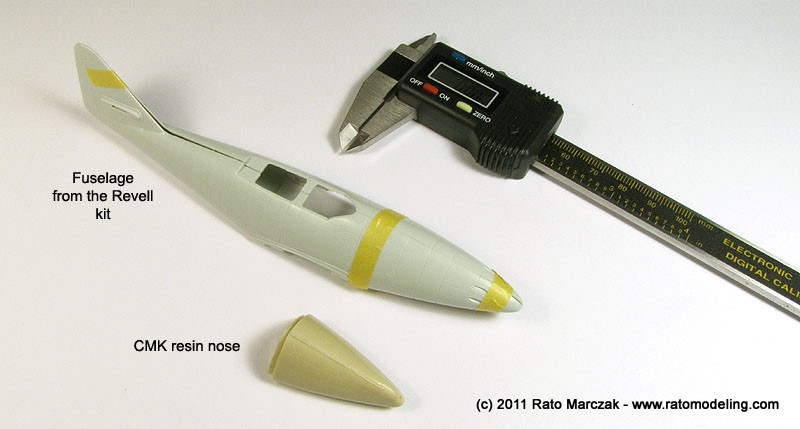
This is a simple set. The parts for V083 consist of resin nose, nose wheel doors and gun muzzle, plus a Aluminum gun barrel. There is also PE retraction hinges for the nose wheel doors. The parts for V056 are all PE, mostly the radar antenaes, and there are also a couple other details common to both versions. The PE fret brings yet four covers supposedly for the deleted standard 262 guns, but none of the versions used them.
My sample came with the V056 antenaes badly warped, but fixable. Decals are provided for both aircraft while still in German hands, including werk numbers. If you choose the Watson's Whizzers' Wilma Jeanne you have to scrounge your own US stars and bars. No stenciling is provided, neither, but you can use the ones from the Revell kit.
Sometime during its existence, V086 had a dorsal fillet right behind the cockpit and a pair of radar masts on the port wing. None of these details are provided. Some photos of the V056 that I examined show the tail painted in a very dark color covered with aerodynamic ribbons. And besides, the radar masts should not be flat (see photo above). Either cases seemed more difficult than the cannon armed version. However, the apparently simpler nose replacement of the later is not so. Let me explain why.
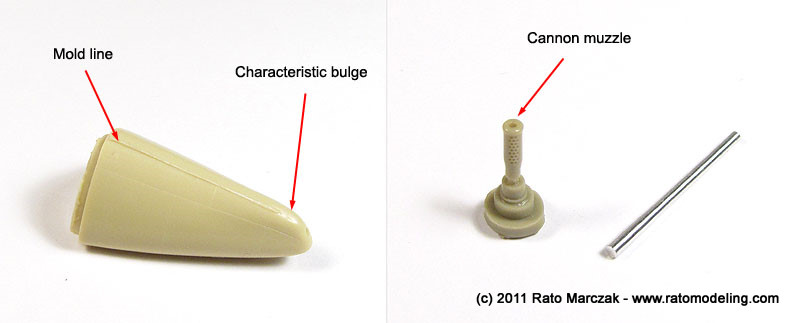
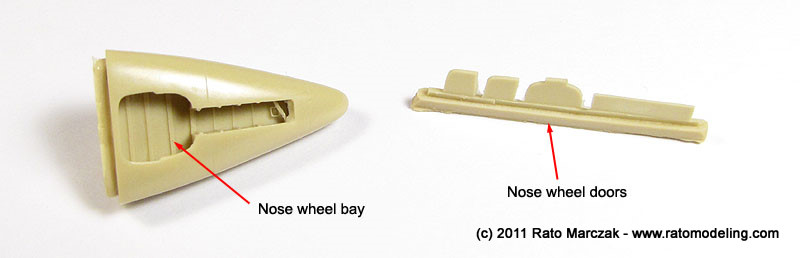
The nose is a solid piece to be used as a direct replacement of the kit's one. The shape is good enough, as well as the cannon muzzle, and the wheel bay doors. The nose wheel bay (remember that the wheel rotated 90 degrees in this version, to in order to provide room for the huge cannon) is adequately detailed, and accepts the kit's wheel. The Aluminum gun barrel, however, is cylindrical, and should be tapered. If you want an accurate representation, I guess one can reproduce the proper taper by sanding it with a Dremel acting as a lathe.
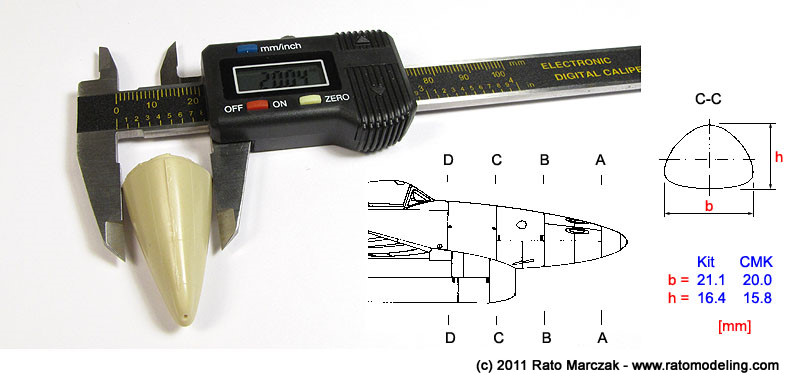
Since I had the donor kit in hand, I took some measurements, just for checking purposes.
I found out that the kit's nose is to be cut off on the firewall behind the gun bay (station C-C, below). After measuring the resin nose and the kit's fuselage at that station, I noted that the CMK nose is too small:
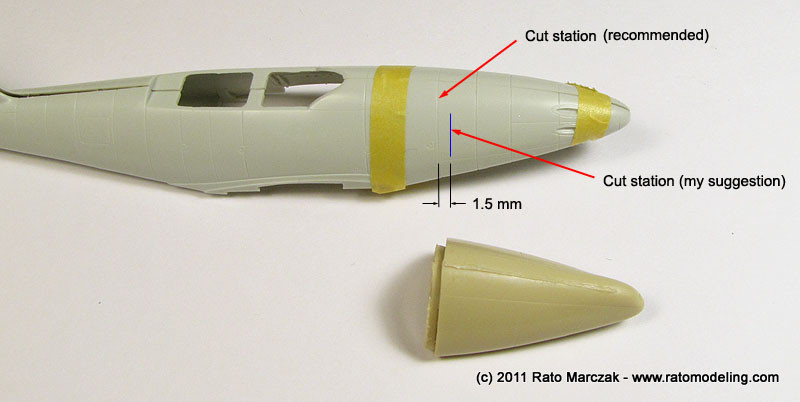
I cannot tell you about the cross section's shape, but it is obvious that if you cut the kit's fuselage at the intended panel line, a big step will result after installing the resin nose. My recommendation is to take advantage of the 262 characteristic nose tapering and cut about 1.5-2.0 mm ahead of where it was intended to. This cut will result a smaller cross section which will fit better to the resin nose. If you cut too much ahead, it is just a matter of sanding it back until if fits right to the resin nose, but the opposite won't have a simple fix.
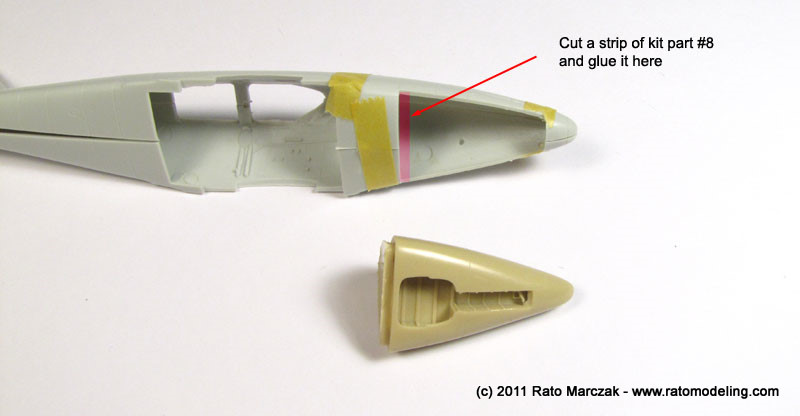
This is not all, though. Revell's fuselage had the whole nose wheel area open, where kit's part #8 is glued. Unfortunately, the insert ends on the original cutoff line. So if you want to follow my recipe, either you cut a slice of part #8 and glue it in place before the final trueing or, even better, assemble the whole fuselage, including part #8 and saw the whole nose off (the cockpit can be inserted through the wing opening).
I've read a review at Plastikowe with complains about the shape of the resin cross section, too, so be prepared to use some filler and elbow grease. Before you ask, I didn't compare this set with the newer Academy's Me-262. All I can tell you is that it is not all that better than the Revell offering...
Postscript (march/2013): Reader P.Clero has a page dedicated to modeling the Me-262 at L'Hirondelle, with a comprehensive list of kit reviews, accessories, decals, and more. Worth to take a look.
I recommend this set if you want to add a V083 to your collection...
badly.
Rato Marczak © 2011, 2013
